
You also want an ePaper? Increase the reach of your titles
YUMPU automatically turns print PDFs into web optimized ePapers that Google loves.
I w<br />
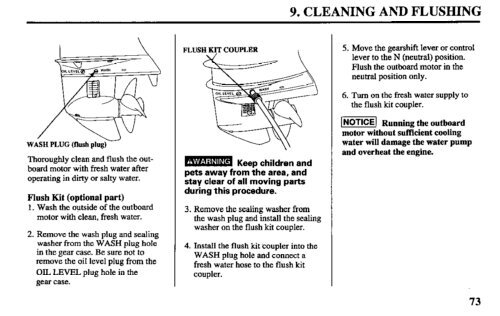
WASH PLUG (flush plug)<br />
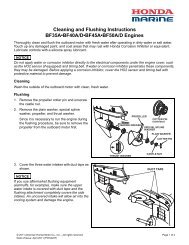
Thoroughly clean and flush the out-<br />
board motor with fresh water after<br />
operating in dirty or salty water.<br />
Flush Kit (optional part)<br />
1. Wash the outside of the outboard<br />
motor with clean, fresh water.<br />
2. Remove the wash plug and sealing<br />
washer from the WASH plug hole<br />
in the gear case. Be sure not to<br />
remove the oil level plug from the<br />
OIL LEVEL plug hole in the<br />
gear case.<br />
FLUSH KIT COUPLER I<br />
B Keep children and<br />
pets away from the area, and<br />
stay clear of all moving parts<br />
during this procedure.<br />
3. Remove the sealing washer from<br />
the wash plug and install the sealing<br />
washer on the flush kit coupler.<br />
4. Install the flush kit coupler into the<br />
WASH plug hole and connect a<br />
fresh water hose to the flush kit<br />
coupler.<br />
9. CLEANING AND FLUSHING<br />
5. Move the gearshift lever or control<br />
lever to the N (neutral) position.<br />
Blush the outboard motor in the<br />
neutral position only.<br />
6. Turn on the fresh water supply to<br />
the flush kit coupler.<br />
I- Running the outboard<br />
motor without sufficient cooling<br />
water will damage the water pump<br />
and overheat the engine.<br />
73