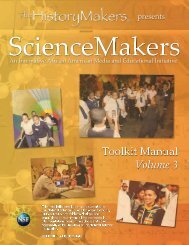
ScienceMakers Toolkit Manual - The History Makers
ScienceMakers Toolkit Manual - The History Makers
ScienceMakers Toolkit Manual - The History Makers

You also want an ePaper? Increase the reach of your titles
YUMPU automatically turns print PDFs into web optimized ePapers that Google loves.
15. Dr. Lester talks about close-coupling problems. What do these problems involve? Why are they called<br />
close-coupling problems? How did Dr. Lester make progress on this problem? What was his solution<br />
and why did it have such an impact? (See Clip #8)<br />
16. Dr. Lester is currently studying photoprotection in bacteria and plants. Explain what photoprotection<br />
is. Why is it necessary? Do people have a mechanism on their bodies that offers photoprotection? What<br />
is it? [Teacher’s note: This is an opportunity to discuss perspiration and its usefulness.] Dr. Lester is<br />
specifi cally looking at carotenoids. Research carotenoids and explain how they help plants. What are<br />
their uses to people? Find some examples of carotenoids that have an effect on people. What is Dr.<br />
Lester trying to determine? (See Clip #9)<br />
Experiment – Candy Chromatography by Dr. Basaam Shakhashiri<br />
Ever wondered why candies are different colors? Many candies contain colored dyes. Bags of M&Ms or Skittles<br />
contain candies of various colors. <strong>The</strong> labels tell us the names of the dyes used in the candies. But which<br />
dyes are used in which candies? We can answer this by dissolving the dyes out of the candies and separating<br />
them using a method called chromatography.<br />
For this experiment you will need:<br />
• M&M or Skittles candies (1 of each color)<br />
• Coffee fi lter paper<br />
• A tall glass<br />
• Water<br />
• Table salt<br />
• A pencil (a pen or marker is not good for this experiment)<br />
• Scissors<br />
• A ruler<br />
• 6 toothpicks<br />
• Aluminum foil<br />
• An empty 2 liter bottle with cap<br />
Cut the coffee fi lter paper into a 3 inch by 3 inch (8 cm by 8 cm) square. Draw a line with the pencil about ½<br />
inch (1 cm) from one edge of the paper. Make six dots with the pencil equally spaced along the line, leaving<br />
about 1/4 inch (0.5 cm) between the fi rst and last dots and the edge of the paper. Below the line, use the pencil<br />
to label each dot for the different colors of candy that you have. For example, Y for yellow, G for green, BU for<br />
blue, BR for brown, etc.<br />
Next we’ll make solutions of the colors in each candy. Take an 8 inch by 4 inch (20 cm by 10 cm) piece of<br />
aluminum foil and lay it fl at on a table. Place six drops of water spaced evenly along the foil. Place one color of<br />
candy on each drop. Wait about a minute for the color to come off the candy and dissolve in the water. Remove<br />
and dispose of the candies.<br />
Now we’ll put drops of the different colors onto the fi lter paper. Dampen the tip of one of the toothpicks in one<br />
of the colored solutions and lightly touch it to the corresponding labeled dot on your coffee fi lter paper. Use a<br />
light touch, so that the dot of color stays small - less than 1/16 inch (2 mm) is best. <strong>The</strong>n using a different toothpick<br />
for each color, similarly place a different color solution on each of the other fi ve dots.<br />
After all the color spots on the fi lter paper have dried, go back and repeat the process with the toothpicks to get<br />
more color on each spot. Do this three times, waiting for the spots to dry each time.<br />
When the paper is dry, fold it in half so that it stands up on its own, with the fold standing vertically and the dots<br />
on the bottom.<br />
21<br />
Chemistry