DUAL ®& DUAL ® SH SINGLE ®& SINGLE ® SH - Expert-CM
DUAL ®& DUAL ® SH SINGLE ®& SINGLE ® SH - Expert-CM
DUAL ®& DUAL ® SH SINGLE ®& SINGLE ® SH - Expert-CM

You also want an ePaper? Increase the reach of your titles
YUMPU automatically turns print PDFs into web optimized ePapers that Google loves.
SERVICE (cont.)<br />
#10-32 slotted head screws holding the solenoid<br />
valve to the mounting bracket.<br />
7. Securely install the new solenoid valve to its<br />
mounting bracket.<br />
8. <strong>DUAL</strong> BREWERS: Attach the solenoid valve and<br />
mounting bracket to the brewer trunk.<br />
9. Securely fasten the water lines to and from the<br />
solenoid valve.<br />
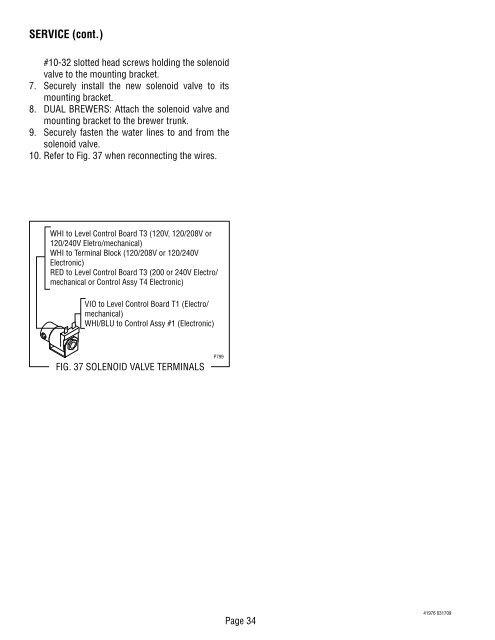
10. Refer to Fig. 37 when reconnecting the wires.<br />
WHI to Level Control Board T3 (120V, 120/208V or<br />
120/240V Eletro/mechanical)<br />
WHI to Terminal Block (120/208V or 120/240V<br />
Electronic)<br />
RED to Level Control Board T3 (200 or 240V Electro/<br />
mechanical or Control Assy T4 Electronic)<br />
VIO to Level Control Board T1 (Electro/<br />
mechanical)<br />
WHI/BLU to Control Assy #1 (Electronic)<br />
FIG. 37 SOLENOID VALVE TERMINALS<br />
P799<br />
Page 34<br />
41976 031709