Sanyo-DP42545 (English) - Specs and reviews at HDTV Review
Sanyo-DP42545 (English) - Specs and reviews at HDTV Review
Sanyo-DP42545 (English) - Specs and reviews at HDTV Review

Create successful ePaper yourself
Turn your PDF publications into a flip-book with our unique Google optimized e-Paper software.
SETUP MENU OPTIONS (CONTINUED)<br />
Screen Saver<br />
Displaying a still picture for a long<br />
time may cause an “afterimage” or<br />
“ghost” on the screen. To neutralize<br />
this situ<strong>at</strong>ion, a Picture Rot<strong>at</strong>ion function<br />
is provided.<br />
Use this fe<strong>at</strong>ure to<br />
protect the Plasma screen from<br />
“afterimage.”<br />
If an afterimage occurs, use the White<br />
P<strong>at</strong>tern fe<strong>at</strong>ure immedi<strong>at</strong>ely to repair<br />
the panel. The more severe the afterimage,<br />
the longer the curing process<br />
may take. It may be impossible to<br />
repair all cases of afterimage burn.<br />
The sooner you remove a still picture<br />
<strong>and</strong> activ<strong>at</strong>e White P<strong>at</strong>tern, the more<br />
likely it is th<strong>at</strong> the panel can be<br />
repaired.<br />
NOTE:<br />
1<br />
Press<br />
Afterimage (or image burn) is not<br />
covered under warranty.<br />
the TUNER key to select<br />
the Analog Tuner. (NOTE: The<br />
Screen Saver setting is available<br />
only from the Analog Main<br />
menu. However, it functions in<br />
all modes.)<br />
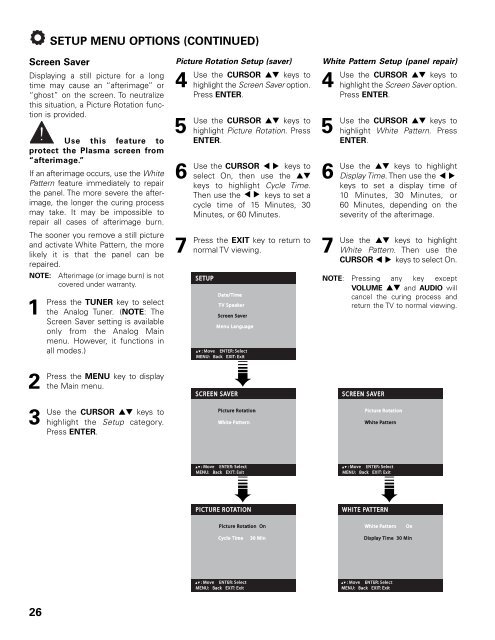
Picture Rot<strong>at</strong>ion Setup (saver)<br />
4<br />
Use the CURSOR ▲▼ keys to<br />
highlight the Screen Saver option.<br />
Press ENTER.<br />
5<br />
Use<br />
6<br />
Use<br />
7<br />
Press<br />
the CURSOR ▲▼ keys to<br />
highlight Picture Rot<strong>at</strong>ion. Press<br />
ENTER.<br />
the CURSOR keys to<br />
select On, then use the ▲▼<br />
keys to highlight Cycle Time.<br />
Then use the keys to set a<br />
cycle time of 15 Minutes, 30<br />
Minutes, or 60 Minutes.<br />
▲<br />
▼<br />
▲<br />
▼<br />
the EXIT key to return to<br />
normal TV viewing.<br />
White P<strong>at</strong>tern Setup (panel repair)<br />
4<br />
Use the CURSOR ▲▼ keys to<br />
highlight the Screen Saver option.<br />
Press ENTER.<br />
5<br />
Use<br />
6<br />
Use<br />
7<br />
Use<br />
the CURSOR ▲▼ keys to<br />
highlight White P<strong>at</strong>tern. Press<br />
ENTER.<br />
the ▲▼ keys to highlight<br />
Display Time. Then use the<br />
keys to set a display time of<br />
10 Minutes, 30 Minutes, or<br />
60 Minutes, depending on the<br />
severity of the afterimage.<br />
the ▲▼ keys to highlight<br />
White P<strong>at</strong>tern. Then use the<br />
CURSOR keys to select On.<br />
▲<br />
▼<br />
▲<br />
▼<br />
NOTE: Pressing any key except<br />
VOLUME ▲▼ <strong>and</strong> AUDIO will<br />
cancel the curing process <strong>and</strong><br />
return the TV to normal viewing.<br />
2<br />
Press<br />
3<br />
Use<br />
the MENU key to display<br />
the Main menu.<br />
the CURSOR ▲▼ keys to<br />
highlight the Setup c<strong>at</strong>egory.<br />
Press ENTER.<br />
➠ ➠<br />
➠<br />
26