EVA Twain Installation & User Guide - ImageWorks - Home
EVA Twain Installation & User Guide - ImageWorks - Home
EVA Twain Installation & User Guide - ImageWorks - Home

Create successful ePaper yourself
Turn your PDF publications into a flip-book with our unique Google optimized e-Paper software.
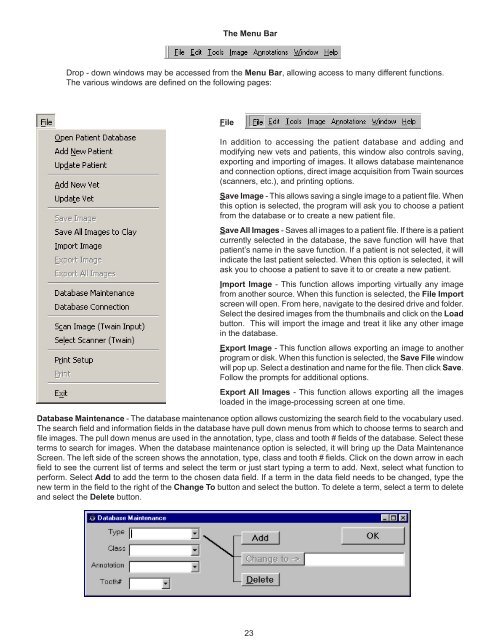
The Menu Bar<br />
Drop - down windows may be accessed from the Menu Bar, allowing access to many different functions.<br />
The various windows are defined on the following pages:<br />
File<br />
In addition to accessing the patient database and adding and<br />
modifying new vets and patients, this window also controls saving,<br />
exporting and importing of images. It allows database maintenance<br />
and connection options, direct image acquisition from <strong>Twain</strong> sources<br />
(scanners, etc.), and printing options.<br />
Save Image - This allows saving a single image to a patient file. When<br />
this option is selected, the program will ask you to choose a patient<br />
from the database or to create a new patient file.<br />
Save All Images - Saves all images to a patient file. If there is a patient<br />
currently selected in the database, the save function will have that<br />
patient’s name in the save function. If a patient is not selected, it will<br />
indicate the last patient selected. When this option is selected, it will<br />
ask you to choose a patient to save it to or create a new patient.<br />
Import Image - This function allows importing virtually any image<br />
from another source. When this function is selected, the File Import<br />
screen will open. From here, navigate to the desired drive and folder.<br />
Select the desired images from the thumbnails and click on the Load<br />
button. This will import the image and treat it like any other image<br />
in the database.<br />
Export Image - This function allows exporting an image to another<br />
program or disk. When this function is selected, the Save File window<br />
will pop up. Select a destination and name for the file. Then click Save.<br />
Follow the prompts for additional options.<br />
Export All Images - This function allows exporting all the images<br />
loaded in the image-processing screen at one time.<br />
Database Maintenance - The database maintenance option allows customizing the search field to the vocabulary used.<br />
The search field and information fields in the database have pull down menus from which to choose terms to search and<br />
file images. The pull down menus are used in the annotation, type, class and tooth # fields of the database. Select these<br />
terms to search for images. When the database maintenance option is selected, it will bring up the Data Maintenance<br />
Screen. The left side of the screen shows the annotation, type, class and tooth # fields. Click on the down arrow in each<br />
field to see the current list of terms and select the term or just start typing a term to add. Next, select what function to<br />
perform. Select Add to add the term to the chosen data field. If a term in the data field needs to be changed, type the<br />
new term in the field to the right of the Change To button and select the button. To delete a term, select a term to delete<br />
and select the Delete button.<br />
23