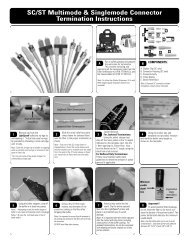
fiber products
fiber products
fiber products

Create successful ePaper yourself
Turn your PDF publications into a flip-book with our unique Google optimized e-Paper software.
Work Area<br />
S210<br />
Products<br />
Shielded<br />
Products<br />
Fiber<br />
Products<br />
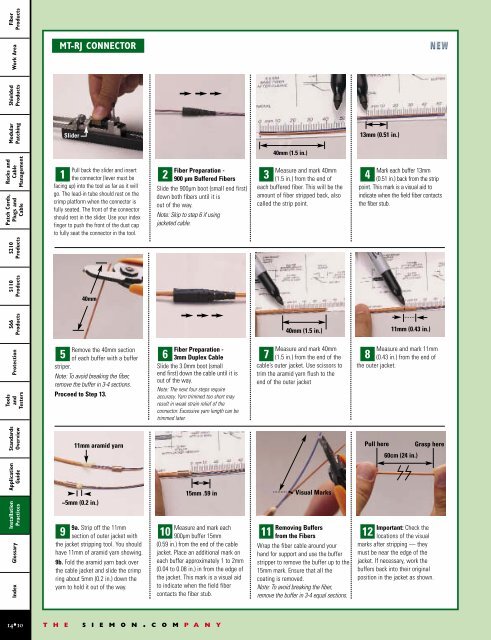
MT-RJ CONNECTOR<br />
Modular<br />
Patching<br />
Slider<br />
13mm (0.51 in.)<br />
40mm (1.5 in.)<br />
Racks and<br />
Cable<br />
Management<br />
Patch Cords,<br />
Plugs and<br />
Cable<br />
1 2 3 4<br />
Pull back the slider and insert<br />
the connector (lever must be<br />
facing up) into the tool as far as it will<br />
go. The lead-in tube should rest on the<br />
crimp platform when the connector is<br />
fully seated. The front of the connector<br />
should rest in the slider. Use your index<br />
finger to push the front of the dust cap<br />
to fully seat the connector in the tool.<br />
Fiber Preparation -<br />
900 µm Buffered Fibers<br />
Slide the 900µm boot (small end first)<br />
down both <strong>fiber</strong>s until it is<br />
out of the way.<br />
Note: Skip to step 6 if using<br />
jacketed cable.<br />
Measure and mark 40mm<br />
(1.5 in.) from the end of<br />
each buffered <strong>fiber</strong>. This will be the<br />
amount of <strong>fiber</strong> stripped back, also<br />
called the strip point.<br />
Mark each buffer 13mm<br />
(0.51 in.) back from the strip<br />
point. This mark is a visual aid to<br />
indicate when the field <strong>fiber</strong> contacts<br />
the <strong>fiber</strong> stub.<br />
S110<br />
Products<br />
40mm<br />
S66<br />
Products<br />
40mm (1.5 in.)<br />
11mm (0.43 in.)<br />
Protection<br />
Tools<br />
and<br />
Testers<br />
Remove the 40mm section<br />
of each buffer with a buffer<br />
striper.<br />
Note: To avoid breaking the <strong>fiber</strong>,<br />
remove the buffer in 3-4 sections.<br />
Proceed to Step 13.<br />
Fiber Preparation -<br />
3mm Duplex Cable<br />
Slide the 3.0mm boot (small<br />
end first) down the cable until it is<br />
out of the way.<br />
Note: The next four steps require<br />
accuracy. Yarn trimmed too short may<br />
result in weak strain relief of the<br />
connector. Excessive yarn length can be<br />
trimmed later.<br />
Measure and mark 40mm<br />
(1.5 in.) from the end of the<br />
cable’s outer jacket. Use scissors to<br />
trim the aramid yarn flush to the<br />
end of the outer jacket<br />
5 6 7 8<br />
Measure and mark 11mm<br />
(0.43 in.) from the end of<br />
the outer jacket.<br />
Standards<br />
Overview<br />
11mm aramid yarn<br />
Pull here Grasp here<br />
60cm (24 in.)<br />
Application<br />
Guide<br />
Installation<br />
Practices<br />
Glossary<br />
Index<br />
~5mm (0.2 in.)<br />
9a. Strip off the 11mm<br />
section of outer jacket with<br />
the jacket stripping tool. You should<br />
have 11mm of aramid yarn showing.<br />
9b. Fold the aramid yarn back over<br />
the cable jacket and slide the crimp<br />
ring about 5mm (0.2 in.) down the<br />
yarn to hold it out of the way.<br />
15mm .59 in<br />
Measure and mark each<br />
900µm buffer 15mm<br />
(0.59 in.) from the end of the cable<br />
jacket. Place an additional mark on<br />
each buffer approximately 1 to 2mm<br />
(0.04 to 0.08 in.) in from the edge of<br />
the jacket. This mark is a visual aid<br />
to indicate when the field <strong>fiber</strong><br />
contacts the <strong>fiber</strong> stub.<br />
Visual Marks<br />
9 10 11 12<br />
Removing Buffers<br />
from the Fibers<br />
Wrap the <strong>fiber</strong> cable around your<br />
hand for support and use the buffer<br />
stripper to remove the buffer up to the<br />
15mm mark. Ensure that all the<br />
coating is removed.<br />
Note: To avoid breaking the <strong>fiber</strong>,<br />
remove the buffer in 3-4 equal sections.<br />
Important: Check the<br />
locations of the visual<br />
marks after stripping — they<br />
must be near the edge of the<br />
jacket. If necessary, work the<br />
buffers back into their original<br />
position in the jacket as shown.<br />
14•10<br />
T H E S I E M O N . C O M P A N Y