TempLinc Owners Manual - Insteon
TempLinc Owners Manual - Insteon
TempLinc Owners Manual - Insteon
Create successful ePaper yourself
Turn your PDF publications into a flip-book with our unique Google optimized e-Paper software.
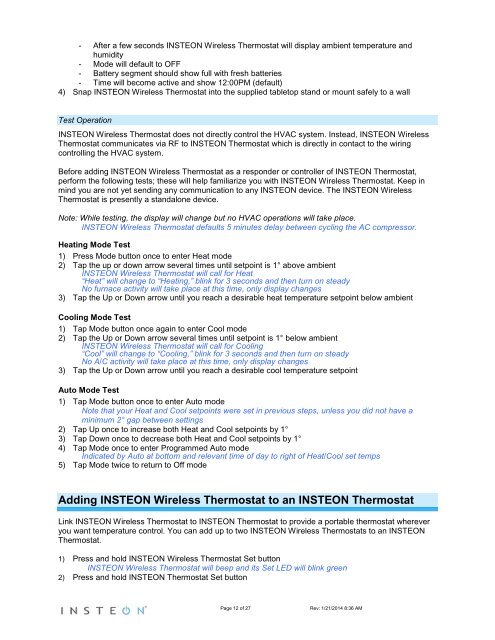
- After a few seconds INSTEON Wireless Thermostat will display ambient temperature and<br />
humidity<br />
- Mode will default to OFF<br />
- Battery segment should show full with fresh batteries<br />
- Time will become active and show 12:00PM (default)<br />
4) Snap INSTEON Wireless Thermostat into the supplied tabletop stand or mount safely to a wall<br />
Test Operation<br />
INSTEON Wireless Thermostat does not directly control the HVAC system. Instead, INSTEON Wireless<br />
Thermostat communicates via RF to INSTEON Thermostat which is directly in contact to the wiring<br />
controlling the HVAC system.<br />
Before adding INSTEON Wireless Thermostat as a responder or controller of INSTEON Thermostat,<br />
perform the following tests; these will help familiarize you with INSTEON Wireless Thermostat. Keep in<br />
mind you are not yet sending any communication to any INSTEON device. The INSTEON Wireless<br />
Thermostat is presently a standalone device.<br />
Note: While testing, the display will change but no HVAC operations will take place.<br />
INSTEON Wireless Thermostat defaults 5 minutes delay between cycling the AC compressor.<br />
Heating Mode Test<br />
1) Press Mode button once to enter Heat mode<br />
2) Tap the up or down arrow several times until setpoint is 1° above ambient<br />
INSTEON Wireless Thermostat will call for Heat<br />
“Heat” will change to “Heating,” blink for 3 seconds and then turn on steady<br />
No furnace activity will take place at this time, only display changes<br />
3) Tap the Up or Down arrow until you reach a desirable heat temperature setpoint below ambient<br />
Cooling Mode Test<br />
1) Tap Mode button once again to enter Cool mode<br />
2) Tap the Up or Down arrow several times until setpoint is 1° below ambient<br />
INSTEON Wireless Thermostat will call for Cooling<br />
“Cool” will change to “Cooling,” blink for 3 seconds and then turn on steady<br />
No A/C activity will take place at this time, only display changes<br />
3) Tap the Up or Down arrow until you reach a desirable cool temperature setpoint<br />
Auto Mode Test<br />
1) Tap Mode button once to enter Auto mode<br />
Note that your Heat and Cool setpoints were set in previous steps, unless you did not have a<br />
minimum 2° gap between settings<br />
2) Tap Up once to increase both Heat and Cool setpoints by 1°<br />
3) Tap Down once to decrease both Heat and Cool setpoints by 1°<br />
4) Tap Mode once to enter Programmed Auto mode<br />
Indicated by Auto at bottom and relevant time of day to right of Heat/Cool set temps<br />
5) Tap Mode twice to return to Off mode<br />
Adding INSTEON Wireless Thermostat to an INSTEON Thermostat<br />
Link INSTEON Wireless Thermostat to INSTEON Thermostat to provide a portable thermostat wherever<br />
you want temperature control. You can add up to two INSTEON Wireless Thermostats to an INSTEON<br />
Thermostat.<br />
1) Press and hold INSTEON Wireless Thermostat Set button<br />
INSTEON Wireless Thermostat will beep and its Set LED will blink green<br />
2) Press and hold INSTEON Thermostat Set button<br />
Page 12 of 27 Rev: 1/21/2014 8:36 AM


