4 / 8 Channel D1 Realtime H.264 DVR - Maplin Electronics
4 / 8 Channel D1 Realtime H.264 DVR - Maplin Electronics
4 / 8 Channel D1 Realtime H.264 DVR - Maplin Electronics

You also want an ePaper? Increase the reach of your titles
YUMPU automatically turns print PDFs into web optimized ePapers that Google loves.
English<br />
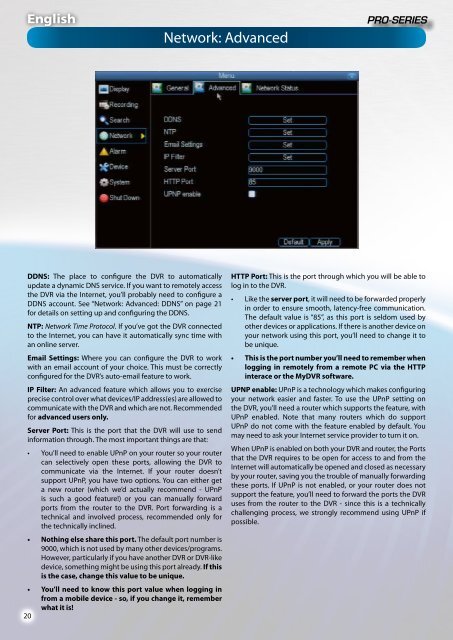
Network: Advanced<br />
DDNS: The place to configure the <strong>DVR</strong> to automatically<br />
update a dynamic DNS service. If you want to remotely access<br />
the <strong>DVR</strong> via the Internet, you’ll probably need to configure a<br />
DDNS account. See “Network: Advanced: DDNS” on page 21<br />
for details on setting up and configuring the DDNS.<br />
NTP: Network Time Protocol. If you’ve got the <strong>DVR</strong> connected<br />
to the Internet, you can have it automatically sync time with<br />
an online server.<br />
Email Settings: Where you can configure the <strong>DVR</strong> to work<br />
with an email account of your choice. This must be correctly<br />
configured for the <strong>DVR</strong>’s auto-email feature to work.<br />
IP Filter: An advanced feature which allows you to exercise<br />
precise control over what devices/IP address(es) are allowed to<br />
communicate with the <strong>DVR</strong> and which are not. Recommended<br />
for advanced users only.<br />
Server Port: This is the port that the <strong>DVR</strong> will use to send<br />
information through. The most important things are that:<br />
• You’ll need to enable UPnP on your router so your router<br />
can selectively open these ports, allowing the <strong>DVR</strong> to<br />
communicate via the Internet. If your router doesn’t<br />
support UPnP, you have two options. You can either get<br />
a new router (which we’d actually recommend - UPnP<br />
is such a good feature!) or you can manually forward<br />
ports from the router to the <strong>DVR</strong>. Port forwarding is a<br />
technical and involved process, recommended only for<br />
the technically inclined.<br />
• Nothing else share this port. The default port number is<br />
9000, which is not used by many other devices/programs.<br />
However, particularly if you have another <strong>DVR</strong> or <strong>DVR</strong>-like<br />
device, something might be using this port already. If this<br />
is the case, change this value to be unique.<br />
• You’ll need to know this port value when logging in<br />
from a mobile device - so, if you change it, remember<br />
what it is!<br />
20<br />
HTTP Port: This is the port through which you will be able to<br />
log in to the <strong>DVR</strong>.<br />
• Like the server port, it will need to be forwarded properly<br />
in order to ensure smooth, latency-free communication.<br />
The default value is “85”, as this port is seldom used by<br />
other devices or applications. If there is another device on<br />
your network using this port, you’ll need to change it to<br />
be unique.<br />
• This is the port number you’ll need to remember when<br />
logging in remotely from a remote PC via the HTTP<br />
interace or the My<strong>DVR</strong> software.<br />
UPNP enable: UPnP is a technology which makes configuring<br />
your network easier and faster. To use the UPnP setting on<br />
the <strong>DVR</strong>, you’ll need a router which supports the feature, with<br />
UPnP enabled. Note that many routers which do support<br />
UPnP do not come with the feature enabled by default. You<br />
may need to ask your Internet service provider to turn it on.<br />
When UPnP is enabled on both your <strong>DVR</strong> and router, the Ports<br />
that the <strong>DVR</strong> requires to be open for access to and from the<br />
Internet will automatically be opened and closed as necessary<br />
by your router, saving you the trouble of manually forwarding<br />
these ports. If UPnP is not enabled, or your router does not<br />
support the feature, you’ll need to forward the ports the <strong>DVR</strong><br />
uses from the router to the <strong>DVR</strong> - since this is a technically<br />
challenging process, we strongly recommend using UPnP if<br />
possible.