4 / 8 Channel D1 Realtime H.264 DVR - Maplin Electronics
4 / 8 Channel D1 Realtime H.264 DVR - Maplin Electronics
4 / 8 Channel D1 Realtime H.264 DVR - Maplin Electronics

You also want an ePaper? Increase the reach of your titles
YUMPU automatically turns print PDFs into web optimized ePapers that Google loves.
English<br />
Introduction<br />
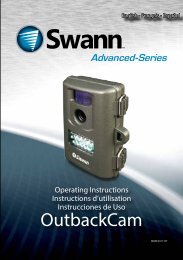
Congratuations on your purchase of this Swann <strong>DVR</strong>. You’ve<br />
made a fine choice for keeping a watchful eye over your home<br />
or business. Let’s take a moment to talk about some of the<br />
features this <strong>DVR</strong> offers, and how to get the most out of them.<br />
Multi-<strong>Channel</strong> Recording Solution<br />
The <strong>DVR</strong> records 4 or 8 channels (depending on your model)<br />
at “<strong>D1</strong>” resolution.<br />
What’s this “<strong>D1</strong>”?<br />
<strong>D1</strong> is a (slightly inaccurate) term for a certain resolution of<br />
video which is now often called “broadcast quality”. We like to<br />
think about it as being about the quality of a DVD movie.<br />
Some savvy nerds will know where the term came from and<br />
why it’s not quite correct, but it’s become a standard term in<br />
the CCTV industry, so we use it here.<br />
Fast and Easy Networking<br />
Now supporting UPnP, networking your <strong>DVR</strong> has never been<br />
easier. For the majority of networks, it’s almost plug-and-play.<br />
Users with more complex network configurations might<br />
have to adjust some settings (see “Network: General” on page<br />
19 for more about networking) to get everything running<br />
smoothly.<br />
Easy Setup using your PC (Recommended)<br />
The remote access and configuration features of the included<br />
My<strong>DVR</strong> software are so powerful that (technically speaking)<br />
you don’t even have to touch the <strong>DVR</strong> to operate it (except for<br />
plugging things in, of course).<br />
If you connect the <strong>DVR</strong> to your network and install the My<strong>DVR</strong><br />
software to a compatible PC on the same network, you can<br />
complete the <strong>DVR</strong> setup procedure there, as well as stream<br />
images from the <strong>DVR</strong> straight to your PC monitor.<br />
Requirements:<br />
A compatible computer connected to the same network<br />
as the <strong>DVR</strong>. The network must support DHCP and UPnP.<br />
• Connect your <strong>DVR</strong> to your cameras, power and a network<br />
as shown on page 6.<br />
• Ensure that your network uses DHCP addressing, and<br />
supports UPnP (Universal Plug and Play - see page 19).<br />
• Install the My<strong>DVR</strong> software on a computer connected to<br />
the same network as the <strong>DVR</strong> (see page 35).<br />
• Login to your <strong>DVR</strong>, view images and configure settings<br />
(see page 36 onwards for more details).<br />
Basic <strong>DVR</strong> Operation<br />
The USB Mouse (Recommended)<br />
The easiest way to operate the <strong>DVR</strong> is to use the included USB<br />
optical mouse - we put together the look and feel of the menu<br />
system specifically for mouse-friendly navigation.<br />
The controls are pretty easy to remember - heck, there are only<br />
two buttons. It couldn’t be simpler.<br />
Left click:<br />
• Selects an item or confirms a choice.<br />
Right click:<br />
• Opens the menu bar from the live viewing screen.<br />
• Returns one “step” from a submenu.<br />
• Opens a context menu in some settings screens.<br />
The Scroll Wheel:<br />
• Can be used to adjust the values of sliders and scales<br />
when highlighted by the moust.<br />
Of course, you don’t have to use the mouse.<br />
The Front Panel<br />
The buttons on the front panel are adequate for operating the<br />
<strong>DVR</strong>, but they’re hardly ideal for ongoing use.<br />
Between Menu, Select and the D-pad (directional pad) you can<br />
navigate through all the <strong>DVR</strong>’s menus and configure almost<br />
any setting. It’s a little clunkier than the mouse and it’s not as<br />
quick and easy, but it does save a little space - and you don’t<br />
need to find the remote!<br />
The Remote Control<br />
The remote control has all the buttons that the front panel<br />
does, plus some others. It operates like a remote control for<br />
a DVD player or similar - it’s hardly a high-tech gadget these<br />
days but it does get the job done!<br />
A full rundown of the remote control and its various functions<br />
can be found on page 8.<br />
4