Basic Stamp 2 Robot Programming - ISL
Basic Stamp 2 Robot Programming - ISL
Basic Stamp 2 Robot Programming - ISL
Create successful ePaper yourself
Turn your PDF publications into a flip-book with our unique Google optimized e-Paper software.
6-24 Chapter Six<br />
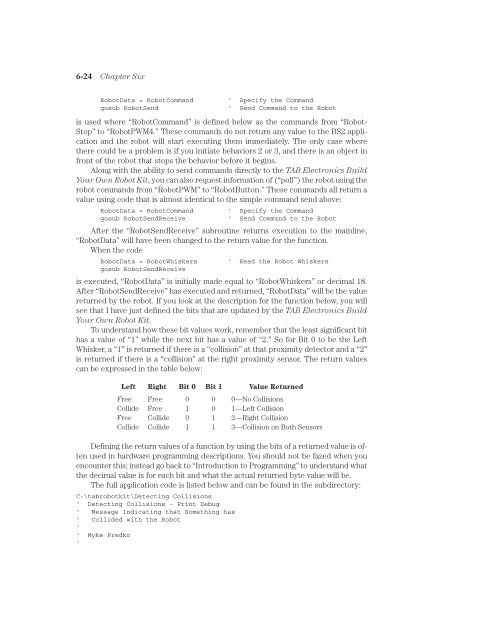
<strong>Robot</strong>Data = <strong>Robot</strong>Command<br />
gosub <strong>Robot</strong>Send<br />
‘ Specify the Command<br />
‘ Send Command to the <strong>Robot</strong><br />
is used where “<strong>Robot</strong>Command” is defined below as the commands from “<strong>Robot</strong>-<br />
Stop” to “<strong>Robot</strong>PWM4.” These commands do not return any value to the BS2 application<br />
and the robot will start executing them immediately. The only case where<br />
there could be a problem is if you initiate behaviors 2 or 3, and there is an object in<br />
front of the robot that stops the behavior before it begins.<br />
Along with the ability to send commands directly to the TAB Electronics Build<br />
Your Own <strong>Robot</strong> Kit, you can also request information of (“poll”) the robot using the<br />
robot commands from “<strong>Robot</strong>PWM” to “<strong>Robot</strong>Button.” These commands all return a<br />
value using code that is almost identical to the simple command send above:<br />
<strong>Robot</strong>Data = <strong>Robot</strong>Command<br />
‘ Specify the Command<br />
gosub <strong>Robot</strong>SendReceive<br />
‘ Send Command to the <strong>Robot</strong><br />
After the “<strong>Robot</strong>SendReceive” subroutine returns execution to the mainline,<br />
“<strong>Robot</strong>Data” will have been changed to the return value for the function.<br />
When the code<br />
<strong>Robot</strong>Data = <strong>Robot</strong>Whiskers ‘ Read the <strong>Robot</strong> Whiskers<br />
gosub <strong>Robot</strong>SendReceive<br />
is executed, “<strong>Robot</strong>Data” is initially made equal to “<strong>Robot</strong>Whiskers” or decimal 18.<br />
After “<strong>Robot</strong>SendReceive” has executed and returned, “<strong>Robot</strong>Data” will be the value<br />
returned by the robot. If you look at the description for the function below, you will<br />
see that I have just defined the bits that are updated by the TAB Electronics Build<br />
Your Own <strong>Robot</strong> Kit.<br />
To understand how these bit values work, remember that the least significant bit<br />
has a value of “1” while the next bit has a value of “2.” So for Bit 0 to be the Left<br />
Whisker, a “1” is returned if there is a “collision” at that proximity detector and a “2”<br />
is returned if there is a “collision” at the right proximity sensor. The return values<br />
can be expressed in the table below:<br />
Left Right Bit 0 Bit 1 Value Returned<br />
Free Free 0 0 0—No Collisions<br />
Collide Free 1 0 1—Left Collision<br />
Free Collide 0 1 2—Right Collision<br />
Collide Collide 1 1 3—Collision on Both Sensors<br />
Defining the return values of a function by using the bits of a returned value is often<br />
used in hardware programming descriptions. You should not be fazed when you<br />
encounter this; instead go back to “Introduction to <strong>Programming</strong>” to understand what<br />
the decimal value is for each bit and what the actual returned byte value will be.<br />
The full application code is listed below and can be found in the subdirectory:<br />
C:\tabrobotkit\Detecting Collisions<br />
‘ Detecting Collisions - Print Debug<br />
‘ Message Indicating that Something has<br />
‘ Collided with the <strong>Robot</strong><br />
‘<br />
‘ Myke Predko<br />
‘


