

Getting Started with Keystone® 600N - Best Access Systems
Getting Started with Keystone® 600N - Best Access Systems
Getting Started with Keystone® 600N - Best Access Systems

You also want an ePaper? Increase the reach of your titles
YUMPU automatically turns print PDFs into web optimized ePapers that Google loves.
Adding records<br />
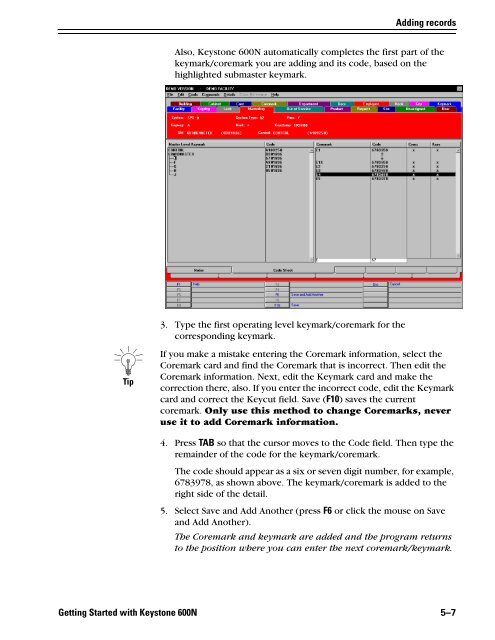
Also, Keystone <strong>600N</strong> automatically completes the first part of the<br />
keymark/coremark you are adding and its code, based on the<br />
highlighted submaster keymark.<br />
3. Type the first operating level keymark/coremark for the<br />
corresponding keymark.<br />
Tip<br />
If you make a mistake entering the Coremark information, select the<br />
Coremark card and find the Coremark that is incorrect. Then edit the<br />
Coremark information. Next, edit the Keymark card and make the<br />
correction there, also. If you enter the incorrect code, edit the Keymark<br />
card and correct the Keycut field. Save (F10) saves the current<br />
coremark. Only use this method to change Coremarks, never<br />
use it to add Coremark information.<br />
4. Press TAB so that the cursor moves to the Code field. Then type the<br />
remainder of the code for the keymark/coremark.<br />
The code should appear as a six or seven digit number, for example,<br />
6783978, as shown above. The keymark/coremark is added to the<br />
right side of the detail.<br />
5. Select Save and Add Another (press F6 or click the mouse on Save<br />
and Add Another).<br />
The Coremark and keymark are added and the program returns<br />
to the position where you can enter the next coremark/keymark.<br />
<strong>Getting</strong> <strong>Started</strong> <strong>with</strong> Keystone <strong>600N</strong> 5–7


![B.A.S.I.S. G Service Manual [T63300] - Best Access Systems](https://img.yumpu.com/48375082/1/190x245/basis-g-service-manual-t63300-best-access-systems.jpg?quality=85)

