Isis Installation Guide - Big Ass Fans
Isis Installation Guide - Big Ass Fans
Isis Installation Guide - Big Ass Fans

Create successful ePaper yourself
Turn your PDF publications into a flip-book with our unique Google optimized e-Paper software.
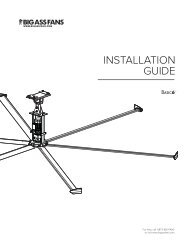
32<br />
<strong>Isis</strong> ®<br />
Electrical <strong>Installation</strong> (cont.)<br />
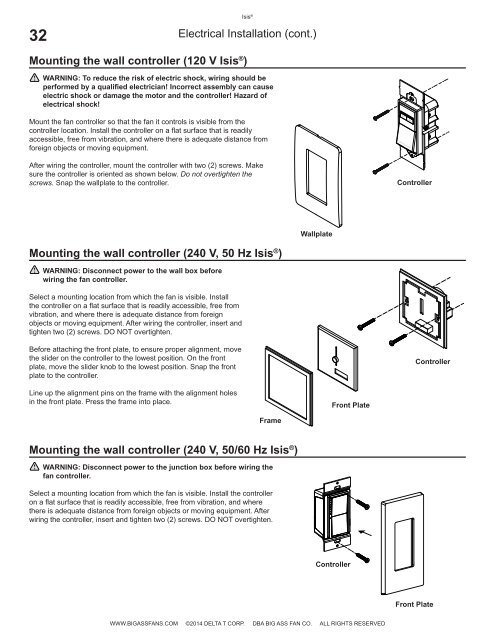
Mounting the wall controller (120 V <strong>Isis</strong> ® )<br />
WARNING: To reduce the risk of electric shock, wiring should be<br />
<br />
<br />
<br />
Mount the fan controller so that the fan it controls is visible from the<br />
<br />
accessible, free from vibration, and where there is adequate distance from<br />
foreign objects or moving equipment.<br />
After wiring the controller, mount the controller with two (2) screws. Make<br />
sure the controller is oriented as shown below. Do not overtighten the<br />
screws. Snap the wallplate to the controller.<br />
Controller<br />
Wallplate<br />
® )<br />
WARNING: Disconnect power to the wall box before<br />
wiring the fan controller.<br />
Select a mounting location from which the fan is visible. Install<br />
<br />
vibration, and where there is adequate distance from foreign<br />
objects or moving equipment. After wiring the controller, insert and<br />
tighten two (2) screws. DO NOT overtighten.<br />
Before attaching the front plate, to ensure proper alignment, move<br />
the slider on the controller to the lowest position. On the front<br />
plate, move the slider knob to the lowest position. Snap the front<br />
plate to the controller.<br />
Controller<br />
Line up the alignment pins on the frame with the alignment holes<br />
in the front plate. Press the frame into place.<br />
Front Plate<br />
Frame<br />
® )<br />
WARNING: Disconnect power to the junction box before wiring the<br />
fan controller.<br />
Select a mounting location from which the fan is visible. Install the controller<br />
<br />
there is adequate distance from foreign objects or moving equipment. After<br />
wiring the controller, insert and tighten two (2) screws. DO NOT overtighten.<br />
Controller<br />
Front Plate<br />
WWW.BIGASSFANS.COM ©2014 DELTA T CORP. DBA BIG ASS FAN CO. ALL RIGHTS RESERVED