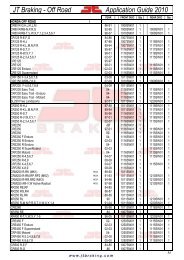
DID 60 standard roller chain - Big Bike Webshop
DID 60 standard roller chain - Big Bike Webshop
DID 60 standard roller chain - Big Bike Webshop

You also want an ePaper? Increase the reach of your titles
YUMPU automatically turns print PDFs into web optimized ePapers that Google loves.
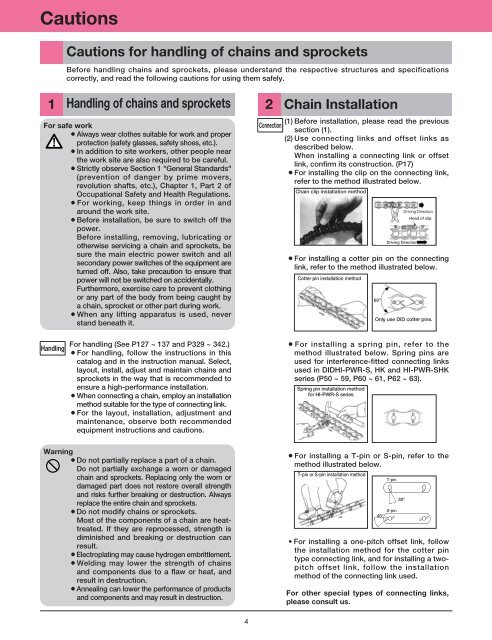
Cautions<br />
Cautions for handling of <strong>chain</strong>s and sprockets<br />
Before handling <strong>chain</strong>s and sprockets, please understand the respective structures and specifications<br />
correctly, and read the following cautions for using them safely.<br />
1 Handling of <strong>chain</strong>s and sprockets 2<br />
For safe work<br />
¡Always wear clothes suitable for work and proper<br />
protection (safety glasses, safety shoes, etc.).<br />
¡In addition to site workers, other people near<br />
the work site are also required to be careful.<br />
¡Strictly observe Section 1 "General Standards"<br />
(prevention of danger by prime movers,<br />
revolution shafts, etc.), Chapter 1, Part 2 of<br />
Occupational Safety and Health Regulations.<br />
¡For working, keep things in order in and<br />
around the work site.<br />
¡Before installation, be sure to switch off the<br />
power.<br />
Before installing, removing, lubricating or<br />
otherwise servicing a <strong>chain</strong> and sprockets, be<br />
sure the main electric power switch and all<br />
secondary power switches of the equipment are<br />
turned off. Also, take precaution to ensure that<br />
power will not be switched on accidentally.<br />
Furthermore, exercise care to prevent clothing<br />
or any part of the body from being caught by<br />
a <strong>chain</strong>, sprocket or other part during work.<br />
¡When any lifting apparatus is used, never<br />
stand beneath it.<br />
Connection<br />
Chain Installation<br />
(1) Before installation, please read the previous<br />
section (1).<br />
(2) Use connecting links and offset links as<br />
described below.<br />
When installing a connecting link or offset<br />
link, confirm its construction. (P17)<br />
¡For installing the clip on the connecting link,<br />
refer to the method illustrated below.<br />
Chain clip installation method<br />
¡For installing a cotter pin on the connecting<br />
link, refer to the method illustrated below.<br />
Cotter pin installation method<br />
<strong>60</strong>°<br />
Driving Direction<br />
<br />
Head of clip<br />
Only use <strong>DID</strong> cotter pins.<br />
Handling<br />
For handling (See P127 ~ 137 and P329 ~ 342.)<br />
¡For handling, follow the instructions in this<br />
catalog and in the instruction manual. Select,<br />
layout, install, adjust and maintain <strong>chain</strong>s and<br />
sprockets in the way that is recommended to<br />
ensure a high-performance installation.<br />
¡When connecting a <strong>chain</strong>, employ an installation<br />
method suitable for the type of connecting link.<br />
¡For the layout, installation, adjustment and<br />
maintenance, observe both recommended<br />
equipment instructions and cautions.<br />
¡For installing a spring pin, refer to the<br />
method illustrated below. Spring pins are<br />
used for interference-fitted connecting links<br />
used in <strong>DID</strong>HI-PWR-S, HK and HI-PWR-SHK<br />
series (P50 ~ 59, P<strong>60</strong> ~ 61, P62 ~ 63).<br />
Spring pin installation method<br />
for HI-PWR-S series<br />
Warning<br />
¡Do not partially replace a part of a <strong>chain</strong>.<br />
Do not partially exchange a worn or damaged<br />
<strong>chain</strong> and sprockets. Replacing only the worn or<br />
damaged part does not restore overall strength<br />
and risks further breaking or destruction. Always<br />
replace the entire <strong>chain</strong> and sprockets.<br />
¡Do not modify <strong>chain</strong>s or sprockets.<br />
Most of the components of a <strong>chain</strong> are heattreated.<br />
If they are reprocessed, strength is<br />
diminished and breaking or destruction can<br />
result.<br />
¡Electroplating may cause hydrogen embrittlement.<br />
¡Welding may lower the strength of <strong>chain</strong>s<br />
and components due to a flaw or heat, and<br />
result in destruction.<br />
¡Annealing can lower the performance of products<br />
and components and may result in destruction.<br />
¡For installing a T-pin or S-pin, refer to the<br />
method illustrated below.<br />
T-pin or S-pin installation method<br />
T-pin<br />
S-pin<br />
45°<br />
• For installing a one-pitch offset link, follow<br />
the installation method for the cotter pin<br />
type connecting link, and for installing a twopitch<br />
offset link, follow the installation<br />
method of the connecting link used.<br />
For other special types of connecting links,<br />
please consult us.<br />
30°<br />
4