Allegro RED Owner's Manual - Tiffin Motorhomes
Allegro RED Owner's Manual - Tiffin Motorhomes
Allegro RED Owner's Manual - Tiffin Motorhomes
- No tags were found...

You also want an ePaper? Increase the reach of your titles
YUMPU automatically turns print PDFs into web optimized ePapers that Google loves.
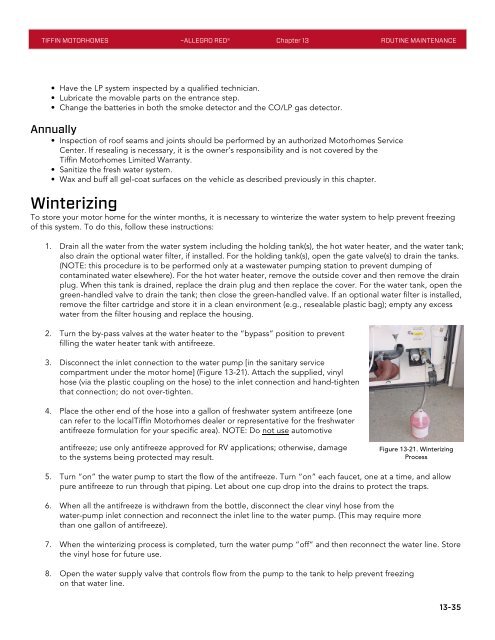
TIFFIN MOTORHOMES –ALLEGRO <strong>RED</strong>® Chapter 13 ROUTINE MAINTENANCE• Have the LP system inspected by a qualified technician.• Lubricate the movable parts on the entrance step.• Change the batteries in both the smoke detector and the CO/LP gas detector.Annually• Inspection of roof seams and joints should be performed by an authorized <strong>Motorhomes</strong> ServiceCenter. If resealing is necessary, it is the owner’s responsibility and is not covered by the<strong>Tiffin</strong> <strong>Motorhomes</strong> Limited Warranty.• Sanitize the fresh water system.• Wax and buff all gel-coat surfaces on the vehicle as described previously in this chapter.WinterizingTo store your motor home for the winter months, it is necessary to winterize the water system to help prevent freezingof this system. To do this, follow these instructions:1. Drain all the water from the water system including the holding tank(s), the hot water heater, and the water tank;also drain the optional water filter, if installed. For the holding tank(s), open the gate valve(s) to drain the tanks.(NOTE: this procedure is to be performed only at a wastewater pumping station to prevent dumping ofcontaminated water elsewhere). For the hot water heater, remove the outside cover and then remove the drainplug. When this tank is drained, replace the drain plug and then replace the cover. For the water tank, open thegreen-handled valve to drain the tank; then close the green-handled valve. If an optional water filter is installed,remove the filter cartridge and store it in a clean environment (e.g., resealable plastic bag); empty any excesswater from the filter housing and replace the housing.2. Turn the by-pass valves at the water heater to the “bypass” position to preventfilling the water heater tank with antifreeze.3. Disconnect the inlet connection to the water pump [in the sanitary servicecompartment under the motor home] (Figure 13-21). Attach the supplied, vinylhose (via the plastic coupling on the hose) to the inlet connection and hand-tightenthat connection; do not over-tighten.4. Place the other end of the hose into a gallon of freshwater system antifreeze (onecan refer to the local <strong>Tiffin</strong> <strong>Motorhomes</strong> dealer or representative for the freshwaterantifreeze formulation for your specific area). NOTE: Do not use automotiveantifreeze; use only antifreeze approved for RV applications; otherwise, damageto the systems being protected may result.Figure 13-21. WinterizingProcess5. Turn “on” the water pump to start the flow of the antifreeze. Turn “on” each faucet, one at a time, and allowpure antifreeze to run through that piping. Let about one cup drop into the drains to protect the traps.6. When all the antifreeze is withdrawn from the bottle, disconnect the clear vinyl hose from thewater-pump inlet connection and reconnect the inlet line to the water pump. (This may require morethan one gallon of antifreeze).7. When the winterizing process is completed, turn the water pump “off” and then reconnect the water line. Storethe vinyl hose for future use.8. Open the water supply valve that controls flow from the pump to the tank to help prevent freezingon that water line.13-35