Allegro RED Owner's Manual - Tiffin Motorhomes
Allegro RED Owner's Manual - Tiffin Motorhomes
Allegro RED Owner's Manual - Tiffin Motorhomes
- No tags were found...

You also want an ePaper? Increase the reach of your titles
YUMPU automatically turns print PDFs into web optimized ePapers that Google loves.
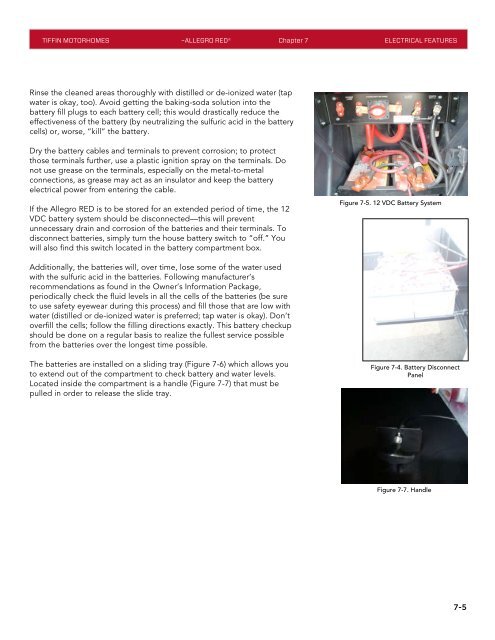
TIFFIN MOTORHOMES –ALLEGRO <strong>RED</strong>® Chapter 7 ELECTRICAL FEATURESRinse the cleaned areas thoroughly with distilled or de-ionized water (tapwater is okay, too). Avoid getting the baking-soda solution into thebattery fill plugs to each battery cell; this would drastically reduce theeffectiveness of the battery (by neutralizing the sulfuric acid in the batterycells) or, worse, “kill” the battery.Dry the battery cables and terminals to prevent corrosion; to protectthose terminals further, use a plastic ignition spray on the terminals. Donot use grease on the terminals, especially on the metal-to-metalconnections, as grease may act as an insulator and keep the batteryelectrical power from entering the cable.If the <strong>Allegro</strong> <strong>RED</strong> is to be stored for an extended period of time, the 12VDC battery system should be disconnected—this will preventunnecessary drain and corrosion of the batteries and their terminals. Todisconnect batteries, simply turn the house battery switch to “off.” Youwill also find this switch located in the battery compartment box.Figure 7-5. 12 VDC Battery SystemAdditionally, the batteries will, over time, lose some of the water usedwith the sulfuric acid in the batteries. Following manufacturer’srecommendations as found in the Owner’s Information Package,periodically check the fluid levels in all the cells of the batteries (be sureto use safety eyewear during this process) and fill those that are low withwater (distilled or de-ionized water is preferred; tap water is okay). Don’toverfill the cells; follow the filling directions exactly. This battery checkupshould be done on a regular basis to realize the fullest service possiblefrom the batteries over the longest time possible.The batteries are installed on a sliding tray (Figure 7-6) which allows youto extend out of the compartment to check battery and water levels.Located inside the compartment is a handle (Figure 7-7) that must bepulled in order to release the slide tray.Figure 7-4. Battery DisconnectPanelFigure 7-7. Handle7-5