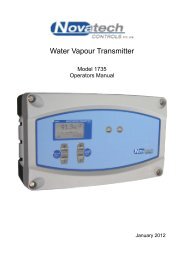
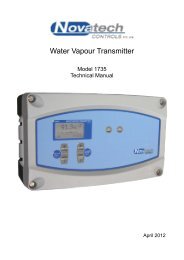
1535 Relative Humidity Transmitter - Novatech Controls
1535 Relative Humidity Transmitter - Novatech Controls
1535 Relative Humidity Transmitter - Novatech Controls
You also want an ePaper? Increase the reach of your titles
YUMPU automatically turns print PDFs into web optimized ePapers that Google loves.
!USING THIS MANUALThe <strong>Novatech</strong> <strong>1535</strong> <strong>Humidity</strong> <strong>Transmitter</strong> has a variety of user-selectable functions.They are simple to use because each selection is menu driven. For options you are not sure about, read themanual on that particular item.Please read the safety information below and the ‘Installation’ section, before connecting power to thetransmitter.CAUTION FOR DIRECT FIRED DRYERSCAUTION1The sensing probe is heated to above 700°C and can be a source of ignition. With direct fixed dryers, raw fuelleaks can occur during burner shutdown, the transmitter has an interlocking relay which removes power from theprobe heater when the main fuel shut-off valve power is off. If this configuration does not suit or if it is possible forraw fuel to come into contact with a hot oxygen probe then the Model <strong>1535</strong> transmitter with its heated probe may beunsuitable for your application.Also read the probe heater interlock caution in section 5.5.10.CAUTION2The probe heater is supplied with 110 VAC at 1 Amp (cold). This supply has electrical shock danger tomaintenance personnel. Always isolate the transmitter before working with the probe. For maximum safety the heatersupply should be transformer isolated.NOVATECH HUMIDITY TRANSMITTER Page 3
!DESCRIPTION &1SPECIFICATIONSSECTIONNUMBER1.1 DESCRIPTION1.2 SPECIFICATIONS1.3 PURGE/CALIBRATION PANELS1.4 THE ZIRCONIA SENSOR1.5 THE OXYGEN PROBE1.6 AMBIENT OR WATER COOLED REFERENCE GAS DRIER1.7 ALARMS1.8 HEATER SUPPLY1.9 APPLICATIONS WHERE SENSING POINT IS NOT ATATMOSPHERIC PRESSURE1.10 PROBE IMPEDANCE1.11 AUTO CALIBRATION—ELECTRONIC1.12 AUTO CALIBRATION—PROBE1.13 AUTO PURGE1.14 RS 232-C PORTS1.15 OTHER INPUTS—HUMIDITY, AMBIENT TEMPERATURE,DRIER TEMPERATURE1.16 WATCHDOG TIMER1.17 BACK-UP BATTERYPage 4NOVATECH HUMIDITY TRANSMITTER
!NOVATECH <strong>1535</strong> HIGH TEMPERATURE,PERCENT WATER VAPOUR TRANSMITTER1.1 DESCRIPTIONThe <strong>Novatech</strong> <strong>1535</strong> <strong>Humidity</strong> <strong>Transmitter</strong> is designed for measuring humidity in hot air drying applications, wherethe drying temperature is above the maximum limit of relative humidity sensors (typically 100°C). The transmittersignal can be used with a conventional controller to improve the efficiency of industrial drying applications, as wellas to optimise the quality of the product being dried. Industrial baking can particularly take advantage ofmeasurement and control of the moisture in the oven to produce consistent browning of the product.The in-situ probe measures the oxygen content within the drying chamber and calculations are performed todetermine how much of the air space is taken up by water vapour.In the case of indirectly heated dryers, air is drawn from the atmosphere as a reference. To improve the accuracy, thehumidity of this air can be measured and the ambient water vapour pressure is entered into the calculations.Where the dryers use direct fired combustion, the drier atmosphere can be used as a reference after removing someor all of the water vapours. In this case, the reference gas oxygen level is the same as the process except that it hasbeen dried. If the drier has a fixed combustion system (fixed firing rate), where the reduction of oxygen due tocombustion is constant, then a reference gas drier system may not be necessary to condition reference gas fromwithin the drier. The accuracy of the transmitter is further improved if the combustion gas is a small percentage ofthe recirculating drier air.WHAT MEASUREMENT TO USEThe humidity can be displayed or transmitted in 4 different engineering units.<strong>Relative</strong> <strong>Humidity</strong> PercentWater Vapour Percentg/KgDew Point degrees CentigradeMost industrial processes operate at high temperatures with resulting low RH levels. For this reason it is normallybest to use a reading of %Water Vapour or g/Kg (or lb/lb) of moisture or Dew Point.A drier temperature thermocouple is only necessary if <strong>Relative</strong> <strong>Humidity</strong> percent is to be displayed or transmitted.FEATURESo The probe can be operated in drier air temperatures up to 600°Co The output signal is continuous and proportional to the percentage volume ofwater vapouro 4 different engineering units Selectable from the keyboard -Water vapour %<strong>Relative</strong> <strong>Humidity</strong> %g/KgDew pointo Fast response (less than 10 seconds)o Long- term continuous and reliable measurementNOVATECH HUMIDITY TRANSMITTER Page 5
!1.2 SPECIFICATIONS – TRANSMITTERModel <strong>1535</strong>Range Keyboard setable in the range of :-0–100% volume of water vapour0-100% <strong>Relative</strong> humidity (RH)0-10,000 g/Kg-50-100 °C Dew pointwith adjustable span and zero.Output4–20 mA DC linearDisplays Various, Refer Section 3.1Alarms Various, Refer Section 3.3.1 & 3.3.2Speed of responseTypically 3 seconds.Accuracyi) In Indirectly Heated Dryersa) With an ambient RH sensor connected: ± 2% RHb) With no ambient RH sensor connected: ± 3% RHii) In Directly Fired Dryersa) With dried reference gas from the process: ± 2% RHb) With the mean process oxygen entered and an actualvariation of 2% oxygen:± 3% RH with ambient RH sensor connected.± 4% RH with no ambient RH sensor connected.Reproduce abilityAmbientRH sensorPower Supply±1% RHLee Integer CH15, 0 –1 VDC = 0 –100% RH(optional if indirectly heated drier or directly heated drierwith reference gas from ambient air)110/240 VAC 50/60 HzSPECIFICATIONS – PROBEModel 1231LengthTemperature RangeProcess ConnectionThermocouple140–1000 mm.100–600°C1.5" BSPT.Type K (for probe heater control. Use a separate thermocouplefor drier temperature measurement).Response Time For indirectly heated & directly fired appliances with fixed oxygen level -(a) with filter on probe 15 seconds(b) with no filter on probe 4 secondsFor directly fired appliances with reference gas cooler (A filter is required onthe probe for this application). 15 secondsTypically less than 4 secondsOperatingTemperature720°C with integral heaterPage 6NOVATECH HUMIDITY TRANSMITTER
!Heater VoltageHead TemperatureReference Gas ConnectionProbe CableProbe LifeReference Gas Fail AlarmReference Gas Flow110 VAC, 1.2 amps150°C max.1/8" NPTF.Supplied with weatherproof connector to specified length,maximum 100 metresTypically 1 –2 years. Low cost refurbishing service available.Piston actuated flow switch type: LPH–125–OALess than 50 c.c./min approx.SPECIFICATIONS – REFERENCE GAS COOLER/DRIERAmbient air cooled -ModelSizeWeightRGC-01300 W x 500 H x 135 D7.5 KgMaximum ambient air temperature 45°CMinimum process moisture content200 g/KgMinium process gas temperature 80°CSPECIFICATIONS – AMBIENT HUMIDITY PROBE(Required for indirectly heated dryers only, for improved accuracy)Model<strong>Humidity</strong> RangeTemperatureOutputCH150–100% RH–20 to +90°C0–1 VDC , linearly proportional to 0–100% RHNOVATECH HUMIDITY TRANSMITTER Page 7
!SPECIFICATIONS – REFERENCE GAS &FILTER PURGE FLOW SWITCHESModelReference Gas LPH–125–0 *Filter Purge LPH–125–7 *RangeReference GasFilter PurgeDimensionsTypeMounting50 c.c./minute2500 c.c./minute50 mm high by 14 mm wideMagnetic piston & reed switch, 1 AMP.Vertical only* Suffix ‘A’ denotes acrylic body with flying leads. (Not suitable for outdoor installation) eg. LPH–125-0ASuffix ‘B’ denotes brass body with conduit thread entry for leads. Suitable for outdoor installation.<strong>1535</strong><strong>Humidity</strong><strong>Transmitter</strong>Ambient <strong>Relative</strong> <strong>Humidity</strong> &Temperature Sensor.(Optional for Improved Accura1231OxygenProbeDryer ChamberHeat ExchangerFigure 1.1 Indirectly Heated Drier <strong>Humidity</strong> MeasurementVentDryerReferenceAir SensingPointReturn DuctTo Ref. Air Port1231OxygenProbe<strong>1535</strong><strong>Humidity</strong><strong>Transmitter</strong>BurnerFanCombustion AirFigure 1.2 Paper Machine Hood Water Vapour MeasurementHoodPage 8NOVATECH HUMIDITY TRANSMITTER
!1.3 PURGE/CALIBRATION PANELSDue to the absolute measurement characteristics of zirconia sensors and the self calibration features of <strong>Novatech</strong>analysers, probe calibration checks with calibrated gases are not normally required. In some installations however,automatic gas calibration checks are required by production engineering management. <strong>Novatech</strong> Purge/CalibrationPanels provide a ready method of connecting on-line calibration gases, and have a probe zero off-set check facility.They provide on-line automatic checking of probe and analyser calibration, as well as a probe purge facility and areference gas facility. The absolute characteristics of zirconia sensors require only one calibration gas to properlycheck the probe’s performance. Where required however, Purge/Cal Panels are available to handle two calibrationgases. The purge and calibration solenoid valves can be operated manually or automatically from a model <strong>1535</strong>series transmitter.Each panel is supplied with:o A reference gas flow meter/regulatoro A reference gas flow switcho A hand valve for zero off-set calibrationo A calibration gas flow meter/regulatoro A 24 VAC solenoid valve for each span (calibration) gasPanels with filter purge include:o A 24 VAC purge solenoid valveo A purge flow switch to test for filter blockageThe customer should supply:o Span gas cylinder(s), typically 2% oxygen in nitrogen or a similar percentage of oxygen close to thenormal level in the gas stream being measured, (to ensure fast recovery).o A 100 kPa (15 psi) clean and dry instrument air supply when filter purging is required. If purging is notrequired and instrument air is not available, an electric pump should be used for reference gas and zerooff-set calibration air.Purge/Cal Panel Model SelectionsMODEL NO. OF SPAN FILTER FOR CLASS 1NUMBER GASES PURGE HAZARDOUSAREA1536–1 1 NO NO1536–3 1 YES NO1536–5 1 NO YES1536–7 1 YES YESAccessories:o Calibration cylinder regulator and pressure gauge. (Customer to supply).o Electric air pump in weatherproof enclosure, 110–250 VAC.Figure 1.3 Model 1536-3 Purge/Cal PanelNOVATECH HUMIDITY TRANSMITTER Page 9
!1.4 THE ZIRCONIA SENSORThe transmitter input is provided from a solid electrolyte oxygen probe which contains a zirconia element andthermocouple. The probe is designed to be inserted into the drier. Sampling lines and filters are not required. Areference gas or gas supply is required for the probe. Refer to section 2.11 for more details on reference gas. Theprobe sensing end construction is shown in Figure 1.4.ThermocoupleWiresExternal WireContactInternal electrode wireFour-Bore ThermocoupleInsulating TubingAlumina TubeHeater(required onlywith heatedprobes)ThermocoupleJunctionInternal ElectrodeElectrode MaterialZiconia PelletFigure 1.4 Schematic View of a Sensor AssemblyThe heater control is a time proportioning temperature controller and triac so that the thermocouple junction iscontrolled to approximately 720 °C.When exposed to different oxygen partial pressures at the outside and inside of the sensor, an EMF (E) is developedwhich obeys the Nernst equation:E (millivolts) = RT4F log e ⎝⎛(PO 2 ) INSIDE(PO 2 ) OUTSIDE⎞⎠Where T is the temperature ( ° K) at the sensor (> 650°C), R is the gas constant, F is the Faraday constant and (PO 2 )INSIDE and (PO 2 ) OUTSIDE are the oxygen partial pressures at the inner and outer electrodes, respectively, withthe higher oxygen partial pressure electrode being positive.If dry air at atmospheric pressure, (21% oxygen) is used as a reference gas at the inner electrode, the followingequations are obtained:E (millivolts) = 2.154 x 10 -2 T log eTransposing this equation0.21(PO 2 ) OUTSIDE-46.421E(%O 2 ) OUTSIDE (ATM) = 0.21 EXPTThe <strong>1535</strong> transmitter solves this equation which is valid above 650°C.1.5 THE OXYGEN PROBEThe probe assembly provides a means of exposing the sensor to the atmosphere to be measured with sensor,thermocouple and heater wires connected via a weatherproof plug to the transmitter lead. Reference gas is fed via agas thread connection. Connections are provided for an in-situ gas calibration check. A cleaning purge of air can beadmitted via the cal. gas entry.Page 10NOVATECH HUMIDITY TRANSMITTER
!1.6 REFERENCE GAS DRIERA cooler is essential if the installation is for a direct fired drier or oven, because the level of oxygen in the oven isreduced by the combustion.A sample of gas must be drawn from the drier and dried sufficiently to be used in the oxygen probe without anymoisture condensing in the probe. The calculations in the transmitter will compensate for the remaining watercontent.Reference Gas SummaryAnswering these questions will help to determine the equipment required for your installation. Refer also to the flowchart in Figure 4.3, Set-up Mode Selection Steps, 4 to 7.Q1. How is the drier fired ?Direct fired (flame direct into the drier) Go to Q2.Indirect fired (electric or heat exchanger) Got to Q3.Direct firedQ2. Does the flame get changed in intensity to regulate the temperature ?ie. The oxygen reduction caused by the combustion in the drier is not constant.No. Constant flame, constant oxygen reduction. Go to A1.Yes. Variable oxygen level in the drier. Go to A2.Indirect firedQ3. Do you require the highest possible accuracy of the humidity calculation ?ie. Do you require compensation for the variation of moisture in the ambient air ?This improves the calculated accuracy of the calculated RH value by about 1%..No. No ambient RH probe. Go to A3.Yes. Ambient RH probe required. Go to A4.NOVATECH HUMIDITY TRANSMITTER Page 11
!AnswersA1. A reference gas cooler is not required.Select 'Direct Fired' in Set-up function #4.Select 'Ambient Air' in Set-up function #5.Set the level of oxygen in to the menu with Set-up function #6.(See Section 4.5.4, Drier Heating Typeand Section 1.2, 'Specifications – Reference gas Cooler/Drier' for further details)A2. It is necessary to have a reference gas cooler to remove the majority of the water vapour.The simplest way to dry the gas is to use the <strong>Novatech</strong> model RGC-01.Select 'Direct Fired' in Set-up function #4.Select 'Dried Process Gas' in Set-up function #5.The reference gas temperature sensor must be used.(See section 2.6, Connecting the Reference Gas Temperature Sensor)A3. A reference gas cooler or an ambient RH probe are not required.Use ambient air to the 'REF' port on the oxygen probe.Select 'Indirect Fired' in Set-up function #4.Select 'No' in Set-up function #7. (External RH probe)A4. A reference gas cooler is not required, but an ambient RH probe is required.Use ambient air to the 'REF' port on the oxygen probe.Select 'Indirect Fired' in Set-up function #4.Select 'Yes' in Set-up function #7. (External RH probe)Page 12NOVATECH HUMIDITY TRANSMITTER
!FLOWSWITCHSOLENOIDVALVE(NOTE 4)PUMPOUTLETRGC 01THE LID MUST BE ONTHIS BOX AT ALL TIMESTO RETAIN HEAT WITHINTHE BOX.COOLING COIL240VMAINSJUNCTION BOXINLETGAS FLOW1/4" O.D. TUBING WITHRAUTOTRACE HEATERAND CLADDING.S.S. TUBING PREFERRED.3/8" TUBINGS.S. PREFERREDREF PORTSAMPLE PROBECAL PORTNOTES:1. SLOPE PROBES & LINES DOWNWARDS ATAN ANGLE OF 10ø MINIMUM.1231 PROBE2. COOLING COIL REQUIRES FREE AIR CIRCULATION.3.AUTOTRACE HEATER NOT REQUIRED IF RGC OUTLETLINE DOES NOT COOL BELOW THE TEMPERATURE OFTHE RGC COIL OUTLET. IF IN DOUBT INSTALL THE HEATER.4. THE SOLENOID VALVE IS (OPTIONAL) IS REQUIRED FOR ANALYSERSWHICH DISPLAY BOTH % WATER VAPOUR & % OXYGEN.5. DISTANCE BETWEEN RGC 01 & PROBE SHOULD BEMINIMISED. TYPICALLY 1.5M.6.THE RGC 01 SHOULD BE INSTALLED IN AN AMBIENTTEMPERATURE OF LESS THAN 50øC.The ideas & design in this drawing remain theproperty of <strong>Novatech</strong> <strong>Controls</strong> (Aust) Pty Ltd.Use without their express permission isprohibited.FIGURE 1.6NOVATECH CONTROLS (AUST) PTY LTD.Description:INSTALLATION OF RGC 01 REFERENCEGAS CONDITIONERDrawing Name: M:ATEAM\DRAWINGS\RGC\INSTALLScale: NTSDate:8/8/94General Revision Rev.109/01/95!Figure 1.6 How to Install the reference gas coolerNOVATECH HUMIDITY TRANSMITTER Page 13
!1.7 ALARMSRefer to OPERATOR FUNCTIONS Section for details on alarm functions.1.8 HEATER SUPPLYCAUTIONThe probe heater is supplied with 110 VAC at 1 Amp (cold). This supply has electrical shock danger to maintenancepersonnel. Always isolate the transmitter before working with the probe. For maximum safety the heater supplyshould be transformer isolated.1.9 APPLICATIONS WHERE SENSING POINT IS NOT AT ATMOSPHERIC PRESSURETo apply the <strong>1535</strong> transmitter to processes which have pressure at the point of measurement significantly above orbelow atmospheric pressure, then compensation must be applied. Refer to set-up step 4.5.10.1.10 PROBE IMPEDANCEThe probe impedance is a basic measurement of the reliability of the oxygen reading. A probe with a high impedancereading will eventually produce erroneous signals. The transmitter checks the probe impedance once per minute andif the impedance is above the maximum level then the impedance alarm will be activated. Typical probe impedanceis 800–2000 °C at 720°C.1.11 AUTO CALIBRATION–ELECTRONICSThe transmitter input section is self calibrating. There are no adjustments. The analog to digital (A/D) converter inputstages are checked against a precision reference source and calibrated once every three seconds. Should the inputelectronics drift slightly, then the drift will be automatically compensated for within the microprocessor. If a largeerror occurs due to an electronic fault, then an ‘A/D CAL ERROR’ alarm will occur.The calibration procedure of the precision reference sources should be repeated about every two years or if theinstrument undergoes a cold start (refer section 2.14). If there is any doubt about the accuracy of the instrumentreadings, then refer Maintenance Section 5.5 items 6, 7, 8 and 9 for a full description of this simple calibrationprocedure.The digital to analog converters or output sections of the transmitter are tested for accuracy only when the 'AUTOCAL' button is pressed. If they are found to have an error then a ‘D/A CAL ERROR’ alarm will occur. The D/Asections are re-calibrated in 3 seconds by pressing the ‘AUTO CAL’ button on the technicians keyboard. All outputsignals will drop to 0 mA for the 3 second period. It is suggested that a D/A re-calibration be performed after theinstrument has stabilised, approximately 30 minutes after first switching on and after the A/D calibration has beencompleted.It should be repeated annually. If a ‘D/A CAL ERROR’ alarm occurs during normal operation then a hardware faultshould be suspected.Page 14NOVATECH HUMIDITY TRANSMITTER
!1.12 AUTO CALIBRATION CHECKING–PROBEAs stated in Section 1.3, on-line automatic gas calibration is not normally required. Where it is required however, theprobe can be checked for accuracy in-situ and on-line. Solenoid valves can admit up to two calibrated gas mixturesinto the probe via the calibration port, under microprocessor control, on a timed basis. For details on installationrefer Section 2.10. For details on setting up this facility refer to set-up steps 11 to 23 Section 4.5.During probe auto calibration checking, the transmitter output will freeze and remain frozen for a further adjustableperiod, allowing the probe time to recover and continue reading the drier oxygen level.Calibration gases may be manually admitted by pressing the ‘CAL’ buttons on the keyboard while in ‘RUN’ mode.The transmitter output is frozen during the pressing of these buttons and immediately becomes active when thebutton is released.1.13 AUTO PURGEIn oil and coal fired plants, or in dryers with high dust loadings, it is possible for the probe sensing filter to becomeblocked. An automatic purge cycle can be set up so that a blast of air, maximum 100 kPa, will automatically backflushthe probe filter on a timed basis. Refer to set-up steps 11 to 15 Section 4.5.A purge flow switch senses that there is sufficient flow to clear the filter during the purge cycle otherwise a ‘FILTERBLOCKED’ alarm will occur.The probe can be manually purged from the keyboard while in ‘RUN’ mode. The transmitter output is not frozenduring or after the pressing of this button.1.14 RS 485 –232C PORTSThe serial port is for connecting a printer, a data logger, or any computer with an RS485 –232-C port.It can be used to monitor the transmitter and process by logging the values of functions selected in step 29 of the setupmenu.The log period may be selected in step 30 for 1–2000 minutes, and the baud rate may be set up in step 31.Alarms, including the time they occurred, will be transmitted to the printer and computer whenever they are firstinitiated, accepted and cleared.NOVATECH HUMIDITY TRANSMITTER Page 15
!1.15 OTHER INPUTS–<strong>Humidity</strong>, Ambient Temperature and Drier TemperatureThe connection of a Lee Integer CH15 or similar sensor/transmitter with a range of 0–100 % RH and output of 0–1volt is optional for dryers with indirect heating. In this case the probe reference gas comes from the ambientatmosphere, and compensating for RH and temperature variations of this reference gas improves the accuracy by 1%RH.Dryers with direct fired combustion processes normally use a sample of atmosphere from within the drier as probereference gas and do not require an RH or ambient air temperature sensor. In this case, the reference gas must bedried to remove all water vapour before entering the probe reference port.If the drier has a fixed combustion system (fixed firing rate), where the reduction of oxygen due to combustion isconstant, then an ambient/water cooled drier may not be necessary to condition reference gas from within the drier.The accuracy of the transmitter is further improved if the combustion gas is a small percentage of the recirculatingdrier air. In this case the CH15 sensor can optionally be installed for a 1 % RH improvement in accuracyIn order to calculate the % RH of the drier, the temperature of the drier gas must be known. A K type thermocoupleis used for this purpose. This thermocouple is not necessary if the transmitter is set to display % Water Vapour, g/Kgor dew point temperature only.1.16 WATCHDOG TIMERThe watchdog timer is started if the microprocessor fails to pulse it within any three second period, (ie. fails to run itsnormal program).The microprocessor will then be repeatedly reset until normal operation is resumed. Reset cycles are displayed by thereset light on the internal keyboard. A steady ‘ON’ light indicates normal operation.If the program has not resumed normal operation after three attempts to reset, the common alarm relay will beactivated.1.17 BACK-UP BATTERYThe transmitter’s RAM and real-time clock are backed up by a lithium battery in the event of power failure. All setupand maintenance variables are saved and the clock is kept running for approximately ten years with the power off.The average life of the battery with the power on is 38 years.Page 16NOVATECH HUMIDITY TRANSMITTER
!INSTALLATION &2COMMISSIONINGSECTIONNUMBERINSTALLATION2.1 MOUNTING THE TRANSMITTER2.2 HEATER INTERLOCK RELAY2.3 EARTH, SHIELD & POWER CONNECTIONS2.4 CONNECTING THE PROBE CABLE2.5 CONNECTING THE RELATIVE HUMIDITY INPUT (OPTIONAL)2.6 CONNECTING THE AMBIENT TEMPERATURE INPUT (OPTIONAL)2.7 CONNECTING THE OUTPUT2.8 CONNECTING THE ALARMS2.9 CONNECTING THE HORN RELAY2.10 CONNECTING THE AUTOMATIC PURGE & CALIBRATION SYSTEM2.11 CONNECTING REFERENCE GAS2.12 CONNECTING THE PRINTER AND TERMINAL PORTS2.13 INSTALLING THE OXYGEN PROBECOMMISSIONING2.14 CONNECTING POWER - COLD START2.15 REFERENCE GAS FLOW SWITCH2.16 COMMISSIONING - MAINTENANCE MODE2.17 COMMISSIONING - SET UP MODE2.18 RUN MODE2.19 HEATER BY-PASS SWITCH2.20 CHECKING THE ALARMS2.21 PROBE CALIBRATION2.22 FILTER PURGE SET UP PROCEDURE2.23 CALIBRATION GAS SET UP PROCEDURE2.24 DUST IN THE FLUE GAS2.25 STRATIFICATIONNOVATECH HUMIDITY TRANSMITTER Page 17
35530 30!INSTALLATION2.1 MOUNTING THE TRANSMITTERSurface mount the transmitter case on to a flat surface or bracket, using the four holes provided. Refer to Figure 2.1.If the hole layout provided is not suitable then the circuit boards may be removed and additional holes drilled in therear of the case. Mounting screws should not come into contact with the printed circuit boards.All wiring should comply with local electrical codes. The lead between the probe and transmitter should be orderedwith the probe. It has an integral weatherproof connector to plug into the probe head.FRONT REAR SIDE31912.529412.51329.5 HolesAll Dimensions in Millimetres38155!Figure 2.1Enclosure Mounting Dimensions2.2 HEATER INTERLOCK RELAYSCAUTIONOn direct fired dryers, explosion protection for heated probes is achieved by switching the power to the probe heater offwhenever the main fuel valve is closed.The principle is that if the main fuel valve is open then the main flame has been established. With this primary source ofignition on, the probe heater can be safely switched on. The most dangerous situation is if fuel leaks into the drier whenthe fuel valve is closed. When power is removed from the main fuel valve the heater must also be switched off.To achieve this protection, connect the main fuel valve power to the ‘burner on I/P’ terminals and check that relay RL 7coil is compatible with the voltage connected eg. 110 or 240 VAC. Refer to Figure 2.2.For installations where there is no risk of explosion, connect a constant mains supply to terminals number 39 and 40.Page 18NOVATECH HUMIDITY TRANSMITTER
!Figure 2.2 Probe Heater Safety Interlock ConnectionsNOVATECH HUMIDITY TRANSMITTER Page 19
!2.3 EARTH, SHIELD & POWER CONNECTIONSAll external earthing should be shielded. The printed circuit boards are fully floating above earth. All earth andshield connections should be connected to the earth terminal No. 44.The mains earth should be connected to a sound electrical earth.Do not connect shields at the field end. Simply clip off and insulate. An extra terminal strip may be required toconnect all shields together. This should be supplied by the installer.Before connection of mains power check that the correct solder links are installed as shown in Figure 2.3.Figure 2.3 Earth, Shield and Power ConnectionsPage 20NOVATECH HUMIDITY TRANSMITTER
!2.4 CONNECTING THE PROBE CABLEConnect the probe lead supplied as shown in Figure 2.4.Probe HeadConnectorZirconiaSensorProbeThermocoupleCBAFOrangeBlackBrownBlue1 Probe +2 Probe -3 Probe TC +4 Probe TC -ProbeHeaterDEProbeEarthGGreen &Yellow(Shield)WhiteWhite37 Heater38 HeaterGreenOtherShieldsShieldCommonTerminal BlockMainsEarthFigure 2.4 Connection of Probe Cable44 Earth!2.5 CONNECTING THE RELATIVE HUMIDITY SENSORThis input is only required for indirectly heated dryers or directly heated dryers with fixed combustion where probescan use ambient air as a reference. Refer to Section 1.15 for details on this optional input. Mount the relativehumidity sensor enclosure in a position to sense ambient air RH . For connection details refer Figure 2.5.NOVATECH HUMIDITY TRANSMITTER Page 21
!Figure 2.5 Connections for <strong>Relative</strong> <strong>Humidity</strong> SensorPage 22NOVATECH HUMIDITY TRANSMITTER
!2.6 CONNECTING THE REFERENCE GAS (AMBIENT) TEMPERATUREAND DRIER TEMPERATURE SENSORSThe ambient temperature sensor is optional for indirectly heated dryers or for directly heated dryers where ambientair is used as a reference. It is essential if the installation is on a directly heated drier with process gas used for areference gas to the oxygen probe.For simply monitoring air temperature, mount the ambient temperature sensor in a protected position with plenty ofexposure to the air. The sensor is supplied within the relative humidity sensing enclosure. Refer to Figure 2.6a forconnection details.Figure 2.6a Connection of Ambient Temperature Sensor, AD590When used with a directly heated drier with process gas used for a reference gas to the probe, the installation musthave a reference gas cooler. This sensor is then used to measure the reference gas temperature after the cooler. Thereference gas sensor will be included in the cooler.The cooler will be fitted with a PT100 RTD sensor. It is necessary to use shielded, low resistance cable for thissensor (18 gauge or lower resistance). Compensation can be made for lead resistance. See section 5.5.15.PT100 RTD1.5k Ω8 RH -9 + 12 V10 AMB TEMP +11 AMB TEMP -Figure 2.6b Connection of Ambient Temperature Sensor, PT100 RTDNOVATECH HUMIDITY TRANSMITTER Page 23
!The Drier Temperature sensor is only required for transmitters displaying and/or transmitting % RH. It is notrequired for the calculation of % Water Vapour, g/Kg or dew point.The sensor must be a ‘K’ type thermocouple mounted in the drier, in a position close to where the % RH is beingmeasured.Figure 2.6c Connection of the Drier Temperature Sensor2.7 CONNECTING THE TRANSMITTER OUTPUTThe 4 –20 mA DC output channel is capable of driving into a maximum 600 Ω load. It is fully isolated. Refer toFigure 2.7.Figure 2.7 Connections the for <strong>Transmitter</strong> Output ChannelPage 24NOVATECH HUMIDITY TRANSMITTER
!2.8 CONNECTING THE ALARMSThe alarm relay functions are described in detail in Sections 3.2 and 3.3. Each relay, except for the horn relay, hasnormally closed contacts. The contacts will open in alarm condition. The horn relay has normally open contacts. Allsystems should have the common alarm relay RL5 and the probe low temperature relay RL3 connected. The probecalibration and horn relays are optional. Alarm wiring should be shielded.2.9 CONNECTING THE HORN RELAYThe horn relay operates as a true alarm system and can be connected directly to a horn. The horn relay is latching andcan be reset by pressing the alarm button. Refer to Figure 2.8.Figure 2.8 Connections for Alarm Horn2.10 CONNECTING THE AUTOMATIC PURGE AND CALIBRATION SYSTEMThe on-line auto purge and calibration system is optional. For details on its operation refer to Sections 1.3, 1.12 and1.13. Typical connection details are shown in Figures 2.9 (a) and (b).After installation, the purge/cal system should be tested thoroughly for leaks. Leaks can cause significant errors if thedrier is at negative pressure. If the drier is at positive pressure, an outward leak can cause corrosion in the purge/calsystem piping and fittings.Figure 2.9a Automatic Purge & Calibration System Wiring SchematicNOVATECH HUMIDITY TRANSMITTER Page 25
!Figure 2.9b Automatic Purge & Calibration System Piping SchematicPage 26NOVATECH HUMIDITY TRANSMITTER
!2.11 CONNECTING REFERENCE GASA reference gas supply is required for the oxygen probe. Connect as shown in Figure 2.10. If the drier is indirectlyheated, the reference gas should be pumped from ambient air with a simple diaphragm pump. A good qualityaquarium pump is adequate.If the drier air is heated by direct firing burners; gas, oil, or other fuel; the reference gas can be drawn from asampling point within the drier near to the oxygen probe sensing tip. It then needs to be dried completely with arefrigerated or desiccant drier. If the drier has a fixed combustion system (fixed firing rate) where the reduction ofoxygen due to combustion is constant, then a refrigerated drier system may not be necessary to condition referencegas from within the drier. The accuracy of the transmitter is further improved if the combustion gas is a smallpercentage of the recirculating drier air.A reference gas flow switch is required. Connection details are shown in Figure 2.9b. The flow switch causes analarm if the reference gas flow is insufficient. Failure of reference gas can cause indeterminate errors.Reference gas pressure should be about 20mm WG to provide a flow of approximately 50 cc/min. As a guide, if theend of the air supply tube is held 12 mm under water, then you should see several bubbles per second. The flowshould be sufficient to actuate the reference gas flow switch.Cooling effect errors will occur if the reference gas flow is too high. This can be checked by turning the flow on andoff while reducing the flow until no difference in oxygen reading is noticed between flow and no-flow.Figure 2.10 Reference gas Connection2.12 CONNECTING THE PRINTER AND TERMINAL PORTSThe RS 485–232-C port is available at the connector CN7 on the lower right hand side of the main circuit board.A printer with a serial port, or a data logger, or a computer terminal may be connected to the port.Data is logged out of the port as arranged in set-up steps 29 and 30. The baud rate is selectable in step 31. Refer toSection 1.14.Connection details are shown in Figure 2.11.Note: For the RS 485–232-C port to work as an RS 232-C port, there must be no other connection from the externaldevice back to the transmitter, (including an earth return).NOVATECH HUMIDITY TRANSMITTER Page 27
!2.13 INSTALLING THE OXYGEN PROBEFigure 2.11 Serial Port ConnectionsWeld a 1 1/2" BSP or NPT socket to the flue in a suitable position on the drier.It is necessary to angle the probe downwards, at about 30° minimum angle from the horizontal, to avoid water vapourbuilding up in the probe housing. The sensing tip should be lower than the head.If installing a probe with a hot environment, slide the probe in slowly to avoid thermal shock to the internal ceramicparts.CAUTIONIt is important that there is no air in leakage near to the oxygen sensing point otherwise there will be a high oxygenreading.Although it is rare, occasionally a probe may sense oxygen vastly differently from the actual. If this occurs then theprobe should be moved, or a longer probe installed. This phenomenon is caused by stratification of gases in the drier.2.14 CONNECTING POWER–COLD STARTCOMMISSIONINGIn direct fired dryers, before commissioning the probe or transmitter, read the two Caution paragraphs at the front ofthis manual.Check that the mains supply voltage link is in the correct place for the supply voltage. To locate this link refer toSection 2.3It is recommended that, prior to commissioning, a ‘COLD START’ be performed. This resets all set up andmaintenance mode entries to their normal default values. ‘COLD START’ will show on the display for a secondprior to a microprocessor initialising sequence which takes about seven seconds.After a ‘COLD START’, it is necessary to set all new variables in Maintenance and Set-up modes, includingcalibration voltages and time and date.To perform a ‘COLD START’, apply power to the transmitter while at the same time holding down one of the nineinternal keyboard buttons.A ‘WARM START’, which is performed by applying power without holding down an internal keyboard button, willretain all data previously entered in Maintenance and Set-up modes.Page 28NOVATECH HUMIDITY TRANSMITTER
!2.15 REFERENCE GAS FLOW SWITCHEnsure that the reference gas is flowing and that the reference gas flow switch is closed by pressing the alarm buttonto ensure a ‘REF AIR FAIL’ alarm is not occurring.2.16 COMMISSIONING–MAINTENANCE MODESwitch the mode switch to ‘MAINT’. Enter the date and time. If the transmitter has performed a ‘COLD START’,the reference voltage and D/A calibrations will have to be performed. If a ‘COLD START’ has been performed or anew probe installed then the probe offset will need to be set. Refer to Section 5 for full details on calibration. Referto Section 5.5.10 and 2.21 for details on probe offset calibration.2.17 COMMISSIONING–SET UP MODESwitch the mode switch to ‘SET-UP’ and enter all set up functions as listed in Section 4.2.18 RUN MODESwitch the mode switch to ‘RUN’. The upper line of the display will now read ‘% RELATIVE HUMIDITY’ or ‘%WATER VAPOUR’. The probe temperature can be checked on the lower line of the display. % <strong>Relative</strong> <strong>Humidity</strong>or % Water Vapour readings are not valid when the probe is below 650°C.2.19 HEATER BYPASS SWITCH (DIRECT FIRED DRYERS ONLY)In indirectly heated dryers, leave the heater by-pass switch in the ‘off’ position and RL7 permanently linked to themains supply. See Section 2.2In directly heated dryers, heated probes should have their heater supply interlocked with RL 7. If the driercombustion is off, then power will not be supplied to the heater.With direct fired dryers, to commission an oxygen probe when the main burner is turned off, switch power off thetransmitter, remove the probe from the mounting point and connect the lead with the probe laying on a metal orceramic surface external to the flue and capable of withstanding 750°C.Re-apply power to the transmitter and press the burner by-pass switch into the ‘down’ position. This will applypower to the probe heater even when the plant is not running. The probe offset can now be set and calibrationchecked with appropriate calibration gases (typically 2 % oxygen in nitrogen).Ensure that the burner by-pass switch and the power are turned off before the probe is re-installed. An alarm willoccur if the burner by-pass switch is turned on (down) during normal operation.2.20 CHECKING THE ALARMSIf any alarms are present the alarm LED should be lit, either flashing or steady. To interpret the alarms, repeatedlypress the alarm button until all alarm functions have been displayed. Rectify the cause of each alarm until no furtheralarms appear on the display. For details on the operation of the alarm button and the alarm functions refer to Section3.NOVATECH HUMIDITY TRANSMITTER Page 29
!2.21 PROBE CALIBRATIONThe zirconia sensor in the probe provides an absolute measurement of oxygen partial pressure. There are nocalibration adjustments, apart from ‘PROBE OFFSET’, for the probe. Refer to Section 5.5.10. The probe EMF iseither correct or the probe is faulty.To check that the probe is functioning correctly, firstly check that the high probe impedance alarm is not activated.The display would show ‘SENSOR FAIL’. The actual impedance can be displayed on the lower line. For a probewith less than one year of non-corrosive service, it will be less than 4000 Ω. Once it is established that the probeimpedance is normal, the probe offset may be tested and set. Refer to Section 5.5.10. A small flow of air must beadmitted to both the ‘REF’ and ‘CAL ’ports when testing probe offset. Gas calibration tests can then be carried out.Refer to Section 2.23.2.22 FILTER PURGE SET-UP PROCEDUREBefore setting up probe calibration gases, the filter purge should be set up. If filter purge is not installed, proceed tothe calibration gas set-up described in the following paragraph.Set up the probe outside the drier so that the filter can be viewed whilst running purge air, (controlled from the‘PURGE’ button on the analyser when in ‘RUN’ mode). Gradually adjust the purge air supply regulator, increasingthe pressure until sufficient flow is obtained to clear the filter. This is best checked with a dirty filter after a period ofoperation, by withdrawing the probe from service and watching any build up on the filter being blown off at the setpressure. Normally 30 kPa (5 psi) is adequate but the air pressure may be set as high as 100 kPa (15 psi).With filter purge set up, the air pressure has been determined and the calibration gas system can be set to an equalpressure.2.23 CALIBRATION GAS SET-UP PROCEDUREIf the installation has a filter purge facility, set this up first. Refer to the previous paragraph. Press the zero offsetvalve to obtain a reasonable flow through the calibration gas flow meter. Leave the pressure set on the air regulatorfor filter purge and adjust the flow on the rotameter flow regulator. The flow requirements vary depending upon thelength of the probe and whether or not the probe has a filter. Required flows normally range from 5 –20 1itres perminute.Probes without filters will require a higher flow to achieve an accurate calibration gas reading and sometimes maynot exactly read the calibration gas due to equilibration of the calibration gas with the process gas near the sensor. Solong as the reading is reasonably close, accuracy is guaranteed, because the sensor is an absolute device. With theprobe removed from service, a filter can be temporarily held over the sensing end of the probe to obtain an accuratecheck of oxygen readings. It is mainly for probes with no filters that acceptable accuracy's can be entered in set-upmode. Too high a flow will cause cooling of the sensor creating errors.With heated probes that have no filter, a compromise flow rate may be required. For this reason an acceptableaccuracy level can be set in the instrument to avoid nuisance ‘GAS CAL ERROR’ alarms. Once this flow has beenset, the calibration gas solenoids should be manually operated from the instrument keyboard by pressing the ‘CAL 1’button whilst in ‘RUN’ mode. The calibration gas cylinder pressure should be gradually increased to achieve exactlythe same flow reading on the flow metre as the zero offset flow without adjusting the rotameter flow regulator.Calibration gas flow and the zero offset flow should be identical.Some adjustments may be required to obtain satisfactory results with calibration gas flow. The maximum pressure onthe calibration gas cylinders is 100 kPa (15 psi). 30 kPa (5 psi) is sufficient, particularly when no purge option isinstalled. Use a calibration gas close to the normal drier oxygen level to avoid a long recovery time. A typical gaswould be 14% oxygen in nitrogen in a drier normally operating at 30% water vapour. Check this oxygen level byreading ‘% Oxygen’ on the lower line of the display while the drier is in operation.Page 30NOVATECH HUMIDITY TRANSMITTER
!2.24 DUST IN THE DRIERThe preferred method of mounting an oxygen probe for dust laden applications is facing vertically downwards withthe filter removed. With no filter some errors in gas calibration can occur when the gas sample has an oxygen contentsignificantly different from that of the flue gas. Allow for this when setting auto-calibration tolerances in the set-upmode. An occasional automatic back purge is helpful with probes mounted at 30° downwards with or without a filter.Normally heated probes are supplied with filters for dusty applications. The probe response time should be testedwhen the probe is first installed and then regularly until it remains constant for a significant period. A partiallyblocked filter will slow the response of the probe. Many probes in the field operate continuously in this way formany years with an occasional filter purge. To test the probe response time, use a stop watch to obtain the time for aprobe to achieve a 63% change from one reading to another.If a probe filter blocks completely in a short period of time, then there is no option but to use the probe without thefilter. Trial probes with filters are available to test whether filter blockage is likely to occur.2.25 STRATIFICATIONIf the transmitter and probe have been fully tested and the oxygen readings in the drier are incorrect, gas stratificationmay be occurring.The phenomenon cannot be anticipated for any particular installation. The problem is normally solved by moving theprobe to a new location.NOVATECH HUMIDITY TRANSMITTER Page 31
!OPERATOR3FUNCTIONSSECTIONNUMBER3.1 DISPLAY BUTTON3.2 ALARM BUTTON3.3 ALARM SCHEDULE3.4 POWER LAMP3.5 ERROR LAMPPage 32NOVATECH HUMIDITY TRANSMITTER
!OPERATOR FUNCTIONS (RUN MODE)3.1 DISPLAY BUTTONThe upper line on the display will read:-‘% <strong>Relative</strong> <strong>Humidity</strong>’‘% Water Vapour’g/KgDew point temperaturewhichever is selected as an output. The following are available for display on the lower line:-1. % RELATIVE HUMIDITY (if it is not selected on the upper line).2. % WATER VAPOUR (if it is not selected on the upper line).3. DEW POINT TEMPERATURE (if it is not selected on the upper line).4. g/Kg (if it is not selected on the upper line).5. PROBE TEMPERATURE6. DRIER TEMPERATURE7. REFERENCE GAS TEMPERATURE8. AMBIENT HUMIDITY, will read correctly only if a sensor is connected.9. PROBE IMPEDANCE, a measure of integrity of the sensor’s electrode, the part of the probe thatnormally wears out first. The reading should be less than 2 KΩ at 720°C. The probe impedance ismeasured every five minutes. In the first five minutes after being switched on, the probe impedancedisplay will show ‘- -’, or until the probe reaches 650°C.10. OXYGEN %, as read by the probe.11. PROBE EMF (millivolts)These variables can be displayed sequentially by pressing the ‘DISPLAY’ button. In addition to the above, theanalyser will automatically display the following lower line messages:12. PROBE UNDERTEMP, when the probe heater is on but the temperature is below 650°C.13. PROBE CALIBRATION, occurring for Cal Gas check.14. PROBE PURGE occurring.Items 12, 13 and 14 will only display as they are occurring.3.2 ALARM BUTTONRepeatedly pressing the operators ‘ALARM’ button will produce alarm displays in sequence on the lowerline of the LCD display. If an alarm has cleared prior to pressing the ‘ALARM’ button, it will not re-appear on asecond run through the alarms. Active alarms which have been previously displayed will have ‘ACC’ (accepted),displayed alongside. New alarms will not have ‘ACC’ displayed until a second press of the ‘ALARM’ button. Afterthe last active alarm is indicated, the lower line of the display will return to the last displayed lower line variable.The alarm ‘LED’ will flash on alarm. Pressing the ‘ALARM’ button will cause the LED to go steady if any alarmsare still active, or extinguish if there are no active alarms.The horn relay will operate when an alarm occurs. Pressing ‘ALARM’ will mute the horn relay which will re-initiateon any new alarms.Figure 3.1 Operator's PanelNOVATECH HUMIDITY TRANSMITTER Page 33
!3.3 ALARM SCHEDULE3.3.1 SUMMARY OF ALARMSALARM‘SENSOR FAIL’‘PROBE HEATERFAILURE’‘PROBE TC O/C’‘REF AIR FAIL’‘FLOW SWITCH’‘A/D CAL ERROR’‘D/A CAL ERROR’‘FILTER BLOCKED’DESCRIPTIONOxygen cell or electrode failure (high impedance);(inhibited under 650°C).In the first 20 minutes of power being applied tothe heater after being switched on, this alarm will not occur, but a ‘PROBEUNDER- TEMPERATURE’ display will occur and relay RL8 will be activated.Refer to Section 5.13.Probe thermocouple is open circuit. The heater inheated probes will switch off.Low reference gas flow to probe.The reference gas flow switch has failed. This is testedby automatically switching off the reference gas pumponce every ten minutes for three seconds to check theoperation of the flow switch.The analog to digital converter has been found to falloutside the normal calibration specifications. This isan electronic fault.The digital to analog and voltage isolator circuit hasbeen found to fall outside the normal calibrationspecifications. This check is only performed when the‘AUTO CAL’ button is pressed. Refer to Section 5.6.6.Blocked probe filter, low purge flow. This test is onlyperformed when automatic purging of the probe isrequested. Refer to step 12 in the set up menu.‘GAS-1 CAL ERROR’ Probe does not correctly calibrate to calibration gas 1.‘HEATER BY-PASS’‘WATCHDOG TIMER’The safety interlock relay has been bypassed byturning on the ‘BURNER BY-PASS’ switch on theterminal printed circuit board. Refer to Section 2.2 and2.19.Software error. This alarm will not appear on thedisplay. The ‘ERROR’ LED on the front door willilluminate.Page 34NOVATECH HUMIDITY TRANSMITTER
!3.3.2 SUMMARY OF ALARM RELAYSALARM RELAY FUNCTION LATCHING NOTES‘PROBE RL3 Probe reading is No If the probe heaterLOW TEMP’ invalid (under has been on for more650°C).than 20 minutes andthe temperature is lessthan 650°C, a heaterfail alarm will occur.‘CAL IN PROG’ RL4 Probe calibration No/purge check inprogress‘ALARM’ RL5 Alarm condition Nopresent‘HORN’ RL6 Horn Driver Yes Press the ‘ALARM’button twice for anyone alarm to reset thehorn relay.3.4 POWER LAMPIlluminated when power is connected to the transmitter.3.5 ERROR LAMPIf the microprocessor’s software fails then the ‘ERROR’ LED will be lit and the common alarm relay activated.NOVATECH HUMIDITY TRANSMITTER Page 35
!SETTING UP4THE TRANSMITTERSECTIONNUMBER4.1 SET-UP MODE SUMMARY4.2 SET-UP/MAINTENANCE/RUN SWITCH4.3 FUNCTION SELECT SWITCHES4.4 ENTER OPTION OR VALUE4.5 SET-UP FUNCTION DETAILSPage 36NOVATECH HUMIDITY TRANSMITTER
!SET-UP MODE SUMMARY4.1 SET-UP MODE FUNCTION'S1. Output Signal/Display Top Line2. <strong>Transmitter</strong> Zero Set3. <strong>Transmitter</strong> Full scale Set4. Drier Heating Type5. Reference gas Selection6. Combustion Oxygen %7. Ambient RH Sensor8. Temperature Units9. Drier Pressure Units10. Drier Pressure11. Purge/Cal Time12. Automatic Purge13. Time Between Purges14. Purge Duration15. Purge Freeze Time16. Number of Cal Gases17. Oxygen Content Cal Gas18. Maximum Acceptable Positive Error Cal Gas19. Maximum Acceptable Negative Error Cal Gas20. Period Between Gas Autocals21. Duration of Autocal22. Cal Gas Freeze Time23. Data to Print24. RS 232 Log25. Printer Baud Rate26. Damping FactorNote: If the Set-up menu does not match the functions in your instrument, check the software version number -On Page 2 of this manualOn the EPROM in the socket labelled IC3 (top left hand corner of the main PCB)4.2 SET-UP/MAINTENANCE/RUN SWITCHTo enter the ‘set-up’ mode via the keyboard, move the toggle switch to ‘SET-UP’. The outputs will be frozen whenin set-up mode.If purges or auto calibration occur while the mode switch is in ‘SET-UP’ mode, they will be delayed until the modeswitch is returned to ‘RUN’.To cancel a purge or calibration cycle, press ‘ENTER’ while in ‘RUN’ mode.4.3 FUNCTION SELECTWhen the SET-UP/MAINTENANCE/RUN switch is moved to ‘SET-UP’, the display will automatically read the lastset-up function selected.To select other function's, operate the ‘FUNCTION ⇑’ button to increment to the next function or ‘FUNCTION ⇓’ todecrement to the previous function.NOVATECH HUMIDITY TRANSMITTER Page 37
!4.4 ENTER OPTION OR VALUEA. Options.To step through the available options for each function press the ‘OPTION ⇑’ or ‘OPTION ⇓’ buttons.When the required option is selected press the ‘ENTER’ button. An asterisk will then appear alongside the optionselected. When stepping through the set-up function's the display will always first indicate the last options entered.The ‘data to print’ function number 23 has multiple options. One or more options may be selected for this function.B. ValuesTo set a value for a particular function press the ‘OPTION ⇑’ button to increase the value and the ‘OPTION ⇓’button to decrease the value. A momentary press will change the value one digit. Holding the button will change thevalue more quickly. Once the correct option or value is displayed, it can be entered into the transmitters memory bypressing the ‘ENTER’ button. When a value has been entered an asterisk will appear at the right-hand-side of thelower line.4.5 SET-UP FUNCTION DETAIL'SFigure 4.1 Internal Technician's Keyboard1. OUTPUT SIGNAL OptionsVARIABLE1. % <strong>Relative</strong> <strong>Humidity</strong>2. % Water Vapour3. Dew Point °C or °F (selectable in Setup #8)4. g/Kg2. TRANSMITTER Range: See the table below, fig 4.2ZERO SET3. TRANSMITTER Range: See the table below, fig 4.2FULL SCALEZero Span Minimum Range<strong>Relative</strong> <strong>Humidity</strong> 0 100 20Water Vapour % 0 100 20Dew Point °C -50 +100 20Dew Point °F -50 +250 50g/Kg 0 10,000 1,000Figure 4.2 Output ScalingPage 38NOVATECH HUMIDITY TRANSMITTER
!4. DRIER HEATING Options:TYPE1. Indirect (heat exchanger)2. Direct Fired CombustionIf (1) is selected, the next set-up step is 7.If (2) is selected go to step 5.Figure 4.3 Set-Up Mode Selection Steps 4 to 75. PROBE REFERENCE This set-up function will appear only if 'direct fired' is selected in set-up #4. IfGAS'indirectly' is selected, this step will not appear on the set-up menu.Choose 'Ambient Air' if the drier has a fixed combustion system (fixed firing rate) where thereduction of oxygen due to combustion is constant. A refrigerated or ambient drier system willnot be necessary to condition reference gas from within the drier. The accuracy of thetransmitter is further improved if the combustion gas is a small percentage of the recirculatingdrier air.If the reduction of oxygen due to the combustion is not constant, then choose 'Process Gas'. Arefrigerated or ambient cooler will now be required. See <strong>Novatech</strong> <strong>Controls</strong> or their agent fordetails of availability.Options:1. Ambient air2. Dried process gas from within the drierIf (1) is selected the next set-up step is 6. If (2) is selected the next set-up step is 8.NOVATECH HUMIDITY TRANSMITTER Page 39
!6. COMBUSTION 0 2 % In dryers where the reduction of oxygen due to the combustion is constant, it is not necessary touse a refrigerated or ambient cooler.The value of oxygen to be entered is determined by removing any wet product from the drier,and having the combustion at the normal level. Read the oxygen on the lower line of thedisplay. Ambient air must already have been supplied to the 'Ref. Air' input to the probe.The next set up is step 8..Range: 0 –21 % oxygen in 0.1 % steps.7. AMBIENT RH Depending on the level of accuracy required, an ambient RHSENSOR CONNECTED sensor is optional. If no RH sensor is connected, the transmitter will default to 50% RH.Compensation for ambient reference gas oxygen content with this sensor will improve theaccuracy of the calculated value of RH by about 1%.Options:1. Yes—RH sensor connected2. No—RH sensor not connected.8. TEMPERATURE UNIT Select whether displays are to be in ° Celsius or Fahrenheit.Options:1. Celsius (Centigrade)2. Fahrenheit9. DRIER PRESSURE The average drier operating pressure must be entered. SelectUNITSwhether to enter in inches or mm WG or kilopascals.Options:mm WGkilopascalsInches WG10. DRIER PRESSURE Enter drier pressure eg. 3 mm WGLimits:-200 – +200 mm WG-9 – +9 inches WG-200 – +200 kPa11. PURGE/CAL TIME Set the purge time to occur at the correct time-of-day. If purging is not required but on-line autogas calibration is required, enter a time-of-day value suitable for the auto calibrations. Cal gas 1will be tested 10 minutes after the purge/cal time and cal gas 2, 20 minutes after. If neitherpurge nor auto calibration is required, ignore the time setting.Range:0–23 hrs in one hour steps, representing midnight to 11pm12. AUTOMATIC PURGE For oil and coal fired plant, probe filters may be used. These should be back purged withsufficient frequency to avoid blockage. The output will be frozen during purging. If no purge isrequired steps 13, 14 and 15 will be skipped.Options:YESNOPage 40NOVATECH HUMIDITY TRANSMITTER
!13. TIME BETWEEN Set the time between purgesPURGESeg. a two hourly purge or a 100 hourly purge.Range:1–199 hours14. PURGE DURATION Set-up purge duration to a number between three and ten seconds. The filter is actually purgedin less than one second but three seconds are required for the purge flow switch to check thatthe filter is not blocked.Range:3–10 seconds15. PURGE FREEZE TIME After the purge period, the transmitter output will remain fixed (frozen) for an adjustableperiod. To allow the probe reading to return to the correct process level and avoid output‘bumps’. The freeze period time required will depend on the probe response time and thus itsdesign and whether it has a filter or not. To determine the required freeze time, manuallyperform a purge while the plant is in operation and note the time required for the reading toreturn to the correct process level within a reasonable tolerance.Refer to section 2.23, 'Calibration Gas Set-up Procedure'.Range:100–1000 sec. in 10 second steps16. CAL GAS Select 'Cal Gas' to have automatic system calibration checking. For example a check gas of 8% could be used to test a large scale signal calibration, and alarm if the result is out of thetolerance values in set-up #18 & 19.Options:No Cal GasCal GasDuring the timed calibration periods, the transmitter outputs will be frozen and the transmitterwill alarm if readings are not within the accuracy limits set in set-up 17 and 18 If autocal is notrequired enter ‘No Cal Gas’ and the transmitter will step to set-up step 23.17. OXYGEN CONTENT OF Enter value of Cal Gas 1 (to one decimal place).CAL GASRange:0.0–20.9 % oxygen18 MAX. ACCEPTABLE Maximum positive error above which the ‘AUTOCAL ERRORPOSITIVE ERROR HIGH’ alarm will be initiated after timed period in set-up 21.Range:0.1–3.0 % oxygen19. MAX. ACCEPTABLE Maximum negative error below which the ‘AUTOCAL ERRORNEGATIVE ERROR LOW’ alarm will be initiated after timed period in set-up 21.Range:0.1–3.0 % oxygenNOVATECH HUMIDITY TRANSMITTER Page 41
!20. PERIOD BETWEEN Set number of hours between autocal gas 1 from 1–1999.GAS AUTOCALS A typical time would be 24 –168 hours. (Daily or weekly)Range:1–1999 hours21. DURATION OF Set the number of seconds that the autocal gas solenoid will beAUTOCALopen. At the end of this period if the oxygen level measured is not within the limits set for CalGas, an AUTOCAL ERROR will initiate. To determine the minimum time required for aparticular length or design of probe to settle, manually admit cal gas from the internal keyboardwhile observing the oxygen reading in ‘RUN’ mode. Typical minimum times vary from 15seconds to 60 seconds depending on the probe length and gas plumbing arrangement. Seesection 2.23, 'Calibration Gas Set-up Procedure'.Range:0–90 seconds22. CAL GAS FREEZE After the cal gas 1 period, the transmitter output will remain fixed (frozen) for an adjustableperiod to allow the probe reading to return to the correct process level and avoid output‘bumps’. The freeze period time required will depend on the probe response time. This isdependant on its length and whether or not it has a filter.Range:10–100 seconds in 10 second stepsTo determine the required freeze time, manually perform a calibration with gas while the plantis in operation and note the time required for the reading to return to the correct process levelwithin a reasonable tolerance.NOTE: If an automatic purge or cal period occurs when the transmitter is switched to ‘SET-UP’ or‘MAINT’ mode, they will be delayed until run mode is selected. They will initiate immediately the modeselector is switched to ‘RUN’.23. DATA TO PRINT Any or all of the following values may be printed on a printer or computer connected to port 2.They may be selected or de-selected using the ‘ENTER’ button.Options :1. Probe Temperature2. Drier Temperature3. Reference gas Temperature4. Ambient <strong>Relative</strong> <strong>Humidity</strong>5. Probe Impedance6. % Oxygen7. Probe EMF8. % Water Vapour9. Dew Point24. PRINT LOG PERIOD Select the time interval between data print outs on the printer.Range:1–2000 minutesPage 42NOVATECH HUMIDITY TRANSMITTER
!25. PRINTER BAUD RATE Select the correct BAUD rate for data to be transmitted out of the serial port to the printer.Options:300120024004800960026. DAMPING FACTOR Each time a new reading is read from the oxygen sensor, the new reading isaveraged with the last readings taken, before the new average is eitherdisplayed on the LCD, or sent to the 4-20mA output. The number of readingsthat are averaged together is adjustable by the user in this function. A value of5, for example means that the new reading from the probe, and the previous 4readings are averaged together before being displayed/output. A value of 0entered her will mean that every new reading from the sensor will be sent to thedisplay/output un-altered.Range:0–25NOVATECH HUMIDITY TRANSMITTER Page 43
!MAINTENANCE 5SECTIONNUMBERTRANSMITTER MAINTENANCE5.1 MAINTENANCE MODE SUMMARY5.2 SET-UP/MAINTENANCE/RUN SWITCH5.3 FUNCTION SWITCH5.4 ENTER VALUES5.5 MAINTENANCE FUNCTION'S DETAIL5.6 D/A CALIBRATION5.7 BACK-UP BATTERY REPLACEMENT5.8 ELECTRONIC REPAIRSPROBE MAINTENANCE5.9 TEST EQUIPMENT REQUIRED5.10 TESTING A PROBE5.11 SENSOR IMPEDANCE5.12 PROBE THERMOCOUPLE5.13 HEATER FAILURE5.14 FILTER BLOCKAGE5.15 PACKINGPage 44NOVATECH HUMIDITY TRANSMITTER
!TRANSMITTER MAINTENANCE5.1 MAINTENANCE MODE SUMMARY1. ENTER DATE, YEAR2. ENTER DATE, MONTH3. ENTER DATE, DAY4. ENTER TIME, HOURS5. ENTER TIME, MINUTES6. SET 20MV REFERENCE (CALIBRATION)7. SET 70MV REFERENCE (CALIBRATION)8. SET 1200MV REFERENCE (CALIBRATION)9. SET 2500MV REFERENCE (CALIBRATION)10. SET PROBE OFFSET (PROBE CALIBRATION)11. 4-20mA OUTPUT CALIBRATION12. ENTER SERVICE YEAR13. ENTER SERVICE MONTH14. ENTER SERVICE DAY15. REFERENCE GAS TEMPERATURE SENSOR CALIBRATIONNote: If the Maintenance menu does not match the functions in your instrument, check the software version number -On Page 2 of this manualOn the EPROM in the socket labelled IC3 (top left hand corner of the main PCB)5.2 SET-UP/MAINTENANCE/RUN SWITCHTo enter the MAINTENANCE mode via the keyboard, move the toggle switch to ‘MAINT’. The output will befrozen when in MAINTENANCE mode.If purges or auto calibration occur while the mode switch is in ‘MAINT’, they will be delayed until the mode switchis returned to ‘RUN’.5.3 FUNCTION SWITCHWhen the ‘SET-UP/MAINTENANCE/RUN’ SWITCH is moved to ‘MAINT’ the display will automatically read thelast MAINTENANCE function selected. To select other function's operate the ‘FUNCTION ⇓’ button to incrementto the next function or the ‘FUNCTION ⇑ ’ to decrement to the previous function.Figure 5.1 Internal Technician's KeyboardNOVATECH HUMIDITY TRANSMITTER Page 45
!5.4 ENTER VALUESTo set a value for a particular function press the ‘OPTION ⇑’ button to increase the value and the ‘OPTION ⇓ —’button to decrease the value. A momentary press will change the value one digit. Holding the button will change thevalue more quickly. Once the correct option or value is displayed it can be entered into the transmitters memory bypressing the ‘ENTER’ button. When a value has been accepted an asterisk will appear at the right-hand side of thelower line (except for calendar date and time values).5.5 MAINTENANCE FUNCTION'S1. ENTER YEAR Set the clock/calender year eg. 04-08-92= 4th August, 1992.2. ENTER MONTH Set the month.3. ENTER DAY Set the day.4. ENTER HOUR Set time, hours (24 hour format).5. ENTER MINUTES Set minutes.6. SET 20 mV REF. Enter the 20 mV reference voltage to calibrate the transmitter.7. SET 70 mV REF. Enter the 70 mV reference voltage.8. SET 1200 mV REF Enter the 1200 mV reference voltage.9. SET 2500 mV REF Enter the 2500 mV reference voltage.Function's 6 to 9 are used to calibrate the A/D of the instrument. This should be done 30 minutes or moreafter the instrument has been on, approximately once every year. The calibration constants are retained inbattery backed memory unless a ‘COLD START’ is performed. Refer to Section 2.14.Connect a 3 1/2 digit multimeter negative lead to the terminal marked ‘COMMON’ to the left of the internalkeyboard. Measure the four test point voltages on the test pins marked 1 to 4 below the common test pin withthe positive lead. Refer to Figure 5.2 These voltages should be approximately:1) 2484 mV2) 1163 mV3) 64.1 mV4) 19.0 mVEnter the measured values in function's 6 to 9. Whenever new values are entered the D/A section should bere-calibrated, Refer to Section 5.6.Figure 5.2 Location of Calibration Test PointsPage 46NOVATECH HUMIDITY TRANSMITTER
!10. SET PROBE A new EMF offset must be entered whenever a newOFFSEToxygen probe is installed to calibrate for any offset an individual probe mayhave. Each probe will have an offset value noted on a removable tag. Enter the‘PROBE OFFSET’ value with opposite polarity eg. if offset value is -1.2 mVenter 1.2 mV. The Typical Maximum is 2 mV.To check a probe offset on-site the probe must be sensing air with reference gas connected (to both the ‘CAL’and ‘REF’ ports) and allowed to settle at the probe operating temperature for 30 minutes. Read the offset in‘RUN’ mode in millivolts on the lower line.Offset errors can occur if the sensor does not have some air passing over it. A gentle flow of air in thecalibration port can be provided by a reference gas pump or by pressing the ‘PROBE OFFSET TEST’ buttonon a 1536 Purge/Cal panel. For heated probes, if the combustion appliance is not operational and the probeheater is interlocked with the “FUEL ON’ signal the ‘heater lockout by-pass switch should be set to ‘BY-PASS’ to power the probe heater after removing the probe from the drier.CAUTION DANGER:Return the ‘heater lockout by-pass’ switch to normal before installing the probe in the drier.Determine the probe offset in ‘RUN’ mode. Select ‘PROBE EMF’ on lower line. With probe in air, stabilisedat temperature for 30 minutes read the ‘PROBE EMF’. Switch back to ‘MAINTENANCE’ mode and enter‘PROBE OFFSET’ of equal value and opposite polarity. For example, if ‘PROBE OFFSET’ was 0.8 mV,enter -0.8 mV.When reading the EMF offset, the flue pressure compensation must be set. If the probe has been removedfrom the flue, set the flue pressure compensation to 0 in set-up step 10.11. SET CALIBRATION FACTOR FOR 4–20 CHANNEL #1The calibration of the 4–20 mA outputs is done by reading back the output into the input and calibrating thisagainst a known standard. The standard however, may vary from analyser to analyser. To allow for this a trimfactor has been provided to set the calibration of each channel for your particular analyser. These two valuesshould only have to be entered once for the life of the instrument, then the only calibration of the outputsshould be to press the ‘AUTOCAL’ button every six months.To determine the factors, generate a full scale value to be sent to the output. eg. For Channel #1, if set upsteps 5 and 6 were set for a full scale output of 10% oxygen, then generate input signals until the top line ofthe display reads 10% oxygen. This is best done with the use of a <strong>Novatech</strong> probe simulator test box, but canalso be achieved with a millivolt generator.Read the output of channel #1 with a three and a half digit multimeter.ie. The output should be 20mA.If your meter reads 19.65mA.20.00 – 19.65 = 0.35(0.35/19.65 *100% = 1.78% error.Enter the value of 101.8 into ‘MAINT’ step 10, 4–20 mA #1 CAL, and press ‘AUTOCAL’ before leaving themaintenance mode.NOTEThe accuracy of the output channels without trimming these factors is generally within 2% after using the ‘AUTOCAL’ procedure. In most cases the instrument can be used without this further trimming of thecalibration.12. ENTER SERVICE For a new ‘DATE OF LAST SERVICE’, enter theYEARservice ‘YEAR’. This can represent the last timethe probe was serviced or the last time the boilerwas serviced. It is recommended that probes berefurbished every two years.13. ENTER SERVICE Enter the current ‘MONTH’.MONTHNOVATECH HUMIDITY TRANSMITTER Page 47
!14. ENTER SERVICE Enter the current ‘DAY’ of the month. Altering these DAY values will resetthe ‘RUN TIME’.15. SET RTD COMPENSATIONThis only needs to checked if an RTD is being used on terminals 10 &11.The input terminals number 10 &11 can be used for either an AD590 solidstate temperature sensor or an PT100 RTD temperature sensor.If an RTD temperature sensor is being used, the sensor calibration must bechecked.Measure the voltage between the screw terminals 2 & 9. Enter this valueon the keypad using the Option buttons.The accuracy of RTD sensor can be further improved by compensating forlead resistance. Add 0.01 volts to the value entered here for every 0.1Ω totallead resistance. (typically add 0.04 volts)The calibration should be checked after the installation, by comparing thedisplayed 'REF AIR' temperature with a calibrated temperature indicator.NOTE:The calibration must always be checked when using either the RGC-01 orRGC-02 reference air coolers because they are supplied with an RTDinstalled.NOTE: If an automatic purge or cal period occurs when the transmitter is switched to ‘SET-UP’ or ‘MAINT’ mode, theywill be delayed until run mode is selected. They will initiate immediately the mode selector is switched to ‘RUN’.5.6 D/A CALIBRATIONIf a cold start is performed (Section 2.14) then the D/A section of the transmitter will be automatically calibratedafter a thirty second delay. The D/A section should be manually re-calibrated after the instrument has been switchedon for 30 minutes and stabilised. This is achieved by pressing the ‘AUTO CAL’ button. This button should bepressed annually, or if the reference voltages are altered in ‘MAINT’, 5.5 items 6, 7,8 or 9. An ‘AUTO CAL’ willbe performed in one second after pressing the button. The transmitter outputs will fall to 0 mA for this one secondperiod. If a ‘D/A CAL’ error occurs during normal operation then a hardware fault should be suspected.Page 48NOVATECH HUMIDITY TRANSMITTER
!5.7 BACK-UP BATTERY REPLACEMENTThe back-up battery is contained within the module, plugged into socket IC2. It is rated for an average service life of38 years with power on, and for ten years with the power off. The battery is not re-chargeable and should bereplaced every three years with stored transmitters with power off or every ten years with transmitters which havehad the power on.After replacing the battery, re-enter all maintenance and set-up mode function's.5.8 ELECTRONIC REPAIRSElectronic schematics are included in Appendix 2. It is recommended that service be performed on a change-overcircuit board basis. A fast turn around or replacement service is available from accredited service agents.Other service aids, including a test ROM and input simulator are also available .NOVATECH HUMIDITY TRANSMITTER Page 49
!PROBE MAINTENANCE5.9 TEST EQUIPMENT REQUIREDAll measurements are simplified if a transmitter is connected to the probe. Readings can then be easily taken ofprobe impedance, EMF, temperature and percent oxygen. The transmitter also provides proper heater control forheated probes.The following tests are described using readily available workshop equipment where a transmitter is not available. Ifa transmitter is available the same test procedures will apply. First check all alarms on the transmitter allowing timefor the probe to heat up after switch on.An instrument to measure probe EMF and temperature is required. A 3 1/2 or 4 1/2 digit multimeter will performboth measurements.A separate temperature indicator to suit a type ‘K’ thermocouple is also useful, although not necessary.A reference gas pump is required and a cylinder of calibration gas eg. 2 % oxygen in nitrogen. The cylinder shouldhave a pressure and flow regulator. Both of these are inexpensive devices available from gas supply companies.The calibration gas should be chromatography tested to an accuracy of 0.1% oxygen.If a <strong>1535</strong> transmitter is available at the test location then no other equipment will be required. If not, then acontrollable power source for the heater is required. A variac set to approximately 100 volts will regulate the probetemperature to approximately 720°C.5.10 TESTING A PROBEWith the probe tip heated to approximately 720°C, either from a small test furnace or its own internal heater, connecta digital multimeter to the probe electrode conductors. Connect the multimeter positive to the internal electrodeconductor. Connect reference gas to the probe and apply a gentle purge of air to the probe calibration port. Referencegas flow should be the smallest flow available (less than 50 cc per minute). The multimeter should read zeromillivolts + two millivolts. If not, then there is a problem with the probe electrodes and the sensor needsrefurbishing. Normally a faulty probe electrode is indicated with a high sensor impedance.To measure the probe sensor impedance, and therefore get a measure of the sensor integrity, use the ‘DISPLAY’button to scroll the lower line of the display until the probe impedance value is shown. This will only be a validreading if the sensor is up to the operating temperature (720°C).If an analyser is not available, use a multimeter switched to read ohms and take a measurement, within a couple ofseconds, of the probe impedance. Reverse the multimeter and repeat the reading. Take the average of the tworeadings for an approximate measurement of impedance. If the impedance is above 4000Ω, then the electrode needsrefurbishing. The probe must be at 720°C or above for this measurement.The reason that impedance measurements need to be performed quickly, is that the zirconia sensor polarises with theDC voltage from the multimeter across it. Where a probe electrode requires refurbishing, it is suggested that theyshould be returned to an accredited service organisation.Page 50NOVATECH HUMIDITY TRANSMITTER
!If the probe tests reveal less than 2 mV offset and a good impedance reading, the next step is to apply a calibrationgas. The calibration gas should be inserted in the calibration port. With the calibration gas flowing, the probe shoulddevelop an EMF according to the tables in Appendix 2. If the EMF reading is low, then there may be insufficientcalibration gas flow. Increase the calibration gas until the reading is correct. An excessive calibration gas flow willcause cooling on one surface of the sensor, giving temperature differential errors on the sensor.The sensor accuracy should be within 0.5 mV with the same offset which was measured with air on both sides of thesensor. If the probe EMF is not within this tolerance, then the electrodes will need to be refurbished.As an alternative, using the reference gas port, the calibration gas can be inserted into the inside of the sensor. Thisrequires a lower flow rate, and thus lower usage of calibration gas. The flow rate should be similar to that of thereference gas which should be removed for internal calibration. The probe EMF reading will be identical butnegative in polarity. A small flow of air should be flowing over the outside of the sensor, when testing in this way.Occasionally a sensor can develop offset with a polluted electrode caused by contaminants in the flue gas stream. Inthis case, the old electrode material must be completely cleaned off before re-applying the fresh electrode material.Again, return the probe or sensor to an accredited service organisation.5.11 SENSOR IMPEDANCEIf the sensor impedance is found to be high in the test described in Section 5.10, it may be necessary to move theinner electrode slightly to re-establish contact. This is achieved by gently pulling the four bore ceramic tube againstits spring loading for approximately 1 mm and releasing. This procedure is normally only required with a probewhich has been sitting cold for many months.With some probes you may view the sensor electrode from outside the outer sheath. The electrode material should beeither grey or green and should fully cover the end of the sensor. If any cream coloured ceramic material is visible atthe sensor end, then the electrode has been degraded and will require refurbishment.5.12 PROBE THERMOCOUPLEThe transmitter has an alarm function which will advise the operator of an open circuit probe thermocouple,however, bench testing can be performed by simply measuring the thermocouple continuity. If the thermocouplerequires replacement, care should be taken not to physically damage the inner electrode material during removal andreplacement of the thermocouple and insulator.5.13 HEATER FAILUREA heater failure will cause a ‘HEATER FAILURE’ alarm. Heaters can be tested from the probe head with acontinuity test.The heater impedance should be approximately 110_. Should the heater be open circuit, contact an accreditedservice agent for replacement.NOVATECH HUMIDITY TRANSMITTER Page 51
!5.14 FILTER BLOCKAGE5.15 PACKINGFor oxygen probes or flow guide tubes with filters in installations with entrained solids in the flue gas, it issometimes necessary to replace the filter. Filters are normally cleared with back purging. However fine fly-ash, orother particles can ultimately completely block a filter necessitating filter replacement. A new probe filter can befitted by an accredited service agent. Flow guide tube filters are field replaceable.To return a probe for refurbishment to our factory, please ensure that it is properly packed. We recommend acardboard box which is normally dropped with less force than a heavy wooden box. Use polystyrene beads forinternal packing and some cardboard to inhibit end travel of the probe.Due to the delicate ceramic inner components of the probe, probes improperly packed are normally broken by thetime they arrive at our factory.Refurbishment is normally an inexpensive operation that can be made expensive with improper packing.Page 52NOVATECH HUMIDITY TRANSMITTER
!APPENDICES1. PROBE EMF TABLES2. CIRCUIT SCHEMATIC'SNOVATECH HUMIDITY TRANSMITTER Page 53
!APPENDIX 1PROBE EMF TABLESPage 54NOVATECH HUMIDITY TRANSMITTER
!MILLIVOLT TABLE WITH AIR REFERENCE% OXYGEN mV at 720°C________________________________________________________________________________20.0 0.99 Using air as a reference,19.5 1.53 the probe e.m.f. is calculated19.0 2.09 using the Nernst equation:18.5 2.6618.0 3.25 e.m.f. = 0.02154 x T x ln (21/ % Oxygen)/ % Oxygen)17.0 4.4716.5 5.1116.0 5.77 Using drier combustion gas as a15.5 6.45 reference, the Nernst equation becomes:15.0 7.1514.5 7.87 e.m.f.=14.0 8.62 0.02154 x T x ln (Drier % Oxygen Dried/Drier % Oxygen Undried)13.5 9.4012.5 11.0512.0 11.92 T= the probe temperature in °K11.5 12.8311.0 13.7810.5 14.7810.0 15.829.5 16.929.0 18.088.5 19.308.0 20.607.5 21.987.0 23.456.5 25.046.0 26.755.5 28.615.0 30.654.5 32.904.0 35.423.5 38.283.0 41.582.5 45.482.0 50.251.5 56.411.0 65.080.5 79.910.2 99.51__________________________'K’ TC mV 29.965NOVATECH HUMIDITY TRANSMITTER Page 55
!APPENDIX 2CIRCUIT SCHEMATICSPage 56NOVATECH HUMIDITY TRANSMITTER


