1735 Technical Manual - Novatech Controls
1735 Technical Manual - Novatech Controls
1735 Technical Manual - Novatech Controls

Create successful ePaper yourself
Turn your PDF publications into a flip-book with our unique Google optimized e-Paper software.
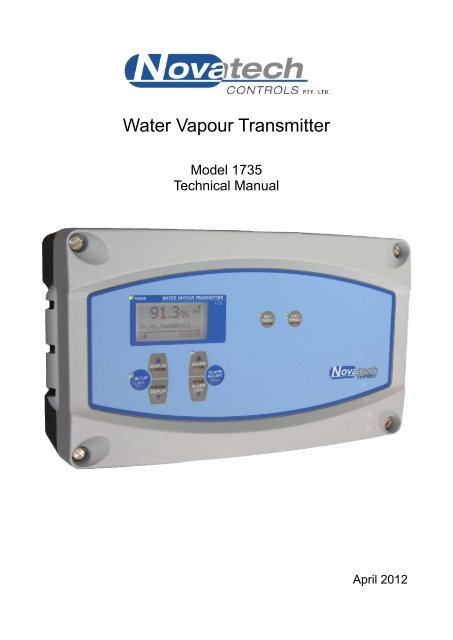
Water Vapour Transmitter<br />
Model <strong>1735</strong><br />
<strong>Technical</strong> <strong>Manual</strong><br />
April 2012
April 2012<br />
2 <strong>1735</strong> Water Vapour Transmitter
TABLE OF CONTENTS<br />
TABLE OF CONTENTS .................................................................................................................................... 3<br />
2. INTRODUCTION ......................................................................................................................................... 11<br />
2.1 <strong>1735</strong> TRANSMITTER .................................................................................................................................. 11<br />
2.2 SERIES 1230 OXYGEN PROBES & SENSORS .............................................................................................. 12<br />
3. DEVICE SPECIFICATIONS ........................................................................................................................ 13<br />
3.1 HARDWARE SPECIFICATIONS ..................................................................................................................... 13<br />
3.1.1 Transmitter Specifications ............................................................................................................... 13<br />
3.1.2 Standard ‘U’ Lengths ....................................................................................................................... 13<br />
3.1.3 Series 1230 Probes Specifications ................................................................................................. 14<br />
3.1.4 Oxygen Probe Model Selection Guide ............................................................................................ 15<br />
3.2 OPERATIONAL SPECIFICATIONS ................................................................................................................. 16<br />
4. INSTALLATION AND COMMISSIONING .................................................................................................. 19<br />
4.1 MOUNTING THE TRANSMITTER ................................................................................................................... 19<br />
4.2 INSTALLING A 1231 OXYGEN PROBE .......................................................................................................... 19<br />
4.3 INSTALLING A 1234 OXYGEN SENSOR ........................................................................................................ 21<br />
4.4 INSTALLING THE AUXILIARY THERMOCOUPLE .............................................................................................. 22<br />
4.5 SHIELD CONNECTIONS .............................................................................................................................. 22<br />
4.6 EARTH CONNECTION (PE) ........................................................................................................................ 22<br />
4.6 ELECTRICAL CONNECTIONS ...................................................................................................................... 23<br />
4.7 HEATER INTERLOCK RELAYS ..................................................................................................................... 25<br />
4.8 CONNECTING AN OXYGEN PROBE CABLE ................................................................................................... 25<br />
4.9 CONNECTING A 1234 SENSOR CABLE ........................................................................................................ 27<br />
4.10 CONNECTING THE AUXILIARY THERMOCOUPLE (OPTIONAL)....................................................................... 27<br />
4.11 CONNECTING THE RGS TEMPERATURE SENSOR (OPTIONAL)..................................................................... 27<br />
4.12 CONNECTING THE OUTPUT CHANNELS .................................................................................................... 27<br />
4.13 CONNECTING THE EXTERNAL DRY OXYGEN INPUT ................................................................................... 28<br />
4.14 CONNECTING THE ALARMS ...................................................................................................................... 28<br />
4.15 CONNECTING THE AUTOMATIC PURGE AND CALIBRATION CHECK SYSTEM ................................................. 29<br />
4.16 CONNECTING REFERENCE AIR ................................................................................................................ 29<br />
4.17 CONNECTING THE TRANSMITTER TO A MODBUS NETWORK.................................................................. 29<br />
4.18 CONNECTING POWER ............................................................................................................................. 31<br />
4.19 COMMISSIONING - RUN MODE................................................................................................................ 31<br />
4.20 PROBE OR SENSOR CALIBRATION ............................................................................................................ 31<br />
4.21 FILTER PURGING .................................................................................................................................... 31<br />
4.22 CALIBRATION GAS CHECK ....................................................................................................................... 31<br />
4.23 DUST IN THE FLUE GAS ........................................................................................................................... 32<br />
4.24 CONNECTING A PRESSURE TRANSDUCER ................................................................................................ 32<br />
5. DISPLAY AND KEYPAD ............................................................................................................................ 33<br />
5.1 GRAPHICAL DISPLAY ................................................................................................................................. 33<br />
5.2 DISPLAY UNITS ......................................................................................................................................... 34<br />
5.3 KEYPAD ................................................................................................................................................... 35<br />
5.3.1 Keypad in RUN mode ...................................................................................................................... 35<br />
5.3.2 Keypad in SETUP / COMMISSIONING / CALIBRATION modes ................................................... 36<br />
6. SETUP MODE ............................................................................................................................................. 37<br />
6.1 FUNCTION SUMMARY TABLE ...................................................................................................................... 37<br />
6.2 CHANGING OPTIONS ................................................................................................................................. 37<br />
6.3 SETUP MODE FUNCTIONS ......................................................................................................................... 38<br />
6.3.1 Probe 1 Offset ................................................................................................................................. 38<br />
6.3.2 Lower Line Items ............................................................................................................................. 38<br />
6.3.3 Display Units.................................................................................................................................... 39<br />
6.3.4 Damping Factor ............................................................................................................................... 39<br />
April 2012<br />
<strong>1735</strong> Water Vapour Transmitter 3
6.3.5 Spike Suppression .......................................................................................................................... 39<br />
6.3.6 Spike Trip Level ............................................................................................................................... 39<br />
7. COMMISSIONING MODE ........................................................................................................................... 41<br />
7.1 FUNCTION SUMMARY TABLE ...................................................................................................................... 41<br />
7.2 COMMISSIONING MODE FUNCTIONS ........................................................................................................... 43<br />
7.2.1 Internal Date / Time ......................................................................................................................... 43<br />
7.2.2 Service Date .................................................................................................................................... 43<br />
7.2.3 Heater Dryer Type ........................................................................................................................... 43<br />
7.2.4 Probe 2 Input ................................................................................................................................... 43<br />
7.2.5 Probe 1 & 2 Type ............................................................................................................................ 43<br />
7.2.6 Probe 1 & 2 Thermocouple Type .................................................................................................... 43<br />
7.2.7 Fixed Combustion Oxygen .............................................................................................................. 43<br />
7.2.8 Top Line Display .............................................................................................................................. 43<br />
7.2.9 Transmitter Output Channel 1 & 2 .................................................................................................. 44<br />
7.2.10 Flue Pressure Units and Value...................................................................................................... 44<br />
7.2.11 Temperature Units ......................................................................................................................... 44<br />
7.2.12 Calibration Freezes Outputs.......................................................................................................... 44<br />
7.2.13 Solenoid 1 & 2 Operation .............................................................................................................. 44<br />
7.2.14 Solenoid 1 & 2 Automatic / <strong>Manual</strong> ............................................................................................... 44<br />
7.2.15 Solenoid 1 & 2 Start Time ............................................................................................................. 44<br />
7.2.16 Solenoid 1 & 2 Period .................................................................................................................... 45<br />
7.2.17 Solenoid 1 & 2 Duration ................................................................................................................ 45<br />
7.2.18 Solenoid 1 & 2 Post Freeze ........................................................................................................... 45<br />
7.2.19 Oxygen Content Calibration Gas 1 & 2 ......................................................................................... 45<br />
7.2.20 Maximum Calibration Gas 1 & 2 Positive / Negative Error ........................................................... 45<br />
7.2.21 Process Alarms ............................................................................................................................. 45<br />
7.2.22 Alarm Relay 1, 2 and 3 Function ................................................................................................... 45<br />
7.2.23 Common Alarm Relay Function .................................................................................................... 47<br />
7.2.24 Operation of the alarm relays when an alarm is accepted ............................................................ 47<br />
7.2.25 Reference Air Pump Options ......................................................................................................... 48<br />
7.2.26 Communications Port Options....................................................................................................... 48<br />
7.2.27 Alarm Log Clearing ........................................................................................................................ 48<br />
7.2.28 External Oxygen Input Delay......................................................................................................... 48<br />
8. CALIBRATION MODE ................................................................................................................................ 49<br />
8.1 FUNCTION SUMMARY TABLE ...................................................................................................................... 49<br />
8.2 CALIBRATION MODE FUNCTIONS ............................................................................................................... 50<br />
8.2.1 Reference Voltages ......................................................................................................................... 50<br />
8.2.2 Output channel 1 and 2 Calibration ................................................................................................. 50<br />
8.2.3 Ambient Temperature Calibration ................................................................................................... 50<br />
8.2.4 Low Oxygen Calibration .................................................................................................................. 50<br />
8.2.5 Transmitter Output Scale ................................................................................................................ 50<br />
8.2.6 Transmitter Output Limiting ............................................................................................................. 50<br />
8.2.7 Mains Voltage Detection ................................................................................................................. 50<br />
8.2.8 Heater SSR Fault Correction ........................................................................................................... 50<br />
8.2.9 SSR Fail Protection ......................................................................................................................... 50<br />
9. ALARMS ..................................................................................................................................................... 51<br />
9.1 COMMON ALARMS ..................................................................................................................................... 51<br />
9.2 SELECTABLE PROCESS ALARMS ................................................................................................................ 53<br />
9.3 ALARM RELAY OPTIONS ............................................................................................................................ 54<br />
10. INSTRUMENT CALIBRATION ................................................................................................................. 55<br />
10.1 CALIBRATION SUMMARY .......................................................................................................................... 55<br />
10.1.1 Calibration of the Inputs ................................................................................................................ 55<br />
10.1.2 Calibration of the Outputs .............................................................................................................. 55<br />
10.1.3 Probe calibration ........................................................................................................................... 55<br />
10.2 COLD START .......................................................................................................................................... 56<br />
10.2.1 Forcing a Cold Start ...................................................................................................................... 56<br />
10.2.2 Resetting the Calibration Factors .................................................................................................. 56<br />
11. GAS CALIBRATION CHECK AND PURGE............................................................................................. 57<br />
April 2012<br />
4 <strong>1735</strong> Water Vapour Transmitter
11.1 PURGE ................................................................................................................................................... 57<br />
11.2 CALIBRATION GAS .................................................................................................................................. 57<br />
12. SOFTWARE UPGRADES ......................................................................................................................... 59<br />
13. TROUBLESHOOTING .............................................................................................................................. 61<br />
13.1 FIRST APPROACH ................................................................................................................................... 61<br />
13.2 DETAILED FAULT ANALYSIS ..................................................................................................................... 61<br />
14. INDEX ........................................................................................................................................................ 63<br />
APPENDIX 1, PROBE EMF TABLES ............................................................................................................ 64<br />
ZIRCONIA OXYGEN PROBE OUTPUT (MV) ............................................................................................... 65<br />
APPENDIX 2, % OXYGEN SCALE TO LOGARITHMIC ................................................................................ 66<br />
APPENDIX 3, MODBUS .............................................................................................................................. 67<br />
April 2012<br />
<strong>1735</strong> Water Vapour Transmitter 5
© Copyright NOVATECH CONTROLS PTY LTD — 2012<br />
Edition - April 2012<br />
This manual describes the transmitter firmware version 1.20, February 2012<br />
Neither the whole nor any part of the information contained in, or the product described in, this manual may<br />
be adapted or reproduced in any material form except with the prior written approval of <strong>Novatech</strong> <strong>Controls</strong><br />
Pty Ltd (<strong>Novatech</strong>).<br />
The product described in this manual and products for use with it are subject to continuous developments<br />
and improvement. All information of a technical nature and particulars of the product and its use (including<br />
the information in this manual) are given by <strong>Novatech</strong> in good faith. However, it is acknowledged that there<br />
may be errors or omissions in this manual. A list of details of any amendments or revisions to this manual<br />
can be obtained upon request from <strong>Novatech</strong> <strong>Controls</strong> <strong>Technical</strong> Enquiries. <strong>Novatech</strong> <strong>Controls</strong> welcome<br />
comments and suggestions relating to the product and this manual.<br />
All correspondence should be addressed to: -<br />
<strong>Technical</strong> Enquiries<br />
<strong>Novatech</strong> <strong>Controls</strong> Pty Ltd<br />
309 Reserve Road, Tel: +61 3 9585 2833<br />
Cheltenham Fax: +61 3 9585 2844<br />
Victoria 3192<br />
Email: info@novatech.com.au<br />
Australia<br />
Web site: http://www.novatech.com.au/<br />
<strong>Novatech</strong> <strong>Controls</strong> or their authorised dealers should carry out all maintenance and service on the product.<br />
<strong>Novatech</strong> <strong>Controls</strong> can accept no liability whatsoever for any loss or damage caused by service or<br />
maintenance by unauthorised personnel. This manual is intended only to assist the reader in the use of the<br />
product, and therefore <strong>Novatech</strong> <strong>Controls</strong> shall not be liable for any loss or damage whatsoever arising from<br />
the use of any information or particulars in, or any error or omission in, this manual, or any incorrect use of<br />
the product.<br />
April 2012<br />
6 <strong>1735</strong> Water Vapour Transmitter
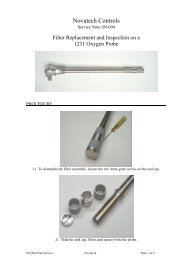
Important Notice Regarding<br />
1231 Probe Option - FIL-3<br />
WARNING: The only identifiable standard for flame arresters for general use is British Standard BS EN<br />
12874:2001. British Standard BS EN 12874:2001 refers to an operating environment up to 150 Degrees<br />
Centigrade.<br />
The FIL-3 device optionally fitted to 1231 Heated Zirconia Probes (the “Probes" or "Probe") operate in an<br />
environment considerably greater than 150 Degrees Centigrade.<br />
Therefore, we know of no Australian, British, European or USA standard applicable to flame arresters or their<br />
testing above 150 degrees Centigrade. Consequently, the FIL-3 device cannot be certified as a safety<br />
device.<br />
The probe is only one of several potential sources of ignition. Extreme care is required when using the<br />
probes during the start up processes of a combustion appliance.<br />
The <strong>Novatech</strong> Burner Interlock Relay facility, which is a standard part of the <strong>Novatech</strong> transmitter, is<br />
designed to be wired to the main safety shut-off fuel valves in a way that can shutdown the probe heater<br />
when the fuel valves are closed.<br />
The risk of ignition of flammable gas mixture at the hot end of the Probe can only be minimised by correct<br />
use, maintenance and operation of the FIL-3 device. The user of the FIL-3 device is responsible for<br />
verification and maintenance and correct use and operation of the FIL-3 device.<br />
THE USER AGREES THAT IT USES THE PROBE AND THE FIL-3 DEVICE AT ITS SOLE RISK.<br />
NOVATECH CONTROLS PTY LTD, TO THE FULL EXTENT PERMITTED BY LAW, GIVES NO<br />
WARRANTIES OR ASSURANCES AND EXCLUDES ALL LIABILITY (INCLUDING LIABILITY FOR<br />
NEGLIGENCE) IN RELATION TO THE PROBE AND THE FIL-3 DEVICE.<br />
The user must ensure that it correctly follows all instructions in relation to the Probe and FIL-3 device,<br />
correctly understands the specifications of the Probe and FIL-3 device and ensures that the Probe and FIL-3<br />
device are regularly inspected and maintained.<br />
FIL-3 equipped Probes should be inspected at least once a year for corrosion and more frequently if there is<br />
any reason to suspect that corrosion may have occurred.<br />
April 2012<br />
<strong>1735</strong> Water Vapour Transmitter 7
This page has been intentionally left blank.<br />
April 2012<br />
8 <strong>1735</strong> Water Vapour Transmitter
1. Important Notices<br />
This manual is intended as a supplement to the <strong>1735</strong> Operators <strong>Manual</strong>. It is intended to be used by<br />
technical personal that are qualified to install, commission, service and calibrate electronic industrial control<br />
equipment.<br />
Please read the safety information below before connecting power to the transmitter.<br />
CAUTION 1<br />
The probe heater is supplied with mains voltage. This supply has electrical shock danger to maintenance<br />
personnel. Always isolate the transmitter before working with the probe.<br />
The EARTH wire (green) from a heated probe must ALWAYS be connected to earth.<br />
CAUTION 2<br />
Combustion or atmosphere control systems can be dangerous. Burners must be mechanically set up so that<br />
in the case of equipment failure, the system cannot generate explosive atmospheres. This danger is<br />
normally avoided with flue gas trim systems by adjustment so that in the case of failure the appliance will not<br />
generate CO in excess of 400ppm in the flue. The CO level in the flue should be measured with a separate<br />
CO instrument, normally an infrared or fuel cell type.<br />
CAUTION 3<br />
The oxygen probe is heated to over 700°C (1300°F) and is a source of ignition. Since raw fuel leaks can<br />
occur during burner shutdown, the transmitter has an interlocking relay that removes power from the probe<br />
heater when the main fuel shut-off valve power is off. If this configuration does not suit or if it is possible for<br />
raw fuel to come into contact with a hot oxygen probe then the Model <strong>1735</strong> transmitter with a heated probe<br />
will not be safe in your application.<br />
An unheated probe can be utilised in such applications, however the oxygen readings are valid only above<br />
650°C (1200°F).<br />
CAUTION 4<br />
The reducing oxygen signal from the transmitter and the associated alarm relay can be used as an explosive<br />
warning or trip. This measurement assumes complete combustion. If incomplete combustion is possible<br />
then this signal will read less reducing and should not be used as an alarm or trip. A true excess<br />
combustibles analyser, normally incorporating a catalyst or thermal conductivity bridge, would be more<br />
appropriate where incomplete combustion is possible.<br />
Also read the probe electrical shock caution in the probe heater interlock caution in chapter 4.7<br />
CAUTION 5<br />
FIL-3 filter. If the optional FIL-3 has been fitted to the 1231 probe in this installation, please read the<br />
Important Notice regarding probe option FIL-3 on the previous page<br />
CAUTION 6<br />
The heater is supplied from the mains power directly, and the temperature is controlled at 720°C (1330°F).<br />
The outside of the process end of the probe can get to temperatures that are dangerous to touch. Wear<br />
insulating gloves when handling a probe that has been on.<br />
April 2012<br />
<strong>1735</strong> Water Vapour Transmitter 9
This page has been intentionally left blank.<br />
April 2012<br />
10 <strong>1735</strong> Water Vapour Transmitter
PERCENT OF READING<br />
2. INTRODUCTION<br />
2.1 <strong>1735</strong> Transmitter<br />
The <strong>1735</strong> water vapour transmitter has been designed as a successive replacement for the model 1635<br />
water vapour transmitter. It has been designed to replicate all the functions of the previous model, as well as<br />
introduce a number of major improvements in its speed, accuracy and user operation.<br />
The device has been designed to meet standards regarding EMC emissions and immunity.<br />
It is possible to use the <strong>1735</strong> to measure the water vapour content in ovens, drying kilns and combustion<br />
appliances at temperatures up to 900°C (1650°F) and the measurement can be displayed as –<br />
Water vapour %<br />
Dew point<br />
Absolute humidity<br />
Mass fraction<br />
Relative humidity<br />
Features include:-<br />
Inputs<br />
Two zirconia oxygen probes, heated or unheated<br />
Oxygen range from 10 -30 to 100%<br />
Drier thermocouple, field selectable as type K or, J<br />
Main flame established safety interlock (for heated probes only)<br />
Purge pressure or flow switch<br />
Outputs<br />
Two linearised 4-20mA or 0-20mA DC isolated outputs, max. load 1000Ω<br />
The output function and the range are field selectable<br />
Common alarm relay<br />
Three other alarm relays with selectable functions<br />
Digital Interface<br />
RS-232 or two wire RS-485 MODBUS for connection to a computer/DCS/PLC for diagnostics of the<br />
transmitter, probe or combustion process.<br />
Display<br />
Multi font graphical display<br />
Large font characters for the oxygen on the top line<br />
Selectable lower line items for the secondary display functions. i.e. Dew point, Water vapour second probe<br />
Alarm display mode that shows the time of the alarm, the acceptance time and the time that the alarm was<br />
cleared of up to 4000 alarm events<br />
8.00<br />
7.00<br />
6.00<br />
5.00<br />
4.00<br />
3.00<br />
2.00<br />
Accuracy Directly Fired<br />
Repeatability Directly Fired<br />
1.00<br />
Accuracy Indirectly Heated<br />
Repeatability Indirectly Heated<br />
0.00<br />
0<br />
100<br />
200 300 400<br />
500 600 700 800 900 1000<br />
WATER CONTENT (g/Kg)<br />
Accuracy & Repeatability of 1635 Water Vapour % Transmitter Readings<br />
April 2012<br />
<strong>1735</strong> Water Vapour Transmitter 11
2.2 Series 1230 Oxygen Probes & Sensors<br />
<strong>Novatech</strong> series 1230 oxygen probes and sensors employ state-of-the-art zirconia sensors and advanced<br />
materials, which provide the following benefits:<br />
• Improved control due to fast response time to typically less than four seconds<br />
• Cost-efficient design provides improved reliability<br />
• Longer-life probes with greater resistance to corrosion from sulphur and zinc contaminants in flue gas<br />
• Low cost allows maintenance by replacement<br />
• Reduced probe breakage due to greater resistance to thermal shock and mechanical damage during<br />
installation and start-up<br />
Series 1230 probe or sensors are simple to install and maintain. All models provide direct measurement of<br />
oxygen level. On-line automatic calibration check is available if required. Probes or sensors may be used<br />
with <strong>Novatech</strong> oxygen transmitters and some model transmitters from other manufacturers.<br />
All <strong>Novatech</strong> oxygen probe or sensors are designed and manufactured to exacting standards of performance<br />
and reliability. Series 1230 probe or sensors are the result of extensive research and development by<br />
<strong>Novatech</strong>, industry and government agencies. <strong>Novatech</strong> <strong>Controls</strong> provides application and after sales<br />
support for oxygen probes, sensors and transmitters, worldwide.<br />
Model 1231 Heated Oxygen Probe<br />
RGS Temperature<br />
Sensor<br />
Model 1234 Sampling Sensor<br />
April 2012<br />
12 <strong>1735</strong> Water Vapour Transmitter
3. DEVICE SPECIFICATIONS<br />
3.1 Hardware Specifications<br />
3.1.1 Transmitter Specifications<br />
Number of oxygen probes:<br />
2 maximum<br />
Oxygen range: 1 x 10 -30 to 100%<br />
Oxygen accuracy:<br />
Thermocouple types:<br />
Temperature accuracy:<br />
Analogue outputs:<br />
Output load:<br />
Alarm relays: 4<br />
Alarm relay contacts:<br />
±1% of actual measured oxygen value with a repeatability of ±0.5% of the<br />
measured value<br />
Type K or J<br />
±2°C<br />
0-20mA or 4-20mA field selectable<br />
Active outputs (Do NOT loop power these outputs)<br />
1000 ohm max<br />
2A/240VAC, 2A/30VDC<br />
Mains voltage supply: 100 to 240VAC 50/60 Hz 1<br />
Power:<br />
Current:<br />
3W for controller plus probe power (100W average per oxygen sensor)<br />
110VAC – 1A peak per oxygen sensor<br />
240VAC – 2.4A peak (1 or 2 oxygen sensors)<br />
Environmental Rating: Operating Temperature -25°C to 55°C<br />
Relative Humidity 5% to 95% (non-condensing)<br />
Degree of Protection:<br />
Case Size:<br />
Weight:<br />
IP65<br />
IP54 with internal reference air pump<br />
260mm (10.2”) wide, 160mm (6.3”) high, 90mm (3.5”) deep<br />
3 Kg (6.6 lbs.)<br />
3.1.2 Standard ‘U’ Lengths<br />
1231 1232<br />
250 mm (10”) 500 mm (20”)<br />
350 mm (14”) 750 mm (30”)<br />
500 mm (20”) 1000 mm (40”)<br />
750 mm (30”) 1500 mm (60”)<br />
1000 mm (40”)<br />
1500 mm (60”)<br />
2000 mm (80”)<br />
Ordering Information<br />
1. Probe insertion length (from process end of mounting thread to probe sensing tip).<br />
2. Mounting thread (process connection), BSP or NPT (for size of thread refer to specifications).<br />
3. Lagging extension length, if required.<br />
4. If model 1232 probe, state preferred thermocouple type (refer to specifications).<br />
1 Heated probes running from mains power may fail to achieve operating temperature if supply voltage is<br />
very low.<br />
April 2012<br />
<strong>1735</strong> Water Vapour Transmitter 13
3.1.3 Series 1230 Probes Specifications<br />
MODEL 1231 1234<br />
Application Insitu probe Sampling sensor<br />
Process<br />
Used as the reference gas conditioner<br />
gases below<br />
(RGS)<br />
900°C (1650°F)<br />
Refer to note 1<br />
Temperature Range 0 to 900°C. Refer to note 2 N/A<br />
(32 to 1650°F)<br />
Length 250 to 2000 mm N/A<br />
(10” to 80”)<br />
Process 1 ½" BSP 1/4" NPT female, inlet and outlet<br />
Connection<br />
or NPT<br />
Electrical<br />
Connection<br />
Cable<br />
Weatherproof plug-in connector or optional screw terminals.<br />
The plug connector can be supplied with the cable.<br />
Order a specific length with the transmitter<br />
Heater Yes Yes<br />
Thermocouple K, integral K, integral<br />
Response Time Typically < 4 secs. Typically < 1 sec<br />
Head Temperature -25 to 100°C (-15 to 210°F) N/A<br />
with weatherproof connector<br />
-25 to 150°C (-15 to 300°F)<br />
with screw terminals<br />
Reference Gas Ambient air, Not required<br />
50 to 150 cc/min (3 to 9 scim).<br />
Pump can be supplied with transmitter.<br />
Ref Air Connection 1/4" NPT N/A<br />
Filter Removable sintered titanium N/A<br />
alloy particulate filter, 30 micron<br />
standard, optional 15 micron available.<br />
Refer to note 2<br />
Calibration Check Gas 1/8" NPT female N/A<br />
Connection<br />
Weight 2 kg (4.4 lb) plus 2.2 kg (4.8 lb)<br />
165 g (5.8 oz) / 100 mm<br />
(4”) length<br />
Notes:<br />
1. Care must be taken to avoid contact with explosive or inflammable gases with 1231 heated probes<br />
and 1234 oxygen sensors when hot. <strong>Novatech</strong> transmitters have built in safety protection.<br />
2. Process gas temperature must be below 800°C if the filters are fitted.<br />
Please contact factory for corrosives other than sulphur or zinc. We can provide test materials to try in your<br />
atmosphere.<br />
April 2012<br />
14 <strong>1735</strong> Water Vapour Transmitter
3.1.4 Oxygen Probe Model Selection Guide<br />
Heated probes-temperature range 0-900°C (1650°F).<br />
1231 - X - X - X - X<br />
Mounting Thread:<br />
1. 1 1 2" BSP Fixed<br />
2. 1 1 2" NPT Fixed<br />
Internal Thermocouple:<br />
1. Type K<br />
max 900°C (1650°F)<br />
Outer Sheath<br />
1. Stainless Steel Grade 316<br />
max 850°C (1560°F)<br />
2. Inconel (*1)<br />
'U' Length<br />
2. 250mm (10")<br />
3. 500mm (20")<br />
4. 750mm (30")<br />
5. 1000mm (40")<br />
6. 1500mm (60")<br />
7. 2000mm (80")<br />
*Note: (1) The Inconel option has all Inconel wetted parts except for the ceramic sensor and viton ‘o’ rings.<br />
1234 SENSOR SPECIFICATIONS<br />
Range of measurement: 1 ppm to 100% oxygen<br />
Output: EMF = 2.154.10 -2 .T.log e (0.209/oxygen level of the sample)<br />
Accuracy: ± 1%<br />
Thermocouple: Type K<br />
Heater:<br />
110 VAC 50 / 60Hz, 100 watts<br />
Heater proportional band: 80°C (175°F)<br />
Speed of Response: Less than 100 milliseconds<br />
Sample flow rate: 1 to 5 litres / minute (2 to 10 scfh)<br />
Differential Pressure: 80 to 800 mm (3 to 30”) WG gives a flow of 1 to 5 litres / min (2 to 10 scfh)<br />
Process Connections: 1/4” NPT female, inlet and outlet<br />
Dimensions:<br />
300 mm (11.81”) high by 125 mm (4.92”) wide by 88 mm (3.46”) deep<br />
Weight:<br />
2.1 kg (4.6 lb)<br />
April 2012<br />
<strong>1735</strong> Water Vapour Transmitter 15
3.2 Operational Specifications<br />
Range of outputs (Output channel #1):<br />
Indirect fired,<br />
Single zone<br />
Indirect fired,<br />
Water vapour 1 √ √ √ √ √<br />
Dew point 1 √ √ √ √ √<br />
Absolute humidity 1 √ √ √ √ √<br />
Mass fraction 1 √ √ √ √ √<br />
Dryer temperature √ √ √<br />
Dryer relative humidity √ √ √<br />
Probe 1 oxygen √ √ √ √ √<br />
Probe 2 oxygen √ √<br />
No output √ √ √ √ √<br />
2 zone<br />
Direct fired,<br />
Fixed oxygen<br />
Direct fired,<br />
Probe + RGS<br />
Direct fired,<br />
External dry<br />
oxygen<br />
Range of outputs (Output channel #2):<br />
Indirect fired,<br />
Single zone<br />
Indirect fired,<br />
Water vapour 1 √ √ √ √ √<br />
Water vapour 2<br />
√<br />
Dew point 1 √ √ √ √ √<br />
Dew point 2<br />
√<br />
Absolute humidity 1 √ √ √ √ √<br />
Absolute humidity 2<br />
√<br />
Mass fraction 1 √ √ √ √ √<br />
Mass fraction 2<br />
√<br />
Dryer temperature √ √ √<br />
Dryer relative humidity √ √ √<br />
Probe 1 oxygen √ √ √ √ √<br />
Probe 2 oxygen √ √<br />
No output √ √ √ √ √<br />
2 zone<br />
Direct fired,<br />
Fixed oxygen<br />
Direct fired,<br />
Probe + RGS<br />
Direct fired,<br />
External dry<br />
oxygen<br />
April 2012<br />
16 <strong>1735</strong> Water Vapour Transmitter
Local display, lower line secondary display items:<br />
Function<br />
Range<br />
Water vapour Zone 1 0.0 to 100.0%<br />
Water vapour Zone 2 0.0 to 100.0%<br />
Dew point Zone 1<br />
-50.0 to 100.0°C<br />
Dew point Zone 2<br />
-50.0 to 100.0°C<br />
Absolute humidity Zone 1<br />
0 to 10,000 g/g<br />
Absolute humidity Zone 2<br />
0 to 10,000 g/g<br />
Mass fraction Zone 1<br />
0 to 1,000 g/kg<br />
Mass fraction Zone 2<br />
0 to 1,000 g/kg<br />
Dryer temperature<br />
Up to 1400°C (2550°F)<br />
Dryer relative humidity 0.0 to 100.0%<br />
Ambient temperature<br />
-25.0 to 80.0°C<br />
Ambient relative humidity 5 to 95%<br />
Runtime<br />
>10 years (hours and minutes)<br />
Service date<br />
Day/Month/Year<br />
Probe #1 temperature<br />
Up to 1400°C (2550°F)<br />
Probe #2 temperature<br />
Up to 1400°C (2550°F)<br />
Probe #1 EMF<br />
-30 to 1350mV<br />
Probe #2 EMF<br />
-30 to 1350mV<br />
Probe #1 sensor impedance<br />
0 to 300k Ω<br />
Probe #2 sensor impedance<br />
0 to 300k Ω<br />
Oxygen probe 1 1x10 -30 to 100%<br />
Oxygen probe 2 1x10 -30 to 100%<br />
April 2012<br />
<strong>1735</strong> Water Vapour Transmitter 17
This page has been intentionally left blank.<br />
April 2012<br />
18 <strong>1735</strong> Water Vapour Transmitter
4. INSTALLATION AND COMMISSIONING<br />
4.1 Mounting the Transmitter<br />
Surface mount the transmitter case on to a flat surface or bracket, using the four mounting brackets<br />
provided.<br />
Make sure the ambient temperature is below 50°C, and that the radiated heat from furnaces and boilers is<br />
kept to a minimum.<br />
314mm<br />
110mm<br />
188mm<br />
275mm<br />
350mm<br />
147mm<br />
221mm<br />
Case Mounting Dimensions<br />
4.2 Installing a 1231 Oxygen Probe<br />
Weld a BSP or NPT socket to the flue in a suitable position for flue gas sensing. For the correct size of<br />
socket refer to probe data in chapter 3.1.3. The closer to the source of combustion the smaller will be<br />
sensing lag time, allowing better control.<br />
The probe has a typical response time of less than four seconds, so most of the delay time is normally the<br />
transit time of the gas from the point of combustion to the point of sensing.<br />
Probes can be mounted at any angle. However, if the probe is to be mounted on a vertical duct wall, it is<br />
better to angle the probe (approx. 15°) down to avoid process condensation inside the cold end of the probe.<br />
If there are any particulates in the flue gas, a filter can be omitted by pointing the probe vertically downwards.<br />
Otherwise the transmitter can be configured to automatically purge the filters, or they can be replaced<br />
periodically.<br />
April 2012<br />
<strong>1735</strong> Water Vapour Transmitter 19
Preferred mounting<br />
angle if there are<br />
particulates in the flue<br />
gas and no filter is used<br />
Furnace,<br />
Flue…<br />
Probe may be mounted<br />
horizontally but a small<br />
angle downwards will<br />
reduce condensation<br />
Oxygen Probe Mounting<br />
CAUTION<br />
It is important that there is no air in leakage upstream of the oxygen sensing point otherwise there will be a<br />
high oxygen reading.<br />
If the probe is to be installed on a bend in the flue, it is best located on the outer circumference of the bend to<br />
avoid dead pockets of flue gas flow. While the standard 1231 probe with a ‘U’ length of 250 mm (10”) will<br />
suit most low temperature flue applications, it is occasionally necessary to have a longer probe with the<br />
sensing tip in the center of the flue gas stream.<br />
Although it is rare, occasionally a probe may sense oxygen vastly differently from the average reading in the<br />
flue gas. If it occurs, then the probe should be moved, or a longer probe installed. This phenomenon is<br />
normally caused by stratification of the flue gas.<br />
April 2012<br />
20 <strong>1735</strong> Water Vapour Transmitter
4.3 Installing a 1234 Oxygen sensor<br />
Mounting - Screw the 1234 sensor to a wall or similar surface with the piping connections at the top.<br />
1234 Sensor Mounting Dimensions<br />
Sample Piping - Connect the gas sample piping to the “sample in” port. If the process, boiler, kiln or furnace<br />
has a positive pressure, no suction will be required. If the sample is under a negative pressure, connect a<br />
pump to the “inlet” port. The flow rate should be within the range of 1 to 5 litres/minute (2 to 10 scfh).<br />
Flue<br />
Gas<br />
Upward sloping<br />
sample line 3/8”<br />
stainless steel<br />
1/4" Stainless Steel Tube<br />
Sampling<br />
Probe<br />
1234<br />
Sensor<br />
Dry<br />
Process<br />
Gas<br />
1234<br />
Sensor<br />
Optional vent to<br />
atmospherre<br />
Vent or return<br />
to process<br />
Flowmeter<br />
Optional return<br />
to flue<br />
April 2012<br />
<strong>1735</strong> Water Vapour Transmitter 21
4.4 Installing the Auxiliary Thermocouple<br />
Weld a 1/2 inch BSP mounting socket to the flue within about 300 mm (12”), and upstream of the oxygen<br />
probe. The thermocouple should be of similar length to the oxygen probe to prevent flue temperature<br />
distribution errors.<br />
The thermocouple should be connected to terminals 7 & 8. These terminals will not be available for an<br />
auxiliary thermocouple if a second probe has been installed.<br />
4.5 Shield Connections<br />
All external wiring to the <strong>1735</strong> transmitter should be shielded. Do not connect shields at the field end.<br />
Simply clip off and insulate. There are two M4 earth screw terminals available in the <strong>1735</strong> transmitter. An<br />
extra terminal strip may be required to connect all shields together. This should be supplied by the installer.<br />
4.6 Earth Connection (PE)<br />
The PE (protective earth) input connection must be made to the earth stud on the right hand side of cabinet.<br />
The PE input connection must be the first connection onto the earth stud and it must be secured by a<br />
separate nut and spring washer. All other earth connections (bonding connections) can be made on either of<br />
the two earth studs in the base of the cabinet.<br />
The controller MUST be securely earthed.<br />
Right hand<br />
earth stud<br />
Incoming<br />
PE wire<br />
Other bonding<br />
earth wires<br />
Assembly of the PE and bonding connections on the earth stud<br />
April 2012<br />
22 <strong>1735</strong> Water Vapour Transmitter
4.6 Electrical Connections<br />
All wiring should comply with local electrical codes. The printed circuit boards are fully floating above earth.<br />
All earth and shield connections should be connected to the earth screws inside the case.<br />
Orange<br />
Brown<br />
Black<br />
Blue<br />
1 Sensor 1+<br />
2 Sensor 1-<br />
3 TC 1+<br />
4 TC 1-<br />
Essential wiring<br />
Probe enable input<br />
Burner safety interlock, or if<br />
the interlock is not required<br />
link terminals 10&11<br />
Optional wiring<br />
4-20mA Outputs<br />
User selectable ranges<br />
Optional wiring<br />
Digital communications<br />
Connect to a MODBUS<br />
network or computer<br />
Orange<br />
Brown<br />
Black<br />
Blue<br />
5 SENSOR 2+<br />
6 SENSOR 2-<br />
7 AUX TC 2+<br />
8 AUX TC 2-<br />
9 5VDC<br />
10 BURNER INPUT<br />
11 BURNER INPUT<br />
12 OUTPUT 1+<br />
13 OUTPUT 1-<br />
14 OUTPUT 2+<br />
15 OUTPUT 2-<br />
16 FLOW SWITCH<br />
17 FLOW SWITCH<br />
18 RS232 Rx<br />
19 RS232 Tx<br />
20 NETWORK -<br />
21 NETWORK +<br />
22 NETWORK COM<br />
Optional wiring<br />
RGS temperature sensor<br />
or External dry oxygen<br />
23 +V<br />
24 BFT+<br />
25 BFT-<br />
White<br />
White<br />
44 HEATER 1<br />
43 HEATER 1<br />
Oxygen Sensor #1<br />
White<br />
White<br />
42 HEATER 2<br />
41 HEATER 2<br />
Oxygen Sensor #2<br />
40 CAL/PRG1<br />
Optional wiring<br />
Gas solenoids<br />
Automatic system calibration checking<br />
or filter purging<br />
Essential wiring<br />
Mains Power<br />
100-240VAC<br />
EARTH must be connected<br />
to PE earth-stud<br />
39 CAL/PRG2<br />
38 SOL COMM<br />
37 MAINS A<br />
36 MAINS N<br />
35<br />
34 MAINS E<br />
Optional wiring<br />
Alarm relays<br />
User programmable, NC contacts<br />
DO NOT USE MAINS VOLTAGE and LOW<br />
VOLTAGE on ADJACENT TERMINALS<br />
33 ALARM 3<br />
32 ALARM 3<br />
31 ALARM 2<br />
30 ALARM 2<br />
29 ALARM 1<br />
28 ALARM 1<br />
27 COM ALARM<br />
26 COM ALARM<br />
Connection Diagram for <strong>1735</strong> Transmitter and one or two 1231 / 1234 Heated Sensors<br />
April 2012<br />
<strong>1735</strong> Water Vapour Transmitter 23
All wiring should comply with local electrical codes. The printed circuit boards are fully floating above earth.<br />
All earth and shield connections should be connected to the earth screws inside the case.<br />
Orange<br />
Black<br />
Red<br />
1 Sensor 1+<br />
2 Sensor 1-<br />
3 TC 1+<br />
4 TC 1-<br />
Essential wiring<br />
Probe enable input<br />
Burner safety interlock, or if<br />
the interlock is not required<br />
link terminals 10&11<br />
Optional wiring<br />
4-20mA Outputs<br />
User selectable ranges<br />
Optional wiring<br />
Pressure sensor to detect a<br />
blocked filter during the<br />
automatic purge cycle<br />
Optional wiring<br />
Digital communications. Connect to<br />
a MODBUS network or computer.<br />
See chapter 4.15 and 7.2.25<br />
Orange<br />
Black<br />
Red<br />
5 SENSOR 2+<br />
6 SENSOR 2-<br />
7 AUX TC 2+<br />
8 AUX TC 2-<br />
9 5VDC<br />
10 BURNER INPUT<br />
11 BURNER INPUT<br />
12 OUTPUT 1+<br />
13 OUTPUT 1-<br />
14 OUTPUT 2+<br />
15 OUTPUT 2-<br />
16 FLOW SWITCH<br />
17 FLOW SWITCH<br />
18 RS232 Rx<br />
19 RS232 Tx<br />
20 NETWORK -<br />
21 NETWORK +<br />
22 NETWORK COM<br />
Optional wiring<br />
RGS temperature sensor<br />
or External dry oxygen<br />
23 +V<br />
24 BFT+<br />
25 BFT-<br />
44 HEATER 1<br />
43 HEATER 1<br />
Oxygen Probe #1<br />
42 HEATER 2<br />
41 HEATER 2<br />
Oxygen Probe #2<br />
Optional wiring<br />
Gas solenoids, MAINS VOLTAGE output<br />
Automatic system calibration checking or<br />
filter purging<br />
Essential wiring<br />
Mains Power<br />
100-240VAC<br />
EARTH must be connected<br />
to PE earth-stud<br />
40 CAL/PRG1<br />
39 CAL/PRG2<br />
38 SOL COMM<br />
37 MAINS A<br />
36 MAINS N<br />
35<br />
34 MAINS E<br />
Optional wiring<br />
Alarm relays<br />
User programmable, NC contacts<br />
DO NOT USE MAINS VOLTAGE and LOW<br />
VOLTAGE on ADJACENT TERMINALS<br />
33 ALARM 3<br />
32 ALARM 3<br />
31 ALARM 2<br />
30 ALARM 2<br />
29 ALARM 1<br />
28 ALARM 1<br />
27 COM ALARM<br />
26 COM ALARM<br />
Connection Diagram for <strong>1735</strong> Transmitter and one or two 1232 Unheated Probes<br />
April 2012<br />
24 <strong>1735</strong> Water Vapour Transmitter
4.7 Heater Interlock Relays<br />
CAUTION<br />
Explosion protection for heated probes is achieved by switching the power to the probe heater off whenever<br />
the main fuel valve is closed.<br />
The principle of safety is that if the main fuel valve is open then main flame has been established. With this<br />
primary source of ignition on, the probe heater can be safely switched on. The most dangerous situation is if<br />
fuel leaks into the combustion appliance when the fuel valve is closed. When power is removed from the<br />
main fuel valve the heater should also be switched off.<br />
To achieve this protection, connect a main fuel valve voltage free contact to the ‘BURNER INPUT’ terminals<br />
10 & 11. When the main fuel valve is open, the voltage free contact should be closed. For installations<br />
where there is no risk of explosion, connect a link between terminals number 10 & 11.<br />
For safety, contacts must be open<br />
if the main fuel valve is closed<br />
10<br />
11<br />
BURNER INPUT<br />
Heater Supply Interlock Connection for Heated Probes<br />
If a safety interlock is not required, a wire must be connected between terminals 10 &11 to enable –<br />
• The heaters on heated probes<br />
• Process alarms<br />
• Auto-purge and auto-cal checking<br />
• Run time timer<br />
4.8 Connecting an Oxygen Probe Cable<br />
Connect the probe lead as shown in the following drawings. Unheated probe leads have integral reference<br />
air tube. An adaptor has been supplied to connect this tube to quarter inch flexible PVC tubing, from the air<br />
pump or reference air supply.<br />
April 2012<br />
<strong>1735</strong> Water Vapour Transmitter 25
E<br />
F<br />
G<br />
A<br />
B<br />
Connector mounted on the<br />
probe head, viewed from the<br />
outside of the head<br />
D C<br />
Probe head<br />
connector<br />
6mm tube to reference air<br />
supply or internal pump<br />
Zirconia sensor<br />
A<br />
B<br />
Orange<br />
Black<br />
1 (5) SENS +<br />
2 (6) SENS -<br />
3 (7) TC+<br />
Thermocouple<br />
E<br />
C<br />
Red<br />
*Note 1<br />
4 (8) TC-<br />
Note 1: Jumper terminal 4 to 8 if efficiency or flue<br />
temperature display is required.<br />
Use copper wire.<br />
Green and yellow wire must be<br />
connected to the EARTH screw in<br />
the transmitter<br />
Connection of Probe Cable for Unheated Probes Models 1232.<br />
Connection of Probe Cable for Heated Probes Model 1231 and 1234.<br />
April 2012<br />
26 <strong>1735</strong> Water Vapour Transmitter
4.9 Connecting a 1234 sensor Cable<br />
The 1234 will either be supplied with a weather proof connector or direct cable wiring.<br />
If the 1234 has a weather proof connector, it will have been supplied with a cable that is already terminated<br />
with a matching plug. The other end of the cable can then be terminated in the <strong>1735</strong> transmitter as shown in<br />
the 1231 / 1234 wiring diagram on the previous page<br />
If the 1234 has been supplied without the weather proof connector, remove the cover of the 1234 and<br />
connect the wires to the connectors on the circuit board as shown below.<br />
OXYGEN<br />
TYPE K THERMOCOUPLE<br />
HEATER 110VAC 100 WATTS<br />
+<br />
C<br />
- B<br />
+<br />
A<br />
- F<br />
+ D<br />
- E<br />
ORANGE<br />
BROWN<br />
BLACK<br />
BLUE<br />
WHITE<br />
WHITE<br />
Connecting a 1234 Sensor Cable<br />
4.10 Connecting the Auxiliary Thermocouple (optional)<br />
For 1231 heated probes, the auxiliary thermocouple must be a separate TC with the junction isolated from<br />
earth, mounted near to and upstream of the oxygen probe. It can be either a K, J, R or S type thermocouple.<br />
It is optional. If the auxiliary temperature or combustion efficiency is not to be displayed or transmitted, then<br />
an auxiliary thermocouple is not necessary.<br />
The thermocouple should be connected to terminals 7 & 8. These terminals will not be available for an<br />
auxiliary thermocouple if a second probe has been installed.<br />
4.11 Connecting the RGS temperature sensor (optional)<br />
When the RGS is used with the <strong>1735</strong> a temperature sensor is fitted into the end of the sample tube. The<br />
sensor must be connected in the <strong>1735</strong> transmitter to the terminals 23, 24 and 25 as shown.<br />
RGS temperature sensor<br />
Red to terminal 23<br />
Yellow to terminal 24<br />
Black to terminal 25<br />
Green / yellow<br />
to earth screw<br />
Connecting the RGS temperature sensor<br />
4.12 Connecting the Output Channels<br />
The two 4 to 20 mA DC output channels are capable of driving into a 1000Ω load. The output terminals are<br />
12 & 13 for channel 1, and 14 & 15 for channel 2.<br />
April 2012<br />
<strong>1735</strong> Water Vapour Transmitter 27
4.13 Connecting the External Dry Oxygen Input<br />
If an external dry oxygen signal is to be connected to the <strong>1735</strong> transmitter it must be a 4 – 20mA signal that<br />
represents 0 – 25% oxygen<br />
The link LK2 (bottom left hand side of the 1730-1 PCB, under the shield) must be on. . An internal 120 ohm<br />
resistor is connected to terminals 24&25 by inserting the link.<br />
Dry Oxygen Analyser<br />
+<br />
4-20mA Output<br />
-<br />
24<br />
25<br />
<strong>1735</strong><br />
Transmitter<br />
BFT+<br />
BFT-<br />
The shield wire must be<br />
connected to the EARTH screw in<br />
<strong>1735</strong> the transmitter<br />
See also chapter 7.2.28, External Oxygen Input Delay.<br />
4.14 Connecting the Alarms<br />
A common alarm, which should be connected for all installations initiates on alarm functions described<br />
below. Three additional alarm relays are available for selectable functions as listed in chapter 9.2. Each<br />
relay has normally open contacts. The contacts will open in alarm condition. Relays are connected as<br />
follows:<br />
Relay<br />
Terminal Numbers<br />
Common Alarm 26 & 27<br />
Alarm 1 28 & 29<br />
Alarm 2 30 & 31<br />
Alarm 3 32 & 33<br />
Common Alarms All of the following conditions will cause a common alarm -<br />
Probe 1 (2) Heater Fail<br />
Probe 1 (2) High Impedance<br />
Probe 1 (2) TC Open Circuit<br />
Aux TC Open Circuit<br />
Ref Air Pump Fail<br />
ADC Calibration Fail<br />
Alarm Log Fail<br />
Output 1 (2) Failure<br />
Heater 1 (2) SSR Failure<br />
Heater SSR Leakage<br />
Probe 1 (2) Filter Blocked<br />
Gas 1 (2) Calibration Error<br />
BBRAM Fail<br />
Watchdog timer error<br />
The watchdog timer is a special alarm. There will not be an alarm message displayed, but the transmitter<br />
will reset.<br />
Alarms can be accepted by pressing the alarm button (viewing the alarm messages).<br />
Alarm relay 2 to 4 Select any one or all of the following for each relay. Refer chapter 9.<br />
In addition, any of the selections that are removed from the common alarm relay can be added to relays two<br />
to four.<br />
High oxygen 1 (2)<br />
Low oxygen 1 (2)<br />
Very low oxygen 1 (2)<br />
Oxygen deviation<br />
Probe 1 (2) temperature low<br />
Calibration check 1 (2) in progress<br />
Probe 1 (2) purge in progress<br />
April 2012<br />
28 <strong>1735</strong> Water Vapour Transmitter
4.15 Connecting the Automatic Purge and Calibration Check System<br />
CAUTION<br />
The purge and calibration solenoid valves are supplied with mains voltage. This supply has electrical shock<br />
danger to maintenance personnel. Always isolate the transmitter before working with the purge and<br />
calibration solenoid valves.<br />
The on-line auto purge and calibration check system is optional. For details on its operation see chapters<br />
4.21, 4.22 and chapter 11.<br />
To automatically sense a blocked probe filter, a flow switch should be installed in the ‘purge’ line to the probe<br />
‘CAL’ port. It should be adjusted so that it energises just below the purge flow with new or clean filters<br />
installed. The flow switch contacts should be connected to terminals 16 & 17 (FLOW SW).<br />
If the filter is still blocked or partly blocked after an auto purge cycle, the flow switch will not energise and will<br />
therefore cause a ‘Probe1 (2) Filter Blocked’ alarm.<br />
After installation the purge/cal system should be tested thoroughly for leaks. Any leaks can cause significant<br />
errors if the flue is at negative pressure. If the flue is at positive pressure, an outward leak can cause<br />
corrosion in the purge/cal system piping and fittings.<br />
If probe/filter purging is required but a “Probe1 (2) Filter Blocked” alarm is not required, do not install the flow<br />
switch but link terminals 16 &17.<br />
40 Cal / Purge 1 solenoid<br />
38 Solenoid common<br />
39 Cal / Purge 2 solenoid<br />
Automatic Purge &<br />
Calibration check System<br />
Wiring Schematic<br />
38 Solenoid common<br />
To oxygen probe<br />
Cal Port<br />
Calibration check gas flowmeter / regulator<br />
5 litres / min (10 scfh)<br />
Cal check gas<br />
140kPa max (20 PSI)<br />
Automatic Purge &<br />
Calibration check System<br />
Piping Schematic<br />
Clean and dry purge<br />
air supply<br />
140kPa max (20PSI)<br />
4.16 Connecting Reference Air<br />
For 1234 sensors, no reference air connection is required.<br />
For oxygen probes, a 1/4” tube connector on the transmitter should be connected via a nylon, copper or<br />
stainless steel tube to the ‘REF’ connector on the probe.<br />
If two probes are being used, a “T” fitting must be supplied to provide reference air supply to both probes.<br />
4.17 Connecting the Transmitter to a MODBUS network<br />
The transmitter can be networked to other transmitters and to a network master. The network uses the<br />
transmitter’s RS485 port. Up to 31 transmitters can be connected to the network, and can be interrogated by<br />
the Network Master.<br />
April 2012<br />
<strong>1735</strong> Water Vapour Transmitter 29
NOTE: Hardware Protocol Selection<br />
The communications port of the <strong>1735</strong> can be configured to communicate on either RS232 or RS485. If the<br />
transmitter is to be used on a MODBUS network, the <strong>1735</strong> transmitter must be set to RS485. For further<br />
details see chapter 7.2.26, Communication Port Options.<br />
NOTE: Terminating Resistor<br />
There is a terminating 100 ohm resistor fitted to the 1730-1 PCB. Link LK3 (TERM), in the bottom left-hand<br />
corner of the PCB, is used to connect the terminating resistor. Link LK3 must be removed on all transmitters<br />
except the transmitter on the end of the network line. If the network line from the transmitters is taken from<br />
the middle of the transmitter network string, a terminating resistor should be enabled with LK3 at each end of<br />
the network line.<br />
The MODBUS protocol of the network is –<br />
Baud Rate 19,200<br />
Parity<br />
None<br />
Stop Bits 1<br />
RS485 Half Duplex<br />
Mode<br />
RTU (binary mode)<br />
For more details see Appendix 3.<br />
Oxygen Transmitter #1<br />
Network Master<br />
Network -<br />
Network +<br />
Network Com.<br />
20 Network -<br />
21 Network +<br />
22 Network Com<br />
Oxygen Transmitter #2<br />
20 Network -<br />
21 Network +<br />
22 Network Com<br />
Oxygen Transmitter #xx<br />
20 Network -<br />
21 Network +<br />
22 Network Com<br />
Network Connections<br />
April 2012<br />
30 <strong>1735</strong> Water Vapour Transmitter
4.18 Connecting Power<br />
Before commissioning the probe, sensor or transmitter, read the CAUTION paragraphs at the front of this<br />
manual. The green & yellow EARTH wire MUST be connected to earth.<br />
4.19 Commissioning - Run Mode<br />
When the transmitter is turned on it will go to RUN mode. The SET-UP/RUN button will toggle between the<br />
two modes. The upper line of the display will now read ‘% OXYGEN’. If the probe or sensor temperature is<br />
not above 650°C (1200°F), a “Probe Low Temperature” message is flashed on the lower line. The probe or<br />
sensor temperature can be checked on the lower line of the display.<br />
4.20 Probe or Sensor Calibration<br />
The zirconia sensor provides an absolute measurement of oxygen partial pressure. There are no calibration<br />
adjustments, apart from ‘Probe 1 Offset’, for the probe. The zirconia sensor EMF is either correct or it needs<br />
to be replaced. To check that the probe is functioning correctly, first check that the high impedance alarm,<br />
‘Probe 1 (2) High Impedance’, is not active. The actual impedance can be displayed on the lower line. It<br />
should be less than 9 KΩ at 720°C (1320°F).<br />
Once it has been established that the impedance is normal, the offset may be set using the millivolt value<br />
marked on the oxygen probe. See chapter 6.3.1, Probe Offset. The probe offset can be tested on site. A<br />
small flow of air must be admitted to both the ‘REF’ and ‘CAL’ ports when testing the probe offset. If the<br />
probe is in the process, the air must fully purge the probe sensor without interference from the process gas<br />
sample. <strong>Novatech</strong> probes can easily achieve this with or without a probe filter and a gas flow of only 1 to 5<br />
litres/minute (2 to 10 scfh) for a 1231 probe and up to 20 litres/minute (40scfh) for an unheated probe. When<br />
a stable oxygen reading has been achieved, read the ‘Probe EMF’. Enter this value into the set-up menu #1<br />
for the probe 1 (set-up #2 for the second probe if it is installed).<br />
4.21 Filter Purging<br />
Purging probe filters is controlled from the ‘GAS/PURGE’ buttons on the transmitter when in ‘RUN’ mode. If<br />
‘Automatic’ has been selected in either ‘Sol. 1 Auto/Man’ or ‘Sol. 2 Auto/Man’ in Commissioning Menus 21 or<br />
30, pressing the GAS/PURGE button will start the automatic cycle. Pressing the button again will cancel the<br />
auto purge cycle. If ‘Automatic’ was not enabled, the solenoid will only stay open for as long as the button is<br />
pressed. Gradually adjust the purge air supply regulator, increasing the pressure until sufficient flow is<br />
obtained to clear the filter. This is best checked with a dirty filter after a period of operation, by withdrawing<br />
the probe from service and watching any build up on the filter being blown off at the set pressure. Normally<br />
30 kPa (5 psi) is adequate but the air pressure may be set as high as 100 kPa (15 psi).<br />
4.22 Calibration Gas Check<br />
If the installation has a filter purge facility, set this up first. Refer to the previous paragraph. Press the<br />
‘GAS/PURGE 1 or ‘GAS/PURGE 2’ button while in ‘SET UP’ mode to obtain a reasonable flow through the<br />
calibration check gas flow meter. If air is being used as a calibration check gas, use the air from the<br />
regulator for filter purge. Then, when setting up a gas for calibration checking, set the pressure from the<br />
calibration gas cylinder so that it is the same as the pressure set on the air regulator. Then the setting on the<br />
rotameter / flow regulator will be the same as that for the airflow. The flow required is 1 to 5 litres/minute (2<br />
to 10 scfh) ) for a 1231 probe and up to 20 litres/minute (40scfh) for an unheated probe.<br />
Air is not the best gas for calibration checking on a zirconia sensor. The output of a zirconia sensor with air<br />
on both sides of the sensor is zero millivolts. It is better to choose a gas value which provides a reasonable<br />
output from the sensor and which is near to the process oxygen level. A cylinder with 2% oxygen in nitrogen<br />
is a commonly used calibration gas. The maximum pressure on the calibration check gas cylinder regulators<br />
is 100 kPa (15 psi).<br />
Note: If ‘Dual probe’ was selected in commissioning menu 4, ‘Cal Gas 2’ must be connected to probe 2.<br />
April 2012<br />
<strong>1735</strong> Water Vapour Transmitter 31
4.23 Dust in the Flue Gas<br />
For heated probes the preferred method of mounting for dust-laden applications is facing vertically<br />
downwards with the filter removed. Probes can also be mounted horizontally with no filter with some dusts.<br />
An occasional automatic back purge is helpful in this case.<br />
Normally heated probes are supplied with filters for applications with particulates in the process gas. The<br />
probe response time should be tested when the probe is first installed, and then regularly until it remains<br />
constant for a significant period. Filter purging should be set up on the time periods determined by these<br />
tests. To test the probe response time, use a stopwatch to obtain the time for a probe to achieve a 63 %<br />
change from one reading to another. If a probe filter blocks completely in a short period of time, then there is<br />
no option but to use the probe without the filter. A trial probe with filter can be installed to test whether a filter<br />
blockage is likely to occur.<br />
4.24 Connecting a Pressure Transducer<br />
If the process gas pressure varies more than 4" WG and therefore requires automatic compensation,<br />
connect a pressure transducer as shown below.<br />
Place a link across LK2, near to the input terminals 24 & 25. If the link is not populated, you can achieve<br />
the same thing connecting a 120Ω resistor across the two terminals.<br />
A pressure change of 4" WG will cause a change in the calculated oxygen reading of approximately 1%.<br />
120ohm Resistor<br />
24 BFT+<br />
25 BFT-<br />
There are no calibration adjustments for the zero or span of the pressure transducer input. Set the<br />
transducer scale range in the commissioning menu - See Section 7.2.10. The pressure can be displayed on<br />
the lower line by enabling the corresponding option. See Section 6.3.2.<br />
April 2012<br />
32 <strong>1735</strong> Water Vapour Transmitter
5. DISPLAY AND KEYPAD<br />
Operator interaction with the oxygen transmitter is done through a graphical display and 8 keys on the front<br />
of the case. The five LED indicators are used to show the status of the transmitter and to alert the operator<br />
of any errors.<br />
Each of the keys has a dual function;<br />
The BLACK text printed on the key is the function while the transmitter is in the RUN mode<br />
The WHITE text printed on the key is the function in one of the three configuring menus,<br />
(SETUP, COMMISSIONING and CALIBRATION)<br />
The menu driven modes are accessed by pressing, and in some cases holding down, the SETUP key (see<br />
chapters 6, 7 and 8 for details of these modes). The transmitter will return to the RUN mode when the<br />
SETUP key is pressed again, or if 60 seconds has elapsed since the last key was pressed.<br />
5.1 Graphical Display<br />
In RUN mode the <strong>1735</strong> shows the prime measurement in large characters at the top of the display and a<br />
user selectable lower line in smaller characters below. Other items on the display include the activity<br />
heartbeat indicator in the top right corner, a row of single letter action indicators in the bottom left corner and<br />
the current time in the bottom right corner.<br />
Power on<br />
indicator<br />
Activity indicator<br />
(see below for<br />
details)<br />
POWER<br />
25.2%<br />
Z 2 Water Vapour 3.7%<br />
B<br />
WATER VAPOUR TRANSMITTER<br />
<strong>1735</strong><br />
WV<br />
14:20:36<br />
Heartbeat<br />
indicator<br />
Prime measurement indicator<br />
(WV, DP, O 2 , AH, MF, RH)<br />
Prime humidity measurement.<br />
User selectable<br />
Lower line,<br />
secondary measurements<br />
Current time<br />
In SETUP mode the RUN display is replaced with a menu driven interface. All other functions of the<br />
transmitter (reading, calculating and transmitting etc) aside from the keypad and display will continue to<br />
operate as normal.<br />
April 2012<br />
<strong>1735</strong> Water Vapour Transmitter 33
5.2 Display Units<br />
The <strong>1735</strong> can calculate the water vapour content in several different units.<br />
The format of the oxygen display changes to maintain the best resolution for the measurement.<br />
Units<br />
Display format<br />
Water vapour (WV) ##.# %<br />
Dew point (DP) ##.# °C (°F)<br />
Probe oxygen (O 2 ) See the table below<br />
Absolute humidity (AH) # g/Kg or #.# Kg/Kg<br />
Mass fraction (MF) # g/Kg<br />
If oxygen is selected for the top line the transmitter will show the oxygen in % format between 100% down to<br />
0.1%. Below of this range the oxygen will be shown in scientific format.<br />
Range<br />
Display format<br />
30.0% to 100.0% ###.# %<br />
1.00% to 29.99% ##.## %<br />
0.100% to 0.999% 0.### %<br />
< 0.100ppm scientific notation (#.## x 10 - ## % )<br />
April 2012<br />
34 <strong>1735</strong> Water Vapour Transmitter
5.3 Keypad<br />
There are eight keys built into the decal on the outside of the door of the <strong>1735</strong> transmitter. The key functions<br />
are written in BLACK and WHITE to identify the function of the key in either RUN mode or SETUP mode.<br />
Key text RUN mode (WHITE text) SETUP mode (BLACK text)<br />
SETUP / RUN Enter SETUP mode Return to RUN mode<br />
DISPLAY / FUNCTION UP Display Next Lower Line Item Next Function<br />
DISPLAY / FUNCTION DOWN Display Prev. Lower Line Item Previous Function<br />
ALARM / OPTION UP Next Alarm Next / Increment Option<br />
ALARM / OPTION DOWN Previous Alarm Previous / Decrement Option<br />
ALARM ACCEPT / ENTER Acknowledge Displayed Alarm Save Current Option<br />
GAS 1 PURGE 1 / SENS IMP Gas 1 / Purge 1 manual activate Check Probe impedance<br />
GAS 2 PURGE 2 / AUTO CAL Gas 2 / Purge 2 manual activate <strong>Manual</strong>ly Activate Output Calibration<br />
5.3.1 Keypad in RUN mode<br />
When the transmitter is turned on and has completed its start-up procedure, it will enter RUN mode and<br />
enable the keypad. The key functions in this mode are as follows;<br />
SETUP / RUN key<br />
Pressing this key will put the transmitter into one of the menu-driven SETUP, COMMISSIONING or<br />
CALIBRATION modes (see chapters 6, 7 and 8 for details). The function of all the keys will then change to<br />
the functions that they have in the SETUP mode.<br />
DISPLAY UP / DOWN keys<br />
The display keys are used to scroll the lower line up and down through the variety of measurements that are<br />
available on the lower line. For a complete list of options see chapter 6.3.2, Lower Line Items.<br />
ALARM UP key<br />
If there is either a new alarm or an active alarm the ALARM UP key can be pressed to examine the alarm<br />
status. The alarm light will be flashing if there is a new alarm or steady if there is an existing alarm. For<br />
more details on the alarm mode and keys see chapter 9, Alarms. The SETUP light will flash slowly to show<br />
that the transmitter is now in the alarm display mode.<br />
ALARM DOWN key<br />
When the transmitter is displaying active alarms (the ALARM UP key has been pressed), the ALARM DOWN<br />
key and the ALARM UP key allow the operator to examine the date / time of the alarm and the date / time<br />
that the alarm was acknowledged.<br />
If the transmitter was in RUN mode when this key is pressed it will go into the alarm log display mode. See<br />
chapter 9 for more details.<br />
ALARM ACCEPT key<br />
The ALARM ACCEPT key is used to accept a new alarm (see chapter 9, Alarms).<br />
GAS 1 / PURGE 1 and GAS 2 / PURGE 2 keys<br />
These two keys are used to turn on the gas / purge solenoids. When the transmitter is in the manual cal /<br />
purge mode (Commissioning functions #21 and 30) the solenoid will be activated for as long as the key is<br />
pressed. When the transmitter is in the auto cal / purge mode the automatic cal / purge cycle is started. The<br />
cycle can be stopped by pressing the same key again.<br />
April 2012<br />
<strong>1735</strong> Water Vapour Transmitter 35
5.3.2 Keypad in SETUP / COMMISSIONING / CALIBRATION modes<br />
NOTE: In order to enter either COMMISSIONING or CALIBRATION modes, the corresponding DIP switch<br />
on the 1730-1 PCB must be turned on.<br />
From RUN mode, if the SETUP / RUN key is pressed once, the transmitter will go into the SETUP mode.<br />
From RUN mode, if the SETUP / RUN key is pressed and held for 2 seconds, the transmitter will go into the<br />
COMMISSIONING mode.<br />
From RUN mode, if the SETUP / RUN key is pressed and held for 4 seconds, the transmitter will go into the<br />
CALIBRATION mode.<br />
The following key functions are then available in all of the above modes.<br />
SETUP / RUN key<br />
Pressing the SETUP / RUN key while in any of the set up modes will return the transmitter to the RUN mode.<br />
FUNCTION up and FUNCTION down keys<br />
These two keys allow for the selection of the setup function. A function summary table is found at the start of<br />
the relevant SETUP, COMMISSIONING or CALIBRATION mode chapter.<br />
OPTION up and OPTION down keys<br />
These two keys allow for changing the option for the selected function. A list/range of options for each<br />
function is found in the function summary table at the start of the relevant SETUP, COMMISSIONING or<br />
CALIBRATION mode chapter.<br />
ENTER key<br />
The ENTER key sets the currently displayed option and stores the value in non-volatile memory to be<br />
retrieved on device start up. If the ENTER key is not pressed when a new option is chosen, the previous<br />
option will be retained.<br />
Probe impedance key<br />
When this key is pressed the transmitter will measure the impedance of oxygen sensor(s) attached to the<br />
transmitter. If the burner is not enabled (terminals 10 & 11) or the probe temperature is below 700°C<br />
(1292°F) impedance checking will not be performed. A ‘Z’ will be seen in the bottom left hand corner of the<br />
display as the test is performed.<br />
Auto calibrate key<br />
When this key is pressed the transmitter will calibrate the analogue output channels that are set to auto<br />
calibration (see chapter 10). This is performed by directing the output current away from the output terminals<br />
(terminals 12&13 and 14&15) back to an analogue input to the transmitter in order to calculate a zero and<br />
span calibration factor for each of the output channels.<br />
During this process normal output to the analogue channels will be interrupted sending the outputs to zero<br />
mA.<br />
April 2012<br />
36 <strong>1735</strong> Water Vapour Transmitter
6. SETUP MODE<br />
This chapter describes the functions available when the SETUP mode is entered on the transmitter.<br />
The SETUP mode is mode is accessed by pressing the SETUP key momentarily so the words ‘Setup Mode’<br />
appear at the bottom of the display. The transmitter will return to the RUN mode when the SETUP key is<br />
pressed again or 1 minute after the last key press.<br />
6.1 Function Summary Table<br />
When the transmitter is in the SETUP mode the SETUP light will be on and the words “Setup Menu” will be<br />
shown at the bottom of the display.<br />
The following table shows the SETUP functions:<br />
Menu # Function name Range Default value<br />
01 Probe 1 offset -6.0 to +6.0mV 0.0mV<br />
02 Probe 2 offset -6.0 to +6.0mV 0.0mV<br />
03 Lower line items -<br />
See SETUP function #3 for<br />
details (chapter 5.2.2)<br />
04 Damping factor<br />
No damping, to<br />
10 samples averaged<br />
5 samples averaged<br />
05 Spike Suppression Disabled / 15 secs – 5 mins Disabled<br />
06 Spike Trip Level 5mV to 100mV 10mV<br />
6.2 Changing Options<br />
The purpose of having a menu driven SETUP mode is to allow for configuration of the transmitter using the<br />
graphical display and keypad.<br />
Once an option is changed and entered using the ENTER key that value immediately becomes active. It is<br />
also stored into the non-volatile memory within the BBRAM and will be loaded again at device start-up. To<br />
reset the transmitter configuration defaults see chapter 10.2, Cold Start.<br />
To change an option in the SETUP menu system:<br />
1. Select the SETUP mode by pressing the SETUP / RUN key once. The SETUP light will come on<br />
and the display will have the format shown below. The operations of the keys are now the<br />
operations written in WHITE on the keypad. The menu name is written at the bottom of the display.<br />
2. When the SETUP mode has been selected the required function can be found by using the<br />
FUNCTION UP and FUNCTION DOWN keys.<br />
The options available for that function can be seen by using the OPTION UP & OPTION DOWN<br />
keys.<br />
3. When the required option is on the display press the ENTER key to save that value.<br />
When finished, press the SETUP / RUN key to return to the RUN mode.<br />
April 2012<br />
<strong>1735</strong> Water Vapour Transmitter 37
6.3 Setup Mode Functions<br />
Power on<br />
indicator<br />
Function<br />
number<br />
Selected option<br />
POWER<br />
WATER VAPOUR TRANSMITTER<br />
<strong>1735</strong><br />
01 Probe 1 Offset<br />
+0.0 mV<br />
Setup Menu<br />
Saved<br />
Function<br />
name<br />
Verification that the<br />
selected option has<br />
been saved<br />
Shows “Setup Menu”<br />
has been accessed<br />
6.3.1 Probe 1 Offset<br />
Each <strong>Novatech</strong> probe has an offset calibration value printed on a tag that is attached to the probe when it is<br />
dispatched. To achieve accurate measurement the offset value must be entered with the same polarity as it<br />
is printed on this label. The offset value should be within ±1.0mV<br />
NOTE: An offset of 1.0mV will change the oxygen reading by approximately 1% oxygen when the probe is in<br />
ambient air. However, as the process oxygen measurement drops, this offset will have a reduced affect. At<br />
a process gas oxygen concentration of 2%, the 1.0mV offset error will only change the reading by 0.1%<br />
oxygen.<br />
If in any doubt about the correct offset value, set it to 0.0mV.<br />
The function ’Probe 2 Offset’ will only appear if the transmitter has been configured for 2 probes. (see<br />
chapter 7.2.4 )<br />
6.3.2 Lower Line Items<br />
This function allows the operator to change the items that are available to be displayed on the lower line of<br />
the transmitter in RUN mode. If the word “Enabled” appears on the display for a selected lower line option,<br />
the measurement will be available to be shown on the display in the RUN mode by scrolling through the list<br />
using the DISPLAY UP and DISPLAY DOWN keys.<br />
A lower line measurement can be “Enabled” or disabled by pressing the ENTER key.<br />
OPTIONS:<br />
Enabled as Default<br />
1 Temperature, Probe #1 *<br />
2 Temperature, Probe #2 *<br />
3 Sensor EMF, Probe #1 *<br />
4 Sensor EMF, Probe #2 *<br />
5 Sensor Impedance, Probe #1 *<br />
6 Sensor Impedance, Probe #2 *<br />
7 Oxygen, Probe #1 *<br />
8 Oxygen, Probe #2 *<br />
9 Zone 1 Water Vapour *<br />
10 Zone 2 Water Vapour *<br />
11 Zone 1 Dew Point *<br />
12 Zone 2 Dew Point *<br />
13 Zone 1 Absolute Humidity *<br />
14 Zone 2 Absolute Humidity *<br />
15 Zone 1 Mass Fraction *<br />
16 Zone 2 Mass Fraction *<br />
17 Dryer Temperature *<br />
18 Dryer Relative Humidity *<br />
April 2012<br />
38 <strong>1735</strong> Water Vapour Transmitter
19 Ambient Temperature *<br />
20 RGS Sensor Temperature<br />
21 Ambient Relative Humidity<br />
22 External Dry Oxygen<br />
23 Flue Pressure<br />
24 Runtime<br />
25 Service Date<br />
26 Analog Output 1 4-20mA<br />
27 Analog Output 2 4-20mA<br />
NOTE: An asterisk (*) on the end of the line identifies the item is enabled by default after a COLD-START.<br />
NOTE: The options may be different to those shown above depending on the selections for the top line<br />
display in the commissioning menu.<br />
6.3.3 Display Units<br />
The top line of the display will display the function that is selected in function #6 of the commissioning menu.<br />
By changing the units here other displays will also be changed –<br />
Alarm levels<br />
Lower line items (the top line item is removed form the lower line options)<br />
6.3.4 Damping Factor<br />
The water vapour measurement can be damped by averaging successive readings from the probe. This will<br />
smooth out fluctuations in the process gas level and will slow down the reaction time of the transmitter. The<br />
larger the number selected here, the more successive readings are averaged and the smoother the<br />
measurement will be.<br />
The damped water vapour value is also used in the calculation of all other parameters that are based on the<br />
water vapour value.<br />
6.3.5 Spike Suppression<br />
This function allows the operator to automatically suppress spike suppression caused by condensation.<br />
Due to the high levels of moisture in some environments it is not unusual to experience condensation buildup<br />
on the inner and outer sheath of the probe. When this occurs the condensation will often drip back onto<br />
the hot sensing area of the probe causing rapid thermal expansion which causes the probe to read incorrect<br />
levels for some period of time.<br />
This menu allows the operator to set the maximum duration of time that the analyser can automatically<br />
suppress these condensation related spikes.<br />
In normal operation a value of ~2 minutes is acceptable<br />
6.3.6 Spike Trip Level<br />
NOTE: This menu is only visible if spike suppression is enabled in the previous menu.<br />
This function sets the instantaneous jump in probe EMF that indicates that a condensation related spike is<br />
interfering with normal readings.<br />
April 2012<br />
<strong>1735</strong> Water Vapour Transmitter 39
This page has been intentionally left blank.<br />
April 2012<br />
40 <strong>1735</strong> Water Vapour Transmitter
7. COMMISSIONING MODE<br />
This chapter describes the functions available when the COMMISSIONING mode is entered on the<br />
transmitter.<br />
The COMMISSIONING mode is accessed by pressing and holding the SETUP key for approximately 2<br />
seconds until the words “Commissioning Menu” appears at the bottom of the display. The transmitter will<br />
return to the RUN mode when the SETUP key is pressed again or 60 seconds after the last key press.<br />
Changing options in the COMMISSIONING mode is the same as the SETUP mode. See chapter 6.2,<br />
Changing Options.<br />
7.1 Function Summary Table<br />
When the transmitter is in the COMMISSIONING mode the SETUP light will be on and the words<br />
“Commissioning Menu” will be shown the bottom of the display.<br />
The following table shows the COMMISSIONING menu functions:<br />
Menu # Function name Range Default value<br />
01 Internal Clock Date -<br />
02 Internal Clock Time -<br />
03 Service Date -<br />
04 Heater Dryer Type See chapter 7.2.3 Indirect Fired<br />
05 Probe 2 Input Oxygen Probe/Dryer TC Disabled<br />
06 Dry O 2 Sample Delay No Delay 600 seconds (10 mins)<br />
07 Top Line Display See chapter 7.2.8 Water Vapour %<br />
08 Probe 1 Type 1231 / 1234 Heated<br />
1231 / 1234 Heated<br />
09 Probe 2 Type or 1232 Unheated<br />
1231 / 1234 Heated<br />
10 Probe 1 TC Type K or J Type K-Type<br />
11 Probe 2 TC Type K or J Type K-Type<br />
12 Fixed Combustion O2 0.1% - 21.0% 5.0%<br />
13 Transmitter Output Channel 1<br />
Water Vapour 1<br />
14 Transmitter Zero Channel 1 0 %<br />
15 Transmitter Span Channel 1 100 %<br />
See Chapter 7.2.9<br />
16 Transmitter Output Channel 1 Water Vapour 1<br />
17 Transmitter Zero Channel 2 0 %<br />
18 Transmitter Span Channel 2 100 %<br />
19 Flue Pressure Units Inches WG, mm WG, kPa, PSI Inches WG<br />
20 Flue Pressure Value -1 to 3 Atm 0 Inches WG<br />
21 Temperature Units Celsius / Fahrenheit Celsius<br />
22 Cal Freezes Outputs Enabled / Disabled Enabled<br />
23 Solenoid 1 Operation<br />
Disabled/Calibration Gas /<br />
Purge<br />
Disabled<br />
24 Solenoid 1 Auto / <strong>Manual</strong> Automatic / <strong>Manual</strong> <strong>Manual</strong><br />
25 Solenoid 1 Start Time 00:00 to 23:45 00:00 ( midnight )<br />
26 Solenoid 1 Period 1 minute – 7 days 1 hour<br />
27 Solenoid 1 Duration 1 – 90 seconds 30 seconds<br />
28 Solenoid 1 Post Freeze 5 – 300 seconds 60 seconds<br />
29 Oxygen Content Cal Gas 1 0.1 – 20.9% 8.0%<br />
30 Max Cal Gas 1 Positive Error 0.1% to 3.0% 0.5%<br />
31 Max Cal Gas 1 Negative Error 0.1% to 3.0% 0.2%<br />
April 2012<br />
<strong>1735</strong> Water Vapour Transmitter 41
32 Solenoid 2 Operation<br />
Disabled/Calibration Gas /<br />
Purge<br />
Disabled<br />
33 Solenoid 2 Auto / <strong>Manual</strong> Automatic / <strong>Manual</strong> <strong>Manual</strong><br />
34 Solenoid 2 Start Time 00:00 – 23:45 00:00 ( midnight )<br />
35 Solenoid 2 Period 1 minute – 7 days 1 hour<br />
36 Solenoid 2 Duration 1 – 90 seconds 30 seconds<br />
37 Solenoid 2 Post Freeze 5 – 300 seconds 60 seconds<br />
38 O2 Content Calibration Gas 2 0.1% to 20.9% 8.0%<br />
39 Max Cal Gas 2 Positive Error 0.1% to 3.0% 0.5%<br />
40 Max Cal Gas 2 Negative Error 0.1% to 3.0% 0.2%<br />
41 Process Alarm 1<br />
42 Process Alarm 1 Delay<br />
43 Process Alarm 2<br />
44 Process Alarm 2 Delay<br />
45 Process Alarm 3<br />
See chapter 7.2.21<br />
46 Process Alarm 3 Delay<br />
47 Process Alarm 4<br />
48 Process Alarm 4 Delay<br />
49 Alarm Relay 1 Function<br />
50 Alarm Relay 2 Function<br />
51 Alarm Relay 3 Function<br />
See chapter 9<br />
52 Common Relay Function<br />
53 Accept Relay Hold Enabled / Disabled Enabled<br />
54 Reference Air Pump Internal / External Internal<br />
55 Internal Pump Voltage 1.5 to 5.0v 5v<br />
56 Reference Air RH % 0 to 80% 55%<br />
57 Serial Interface RS-232 / RS-485 RS-485<br />
58 Serial Baud Rate 9600 – 57600 bps 19200bps<br />
59 Serial Parity Even / Odd / No Parity Even Parity<br />
60 Modbus Address 1 – 246 Modbus Disabled ( 0 )<br />
61 Clear Alarm Log Clear / Don’t Clear Don’t Clear<br />
April 2012<br />
42 <strong>1735</strong> Water Vapour Transmitter
7.2 Commissioning Mode Functions<br />
7.2.1 Internal Date / Time<br />
The date and time are used in the transmitter to run time based operations such as impedance readings and<br />
gas calibration checks. The correct date and time should be entered by pressing and holding the OPTION<br />
UP & DOWN keys. The date and time will change faster the longer the OPTION key is held.<br />
7.2.2 Service Date<br />
The service date can be used to keep a record of when a probe was changed. The RUNTIME timer which<br />
keeps a track of the hours and minutes that the transmitter and probe has been operating is reset when the<br />
service date is changed.<br />
The service date and the runtime timer can be displayed as lower line items in RUN mode.<br />
7.2.3 Heater Dryer Type<br />
The most important selection in the commissioning of the <strong>1735</strong> transmitter is the selection of the dryer heater<br />
type. The options are –<br />
Mode<br />
Selection mode in COMMISSIONING<br />
menu 4<br />
1231 oxygen<br />
probe<br />
installed<br />
Second<br />
probe<br />
installed<br />
1 Indirect Fired, 1 zone Yes No No<br />
2 Indirect Fired, 2 zones Yes 1231 No<br />
3 Direct fired, fixed combustion Yes No No<br />
4 Direct fired, 2 probes + Temp. sensor Yes RGS-01 Yes<br />
5 Directly fired, external dry oxygen sensor Yes No No<br />
RGS temp<br />
sensor<br />
For a detailed explanation of the operation of these heater types see chapter 2 of the Operators <strong>Manual</strong>.<br />
7.2.4 Probe 2 Input<br />
When the transmitter is operating as a single probe device the second probe input can be configured to be<br />
an additional thermocouple input for dryer temperature measurement, or as a second standard oxygen<br />
sensor.<br />
7.2.5 Probe 1 & 2 Type<br />
The probe type function allows a selection between a heated probe and an unheated probe types. Heater<br />
control and alarms will be disabled if unheated probe type is selected.<br />
7.2.6 Probe 1 & 2 Thermocouple Type<br />
The thermocouple type can be set to K to J. The thermocouple in the <strong>Novatech</strong> 1231/1234 heated probes<br />
are always K type. Other thermocouple options are made available for special installations.<br />
7.2.7 Fixed Combustion Oxygen<br />
In dryers where the reduction of oxygen due to the combustion is constant, it is not necessary to use an<br />
RGS-01, reference gas sensor. The value of oxygen to be entered is determined by removing any wet<br />
product from the dryer, and having the combustion at the normal level. Read the oxygen on the lower line of<br />
the display. Alternatively, a gravimetric test of the dryer of oven water vapour level will allow the operator to<br />
set the ‘Combustion O 2 ’ level so that the percent water vapour reading is correct. Ambient air must already<br />
have been supplied to the ‘Ref. Air’ input to the probe.<br />
7.2.8 Top Line Display<br />
The top line of the transmitter can be configured to display one of five calculated variables. As well as being<br />
displayed in large text on the top line of the transmitter display this variable is also used for triggering<br />
process alarms.<br />
April 2012<br />
<strong>1735</strong> Water Vapour Transmitter 43
7.2.9 Transmitter Output Channel 1 & 2<br />
The <strong>1735</strong> transmitter has two fully configurable 4-20mA analogue outputs. The channels can be configured<br />
independently to output one of several calculated values.<br />
If the transmitter is configured for Indirect fired, two zone operation, channel 2 will output zone 2 variables<br />
where applicable, otherwise it will output zone 1 variables.<br />
Output Zero Span Step Min Span Default<br />
Water Vapour 0 to 80% 20 to 100% 5% 20% 0 to 100%<br />
Dew Point -50 to 80°C -30 to 100°C 5°C 20°C -25 to 100°C<br />
Absolute Humidity<br />
0g/Kg to 9.8 200g/Kg to<br />
Kg/Kg<br />
10Kg/kg<br />
100g/kg 200g/kg 0 to 1Kg/Kg<br />
Mass Fraction 0 to 950g/kg 50 to 1,000g/kg 10g/kg 50k/kg<br />
0 to<br />
1,000g/Kg<br />
Dryer Temperature * 0 to 350°C 50 to 400°C 1°C 50°C 0 to 200°C<br />
Dryer Relative Humidity * 0 to 95% 5 to 100 % 1% 5% 0 to 20%<br />
Probe 1 Oxygen 0 to 24% 1 to 25% 1% 1% 0 to 20%<br />
Probe 2 Oxygen ** 0 to 24% 1 to 25% 1% 1% 0 to 20%<br />
No Output - - - - -<br />
* Only available if Dryer TC is installed ** Only available in dual probe mode<br />
The zero and span of the selected output are set in the following two menus (functions 13&14 and 16&17).<br />
7.2.10 Flue Pressure Units and Value<br />
The <strong>1735</strong> transmitter is capable of fixed or variable input pressure compensation in the calculation of oxygen<br />
from -1 Atm to +3 Atm. If the probe is running in a pressurised environment this value should be set to allow<br />
for accurate oxygen measurement. If the flue pressure is constant select 'Fixed" in this function and set the<br />
pressure units and value in the proceeding menus. If the pressure varies, select "Variable", and connect a<br />
pressure transducer to terminals 24 & 25. (See section 4.24). Set the range of the transducer using a zero<br />
and span value in the commissioning menus.<br />
7.2.11 Temperature Units<br />
The display on the transmitter can be changed to show temperature in either Celsius or Fahrenheit scales.<br />
7.2.12 Calibration Freezes Outputs<br />
During gas calibration checks it may be required that the analogue outputs remain frozen at their last<br />
reading. When cal freezes is enabled both analogue outputs remain frozen until the entire calibration cycle<br />
has completed.<br />
7.2.13 Solenoid 1 & 2 Operation<br />
The two solenoid outputs can be individually configured to perform gas calibration check or probe purge.<br />
Some of the menus between functions 24 to 30 (33 to 39) will not appear depending on what has been<br />
selected in function #22 and #23 (31 and 32).<br />
7.2.14 Solenoid 1 & 2 Automatic / <strong>Manual</strong><br />
When set to automatic the solenoid will perform a pre-programmed gas calibration or purge cycle. When set<br />
to manual the solenoid is controlled directly from the corresponding key on the front of the case. When set to<br />
automatic the calibration check or the purge cycle can be started by pressing the corresponding key on the<br />
front of the case. It can be stopped by pressing the same key again.<br />
7.2.15 Solenoid 1 & 2 Start Time<br />
For automatic gas calibration or purge events a start time is specified to allow precise control over the timing<br />
of such events. Starting at this specified time, the next gas calibration or purge event will occur in<br />
successive intervals from this time.<br />
April 2012<br />
44 <strong>1735</strong> Water Vapour Transmitter
7.2.16 Solenoid 1 & 2 Period<br />
This option specifies the period between automatic gas calibration or purge events. For periods less than 24<br />
hours the period is divisible into 24 hours forcing scheduling of events to occur at the same time each day<br />
between 1 minute and 7 days.<br />
The ‘No Timed Operation’ option accessible by scrolling the option below 1 minute allows for pre-configured<br />
solenoid cycles to be triggered manually via the keypad, but without the automatic scheduling.<br />
7.2.17 Solenoid 1 & 2 Duration<br />
Duration of time that an automatic gas calibration or purge event energises the solenoid<br />
7.2.18 Solenoid 1 & 2 Post Freeze<br />
Duration of time the transmitter waits before resuming live readings following a gas calibration or purge<br />
event. (See also chapter 7.2.13)<br />
7.2.19 Oxygen Content Calibration Gas 1 & 2<br />
When configured as a gas calibration check solenoid this value specifies the oxygen content of the<br />
calibration gas.<br />
7.2.20 Maximum Calibration Gas 1 & 2 Positive / Negative Error<br />
Specifies the maximum positive & negative error levels used during the gas calibration check.<br />
If the difference between the specified oxygen content and the measured process gas exceed these<br />
thresholds, a gas calibration error alarm will be triggered immediately.<br />
7.2.21 Process Alarms<br />
Although the <strong>1735</strong> transmitter is capable of calculating a number of different process variables such as water<br />
vapour, dew point etc, only one of these process variables is deemed to be the ‘prime’ process variable<br />
which will be used to set process alarms. The prime process variable is whichever options is selected on the<br />
top line display (section 7.2.8).<br />
There are four independent process alarms; each one individually set using the option up/down keys. From<br />
the default ‘disabled’ position, by pressing the option up button the alarm condition becomes process<br />
variable exceeding threshold, by pressing the down button the alarm condition becomes process variable is<br />
below threshold. The operator may configure any combination of alarm thresholds which can then be used<br />
to drive the three alarm relay outputs. By pressing up/down the alarm threshold is increased/decreased.<br />
The disabled option is positioned between the minimum excess threshold and the minimum deficit threshold.<br />
7.2.22 Alarm Relay 1, 2 and 3 Function<br />
There are 4 user configurable alarm relays. Any of the relays can be configured to be triggered on the<br />
following alarm conditions. In addition, any of the alarm conditions that are disabled from the common alarm<br />
relay can also be configured to trigger these 3 relays. Multiple selections can be made.<br />
Process Alarms<br />
Zone 1 Process Alarm 1<br />
Zone 1 Process Alarm 2<br />
Zone 1 Process Alarm 3<br />
Zone 1 Process Alarm 4<br />
Zone 2 Process Alarm 1**<br />
Zone 2 Process Alarm 2**<br />
Zone 2 Process Alarm 3**<br />
Zone 2 Process Alarm 4**<br />
Probe 1 Temperature Low<br />
Probe 2 Temperature Low*<br />
Calibration 1 In Progress<br />
Calibration 2 In Progress<br />
Purge 1 In Progress<br />
April 2012<br />
<strong>1735</strong> Water Vapour Transmitter 45
Purge 2 In Progress<br />
* Are only available if second probe is enabled ** Are only available in two zone mode.<br />
April 2012<br />
46 <strong>1735</strong> Water Vapour Transmitter
7.2.23 Common Alarm Relay Function<br />
The common alarm relay can be configured to be triggered on any of the following:<br />
Instrument Alarms<br />
Probe 1 Heater Fail<br />
Probe 2 Heater Fail*<br />
Probe 1 High Impedance<br />
Probe 2 High Impedance*<br />
Probe 1 Thermocouple Open Circuit<br />
Probe 2 Thermocouple Open Circuit*<br />
Dryer Thermocouple Open Circuit<br />
Reference Air Pump Fail<br />
Reference Air Pump Overload<br />
BBRAM Fail<br />
Alarm Log Fail<br />
ADC Calibration Fail<br />
Output 1 Fail<br />
Output 2 Fail<br />
Heater 1 SSR Fail<br />
Heater 2 SSR Fail*<br />
Heater SSR Leakage<br />
RGS Sensor Failed<br />
Probe 1 Filter Blocked<br />
Probe 2 Filter Blocked*<br />
Gas 1 Calibration Error<br />
Gas 2 Calibration Error*<br />
* Are only available in dual probe mode.<br />
All of the items in this list are selected as the default setting. Any of these items can be disabled from the<br />
common alarm by pressing the ENTER key, and they will then appear on the list in the other alarm relays.<br />
7.2.24 Operation of the alarm relays when an alarm is accepted<br />
An option is available to in the commissioning menu to change the operation of the alarm relay when an<br />
alarm has been accepted. The states for the alarm relay contacts are shown in the following table –<br />
Alarm state Accepted Relay hold setting- Accepted Relay hold setting-<br />
Enabled<br />
Disabled<br />
No alarm condition Closed circuit Closed circuit<br />
New alarm Open circuit Open circuit<br />
All alarms accepted Open circuit Closed circuit<br />
Alarms self cleared Closed circuit Closed circuit<br />
The default setting is ‘Enabled’ after a cold start. This state makes the 1732 react to alarms in the same way<br />
as the earlier model 1632 transmitter.<br />
April 2012<br />
<strong>1735</strong> Water Vapour Transmitter 47
7.2.25 Reference Air Pump Options<br />
Normally the reference air is supplied from the transmitter using the internal pump. The pump will be a<br />
model MP-24 or a model CM-15. The default options are to use an Internal MP-24 pump at 2.00v.<br />
Function<br />
Options<br />
52 Reference Air Pump External or Internal<br />
53 Internal Pump Voltage MP-24 select 2.00v, CM-15 select 3.5v<br />
54 Reference Air RH% If external is selected, set the RH level. (5% if instrument air is used)<br />
7.2.26 Communications Port Options<br />
The <strong>1735</strong> transmitter has a serial communications port available at terminals 18 to 22. The default protocol<br />
is for RS-232 running at 19,200 baud rate with 8 bits, Even parity and 1 stop bit.<br />
Function<br />
Options<br />
55 Serial Interface RS-232 or RS-485 (Use RS-485 for MODBUS)<br />
56 Serial Baud Rate 9600, 19200, 38400, 57600 (RS-232 up to 19200 only)<br />
57 Serial Parity Even, Odd or No Parity<br />
58 MODBUS Address<br />
Set the MODBUS address for this device between 1 and 246.<br />
0 is to disable the MODBUS<br />
7.2.27 Alarm Log Clearing<br />
Every alarm that is instigated internally in the transmitter or as a process level is recorded in the alarm log<br />
with the activation time, accepted time and the cleared time. The last 4000 events will be recorded and then<br />
the oldest alarms will be dropped off as new ones occur. If you would like to delete the log recording select<br />
CLEAR in SETUP step 64 by using the OPTION keys and press the ENTER key. The message “Alarm Log<br />
Cleared” will be displayed.<br />
7.2.28 External Oxygen Input Delay<br />
If the chosen operating mode is “Directly Heated, External Dry Oxygen”, then the dry oxygen signal will need<br />
to be fed into the BFT terminals 24 & 25 as a 4-20mA signal scaled 0-25% oxygen. If there is a gas<br />
transport lag between the oxygen reading from the in-situ oxygen probe and the sample of the oven / dryer<br />
gas taken through the sample gas dryer, then a compensating delay can be entered into function #6 in the<br />
commissioning menu. The time can be between “No Delay” and 600 seconds (10 minutes).<br />
April 2012<br />
48 <strong>1735</strong> Water Vapour Transmitter
8. CALIBRATION MODE<br />
This chapter describes the functions available when the CALIBRATION mode is selected on the transmitter.<br />
For specific information about calibrating the transmitter see chapter 10, Instrument Calibration.<br />
The CALIBRATION mode is accessed by pressing and holding the SETUP key for approximately 4 seconds<br />
until the words “Calibration Menu” appears at the bottom of the display. The transmitter will return to the<br />
RUN mode when the SETUP key is pressed again or 60 seconds after the last key press.<br />
Changing options in the CALIBRATION mode is the same as the SETUP mode. See chapter 6.2 Changing<br />
Options.<br />
8.1 Function Summary Table<br />
When the transmitter is in the CALIBRATION mode the SETUP light will be on and the words<br />
“Commissioning Menu” will be at the bottom of the display. The following table shows the CALIBRATION<br />
menu functions:<br />
Menu # Function name Range Default value<br />
01 Reference Voltage 1, 50mV 40.00 to 60.00mV 47.14mV<br />
02 Reference Voltage 2, 200mV 180.00 to 210.00mV 182.24mV<br />
03 Reference Voltage 3, 1200mV 1150.0 to 1250.0mV 1221.8mV<br />
04 Reference Voltage 4, 2500mV 2400.0 to 2550.0mV 2489.2mV<br />
05 Output Channel 1, Calibration<br />
Auto Calibrated<br />
<strong>Manual</strong> Calibrated<br />
Set 4mA<br />
Auto Calibrated<br />
Set 20mA<br />
06 Output Channel 1, 4mA Trim 3.00 to 5.00mA 4.00mA<br />
07 Output Channel 1, 20mA Trim 19.00 to 21.00mA 20.00mA<br />
08 Output Channel 2, Calibration<br />
Auto Calibrated<br />
<strong>Manual</strong> Calibrated<br />
Set 4mA<br />
Auto Calibrated<br />
Set 20mA<br />
09 Output Channel 2, 4mA Trim 3.00 to 5.00mA 4.00mA<br />
10 Output Channel 2, 20mA Trim 19.00 to 21.00mA 20.00mA<br />
11<br />
Ambient Temperature Sensor<br />
Offset<br />
-10.0°C to 10.0°C<br />
0.0°C<br />
12 Low Oxygen Cal 1 80.0% to 120.0% 100.0%<br />
13 Low Oxygen Cal 2 80.0% to 120.0% 100.0%<br />
14 Transmitter Output Select 4-20mA / 0-20mA 4-20mA<br />
15 Transmitter Output Limiting<br />
Hold 0mA / Hold 20mA<br />
Disabled<br />
Hold 20mA<br />
16<br />
Mains Voltage Detection Automatic /<br />
Override<br />
220/240 / 110/120<br />
Automatic<br />
17<br />
Mains Frequency Detection Automatic /<br />
Override<br />
50Hz / 60Hz<br />
Automatic<br />
Normal<br />
Normal<br />
18 Heater SSR Selection<br />
Heater1 Heater2<br />
Heaters CalPurge<br />
April 2012<br />
<strong>1735</strong> Water Vapour Transmitter 49
8.2 Calibration Mode Functions<br />
8.2.1 Reference Voltages<br />
The calibration of the analogue inputs is based on the voltage of a temperature compensated voltage<br />
reference integrated circuit. There are 4 voltages generated from the standard reference voltage. They will<br />
vary by about 1% from one transmitter to another but can be trimmed by setting the actual voltages into<br />
CALIBRATION menu functions #1 to 4.<br />
8.2.2 Output channel 1 and 2 Calibration<br />
The output 4-20mA calibration can be set either AUTOMATICALLY (default) or MANUALLY.<br />
If Auto Calibrated is selected the transmitter will go through an output calibration cycle when the power is<br />
turned on or when the AUTO CAL button is pressed in SETUP mode. This will divert the outputs back to the<br />
input and automatically set the 4mA and 20mA calibration.<br />
If <strong>Manual</strong>ly Calibrated is selected then the 4mA and 20mA calibration must be set in the next two functions.<br />
For the full explanation see chapter 10.1.2.<br />
8.2.3 Ambient Temperature Calibration<br />
The ambient temperature measurement is used as the cold junction temperature for the thermocouple<br />
measurements. Use an independent temperature sensor to measure the temperature inside the transmitter<br />
case near the screw terminal #1. Enter this temperature into the calibration function 11 by using the<br />
OPTION keys and then the ENTER key.<br />
8.2.4 Low Oxygen Calibration<br />
The low oxygen calibration factors can be used to fine tune the oxygen calculation at low oxygen readings. It<br />
will not affect the measurement at 20.9%. They are included to allow oxygen probes made by other<br />
manufacturers to be used on a <strong>Novatech</strong> transmitter. The default is 100% but can be set to between 80 and<br />
120%.<br />
8.2.5 Transmitter Output Scale<br />
The transmitter outputs can be configured to either 4-20mA or 0-20mA.<br />
8.2.6 Transmitter Output Limiting<br />
If the oxygen reading is invalid the output can be made to be set to either 0mA or 20mA. An invalid reading<br />
is when the probe temperature is below 650°C (1200°F) or the probe thermocouple has been detected as<br />
open circuit. The default is to set the output to 20mA but the function can also be disabled.<br />
8.2.7 Mains Voltage Detection<br />
The default setting for the <strong>1735</strong> transmitter is that it will automatically detect the mains voltage and frequency<br />
in order to correctly drive the probe heaters. If there is any uncertainty in this detection system the voltage<br />
can be forced to 220-240 or 100-127, and the frequency can be set to 50 or 60Hz.<br />
8.2.8 Heater SSR Fault Correction<br />
In the event of one of the heater solid state relays (SSR) failing in single probe mode, the heater drive output<br />
can be swapped to the HEATER 2 output. Select “Heater 1 Heater 2”.<br />
If you are running in dual probe mode but not using the calibration gas or purge solenoid outputs the<br />
solenoid outputs can be swapped to the 2 heater outputs. Select “Heaters CalPurge”.<br />
The default setting is “Normal”.<br />
8.2.9 SSR Fail Protection<br />
The transmitter continuously monitors the high voltage outputs on the solid state relays that power the probe<br />
and purge/cal solenoids. If it detects that any solenoids are not switching off correctly then it mechanically<br />
isolates all high voltage outputs in order to protect the instrument. This feature can be switched off by setting<br />
the SSR fail protection to disabled.<br />
April 2012<br />
50 <strong>1735</strong> Water Vapour Transmitter
9. ALARMS<br />
The <strong>1735</strong> has 4 alarm relays and a built in alarm annunciator.<br />
If an alarm occurs, the ALARM light will flash. To find out what the alarm is, press the ALARM up key.<br />
When the ALARM up key has been pressed, the transmitter goes into the alarm display mode. In this mode<br />
some of the keys take on a special function.<br />
Key text RUN mode ALARM mode<br />
SETUP / RUN * Return to RUN mode<br />
DISPLAY / FUNCTION up * Next alarm<br />
DISPLAY / FUNCTION down * Last alarm<br />
ALARM / OPTION up Enter ALARM display mode Alarm activated time<br />
ALARM / OPTION down Enter ALARM log mode Alarm acknowledged time<br />
ALARM ACCEPT / ENTER * Acknowledge alarm<br />
GAS 1 PURGE 1 / SENS IMP * *<br />
GAS 2 PURGE 2 / AUTO CAL * *<br />
* This key is not used in the ALARM mode<br />
The common alarm relay is used to monitor faults within the transmitter and the probe. The other three<br />
alarm relays relate to the process gas. All relays have user defined actions.<br />
If one of the alarm events is removed from the common alarm using COMMISSIONING menu function #49,<br />
then this alarm event can be programmed for one of the other 3 alarm relays.<br />
When the alarm mode has been entered, the SETUP light flashes once a second until the SETUP key is<br />
pressed to return the transmitter to RUN mode.<br />
All relays have fail-safe alarm contacts. That is –<br />
When the transmitter is turned off the contacts are open circuit<br />
When the transmitter is on but there are no alarms the contacts will be closed<br />
When there is a current unaccepted alarm event the contacts will be open circuit<br />
When there is a current accepted alarm event the state of the contacts will depend on the selection in<br />
the commissioning menu #50. See chapter 7.2.24, Operation of the alarm relay when an alarm is<br />
accepted.<br />
All alarms drive the alarm light on the front door.<br />
The light will be off if there are no alarms current<br />
The light will flash if there is a current alarm that has not been acknowledged<br />
The light will be on steady if there are current alarm(s) that have not been cleared<br />
The light will flash faster as more alarms occur<br />
9.1 Common alarms<br />
The events that drive the common alarm are –<br />
1. ‘Probe 1 Heater Fail’<br />
2. ‘Probe 2 Heater Fail’<br />
In the first 20 minutes of power being applied to the heater after being switched on, this alarm will not occur,<br />
but a ‘T’ display will be shown on the bottom of the display. If an ADC alarm occurs, the heaters will<br />
automatically be turned off. If the probe has not reached 650°C (1200°F) in 20 minutes the ‘Probe 1(2)<br />
Heater Fail’ alarm will be raised.<br />
3. ‘Probe 1 High Impedance’<br />
4. ‘Probe 2 High Impedance’<br />
April 2012<br />
<strong>1735</strong> Water Vapour Transmitter 51
Oxygen probe or electrode failure. The sensor has a high impedance measurement. Replace the probe.<br />
This alarm is inhibited when the probes are less than 650°C (1200°F).<br />
5. ‘Probe 1 TC Open Circuit’<br />
6. ‘Probe 2 TC Open Circuit’<br />
Probe thermocouple is open circuit. The heater in heated probes will switch off.<br />
7. ‘Dryer TC Open Circuit’<br />
The dryer thermocouple is open circuit. If the thermocouple is not needed, select “Disabled” in<br />
COMMISSIONING menu function #5, “Probe 2 Input” or place a short circuit between terminals 7 & 8.<br />
8. ‘Ref Air Pump Fail’<br />
The reference air pump in the transmitter has failed. Replace the reference air pump.<br />
9. ‘Reference Air Pump Overload’<br />
The reference air pump in the transmitter is drawing excessive power and has been disabled to prevent<br />
damage to the analyser.<br />
10. ‘BBRAM Fail’<br />
The BBRAM is an internal component that maintains the clock. If this device fails then the device loses its<br />
ability to accurately set and maintain time. This will affect time-related functions such as automatic purges<br />
which will no longer trigger at the set time.<br />
11. ‘Alarm Log Fail’<br />
The internal memory device responsible for storing both the device calibration and alarm log has failed. If<br />
this occurs then the device will run using default settings. If this alarm appears contact your supplier to<br />
arrange for the device to be repaired.<br />
12. ‘ADC Calibration Fail’<br />
The analog to digital converter has been found to fall outside the normal calibration specifications. In this<br />
case the probe heaters will automatically be turned off and the device will have very limited functionality.<br />
13. ‘Output 1 Failure’<br />
14. ‘Output 2 Failure’<br />
The digital to analogue and voltage isolator circuit has been found to fall outside the normal calibration<br />
specifications. This check is only performed when the ‘AUTO CAL’ button is pressed. See chapter 10.1.2.<br />
15. ‘Heater 1 SSR Failure’<br />
16. ‘Heater 2 SSR Failure’<br />
One of the heater power control devices (SSR) has been found to have failed. See chapter 8.2.8, Heater<br />
SSR fault correction.<br />
17. ‘Heater SSR Leakage’<br />
One of the heater power control devices (SSR) has been found to have failed but the transmitter cannot<br />
determine which one(s) has failed.<br />
18. ‘RGS Sensor Failed’<br />
The transmitter has determined that a RGS temperature sensor is required for operation, but has failed to<br />
detect a valid input.<br />
19. ‘Probe 1 Filter Blocked’<br />
20. ‘Probe 2 Filter Blocked’<br />
Blocked probe filter. This test is only performed when automatic purging of the probe is selected. See<br />
chapter 11. This alarm will not reset until the next purge cycle. The cycle can be initiated manually or<br />
automatically.<br />
21. ‘Gas 1 Calibration Error’<br />
22. ‘Gas 2 Calibration Error’<br />
At the end of an automatic gas calibration check cycle the oxygen reading was outside the values set in the<br />
COMMISSIONING menu #26 to 28 (#35 to 37). This alarm will not reset until the next calibration check<br />
cycle. The cycle can be initiated manually or automatically.<br />
April 2012<br />
52 <strong>1735</strong> Water Vapour Transmitter
9.2 Selectable Process Alarms<br />
The alarm relays 1, 2 and 3 are generally used to transmit a gas related alarm event. Any or all of the<br />
following functions can be selected for each relay.<br />
The trip levels and the delay times are set is in the COMMISSIONING menu.<br />
23. Zone 1 Process Alarm 1<br />
24. Zone 1 Process Alarm 2<br />
25. Zone 1 Process Alarm 3<br />
26. Zone 1 Process Alarm 4<br />
The measured process variable level on the indicated zone has been below the trip level shown in<br />
COMMISSIONING menu function #40 for longer than the delay time shown in function #41.<br />
27. Zone 2 Process Alarm 1<br />
28. Zone 2 Process Alarm 2<br />
29. Zone 2 Process Alarm 3<br />
30. Zone 2 Process Alarm 4<br />
The measured process variable level on the indicated zone has been above the trip level shown in<br />
COMMISSIONING menu function #44 for longer than the delay time shown in function #45.<br />
31. ‘Probe 1 Temperature Low’<br />
32. ‘Probe 2 Temperature Low’<br />
The probe temperature is under 650°C (1200°F). The oxygen reading is therefore invalid. If the probe<br />
heater has been on for more than 20 minutes and the temperature is less than 650°C (1200°F) a ‘Probe #<br />
Heater Fail’ alarm will occur.<br />
NOTE: The ‘Probe # Temperature Low’ relay function is used with unheated probes to indicate oxygen<br />
reading is invalid (the probe is below 650°C / 1200°F), in case the process temperature falls below this level.<br />
With heated probes this relay will be de-energised while the probe is heating up from ambient, making the<br />
contacts open circuit.<br />
33. ‘Cal 1 in Progress’<br />
34. ‘Cal 2 in Progress’<br />
A calibration check is occurring, either manual or automatic mode.<br />
35. ‘Purge 1 in Progress’<br />
36. ‘Purge 2 in Progress’<br />
A probe purge is occurring, either manual or automatic mode.<br />
April 2012<br />
<strong>1735</strong> Water Vapour Transmitter 53
9.3 Alarm Relay Options<br />
The three process alarm relays (relays 1 to 3) are user defined. The relay action will depend on the<br />
selections made in the COMMISSIONING menu functions #45 to #48.<br />
The relay contacts are all designed to be “Fail Safe”. That is, they are<br />
• open when the transmitter power is off<br />
• closed when there is NOT an alarm condition<br />
• open when an alarm occurs<br />
The contact will close circuit again (relay energised) when the alarm condition is acknowledged.<br />
Choose to have the relays react to any or all of the following alarms or warnings –<br />
Zone 1 Process Alarm 1<br />
Zone 1 Process Alarm 2<br />
Zone 1 Process Alarm 3<br />
Zone 1 Process Alarm 4<br />
Zone 2 Process Alarm 1<br />
Zone 2 Process Alarm 2<br />
Zone 2 Process Alarm 3<br />
Zone 2 Process Alarm 4<br />
Probe 1 Temperature Low<br />
Probe 2 Temperature Low<br />
Calibration check on probe 1 in Progress<br />
Calibration check on probe 2 in Progress<br />
Purge on probe 1 in Progress<br />
Purge on probe 2 in Progress<br />
Alarm<br />
Alarm<br />
Alarm<br />
Alarm<br />
Alarm<br />
Alarm<br />
Alarm<br />
Alarm<br />
Warning<br />
Warning<br />
Warning<br />
Warning<br />
Warning<br />
Warning<br />
In addition to the above process alarms that can activate the process alarm relays, any of the common alarm<br />
relay events that have been taken off the common alarm list in COMMISSIONING menu function #49 will<br />
appear on the process alarm relay lists in function #46 to #48.<br />
April 2012<br />
54 <strong>1735</strong> Water Vapour Transmitter
10. INSTRUMENT CALIBRATION<br />
10.1 Calibration Summary<br />
The 1730 oxygen transmitter has a self calibration and diagnostic system built into the hardware and<br />
software. Once the reference voltages have been set into memory the self calibration system maintains the<br />
calibration of the transmitter. An automatic update of the zero and span is done every minute.<br />
The 4-20mA outputs can be automatically calibrated with the press of the AUTO CAL key or manually finetuned.<br />
One entry for each probe offset is required to optimise the calibration of the oxygen measurement although<br />
an automatic system calibration check can be programmed into the transmitter using certified gasses.<br />
10.1.1 Calibration of the Inputs<br />
The calibration of the analogue inputs is based on the voltage of a temperature compensated voltage<br />
reference integrated circuit. There are 4 voltages generated from the standard reference voltage. They will<br />
vary by about 1% from one transmitter to another but can be trimmed by setting the actual voltages into<br />
CALIBRATION menu functions #1 to 4.<br />
The calibration should be done 30 minutes or more after the instrument has been on, approximately once<br />
every year. The calibration constants are retained in battery backed memory unless a ‘COLD START’ is<br />
performed. See chapter 10.2, Cold Start.<br />
Connect a 3 1/2 digit multimeter negative lead to the test point marked ‘COM’ in the centre of the 1730-1<br />
PCB (labelled ‘V-REFS’). Measure the four voltages on the test point marked 1 to 4 with the positive lead of<br />
the multimeter. Enter the measured values in the CALIBRATION menu functions #1 to 4. Whenever new<br />
values are entered, the D/A Section should be re-calibrated. See chapter 10.1.2.<br />
10.1.2 Calibration of the Outputs<br />
The easiest way to calibrate the outputs is to select ‘Auto Calibrated’ in CALIBRATION menu functions #5<br />
and 8. If this is selected the outputs will be directed away from the output terminals and back into an<br />
analogue input of the transmitter. The outputs are then tested and a zero and span calibration factor is<br />
recorded.<br />
If a more accurate calibration is required select ‘<strong>Manual</strong>ly Calibrated’ in CALIBRATION menu functions #5<br />
and 8. This will inhibit the automatic calibration system overwriting the calibration factors. However, the zero<br />
and span factors will need to be manually set. To set the calibration factors use the following steps for each<br />
output:<br />
1. Select CALIBRATION menu function #5 (8) and set the option to ‘Calibrate 4mA’.<br />
2. Use the FUNCTION up key to go to function #6 (9).<br />
3. Set this to 4.00mA and press the ENTER key.<br />
4. Measure the actual output current with a digital multimeter.<br />
5. Use the OPTION keys to set the option to the value read on the digital multimeter and press ENTER.<br />
6. The output should go to 4.00mA. The value in function #6 (9) can be fine-tuned if necessary.<br />
7. Go back to function #5 (8) and select ‘Calibrate 20mA’.<br />
8. Go up to function #7 (10) and set the option value to 20.00mA.<br />
9. Measure the actual output current with a digital multimeter.<br />
10. Use the OPTION keys to set the option to the value read on the digital multimeter and press ENTER.<br />
11. The output should go 20.00mA. The value in function #7 (10) can be fine-tuned if necessary.<br />
12. Go back to function #5 (8) and select ‘Calibrate 4mA’ again and check that the output is still set to<br />
4.00mA. If it is not exactly 4.00mA the value in function #6 (9) can be trimmed again.<br />
13. Go back to function #5 (8) and select ‘<strong>Manual</strong>ly Calibrated’.<br />
10.1.3 Probe calibration<br />
There is only one calibration factor for the calibration of the oxygen probe. This is the sensor offset, and it is<br />
written on a tag attached to every probe.<br />
Use the FUNCTION keys to go to SETUP menu #1 (2) and then use the OPTION keys to set the value to the<br />
value written on the tag. If in doubt the best option is to set the offset to 0.0mV because this will only<br />
produce an error of around 0.1% oxygen in a combustion application for a 1mV error in the offset value.<br />
For information on checking the probe and transmitter system with a certified gas see chapter 11.<br />
April 2012<br />
<strong>1735</strong> Water Vapour Transmitter 55
10.2 Cold Start<br />
The intention of the cold start function of the transmitter is to return all of the configuration set up back to the<br />
default values. There are 3 parts to the cold start:<br />
1. If a software upgrade is installed and the changes require a change to the menu functions then the<br />
transmitter will automatically do a cold start. The transmitter will also do a cold start when the power<br />
is turned on and the configuration / calibration factors are found to be corrupted. It will only reset<br />
either the configuration values or the calibration values if either of them is found to be corrupted.<br />
2. A cold start can be forced if the operator wants to reset the transmitter back to the default set up.<br />
See chapter 10.2.1; Forcing a Cold Start.<br />
3. Resetting the calibration factors back to the default values. See chapter 10.2.2; Resetting the<br />
Calibration Factors.<br />
10.2.1 Forcing a Cold Start<br />
The cold start can be initiated by following these steps:<br />
1. Turn the transmitter power off.<br />
2. Use a fine point or screw driver to turn the COLD START switch on. The switch is at the bottom of<br />
the 1730-1 PCB, accessible through the window in the shield.<br />
3. Turn the transmitter back on.<br />
4. You will be prompted to select ‘Reset’ or ‘Cancel’ to the prompt ‘Reset Calibration Data?’. Press the<br />
DISPLAY up key to reset the calibration factors and the configuration data or the ALARM up key to<br />
only reset the configuration of the transmitter.<br />
5. Turn off the cold start switch when prompted by ‘Turn off C/Start Switch’.<br />
If the calibration factors have been reset, follow the instructions in chapter 10.1 to recalibrate the transmitter.<br />
If only the configuration has been reset it is also important to check items that will affect the transmitter<br />
outputs, number of probes, the serial communications, the solenoid configuration and other items.<br />
10.2.2 Resetting the Calibration Factors<br />
If it is required to reset the calibration factors, follow the instructions in the previous section and select ‘Reset’<br />
when prompted to ‘Reset Calibration Data?’.<br />
April 2012<br />
56 <strong>1735</strong> Water Vapour Transmitter
11. GAS CALIBRATION CHECK AND PURGE<br />
The <strong>Novatech</strong> oxygen sensor that is used in the <strong>Novatech</strong> oxygen probe is extremely predictable, stable and<br />
reliable. For this reason, the calibration of a <strong>Novatech</strong> oxygen system does not require the use of calibration<br />
gases. However, all <strong>Novatech</strong> oxygen probes have a built in gas connection that does allow the accuracy of<br />
the probe to be checked in-situ. This chapter describes the operation of this gas checking system.<br />
The <strong>1735</strong> has a timer and solenoid driving system that can be configured to admit a certified calibration gas<br />
into the probe or an air supply to purge the probe filters through the gas connection. Both the calibration gas<br />
and the filter purge gas must be piped to the port on the probe labelled “CAL”.<br />
There are two solenoids drivers in the <strong>1735</strong> transmitter. They can be used for any combinations of gas<br />
checking and probe filter purging. The only limitation is that if the transmitter is in dual probe mode, then<br />
solenoid #1 must be wired and plumbed to the probe #1 and solenoid #2 must be wired and plumbed to<br />
probe #2.<br />
The transmitter can also be configured to be in a MANUAL or AUTOMATIC purge and gas check mode.<br />
Function # Function Description Options<br />
22 (31) Solenoid 1 (2) Operation<br />
Disabled / Calibration Gas<br />
/ Purge<br />
√ √ √<br />
23 (32) Solenoid 1 (2) Auto / <strong>Manual</strong> Automatic / <strong>Manual</strong> √ √ √<br />
24 (33) Solenoid 1 (2) Start Time 00:00 to 23:45 √ √<br />
25 (34) Solenoid 1 (2) Period 1 hour – 7 days √ √<br />
26 (35) Solenoid 1 (2) Duration 1 – 90 seconds √ √<br />
27 (36) Solenoid 1 (2) Post Freeze 5 – 300 seconds √ √<br />
28 (37) Oxygen Content Cal Gas 1 (2) 0.1 – 20.9% √<br />
29 (38) Max Cal Gas 1 (2) Positive Error 0.1% to 3.0% √<br />
30 (39) Max Cal Gas 1 (2) Negative Error 0.1% to 3.0% √<br />
Functions available if either Calibration Gas or Purge<br />
and <strong>Manual</strong> are selected<br />
11.1 Purge<br />
Functions available if Purge<br />
and Automatic are selected<br />
For processes that have particulate present in the gas stream, probe filters are necessary and should be<br />
back-purged with sufficient frequency to avoid blocked filters.<br />
Select ‘Purge’ in function #20 (29) and ‘Automatic’ in function #30 and then set the times in function #22 (31)<br />
to #25 (34) The outputs can be frozen during purging if selected in COMMISSIONING menu function #19.<br />
A flow switch can be wired to terminals 16 and 17. If the flow is not sufficient at the end of the purge cycle to<br />
close the contacts of the flow switch a ‘Probe 1 (2) Filter Blocked’ alarm is generated. If a flow switch is not<br />
being used a short circuit should be placed across terminals 16 and 17 to suppress the ‘Probe 1 (2) Filter<br />
Blocked’ alarm.<br />
11.2 Calibration Gas<br />
Functions available if Calibration Gas<br />
and Automatic are selected<br />
If it is required to automatically check the oxygen probe and transmitter on line, select ‘Calibration Gas’ in<br />
function #20 (29) and ‘Automatic’ in function #30 and then set the times in function #22 (31) to #25 (34) and<br />
the gas levels in function #26 (35) to 28 (37).<br />
If the transmitter measurement does not fall within the limits set in function #26 (35) to 28 (37) a ‘Gas1 (2)<br />
Calibration Error’ alarm will be generated.<br />
If the transmitter has ‘Automatic’ selected in function #21 (30) and one of the GAS/PURGE keys is pressed<br />
in RUN mode, the automatic cycle will be started and the alarms will be checked. The cycle can be stopped<br />
at any time by pressing the same key during the cycle.<br />
April 2012<br />
<strong>1735</strong> Water Vapour Transmitter 57
This page has been intentionally left blank.<br />
April 2012<br />
58 <strong>1735</strong> Water Vapour Transmitter
12. SOFTWARE UPGRADES<br />
The software for the 1730 series transmitters is contained in memory inside the microprocessor integrated<br />
circuit (IC). The transmitter therefore does not require an external memory IC for the software. Provision<br />
has been made to enable the software to be upgraded in the field without the use of a computer.<br />
If an upgrade is to be made to the software it will be supplied in a 32 pin EEROM IC type 29F010B. To do<br />
the upgrade, use the following steps:<br />
1. Turn the power off to the transmitter at the power switch<br />
2. Remove the hose from the reference air pump (if fitted)<br />
3. Unplug the reference air DC power lead (if fitted)<br />
4. Undo the two M4 screws at the top and bottom of the main shield<br />
5. Remove the earth screw from the main shield on the right hand side of the cabinet<br />
6. Lift out the main shield around the cable glands<br />
7. Fold out the two wings of the blue socket labelled “FIRMWARE UPGRADE SOCKET”. Plug the<br />
29F010B into the socket. Carefully note the direction of the IC. Pin 1 is identified on the PCB<br />
and pin 1 on the IC has a small round indentation next to the pin.<br />
8. Hold down the DISPLAY down and the ALARM LOG keys and then turn on the power<br />
9. Release the keys when the message “Verifying the EEROM” will be shown. The transmitter is<br />
confirming that the new firmware is valid.<br />
10. After the EEROM has been read and confirmed this message will be shown:<br />
Upgrade Firmware?<br />
Model <strong>1735</strong><br />
New Version: 1.##<br />
Upgrade<br />
Cancel<br />
11. Press the DISPLAY up key to ‘Upgrade’ the firmware.<br />
12. Press the ALARM up key to cancel the upgrade and continue the start up of the current firmware.<br />
Upgrading Firmware.<br />
Transmitter will reset itself<br />
in approx. 15 seconds.<br />
Do not turn off the power<br />
NOTE: While the firmware is being upgraded it is essential that the power is not turned off otherwise<br />
the programme will be corrupted and will not be recoverable.<br />
13. When the transmitter has upgraded the firmware it will start up the normal initialisation. The version<br />
of the firmware is shown on the start up screen.<br />
14. Turn the transmitter power off.<br />
15. Unplug the EEROM by pressing out the wings of the blue upgrade socket. Keep the EEROM in a<br />
safe place. It can be used to upgrade any number of transmitters as required.<br />
16. Replace the main shield and secure it with the three screws.<br />
17. Reconnect the reference air pump hose and plug (if fitted).<br />
18. Turn the power back on.<br />
NOTE: The transmitter may do an automatic COLD START after the upgrade. The words ‘Cold Start’<br />
will be shown on the display in step 14 if the cold start has been performed. The calibration will NOT<br />
be changed but the configuration may have been changed.<br />
April 2012<br />
<strong>1735</strong> Water Vapour Transmitter 59
This page has been intentionally left blank.<br />
April 2012<br />
60 <strong>1735</strong> Water Vapour Transmitter
13. TROUBLESHOOTING<br />
The <strong>Novatech</strong> oxygen transmitter has proved an extremely reliable instrument. The trouble shooting guide<br />
here is based on an analysis of the potential problem that may occur after many years of operation in the<br />
field. A current list of problems and solutions can be found on the <strong>Novatech</strong> web site at<br />
www.novatech.com.au when any are identified.<br />
13.1 First Approach<br />
The probe will not heat up.<br />
Turn the power off, remove and check 2 x 20mm glass fuses. If either of them is blown, check the probe<br />
heater resistance between the two white wires that come from the probe. It should be 110 +/- 15 ohms, and<br />
both wires should be open circuit to earth. If not, replace the probe.<br />
Is the ‘B’ shown on the bottom left hand corner of the display? If not, check that the burner is enabled with<br />
either a link between terminals 10&11, BURNER INPUT, or is enabled with a connection to a voltage-free<br />
contact from the main fuel valve to these terminals.<br />
The display is blank and there is no backlight on.<br />
Measure the power supply voltages at the test points labelled COMM and +5v at the right hand side of the<br />
main PCB 1730-1. It should be 5 +/- 0.15v.<br />
Turn off the power and remove the main shield. Check that the plug-in fuse FS1 has not blown. It should<br />
only be replaced with a 1A, 250v fuse if it has blown.<br />
Is the mains power being supplied to terminals 36&37 and is it between 85 and 265VAC? If may be<br />
necessary to replace the switch mode power supply, PS5, APC-5S.<br />
An ‘ADC Calibration Fail’ alarm has occurred.<br />
Turn the transmitter off and remove the main shield. Turn the transmitter back on and measure the voltages<br />
on the ‘ACom’ test points. With the negative lead on the centre terminal the other 2 terminals should<br />
measure 12 +/-0.3v. If not, replace the small DC-DC converter PS4.<br />
An ‘Output 1 (2) Failure’ alarm has occurred.<br />
Turn the transmitter off and remove the main shield. Turn the transmitter back on and measure the voltages<br />
on the ‘D1com’ test points. With the negative lead on the centre terminal the other 2 terminals should<br />
measure 12 +/-0.3v. If not, replace the small DC-DC converter PS4.<br />
A ‘Heater 1 (2) Failure’ alarm has occurred.<br />
The software has found that the SSR4 has failed. If only one probe is being used and you need to gets the<br />
transmitter back working quickly, use the CALIBRATION menu function 18, Heater SSR Select, to change<br />
the heater output terminals. See chapter 8.2.8, Heater SSR fault correction.<br />
A ‘BBRAM Fail’ alarm has occurred<br />
Replace the BBRAM, MEM1 on the 1730-1 main PCB.<br />
13.2 Detailed Fault Analysis<br />
The <strong>1735</strong> transmitter has a diagnostics mode built into the software. This mode allows detailed analysis of<br />
the hardware of the transmitter, but does require a level of competence in electronics.<br />
The diagnostics mode is selectable by turning the ‘Diagnostics’ DIP switch to ON and then turn on the power.<br />
There is a separate Diagnostics Mode <strong>Manual</strong> available that describes its use. Ask <strong>Novatech</strong> for more<br />
details.<br />
April 2012<br />
<strong>1735</strong> Water Vapour Transmitter 61
This page has been intentionally left blank.<br />
April 2012<br />
62 <strong>1735</strong> Water Vapour Transmitter
14. INDEX<br />
1230 Oxygen Probes ....................................................................................................................................... 12<br />
Alarm connections ........................................................................................................................................... 28<br />
Alarm log clearing ............................................................................................................................................ 47<br />
Alarm relay options .......................................................................................................................................... 54<br />
Alarms .............................................................................................................................................................. 51<br />
Alarms, common .............................................................................................................................................. 51<br />
Alarms, process ............................................................................................................................................... 53<br />
Alarms, process enabling ................................................................................................................................ 39<br />
Auxiliary Thermocouple ............................................................................................................................. 22, 27<br />
Calibration ........................................................................................................................................................ 55<br />
Calibration gas check ...................................................................................................................................... 31<br />
Calibration Mode .............................................................................................................................................. 49<br />
Calibration of the sensor .................................................................................................................................. 31<br />
Cold start ......................................................................................................................................................... 56<br />
Commissioning Mode ...................................................................................................................................... 41<br />
Common Alarms .............................................................................................................................................. 28<br />
Communications port options .......................................................................................................................... 47<br />
Connecting the power ...................................................................................................................................... 31<br />
Connections, electrical ..................................................................................................................................... 23<br />
Damping factor ................................................................................................................................................ 39<br />
Date / Time ...................................................................................................................................................... 43<br />
Display units, oxygen ....................................................................................................................................... 34<br />
Dry oxygen input .............................................................................................................................................. 28<br />
Dust in the flue gas .......................................................................................................................................... 32<br />
Filter purging .................................................................................................................................................... 31<br />
Gas calibration check ...................................................................................................................................... 57<br />
Graphical display ............................................................................................................................................. 33<br />
Heater interlock relays ..................................................................................................................................... 25<br />
Installing a 1231 Oxygen Probe ...................................................................................................................... 19<br />
Installing a 1234 Oxygen sensor ..................................................................................................................... 21<br />
Keypad ............................................................................................................................................................. 35<br />
Lower line ........................................................................................................................................................ 38<br />
Mains voltage detection ................................................................................................................................... 50<br />
MODBUS connection ....................................................................................................................................... 29<br />
Mounting the Transmitter ................................................................................................................................. 19<br />
Outputs, 4-20mA .............................................................................................................................................. 44<br />
Pressure compensation ................................................................................................................................... 44<br />
Probe Cable ............................................................................................................................................... 25, 26<br />
Probe offset entry ............................................................................................................................................ 38<br />
Purge ............................................................................................................................................................... 57<br />
Purge and calibration connections .................................................................................................................. 29<br />
Reference air connection ................................................................................................................................. 29<br />
Reference air pump options ............................................................................................................................ 47<br />
Reference Voltages ......................................................................................................................................... 50<br />
Run mode ........................................................................................................................................................ 31<br />
Serial Port ........................................................................................................................................................ 30<br />
Setup Mode ..................................................................................................................................................... 37<br />
Setup mode functions ...................................................................................................................................... 38<br />
Software upgrades ........................................................................................................................................... 59<br />
SPECIFICATIONS ........................................................................................................................................... 14<br />
Specifications - Hardware ................................................................................................................................ 13<br />
Specifications - Software ................................................................................................................................. 16<br />
SSR fault correction ......................................................................................................................................... 50<br />
Temperature units ............................................................................................................................................ 44<br />
Troubleshooting ............................................................................................................................................... 61<br />
Warnings ............................................................................................................................................................ 9<br />
April 2012<br />
<strong>1735</strong> Water Vapour Transmitter 63
APPENDIX 1, PROBE EMF TABLES<br />
OXYGEN Probe EMF OXYGEN Probe EMF<br />
% @ 720°C (1320°F) % @ 720°C (1320°F)<br />
20.95 0 10.0 15.930<br />
20.5 0.517 9.5 17.033<br />
20.0 1.046 9.0 18.196<br />
19.5 1.589 8.5 19.426<br />
19.0 2.147 8.0 20.730<br />
18.5 2.719 7.5 22.120<br />
18.0 3.306 7.0 23.607<br />
17.5 3.911 6.5 25.204<br />
17.0 4.533 6.0 26.930<br />
16.5 5.173 5.5 28.808<br />
16.0 5.834 5.0 30.867<br />
15.5 6.515 4.5 33.145<br />
15.0 7.219 4.0 35.695<br />
14.5 7.947 3.5 38.590<br />
14.0 8.700 3.0 41.940<br />
13.5 9.481 2.5 45.913<br />
13.0 10.292 2.0 50.797<br />
12.5 11.134 1.5 57.135<br />
12.0 12.011 0.9 66.182<br />
11.5 12.925 0.4 82.168<br />
11.0 13.881 0.2 99.518<br />
10.5 14.881 0.1 114.347<br />
'K' Type TC 29.965 mV @ 720°C (1320°F)<br />
These tables are based on the Nernst equation:<br />
⎛ O2<br />
⎞<br />
T loge⎜<br />
⎟<br />
⎝ 20.95<br />
EMF =<br />
⎠<br />
− 46.421<br />
Where T is temperature° K<br />
April 2012<br />
64 <strong>1735</strong> Water Vapour Transmitter
ZIRCONIA OXYGEN PROBE OUTPUT (mV)<br />
TEMPERATURE ºC (°F)<br />
OXYGEN 600 700 800 900 1000 1100 1200 1300 1400<br />
% (1110) (1290) (1470) (1650) (1830) (2010) (2190) (2370) (2550)<br />
20 0.873 0.973 1.073 1.173 1.273 1.373 1.473 1.573 1.673<br />
19.5 1.349 1.504 1.658 1.813 1.967 2.122 2.276 2.431 2.585<br />
19 1.838 2.048 2.259 2.469 2.680 2.890 3.100 3.311 3.521<br />
18.5 2.339 2.607 2.875 3.143 3.411 3.679 3.947 4.215 4.483<br />
18 2.855 3.182 3.509 3.835 4.162 4.489 4.816 5.143 5.470<br />
17.5 3.385 3.772 4.160 4.547 4.935 5.323 5.710 6.098 6.485<br />
17 3.930 4.380 4.830 5.280 5.730 6.180 6.630 7.080 7.530<br />
16.5 4.491 5.006 5.520 6.034 6.549 7.063 7.578 8.092 8.606<br />
16 5.070 5.651 6.231 6.812 7.393 7.973 8.554 9.135 9.715<br />
15.5 5.667 6.316 6.965 7.614 8.263 8.913 9.562 10.211 10.860<br />
15 6.284 7.004 7.723 8.443 9.163 9.882 10.602 11.322 12.042<br />
14.5 6.922 7.714 8.507 9.300 10.093 10.885 11.678 12.471 13.263<br />
14 7.582 8.450 9.318 10.187 11.055 11.923 12.792 13.660 14.528<br />
13.5 8.266 9.212 10.159 11.106 12.052 12.999 13.946 14.892 15.839<br />
13 8.976 10.004 11.032 12.060 13.087 14.115 15.143 16.171 17.199<br />
12.5 9.713 10.826 11.938 13.051 14.163 15.276 16.388 17.500 18.613<br />
12 10.481 11.682 12.882 14.082 15.283 16.483 17.684 18.884 20.084<br />
11.5 11.282 12.574 13.866 15.158 16.450 17.742 19.034 20.326 21.618<br />
11 12.118 13.506 14.893 16.281 17.669 19.057 20.445 21.833 23.220<br />
10.5 12.993 14.481 15.969 17.457 18.945 20.433 21.921 23.409 24.897<br />
10 13.911 15.504 17.097 18.690 20.283 21.876 23.469 25.063 26.656<br />
9.5 14.875 16.579 18.283 19.986 21.690 23.394 25.097 26.801 28.504<br />
9 15.892 17.712 19.533 21.353 23.173 24.993 26.813 28.633 30.453<br />
8.5 16.967 18.911 20.854 22.797 24.740 26.684 28.627 30.570 32.513<br />
8 18.108 20.182 22.255 24.329 26.403 28.477 30.551 32.625 34.698<br />
7.5 19.322 21.535 23.747 25.960 28.173 30.386 32.599 34.812 37.025<br />
7 20.619 22.981 25.342 27.704 30.065 32.427 34.788 37.150 39.511<br />
6.5 22.013 24.534 27.056 29.577 32.098 34.619 37.140 39.661 42.182<br />
6 23.519 26.212 28.906 31.600 34.293 36.987 39.680 42.374 45.067<br />
5.5 25.155 28.036 30.917 33.798 36.679 39.560 42.442 45.323 48.204<br />
5 26.948 30.035 33.121 36.207 39.293 42.380 45.466 48.552 51.639<br />
4.5 28.930 32.243 35.557 38.870 42.183 45.496 48.810 52.123 55.436<br />
4 31.145 34.712 38.279 41.846 45.413 48.980 52.547 56.115 59.682<br />
3.5 33.657 37.512 41.366 45.221 49.076 52.930 56.785 60.640 64.494<br />
3 36.557 40.743 44.930 49.117 53.303 57.490 61.677 65.864 70.050<br />
2.5 39.986 44.565 49.145 53.724 58.304 62.883 67.463 72.042 76.622<br />
2 44.183 49.243 54.303 59.364 64.424 69.484 74.544 79.604 84.665<br />
1.5 49.594 55.274 60.954 66.634 72.314 77.994 83.674 89.354 95.034<br />
1 57.221 63.774 70.327 76.881 83.434 89.988 96.541 103.094 109.648<br />
0.5 70.258 78.305 86.351 94.398 102.445 110.491 118.538 126.584 134.631<br />
0.2 87.493 97.514 107.534 117.554 127.575 137.595 147.616 157.636 167.657<br />
Thermocouple mV<br />
'K' Type 24.905 29.129 33.275 37.326 41.276 45.119 48.838 52.410 -<br />
'J' Type 33.102 39.132 45.494 51.877 57.953 63.792 69.553 - -<br />
'R' Type 5.583 6.743 7.950 9.205 10.506 11.850 13.228 14.629 16.040<br />
'S' Type 5.239 6.275 7.345 8.449 9.587 10.757 11.951 13.159 14.373<br />
'N' Type 20.613 24.527 28.455 32.371 36.256 40.087 43.846 47.513 -<br />
These tables are based on the Nernst equation:<br />
⎛ O2<br />
⎞<br />
T loge⎜<br />
⎟<br />
⎝ 20.95<br />
EMF =<br />
⎠<br />
− 46.421<br />
Where T is temperature° K<br />
Thermocouple information from NIST ITS-90 data tables<br />
April 2012<br />
<strong>1735</strong> Water Vapour Transmitter 65
APPENDIX 2, % OXYGEN SCALE TO LOGARITHMIC<br />
OXYGEN FULL SCALE<br />
% %<br />
0.1 0<br />
0.15 7.65<br />
0.2 13.1<br />
0.3 20.7<br />
0.4 26.2<br />
0.6 33.8<br />
0.8 39.2<br />
1 43.5<br />
1.5 51.1<br />
2 56.5<br />
3 64.2<br />
4 69.6<br />
6 77.3<br />
8 82.7<br />
10 86.9<br />
12 90.4<br />
14 93.3<br />
16 95.8<br />
18 98<br />
20 100<br />
April 2012<br />
66 <strong>1735</strong> Water Vapour Transmitter
APPENDIX 3, MODBUS<br />
The <strong>Novatech</strong> <strong>1735</strong> transmitter has the ability to work as a Modbus slave node on serial RS-232 or 3-wire<br />
RS-485 via RTU mode transmissions. By accessing information stored in the input and holding registers it is<br />
possible to access runtime variables, alarm conditions and modify the device configuration.<br />
The implementation of the Modbus protocol is limited to the specific command set relevant to reading and<br />
writing register variables. Attempting to send unrecognised commands will result in appropriate error<br />
responses<br />
MODBUS Functions Supported:-<br />
0x03: Read Holding Registers<br />
0x04: Read Input Registers<br />
0x06: Write Single Holding Register<br />
0x08: (return query data – for loopback testing)<br />
0x10: Write Multiple Holding Registers<br />
0x16: Mask Write Holding Register<br />
0x17: Read/Write Multiple Holding Registers<br />
0x2B: Encapsulated Interface (read device information)<br />
0x41: Special Instruction Function<br />
Serial Configuration<br />
The serial configuration for the slave device is accessed in the Commissioning menu of the transmitter.<br />
Default settings are highlighted in bold.<br />
Baud Rate 9600, 19200, 38400, 57600<br />
Parity Even, Odd, None<br />
Stop Bits 1<br />
Interface RS-485, RS-232<br />
All holding register addresses contain a single 16 bit value, however some variables span multiple holding<br />
registers to yield a single 32 bit variable.<br />
When reading register values be aware that the byte order of data within registers may differ from that of the<br />
target system.<br />
Modbus Protocol<br />
The Modbus over serial line protocol defines a messaging system for master/slave communications. Only<br />
one master device may be connected to any network with one or several slave nodes.<br />
In unicast mode, the master initiates communication with a specific slave node by sending a request<br />
message. The slave processes the request and returns a reply message containing the requested<br />
information or a confirmation that the request was fulfilled.<br />
Modbus requests are transmitted as a formed request frame with a CRC for data integrity checking. The<br />
frame for each request and reply type will vary somewhat, but will always have the basic structure described<br />
below:<br />
1 byte 1 byte up to 255 bytes 2 bytes<br />
slave<br />
address<br />
function<br />
code<br />
data<br />
checksum<br />
Detailed information regarding the implementation of the Modbus protocol can be obtained from the website<br />
of the Modbus Organisation.<br />
http://www.modbus-ida.org<br />
Internal Representation of Dates & Alarm Status<br />
The transmitter stores all dates as an unsigned 32bit count of seconds elapsed since 1-Jan 2004.<br />
Alarm status is stored as an integer value:<br />
0 clear 2 active<br />
1 self cleared 3 acknowledged<br />
April 2012<br />
<strong>1735</strong> Water Vapour Transmitter 67
<strong>1735</strong> Transmitter Modbus Input Register Table for firmware v1.04<br />
Current Alarm Status Probe 2 Runtime Data Probe 1 Runtime Data<br />
Last Alarm User Acknowledged Time<br />
Reg Description Bits Type Reg Description Bits Type<br />
0 Water Vapour % 32 floating point 38 Dryer TC Temperature 32 floating point<br />
2 Dew Point 32 floating point 40 Dryer TC Open Ct Flag 16 boolean<br />
4 Abs Humidity 32 floating point 41 Dryer Relative Humidity 32 floating point<br />
6 Mass Fraction 32 floating point 43 RGS Temperature 16 signed integer<br />
8 Oxygen % 32 floating point 44 External Dry Oxygen 32 floating point<br />
10 EMF mV 32 floating point 46 4-20mA Outputs Frozen 16 boolean<br />
12 Temperature degC 32 floating point 47 Ambient Temperature 16 signed integer<br />
14 Temperature Open Ct Flag 16 boolean 48 Maximum Ambient Temperature 16 signed integer<br />
15 Temperature Low Flag 16 boolean 49 Reference Air Oxygen 32 floating point<br />
16 Impedance kOhms 32 floating point 51 Burner Runtime Minutes 32 unsigned integer<br />
18 Power Output 16 unsigned integer 53 Burner On Time Minutes 32 unsigned integer<br />
19 Water Vapour % 32 floating point 55 Current Date & Time 32 unsigned integer<br />
21 Dew Point 32 floating point 57 Next Purge/Cal 1 Time 32 unsigned integer<br />
23 Abs Humidity 32 floating point 59 Next Purge/Cal 2 Time 32 unsigned integer<br />
25 Mass Fraction 32 floating point 61 Next Probe Impedance Check 32 unsigned integer<br />
27 Oxygen % 32 floating point 63 Relay 1 Status 16 boolean<br />
29 EMF mV 32 floating point 64 Relay 2 Status 16 boolean<br />
31 Temperature degC 32 floating point 65 Relay 3 Status 16 boolean<br />
33 Temperature Open Ct Flag 16 boolean 66 Common Relay Status 16 boolean<br />
34 Temperature Low Flag 16 boolean 67 Mains Voltage 16 unsigned integer<br />
35 Impedance kOhms 32 floating point 68 Mains Frequency 16 unsigned integer<br />
37 Power Output 16 unsigned integer<br />
69 Heater 1 Fail Alarm 16 unsigned integer 98 Heater 1 Fail Alarm 32 unsigned integer<br />
70 Heater 2 Fail Alarm 16 unsigned integer 100 Heater 2 Fail Alarm 32 unsigned integer<br />
71 Probe 1 Hi Impedance 16 unsigned integer 102 Probe 1 Hi Impedance 32 unsigned integer<br />
72 Probe 2 Hi Impedance 16 unsigned integer 104 Probe 2 Hi Impedance 32 unsigned integer<br />
73 Probe 1 Thermocouple Open Ct 16 unsigned integer 106 Probe 1 Thermocouple Open Ct 32 unsigned integer<br />
74 Probe 2 Thermocouple Open Ct 16 unsigned integer 108 Probe 2 Thermocouple Open Ct 32 unsigned integer<br />
75 Dryer Thermocouple Open Tc 16 unsigned integer 110 Dryer Thermocouple Open Tc 32 unsigned integer<br />
76 Reference Air Pump Fail 16 unsigned integer 112 Reference Air Pump Fail 32 unsigned integer<br />
77 Reference Air Pump Overload 16 unsigned integer 114 Reference Air Pump Overload 32 unsigned integer<br />
78 Battery Backup RAM Failure 16 unsigned integer 116 Battery Backup RAM Failure 32 unsigned integer<br />
79 Internal Alarm Log Memory Failure 16 unsigned integer 118 Internal Alarm Log Memory Failure 32 unsigned integer<br />
80 Internal ADC Fail 16 unsigned integer 120 Internal ADC Fail 32 unsigned integer<br />
81 Internal DAC Output 1 Fail 16 unsigned integer 122 Internal DAC Output 1 Fail 32 unsigned integer<br />
82 Internal DAC Output 2 Fail 16 unsigned integer 124 Internal DAC Output 2 Fail 32 unsigned integer<br />
83 Heater 1 SSR Relay Fail 16 unsigned integer 126 Heater 1 SSR Relay Fail 32 unsigned integer<br />
84 Heater 2 SSR Relay Fail 16 unsigned integer 128 Heater 2 SSR Relay Fail 32 unsigned integer<br />
85 Heater SSR Leaking 16 unsigned integer 130 Heater SSR Leaking 32 unsigned integer<br />
86 Probe 1 Blocked 16 unsigned integer 132 Probe 1 Blocked 32 unsigned integer<br />
87 Probe 2 Blocked 16 unsigned integer 134 Probe 2 Blocked 32 unsigned integer<br />
88 Gas 1 Calibration Error 16 unsigned integer 136 Gas 1 Calibration Error 32 unsigned integer<br />
89 Gas 2 Calibration Error 16 unsigned integer 138 Gas 2 Calibration Error 32 unsigned integer<br />
90 Zone 1 Process Low 1 16 unsigned integer 140 Zone 1 Process Low 1 32 unsigned integer<br />
91 Zone 1 Process Low 2 16 unsigned integer 142 Zone 1 Process Low 2 32 unsigned integer<br />
92 Zone 2 Process Low 1 16 unsigned integer 144 Zone 2 Process Low 1 32 unsigned integer<br />
93 Zone 2 Process Low 2 16 unsigned integer 146 Zone 2 Process Low 2 32 unsigned integer<br />
94 Zone 1 Process High 1 16 unsigned integer 148 Zone 1 Process High 1 32 unsigned integer<br />
95 Zone 1 Process High 2 16 unsigned integer 150 Zone 1 Process High 2 32 unsigned integer<br />
96 Zone 1 Process High 1 16 unsigned integer 152 Zone 1 Process High 1 32 unsigned integer<br />
97 Zone 2 Process High 2 16 unsigned integer 154 Zone 2 Process High 2 32 unsigned integer<br />
156 Heater 1 Fail Alarm 32 unsigned integer 214 Heater 1 Fail Alarm 32 unsigned integer<br />
158 Heater 2 Fail Alarm 32 unsigned integer 216 Heater 2 Fail Alarm 32 unsigned integer<br />
160 Probe 1 Hi Impedance 32 unsigned integer 218 Probe 1 Hi Impedance 32 unsigned integer<br />
162 Probe 2 Hi Impedance 32 unsigned integer 220 Probe 2 Hi Impedance 32 unsigned integer<br />
164 Probe 1 Thermocouple Open Ct 32 unsigned integer 222 Probe 1 Thermocouple Open Ct 32 unsigned integer<br />
166 Probe 2 Thermocouple Open Ct 32 unsigned integer 224 Probe 2 Thermocouple Open Ct 32 unsigned integer<br />
168 Dryer Thermocouple Open Tc 32 unsigned integer 226 Dryer Thermocouple Open Tc 32 unsigned integer<br />
170 Reference Air Pump Fail 32 unsigned integer 228 Reference Air Pump Fail 32 unsigned integer<br />
172 Reference Air Pump Overload 32 unsigned integer 230 Reference Air Pump Overload 32 unsigned integer<br />
174 Battery Backup RAM Failure 32 unsigned integer 232 Battery Backup RAM Failure 32 unsigned integer<br />
176 Internal Alarm Log Memory Failure 32 unsigned integer 234 Internal Alarm Log Memory Failure 32 unsigned integer<br />
178 Internal ADC Fail 32 unsigned integer 236 Internal ADC Fail 32 unsigned integer<br />
180 Internal DAC Output 1 Fail 32 unsigned integer 238 Internal DAC Output 1 Fail 32 unsigned integer<br />
182 Internal DAC Output 2 Fail 32 unsigned integer 240 Internal DAC Output 2 Fail 32 unsigned integer<br />
184 Heater 1 SSR Relay Fail 32 unsigned integer 242 Heater 1 SSR Relay Fail 32 unsigned integer<br />
186 Heater 2 SSR Relay Fail 32 unsigned integer 244 Heater 2 SSR Relay Fail 32 unsigned integer<br />
188 Heater SSR Leaking 32 unsigned integer 246 Heater SSR Leaking 32 unsigned integer<br />
190 Probe 1 Blocked 32 unsigned integer 248 Probe 1 Blocked 32 unsigned integer<br />
192 Probe 2 Blocked 32 unsigned integer 250 Probe 2 Blocked 32 unsigned integer<br />
194 Gas 1 Calibration Error 32 unsigned integer 252 Gas 1 Calibration Error 32 unsigned integer<br />
196 Gas 2 Calibration Error 32 unsigned integer 254 Gas 2 Calibration Error 32 unsigned integer<br />
198 Zone 1 Process Low 1 32 unsigned integer 256 Zone 1 Process Low 1 32 unsigned integer<br />
200 Zone 1 Process Low 2 32 unsigned integer 258 Zone 1 Process Low 2 32 unsigned integer<br />
202 Zone 2 Process Low 1 32 unsigned integer 260 Zone 2 Process Low 1 32 unsigned integer<br />
204 Zone 2 Process Low 2 32 unsigned integer 262 Zone 2 Process Low 2 32 unsigned integer<br />
206 Zone 1 Process High 1 32 unsigned integer 264 Zone 1 Process High 1 32 unsigned integer<br />
208 Zone 1 Process High 2 32 unsigned integer 266 Zone 1 Process High 2 32 unsigned integer<br />
210 Zone 1 Process High 1 32 unsigned integer 268 Zone 1 Process High 1 32 unsigned integer<br />
212 Zone 2 Process High 2 32 unsigned integer 270 Zone 2 Process High 2 32 unsigned integer<br />
Analyser Runtime Data<br />
Event<br />
Times<br />
Relay<br />
Status<br />
Last Alarm Active Time<br />
Last Alarm State Cleared Time<br />
April 2012<br />
68 <strong>1735</strong> Water Vapour Transmitter
<strong>1735</strong> Transmitter Modbus Holding Register Table for firmware v1.04<br />
Transmitter 1 Configuration Analyser Calibration & Configuration<br />
Reg Description Bits Type Reg Description Bits Type<br />
0 50mV Reference Voltage 32 unsigned integer 57 Transmitter 2 Output 16 unsigned integer<br />
2 200mV Reference Voltage 32 unsigned integer 58 Transmitter 2 Zero (Water Vapour) 16 unsigned integer<br />
4 1200mV Reference Voltage 32 unsigned integer 59 Transmitter 2 Zero (Dew Point) 16 unsigned integer<br />
6 2500mV Reference Voltage 32 unsigned integer 60 Transmitter 2 Zero (Abs Humidity) 16 unsigned integer<br />
8 Dryer Type 16 unsigned integer 61 Transmitter 2 Zero (Mass Fraction) 16 unsigned integer<br />
9 Probe 2 Input Type 16 unsigned integer 62 Transmitter 2 Zero (Dryer Temp) 16 unsigned integer<br />
10 Fixed Combustion Oxygen 16 unsigned integer 63 Transmitter 2 Zero (Dryer RH) 16 unsigned integer<br />
11 Service Date 16 unsigned integer 64 Transmitter 2 Zero (Probe 1 Oxygen) 16 unsigned integer<br />
12 Probe 1 Type 16 unsigned integer 65 Transmitter 2 Zero (Probe 2 Oxygen) 16 unsigned integer<br />
13 Probe 1 TC Type 16 unsigned integer 66 Transmitter 2 Span (Water Vapour) 16 unsigned integer<br />
14 Probe 1 Offset 16 signed integer 67 Transmitter 2 Span (Dew Point) 16 unsigned integer<br />
15 Probe 2 Type 16 unsigned integer 68 Transmitter 2 Span (Abs Humidity) 16 unsigned integer<br />
16 Probe 2 TC Type 16 unsigned integer 69 Transmitter 2 Span (Mass Fraction) 16 unsigned integer<br />
17 Probe 2 Offset 16 signed integer 70 Transmitter 2 Span (Dryer Temp) 16 unsigned integer<br />
18 Flue Pressure Units 16 unsigned integer 71 Transmitter 2 Span (Dryer RH) 16 unsigned integer<br />
19 Flue Pressure Value 16 signed integer 72 Transmitter 2 Span (Probe 1 Oxygen) 16 unsigned integer<br />
20 Temperature Units 16 unsigned integer 73 Transmitter 2 Span (Probe 2 Oxygen) 16 unsigned integer<br />
21 Top Line Item 16 unsigned integer 74 Transmitter 2 4-20mA Cal Mode 16 unsigned integer<br />
22 Lower Line Items 64 bitmask 75 Transmitter 2 4mA Trim 16 unsigned integer<br />
26 Reference Air Pump 16 unsigned integer 76 Transmitter 2 20mA Trim 16 unsigned integer<br />
27 Reference Pump Voltage 16 unsigned integer 77 Enable Process Alarms 16 boolean<br />
28 Reference Air RH% 16 unsigned integer 78 Low Process Alarm 1 16 unsigned integer<br />
29 Oxygen Damping Factor 16 unsigned integer 79 Low Process Alarm 1 Delay 16 unsigned integer<br />
30 Ambient Temperature Offset 16 signed integer 80 Low Process Alarm 2 16 unsigned integer<br />
31 Transmitter 4-20mA / 0-20mA Select 16 unsigned integer 81 Low Process Alarm 2 Delay 16 unsigned integer<br />
32 Transmitter Output Limiting for Low Temp 16 unsigned integer 82 High Process Alarm 1 16 unsigned integer<br />
33 <strong>Manual</strong> Mains Voltage Select 16 unsigned integer 83 High Process Alarm 1 Delay 16 unsigned integer<br />
Transmitter 2 Configuration<br />
Process Alarms<br />
Configuration<br />
34 <strong>Manual</strong> Mains Frequency Select 16 unsigned integer 84 High Process Alarm 2 16 unsigned integer<br />
35 Freeze 4-20mA Outputs during cal 16 unsigned integer 85 High Process Alarm 2 Delay 16 unsigned integer<br />
36 Accepted Alarm Relay Active Hold 16 unsigned integer 86 Alarm Relay 2 Options 64 bitmask<br />
37 Transmitter 1 Output 16 unsigned integer 90 Alarm Relay 3 Options 64 bitmask<br />
38 Transmitter 1 Zero (Water Vapour) 16 unsigned integer 94 Alarm Relay 4 Options 64 bitmask<br />
Alarm<br />
Relays<br />
39 Transmitter 1 Zero (Dew Point) 16 unsigned integer 98 Common Relay Mask Options 64 bitmask<br />
40 Transmitter 1 Zero (Abs Humidity) 16 unsigned integer 102 Solenoid 1 Operation (Cal/Purge) 16 unsigned integer<br />
41 Transmitter 1 Zero (Mass Fraction) 16 unsigned integer 103 Solenoid 1 Auto/Man 16 unsigned integer<br />
42 Transmitter 1 Zero (Dryer Temp) 16 unsigned integer 104 Solenoid 1 Start Time 16 unsigned integer<br />
43 Transmitter 1 Zero (Dryer RH) 16 unsigned integer 105 Solenoid 1 Period 16 unsigned integer<br />
44 Transmitter 1 Zero (Probe 1 Oxygen) 16 unsigned integer 106 Solenoid 1 Purge/Cal Duration 16 unsigned integer<br />
45 Transmitter 1 Zero (Probe 2 Oxygen) 16 unsigned integer 107 Solenoid 1 Post P/C Freeze 16 unsigned integer<br />
Solenoid 1<br />
Configuration<br />
46 Transmitter 1 Span (Water Vapour) 16 unsigned integer 108 Solenoid 1 Calibration Gas Content 16 unsigned integer<br />
47 Transmitter 1 Span (Dew Point) 16 unsigned integer 109 Solenoid 1 Calibration Gas Positive Error 16 unsigned integer<br />
48 Transmitter 1 Span (Abs Humidity) 16 unsigned integer 110 Solenoid 1 Calibration Gas Negative Error 16 unsigned integer<br />
49 Transmitter 1 Span (Mass Fraction) 16 unsigned integer 111 Solenoid 2 Operation (Cal/Purge) 16 unsigned integer<br />
50 Transmitter 1 Span (Dryer Temp) 16 unsigned integer 112 Solenoid 2 Auto/Man 16 unsigned integer<br />
51 Transmitter 1 Span (Dryer RH) 16 unsigned integer 113 Solenoid 2 Start Time 16 unsigned integer<br />
Solenoid 2 Configuration<br />
52 Transmitter 1 Span (Probe 1 Oxygen) 16 unsigned integer 114 Solenoid 2 Period 16 unsigned integer<br />
53 Transmitter 1 Span (Probe 2 Oxygen) 16 unsigned integer 115 Solenoid 2 Purge/Cal Duration 16 unsigned integer<br />
54 Transmitter 1 4-20mA Cal Mode 16 unsigned integer 116 Solenoid 2 Post P/C Freeze 16 unsigned integer<br />
55 Transmitter 1 4mA Trim 16 unsigned integer 117 Solenoid 2 Calibration Gas Content 16 unsigned integer<br />
56 Transmitter 1 20mA Trim 16 unsigned integer 118 Solenoid 2 Calibration Gas Positive Error 16 unsigned integer<br />
119 Solenoid 2 Calibration Gas Negative Error 16 unsigned integer<br />
0x41 Special Instruction Function<br />
This command allows you to interact with the transmitter allowing access to functionality that would<br />
otherwise only be accessible via the keypad. The request length will vary from one command to the next<br />
depending on what arguments are required. Requests are formed the same as other Modbus requests:<br />
1 byte 1 byte 1 byte 0 - 4 bytes 2 bytes<br />
slave command function<br />
arguments checksum<br />
address code code<br />
Function<br />
Code<br />
Command<br />
Arguments<br />
0x01 Accept All Active Alarms none<br />
0x02 remote set key down 1 byte keymask<br />
0x03 remote reset key down 1 byte keymask<br />
0x04 Initiate Probe Impedance Check none<br />
0x05 Set Internal Clock 4 byte rtc*<br />
* date expressed as seconds since 1-Jan 2004<br />
keymask<br />
0x01<br />
0x02<br />
0x04<br />
0x08<br />
0x10<br />
0x20<br />
0x40<br />
0x80<br />
option down<br />
option up<br />
setup<br />
function down<br />
function up<br />
purge/cal 1 key<br />
purge/cal 2 key<br />
enter<br />
April 2012<br />
<strong>1735</strong> Water Vapour Transmitter 69
April 2012<br />
70 <strong>1735</strong> Water Vapour Transmitter
Declaration of Conformity<br />
Application of Council Directives:<br />
89/336/EEC (92/31/EEC)<br />
72/23/EEC<br />
Standards to which conformity is declared:<br />
EN550011.1:1995 (ISM, Group 1, Class B)<br />
EN55014:1995 (Clause 4.2)<br />
EN50082-2 (Industrial)<br />
EN61010-1<br />
AS61000.4.5:1999<br />
IEC-68-2-2<br />
IEC-68-2-3<br />
AS1099.2.6<br />
Manufacturer’s name:<br />
Manufacturer’s address:<br />
<strong>Novatech</strong> <strong>Controls</strong> Pty Ltd<br />
309 Reserve Road<br />
Cheltenham, Victoria 3192<br />
Australia<br />
Type of equipment:<br />
Equipment Class:<br />
Model Number:<br />
Oxygen Transmitter<br />
ISM, Group 1, Class B<br />
1730 Series Transmitter<br />
1231 Oxygen Probe<br />
I hereby declare that the equipment specified herein conforms to the above directive(s)<br />
and standards(s).<br />
Full Name:<br />
Position:<br />
Fraser Chapman<br />
R & D Manager<br />
April 2012<br />
<strong>1735</strong> Water Vapour Transmitter 71