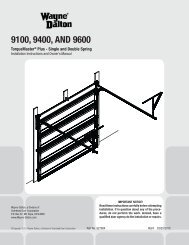
TorqueMaster SD Spring - 9100 9400 9600 - Wayne Dalton
TorqueMaster SD Spring - 9100 9400 9600 - Wayne Dalton
TorqueMaster SD Spring - 9100 9400 9600 - Wayne Dalton

You also want an ePaper? Increase the reach of your titles
YUMPU automatically turns print PDFs into web optimized ePapers that Google loves.
17Tools Needed:None<strong>TorqueMaster</strong> ® <strong>Spring</strong> Tube<strong>TorqueMaster</strong> ® springs come lubricatedand pre-assembled inside the<strong>TorqueMaster</strong> ® spring tube. To install, laythe <strong>TorqueMaster</strong> ® spring tube on thefloor (inside garage) in front of the doorwith the labeled end to the left.<strong>TorqueMaster</strong> ®<strong>Spring</strong> TubeLABELED END18Center Bracket BushingTools Needed:NOTE: If you are installing the idrive ®opener on your garage door, skip thisstep and continue with Step 19.CENTERBRACKETASSEMBLYNOTE: If you are not installing theidrive ® opener on your garage door, youmust install the center bracket bushingassembly. Follow these instructions fornon-idrive ® operated garage doors.<strong>TorqueMaster</strong> ®<strong>Spring</strong> TubeNOTE: If you are installing aDoorMaster opener, see optionalDoorMaster Bracket installations onpage 32, Figure A.Being cam shaped the center bracketbushing only fits one way.Slide the center bracket assemblytowards the center of the <strong>TorqueMaster</strong> ®spring tube, from the right side asshown.NOTE: Upon completion of this step,continue with Step 20.<strong>TorqueMaster</strong> ®<strong>Spring</strong> TubeCENTERBRACKETBUSHING20Please Do Not Return This Product To The Store. Contact your local <strong>Wayne</strong>-<strong>Dalton</strong> dealer. To find your local <strong>Wayne</strong>-<strong>Dalton</strong> dealer, refer to yourlocal yellow pages/business listings or go to the Find a Dealer section online at www.<strong>Wayne</strong>-<strong>Dalton</strong>.com