TorqueMaster SD Spring - 9100 9400 9600 - Wayne Dalton
TorqueMaster SD Spring - 9100 9400 9600 - Wayne Dalton
TorqueMaster SD Spring - 9100 9400 9600 - Wayne Dalton

Create successful ePaper yourself
Turn your PDF publications into a flip-book with our unique Google optimized e-Paper software.
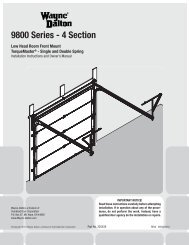
P3Tools Needed:Recommendedtools frompage 5Extension <strong>Spring</strong> RemovalStep 1: Raise the door to the fully openposition and place vice clamps to the backlegs of both vertical tracks, below thebottom rollers to prevent the door fromfalling. By opening the door you releasemost of the spring tension. Carefullyunfasten the S-hook from the horizontalangle. Remove cable, sheave and extensionspring. Repeat for the other side. If safetycables are running through the extensionsprings, remove them also. Remove partsfrom work area.remove lag screwfrom safety cable (ifinstalled). repeat foropposite side.bottom section(door open)PRE-INSTALLATIONStep 2: Holding door in the open position,remove the vice clamps, be preparedto support the entire weight of the door.Garage doors can weigh 200-400 pounds.With assistance, carefully lower the door, bygrasping the door firmly by it’s lift handles.Do not place fingers or hands near joints,between sections, or between bottom ofdoor and floor. Otherwise, severe injurycould result.carefully remove “s”hook and countrebalancecable (repeat for theopposite side)horizontal angleNOTE: Continue with “P4” on page 9 aftercompleting this step.P4Removing the Old DoorTools Needed:Recommendedtools frompage 5Having removed the counterbalancesystem, the door can now bedisassembled.Start by first removing the top row ofcenter hinge(s).top brackethorizontal trackWith assistance, hold the top section tokeep it from falling and remove thetop brackets. With assistance, lift the topsection out of the opening and removeit from the work area. Repeat for allremaining sections.hingesAfter door is disassembled, unbolt bothtrack assemblies from the jambs andremove all material from the work area.You can neatly dispose of the old door byplacing it in the carton of your new door.Clean up area and complete “Preparingthe Opening” “P5” on page 10 beforeinstalling the new door.Please Do Not Return This Product To The Store. Contact your local <strong>Wayne</strong>-<strong>Dalton</strong> dealer. To find your local <strong>Wayne</strong>-<strong>Dalton</strong> dealer, refer to yourlocal yellow pages/business listings or go to the Find a Dealer section online at www.<strong>Wayne</strong>-<strong>Dalton</strong>.com9