m return - mbm-Service GmbH
m return - mbm-Service GmbH
m return - mbm-Service GmbH

You also want an ePaper? Increase the reach of your titles
YUMPU automatically turns print PDFs into web optimized ePapers that Google loves.
GB<br />
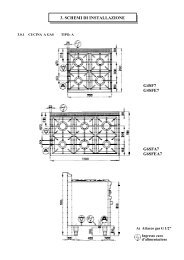
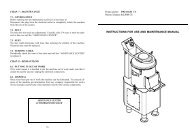
II. INSTRUCTIONS FOR INSTALLATION<br />
Important: The external oven panels must be removed to perform the operations described in this chapter. Since the appliance<br />
must be switched on to make certain adjustments, exercise the utmost care when working in the vicinity of the appliance’s “live”<br />
parts.<br />
1. INSTALLATION PLACE<br />
• The appliance must only be installed in adequately ventilated premises.<br />
2. POSITIONING<br />
• Unpack the appliance and carefully remove the protective film from the external panels to avoid leaving any trace of glue.<br />
Use a suitable diluent to remove any glue residue.<br />
• Dispose of the packaging as instructed in the chapter on "Safeguarding the environment"<br />
• Refer to the installation diagrams at the beginning of this booklet for the space requirements and connection dimensions of the<br />
appliance.<br />
• The LH side of the appliance must be installed at least 50 cm from adjacent units to provide easy access for maintenance, while<br />
the RH side must be installed 10 cm from adjacent units made from flammable materials.<br />
• Place the appliance in the required position and adjust the height of the work surface using the adjustable feet.<br />
• The appliance is not suitable for built-in installation.<br />
Important:<br />
Make sure vapours from the oven’s drain or adjacent appliances do not enter the aeration vents under the appliance,<br />
which cool the oven’s internal components.<br />
40