m return - mbm-Service GmbH
m return - mbm-Service GmbH
m return - mbm-Service GmbH

Create successful ePaper yourself
Turn your PDF publications into a flip-book with our unique Google optimized e-Paper software.
6) End of cooking cycle with temperature probe. When the<br />
target core temperature is reached, the oven switches off automatically<br />
as described in paragraph 6.8 above.<br />
7) Deactivation of temperature probe. (Only possible when the<br />
cooking cycle has stopped). Set any cooking time on timer TM to<br />
automatically zero any previous temperature probe setting. Likewise,<br />
set any temperature setting on probe control knob PRB to<br />
automatically zero any previous timer setting. The temperature<br />
probe cooking cycle may also be deactivated by switching off the<br />
oven.<br />
6.12. AUTOMATIC MULTI-PHASE COOKING CYCLE<br />
Functional level 6 ovens enable you to program cooking cycles<br />
comprising up to 6 sequential phases. For example:<br />
- Phase 1: - Convection, 200°C<br />
- Temperature probe, 70°C<br />
- Phase 2: - Mixed, 220°C<br />
- Length, 40 minutes<br />
- Phase 3: - Convection, 250°C<br />
- Length, 15 minutes<br />
and so forth up to a maximum of 6 phases.<br />
The cycle automatically passes from one phase to the next until<br />
the program stops on completion of the last phase.<br />
The multi-phase cooking program is controlled by the button<br />
illustrated below.<br />
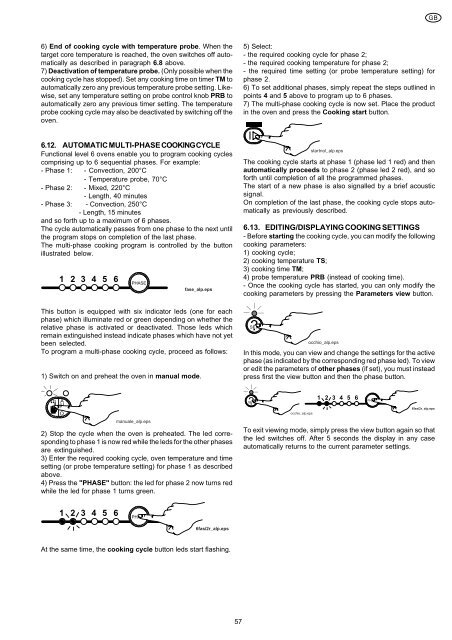
1 2 3 4 5 6<br />
PHASE<br />
fase_alp.eps<br />
This button is equipped with six indicator leds (one for each<br />
phase) which illuminate red or green depending on whether the<br />
relative phase is activated or deactivated. Those leds which<br />
remain extinguished instead indicate phases which have not yet<br />
been selected.<br />
To program a multi-phase cooking cycle, proceed as follows:<br />
1) Switch on and preheat the oven in manual mode.<br />
A<br />
U<br />
T<br />
O<br />
manuale_alp.eps<br />
2) Stop the cycle when the oven is preheated. The led corresponding<br />
to phase 1 is now red while the leds for the other phases<br />
are extinguished.<br />
3) Enter the required cooking cycle, oven temperature and time<br />
setting (or probe temperature setting) for phase 1 as described<br />
above.<br />
4) Press the "PHASE" button: the led for phase 2 now turns red<br />
while the led for phase 1 turns green.<br />
1 2 3 4 5 6<br />
PHASE<br />
6fasi2r_alp.eps<br />
At the same time, the cooking cycle button leds start flashing.<br />
57<br />
5) Select:<br />
- the required cooking cycle for phase 2;<br />
- the required cooking temperature for phase 2;<br />
- the required time setting (or probe temperature setting) for<br />
phase 2.<br />
6) To set additional phases, simply repeat the steps outlined in<br />
points 4 and 5 above to program up to 6 phases.<br />
7) The multi-phase cooking cycle is now set. Place the product<br />
in the oven and press the Cooking start button.<br />
startnol_alp.eps<br />
The cooking cycle starts at phase 1 (phase led 1 red) and then<br />
automatically proceeds to phase 2 (phase led 2 red), and so<br />
forth until completion of all the programmed phases.<br />
The start of a new phase is also signalled by a brief acoustic<br />
signal.<br />
On completion of the last phase, the cooking cycle stops automatically<br />
as previously described.<br />
6.13. EDITING/DISPLAYING COOKING SETTINGS<br />
- Before starting the cooking cycle, you can modify the following<br />
cooking parameters:<br />
1) cooking cycle;<br />
2) cooking temperature TS;<br />
3) cooking time TM;<br />
4) probe temperature PRB (instead of cooking time).<br />
- Once the cooking cycle has started, you can only modify the<br />
cooking parameters by pressing the Parameters view button.<br />
?SET<br />
occhio_alp.eps<br />
In this mode, you can view and change the settings for the active<br />
phase (as indicated by the corresponding red phase led). To view<br />
or edit the parameters of other phases (if set), you must instead<br />
press first the view button and then the phase button.<br />
?SET<br />
occhio_alp.eps<br />
1 2 3 4 5 6<br />
PHASE<br />
GB<br />
6fasi2r_alp.eps<br />
To exit viewing mode, simply press the view button again so that<br />
the led switches off. After 5 seconds the display in any case<br />
automatically <strong>return</strong>s to the current parameter settings.