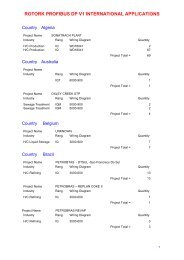
Profibus Actuator Control Profibus DP Option Card Installation Manual
Profibus Actuator Control Profibus DP Option Card Installation Manual
Profibus Actuator Control Profibus DP Option Card Installation Manual
- No tags were found...

You also want an ePaper? Increase the reach of your titles
YUMPU automatically turns print PDFs into web optimized ePapers that Google loves.
<strong>Profibus</strong> <strong>DP</strong> Mk2 <strong>Option</strong> <strong>Card</strong> <strong>Installation</strong> <strong>Manual</strong><br />
LED Description State Function<br />
Flash (Green) PLC comms not present<br />
4 Diagnostic<br />
Solid (Green) Data being exchanged with PLC<br />
Solid (Red) Fatal Error<br />
Flash (Red) After solid green shows comms lost<br />
5 Channel 2 Data Exchange<br />
On (Red) In data exchange mode with PLC<br />
6 Channel 2 RTS line<br />
Off<br />
On (Red)<br />
Off<br />
Not in data exchange mode<br />
Ready to reply to PLC<br />
Not ready to respond<br />
6.7 Basic Operation on Start up<br />
Whenever a field device is powered up and it is found by the PLC it will<br />
go through the standard <strong>Profibus</strong> procedure of Parameterisation and<br />
Configuration before commencing Data Exchange. This exchange can<br />
include altering the address if the device has an address of 126 and<br />
the master supports address changes – master class 2.<br />
1) The first message – master sends a DIAG_req telegram.<br />
2) The response should be a DIAG_res with diagnostic data<br />
attached.<br />
3) If this is correct a Set_Parameter telegram is sent with the<br />
parameterisation data attached.<br />
4) The response should be a Short Ack message<br />
5) If a correct response is received a Check_Config telegram is sent<br />
6) The response should be a Short Ack message<br />
7) If this is correct a DIAG_req telegram is sent<br />
8) The response should be a DIAG_res with diagnostic data<br />
attached.<br />
9) If DIAG is not reporting an error data exchange commences.<br />
The Parameterisation data is extracted from the GSD file for the<br />
particular address of the slave device. The association between the<br />
GSD to be used and the address is made in the master during the<br />
configuration of the network on the master (a table is created). The<br />
association can also be defined in a Master 2 and sent to a Master 1 by<br />
the master to master comms. Most masters 1 devices permit the same<br />
device type (as described in the GSD) to have different GSD files, so<br />
allowing the GSD to be edited.<br />
Editing the GSD file guarantees that a device coming on line after<br />
having been switched off will have the correct settings. If FDT or PDM<br />
changes the same parameters as those installed by a GSD then the<br />
GSD values will replace those set by the FDT or PDM when the device<br />
is switched off and on again, or the PLC is powered off and back on,<br />
unless GSD parameterisation is not permitted.<br />
(See section 5.4 for information on the Configurations allowed).<br />
Fig 27: <strong>Profibus</strong> Start Up Sequence<br />
48 of 66 Publication S420E V3.0 Issue 01/05