Digital_Camera_World_Issue_192_July_2017
Create successful ePaper yourself
Turn your PDF publications into a flip-book with our unique Google optimized e-Paper software.
PhotoshoP mastercLass<br />
<strong>Digital</strong> Darkroom<br />
7<br />
8<br />
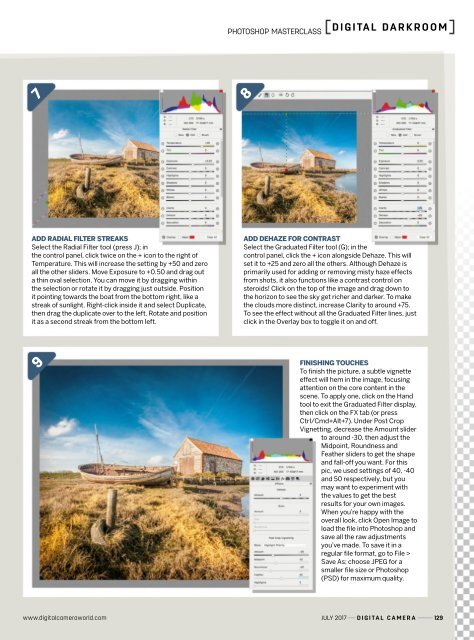
Add rAdiAl filter streAks<br />
Select the Radial Filter tool (press J); in<br />
the control panel, click twice on the + icon to the right of<br />
Temperature. This will increase the setting by +50 and zero<br />
all the other sliders. Move Exposure to +0.50 and drag out<br />
a thin oval selection. You can move it by dragging within<br />
the selection or rotate it by dragging just outside. Position<br />
it pointing towards the boat from the bottom right, like a<br />
streak of sunlight. Right-click inside it and select Duplicate,<br />
then drag the duplicate over to the left. Rotate and position<br />
it as a second streak from the bottom left.<br />
Add dehAze for contrAst<br />
Select the Graduated Filter tool (G); in the<br />
control panel, click the + icon alongside Dehaze. This will<br />
set it to +25 and zero all the others. Although Dehaze is<br />
primarily used for adding or removing misty haze effects<br />
from shots, it also functions like a contrast control on<br />
steroids! Click on the top of the image and drag down to<br />
the horizon to see the sky get richer and darker. To make<br />
the clouds more distinct, increase Clarity to around +75.<br />
To see the effect without all the Graduated Filter lines, just<br />
click in the Overlay box to toggle it on and off.<br />
9<br />
finishing touches<br />
To finish the picture, a subtle vignette<br />
effect will hem in the image, focusing<br />
attention on the core content in the<br />
scene. To apply one, click on the Hand<br />
tool to exit the Graduated Filter display,<br />
then click on the FX tab (or press<br />
Ctrl/Cmd+Alt+7). Under Post Crop<br />
Vignetting, decrease the Amount slider<br />
to around -30, then adjust the<br />
Midpoint, Roundness and<br />
Feather sliders to get the shape<br />
and fall-off you want. For this<br />
pic, we used settings of 40, -40<br />
and 50 respectively, but you<br />
may want to experiment with<br />
the values to get the best<br />
results for your own images.<br />
When you’re happy with the<br />
overall look, click Open Image to<br />
load the file into Photoshop and<br />
save all the raw adjustments<br />
you’ve made. To save it in a<br />
regular file format, go to File ><br />
Save As; choose JPEG for a<br />
smaller file size or Photoshop<br />
(PSD) for maximum quality.<br />
www.digitalcameraworld.com JULY <strong>2017</strong> <strong>Digital</strong> <strong>Camera</strong> 129


