You also want an ePaper? Increase the reach of your titles
YUMPU automatically turns print PDFs into web optimized ePapers that Google loves.
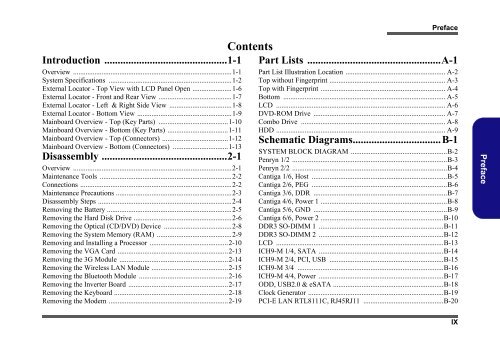
Introduction ..............................................1-1<br />
Overview .........................................................................................1-1<br />
System Specifications .....................................................................1-2<br />
External Locator - Top View with LCD Panel Open ......................1-6<br />
External Locator - Front and Rear View .........................................1-7<br />
External Locator - Left & Right S<strong>id</strong>e View ...................................1-8<br />
External Locator - Bottom View .....................................................1-9<br />
Mainboard Overview - Top (Key Parts) .......................................1-10<br />
Mainboard Overview - Bottom (Key Parts) ..................................1-11<br />
Mainboard Overview - Top (Connectors) .....................................1-12<br />
Mainboard Overview - Bottom (Connectors) ...............................1-13<br />
Disassembly ...............................................2-1<br />
Overview .........................................................................................2-1<br />
Maintenance Tools ..........................................................................2-2<br />
Connections .....................................................................................2-2<br />
Maintenance Prec<strong>au</strong>tions .................................................................2-3<br />
Disassembly Steps ...........................................................................2-4<br />
Removing the Battery ......................................................................2-5<br />
Removing the Hard Disk Drive .......................................................2-6<br />
Removing the Optical (CD/DVD) Device ......................................2-8<br />
Removing the System Memory (RAM) ..........................................2-9<br />
Removing and Installing a Processor ............................................2-10<br />
Removing the VGA Card ..............................................................2-13<br />
Removing the 3G Module .............................................................2-14<br />
Removing the Wireless LAN Module ...........................................2-15<br />
Removing the Bluetooth Module ..................................................2-16<br />
Removing the Inverter Board ........................................................2-17<br />
Removing the Keyboard ................................................................2-18<br />
Removing the Modem ...................................................................2-19<br />
Contents<br />
Preface<br />
Part Lists ..................................................A-1<br />
Part List Illustration Location ........................................................ A-2<br />
Top without Fingerprint ................................................................. A-3<br />
Top with Fingerprint ...................................................................... A-4<br />
Bottom ........................................................................................... A-5<br />
LCD ............................................................................................... A-6<br />
DVD-ROM Drive .......................................................................... A-7<br />
Combo Drive ................................................................................. A-8<br />
HDD ............................................................................................... A-9<br />
Schematic Diagrams.................................B-1<br />
SYSTEM BLOCK DIAGRAM ......................................................B-2<br />
Penryn 1/2 .......................................................................................B-3<br />
Penryn 2/2 .......................................................................................B-4<br />
Cantiga 1/6, Host ............................................................................B-5<br />
Cantiga 2/6, PEG ............................................................................B-6<br />
Cantiga 3/6, DDR ...........................................................................B-7<br />
Cantiga 4/6, Power 1 .......................................................................B-8<br />
Cantiga 5/6, GND ...........................................................................B-9<br />
Cantiga 6/6, Power 2 .....................................................................B-10<br />
DDR3 SO-DIMM 1 ......................................................................B-11<br />
DDR3 SO-DIMM 2 ......................................................................B-12<br />
LCD ..............................................................................................B-13<br />
ICH9-M 1/4, SATA ......................................................................B-14<br />
ICH9-M 2/4, PCI, USB ................................................................B-15<br />
ICH9-M 3/4 ..................................................................................B-16<br />
ICH9-M 4/4, Power ......................................................................B-17<br />
ODD, USB2.0 & eSATA ..............................................................B-18<br />
Clock Generator ............................................................................B-19<br />
PCI-E LAN RTL8111C, RJ45RJ11 .............................................B-20<br />
IX<br />
Preface


