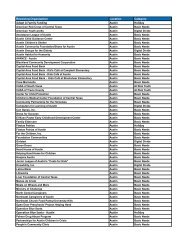
Customer Guide - visit site - Grande Communications
Customer Guide - visit site - Grande Communications
Customer Guide - visit site - Grande Communications

You also want an ePaper? Increase the reach of your titles
YUMPU automatically turns print PDFs into web optimized ePapers that Google loves.
24<br />
Your Internet Service<br />
Setting Up Email Filters<br />
<strong>Grande</strong> enable email filters (email security) by default. You may turn<br />
this feature off if it is critical that no email addressed to you is refused.<br />
To disable email security click on “Email Security Disabled (I will manage<br />
my own email security)”.<br />
Spam-Filter Management<br />
When this option is enable <strong>Grande</strong> attempts to determine whether your<br />
email is clean of spam. There are four options available:<br />
1. No Content Filtering: turns spam filters off.<br />
2. Quarantine to my Webmail JUNK folder: this filter will move spam<br />
messages into a Junk folder that you can browse whenever you<br />
choose.<br />
3. Tag my Subject Line: this filter will add the word “SPAM” to the<br />
subject line of any email that is identified as spam.<br />
4. Discard the email: if spam is found it will be automatically deleted.<br />
WhiteList Email Addresses<br />
With this option you can add email addresses or email domains that<br />
you would to bypass spam filters. Follow these steps to add addresses<br />
to the WhiteList:<br />
1. Click on the “Manage” button under the WhiteList column.<br />
2. Enter the list of email addresses using this format:<br />
user@domain.com, @domain.com, user@, or domain.com. Blank<br />
lines and any other invalid entries will automatically be removed.<br />
3. Click on “Yes” to enable the WhiteList.<br />
4. Click on “Save” to save your changes.<br />
BlackList Email Addresses<br />
With this option you can add email addresses or email domains that<br />
you would like to block. Follow these steps to add address to you<br />
BlackList:<br />
1. Click on the “Manage” button under the BlackList column.<br />
2. Enter the list of email addresses using this format:<br />
user@domain.com, @domain.com, user@, or domain.com. Blank<br />
lines and any other invalid entries will automatically be removed.<br />
3. Click on “Yes” to enable the BlackList.<br />
4. Click on “Save” to save your changes.<br />
Setting Up an Auto-Responder Message<br />
This feature allows you to create your own automated response message.<br />
Anyone that sends you an email will receive the response message.<br />
Follow these steps to create and activate your message:<br />
1. Click on the “Manage” button under the “Bouncer” column.<br />
2. Enter a custom message in the text box.<br />
3. Click on “Yes” to enable your automated response message.<br />
4. Click on “Save” to save your changes. Once enabled, when a<br />
new message is received in your mailbox, the sender will<br />
automatically receive your custom message.<br />
Setting Up Email Applications<br />
Set Up Windows Mail<br />
Windows Mail is the default email that comes standard with Internet<br />
Explorer. Follow the steps outlined below to set up a new account:<br />
1. In Windows Mail, click Tools > Accounts > Mail > Add > Email<br />
Account. This will start a mail wizard configuration screen.<br />
2. Enter your name as you wish it to appear in the “Display Name”<br />
field.<br />
3. Enter your <strong>Grande</strong> email address in the username@mygrande.net<br />
format in the email address field.<br />
4. Set up email servers window settings: Select POP in the drop-down<br />
list. Enter “mail.mygrande.net” in the “Incoming Mail Server<br />
(POP3)” field. Enter “mail.mygrande.net” in the “Outgoing Mail<br />
Server (SMTP)” field.<br />
5. Click “Next”. Your email is now configured to use any available<br />
connection.<br />
6. Enter the <strong>Grande</strong> username and password. Then click “Next”.<br />
7. You should see a congratulations message.<br />
8. Now click “Finish”. You should be able to send and receive email<br />
using your <strong>Grande</strong> email address.<br />
Set Up Outlook Express<br />
Follow the steps outlined below to set up Outlook Express with your<br />
<strong>Grande</strong> username and password:<br />
1. Open Outlook Express by double-clicking the Outlook Express icon<br />
on your desktop.<br />
2. The first time you start Outlook Express the Internet Connection<br />
Wizard will run. Select “Create a new Internet mail account” and<br />
click “Next” to continue.<br />
3. On the “Your Name” screen type in your name as you would like it<br />
to appear on your outgoing e-mail messages and click “Next” to<br />
continue.<br />
4. Type in your email address on the “Internet Email Address” screen.<br />
Click “Next” to continue.<br />
5. On the email server names screen, select POP3 from the drop<br />
down list.<br />
6. In the space provided below Incoming mail (POP3, IMAP or HTTP)<br />
server: enter: mail.mygrande.net.<br />
7. Type in mail.mygrande.net as your Outgoing mail (SMTP) server<br />
and click “Next” to continue.<br />
8. On the Internet mail logon screen, type in your <strong>Grande</strong> username in<br />
the field titled “Account Name”. Your user name is everything<br />
leading up to, but not including the @mygrande.net part of your<br />
e-mail address. For example, if your e-mail address is<br />
test_account@mygrande.net, you would enter test_account as your<br />
Account Name.<br />
9. In the “Password field”, enter your <strong>Grande</strong> password. If you do not<br />
wish to enter your password every time you check your email, put<br />
a check in the box labeled “Remember Password”. Click “Next” to<br />
continue.<br />
10. Congratulations, you have now set up Outlook Express as your<br />
email program. Click “Finish” to begin sending and receiving email.<br />
Set Up Outlook 2003<br />
Your Internet Service<br />
Follow the steps outlined below to set up Outlook 2003 with your<br />
<strong>Grande</strong> username and password:<br />
1. Open Microsoft Office Outlook 2003 by double-clicking the Outlook<br />
icon on your desktop.<br />
2. If the Email Accounts wizard doesn’t launch on its own, select “Tools”<br />
from the top menu, and “Email Accounts” from the drop down list.<br />
3. Select “Add” a new email account and click “Next” to continue.<br />
4. On the “Server Type” screen, select POP3 and then click “Next” to<br />
continue.<br />
5. On the “Internet e-mail settings (POP3)” page you will need to<br />
fill in your information for each of the six fields. For “Your Name”<br />
type in your name, for “Email Address” type in your <strong>Grande</strong><br />
provided email address. In the “username” field type in your<br />
<strong>Grande</strong> username (which is the part before @mygrande.net in your<br />
e-mail address) and in the “Password” field type in your password.<br />
For “Incoming mail server (POP3)” type in “mail.mygrande.net”.<br />
For “Outgoing Mail Server (SMTP)” type in “mail.mygrande.net”.<br />
After filling the six fields, click the “Test Account Settings” button.<br />
6. If anything shows up as Failed, return to the previous window and<br />
double-check your settings.<br />
7. At this point you have finished setting up Outlook 2003 and need<br />
to click the “Finish” button. You may now begin to use Outlook<br />
2003 to send and receive email.<br />
Set Up Outlook 2007<br />
Follow the steps outlined below to set up Outlook 2007 with your<br />
<strong>Grande</strong> username and password:<br />
1. Open Microsoft Office Outlook 2007 by double-clicking on the<br />
Outlook icon on your desktop.<br />
2. If the email account wizard doesn’t launch on its own, select<br />
“Tools” from the top menu, and “Account Settings…” from the<br />
drop-down list.<br />
3. On the “E-mail” tab, click the “New…” button.<br />
4. In the Outlook 2007 Startup wizard, click “Next” to continue.<br />
5. On the “Account Configuration” page, choose “Yes”, then click<br />
“Next” to continue.<br />
33 25