Customer Guide - visit site - Grande Communications
Customer Guide - visit site - Grande Communications
Customer Guide - visit site - Grande Communications
Create successful ePaper yourself
Turn your PDF publications into a flip-book with our unique Google optimized e-Paper software.
26<br />
Your Internet Service<br />
Set Up Outlook 2007 (continued...)<br />
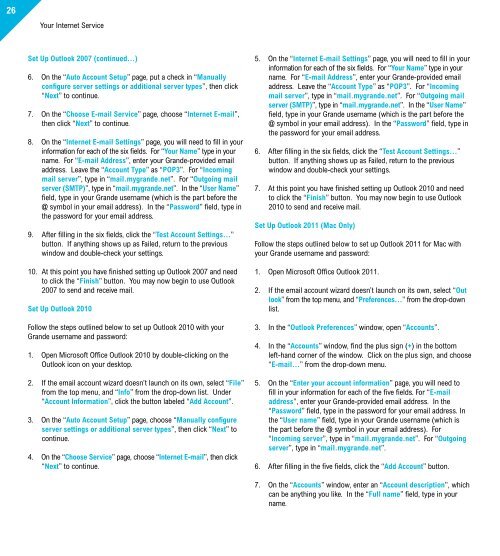
6. On the “Auto Account Setup” page, put a check in “Manually<br />
configure server settings or additional server types”, then click<br />
“Next” to continue.<br />
7. On the “Choose E-mail Service” page, choose “Internet E-mail”,<br />
then click “Next” to continue.<br />
8. On the “Internet E-mail Settings” page, you will need to fill in your<br />
information for each of the six fields. For “Your Name” type in your<br />
name. For “E-mail Address”, enter your <strong>Grande</strong>-provided email<br />
address. Leave the “Account Type” as “POP3”. For “Incoming<br />
mail server”, type in “mail.mygrande.net”. For “Outgoing mail<br />
server (SMTP)”, type in “mail.mygrande.net”. In the “User Name”<br />
field, type in your <strong>Grande</strong> username (which is the part before the<br />
@ symbol in your email address). In the “Password” field, type in<br />
the password for your email address.<br />
9. After filling in the six fields, click the “Test Account Settings…”<br />
button. If anything shows up as Failed, return to the previous<br />
window and double-check your settings.<br />
10. At this point you have finished setting up Outlook 2007 and need<br />
to click the “Finish” button. You may now begin to use Outlook<br />
2007 to send and receive mail.<br />
Set Up Outlook 2010<br />
Follow the steps outlined below to set up Outlook 2010 with your<br />
<strong>Grande</strong> username and password:<br />
1. Open Microsoft Office Outlook 2010 by double-clicking on the<br />
Outlook icon on your desktop.<br />
2. If the email account wizard doesn’t launch on its own, select “File”<br />
from the top menu, and “Info” from the drop-down list. Under<br />
“Account Information”, click the button labeled “Add Account”.<br />
3. On the “Auto Account Setup” page, choose “Manually configure<br />
server settings or additional server types”, then click “Next” to<br />
continue.<br />
4. On the “Choose Service” page, choose “Internet E-mail”, then click<br />
“Next” to continue.<br />
5. On the “Internet E-mail Settings” page, you will need to fill in your<br />
information for each of the six fields. For “Your Name” type in your<br />
name. For “E-mail Address”, enter your <strong>Grande</strong>-provided email<br />
address. Leave the “Account Type” as “POP3”. For “Incoming<br />
mail server”, type in “mail.mygrande.net”. For “Outgoing mail<br />
server (SMTP)”, type in “mail.mygrande.net”. In the “User Name”<br />
field, type in your <strong>Grande</strong> username (which is the part before the<br />
@ symbol in your email address). In the “Password” field, type in<br />
the password for your email address.<br />
6. After filling in the six fields, click the “Test Account Settings…”<br />
button. If anything shows up as Failed, return to the previous<br />
window and double-check your settings.<br />
7. At this point you have finished setting up Outlook 2010 and need<br />
to click the “Finish” button. You may now begin to use Outlook<br />
2010 to send and receive mail.<br />
Set Up Outlook 2011 (Mac Only)<br />
Follow the steps outlined below to set up Outlook 2011 for Mac with<br />
your <strong>Grande</strong> username and password:<br />
1. Open Microsoft Office Outlook 2011.<br />
2. If the email account wizard doesn’t launch on its own, select “Out<br />
look” from the top menu, and “Preferences…” from the drop-down<br />
list.<br />
3. In the “Outlook Preferences” window, open “Accounts”.<br />
4. In the “Accounts” window, find the plus sign (+) in the bottom<br />
left-hand corner of the window. Click on the plus sign, and choose<br />
“E-mail…” from the drop-down menu.<br />
5. On the “Enter your account information” page, you will need to<br />
fill in your information for each of the five fields. For “E-mail<br />
address”, enter your <strong>Grande</strong>-provided email address. In the<br />
“Password” field, type in the password for your email address. In<br />
the “User name” field, type in your <strong>Grande</strong> username (which is<br />
the part before the @ symbol in your email address). For<br />
“Incoming server”, type in “mail.mygrande.net”. For “Outgoing<br />
server”, type in “mail.mygrande.net”.<br />
6. After filling in the five fields, click the “Add Account” button.<br />
7. On the “Accounts” window, enter an “Account description”, which<br />
can be anything you like. In the “Full name” field, type in your<br />
name.<br />
8. At this point you have finished setting up Outlook 2011 and need to<br />
close the “Accounts” window. You may now begin to use Outlook<br />
2011 to send and receive mail.<br />
Set Up OS X Mail<br />
Follow the steps outlined below to set up OS X Mail:<br />
1. Click the “Mail” icon in the Dock (Menu) bar.<br />
2. Select “Preferences” from the Mail menu.<br />
3. After clicking the “Mail” icon, the Mail Setup screen automatically<br />
appears. To configure your email settings, enter your name in the<br />
“Full Name” field and your username@mygrande.net in the “Email<br />
Address” field.<br />
4. Now set your “Incoming Mail Server” and “Outgoing Mail Server<br />
(SMTP)” to “mail.mygrande.net” and select “POP” from the<br />
“Account Type” drop-down list.<br />
5. Enter your <strong>Grande</strong> username and <strong>Grande</strong> password in their<br />
respective fields.<br />
6. Click the “OK” button.<br />
7. Your inbox will be displayed. Click the “Get Mail” icon to check for<br />
new email.<br />
Set Up Entourage (Mac) Mail<br />
Follow the steps outlined below to set up a new Entourage (Mac) Mail<br />
account:<br />
1. When Entourage is launched for the first time, the Entourage Setup<br />
Assistant will run. On the first screen, enter your First name and<br />
Last name in the spaces provided and then click the right arrow to<br />
continue.<br />
2. On the “Home Information” screen, enter your home address<br />
information, and then click the right arrow to continue.<br />
3. On the “Work Information” screen, enter your work address<br />
information, and the click the right arrow to continue.<br />
4. On the next “Welcome Screen”, select “I want to start using<br />
Entourage without importing anything” and click the right arrow to<br />
continue. If you do in fact want to import information into<br />
Entourage, you can do so at any time by selecting File > Import<br />
from within Entourage.<br />
Your Internet Service<br />
5. On the “Junk Mail Filter” screen, decide if you want to enable the<br />
Junk Mail Filter and then click the right arrow to continue.<br />
6. On the “Your Name” screen, enter your name as you would like it to<br />
appear on your outgoing email messages, and then click the right<br />
arrow to continue.<br />
7. On the “Your Email Address” screen, select “I already have an email<br />
address that I’d like to use” and then enter your mygrande.net<br />
email address in the space provided. Once completed, click the<br />
right arrow to continue.<br />
8. On the “Mail Servers” screen, make sure that POP is selected in the<br />
“My Incoming Mail Server” is a(n)__server drop-down list. In<br />
“Incoming Mail Server” field, enter “mail.mygrande.net”. In the<br />
“Outgoing Mail (SMTP)” field, enter “mail.mygrande.net”. Click the<br />
right arrow to continue.<br />
9. On the “Account ID and Password” screen, enter your username in<br />
the “Account ID” field. Your username is every thing leading up to,<br />
but not including the @mygrande.net part of your email address.<br />
For example, if your email address is test_account@mygrande.net,<br />
you would enter test_account as your Account ID. In the<br />
“Password” field, enter in your <strong>Grande</strong> assigned password. If you<br />
do not wish to enter your password every time you check your<br />
email, put a check in the box labeled “Save Password in my Mac<br />
OS keychain”. Click the right arrow to continue.<br />
10. On the last screen, enter an Account Name in the space provided.<br />
The name you provide should be descriptive so you can easily<br />
identify this account should you need to make changes.<br />
Click “Finish” to begin using Entourage.<br />
33 27


