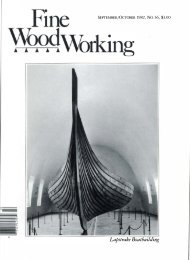
NOVEMBER/DECEMBER 1983, No. 43, $3.50 Making ... - Wood Tools
NOVEMBER/DECEMBER 1983, No. 43, $3.50 Making ... - Wood Tools
NOVEMBER/DECEMBER 1983, No. 43, $3.50 Making ... - Wood Tools

You also want an ePaper? Increase the reach of your titles
YUMPU automatically turns print PDFs into web optimized ePapers that Google loves.
After the grooves are cut on the plywood sanding<br />
more important, you can control the amount of overhang. I<br />
use somewhere between Ya2-in. and X-in. overhang, depending<br />
on whether I'm going for a hard line or a soft, rolled<br />
effect. Usually, Va in. is preferable. Also, after I cut an 8-in.<br />
disc out of 8�-in. by ll-in. paper, I am left with enough<br />
scraps to use for lathe sanding and drum sanders. I recycle<br />
discs worn at the perimeter by cutting them down for 5-in.<br />
Power Pads and orbital sander discs.<br />
I sand each groove in sequence, going two or three times<br />
around the bowl with the Power Pad in each grit. I begin<br />
with 80-grit aluminum oxide paper, then repeat the process<br />
with 150-grit aluminum oxide, 220-grit aluminum oxide and<br />
400-grit silicon carbide. Then I move to the Sand-O-Flex<br />
flap sander (which can also be run on the lathe), using a<br />
combination of 240-grit and 320-grit, Va-in. shred, for removal<br />
of sharp edges and concave fmish work. Final-sanding<br />
is done on the Power Pad, with 400-grit and 600-grit, then I<br />
hand-sand. The piece is now ready for buffing.<br />
The buffing process I use was originally designed for briar<br />
smoking pipes and works well on closed-grain hardwoods.<br />
The beauty of it is that, unlike metal buffmg compounds, it<br />
Freehand disc-sanding also lends itself to less regular, asymmetric<br />
decoration, as in this 6-in. dia. Indian rosewood bowl.<br />
68<br />
, Hunter uses a foam-baLked disc to refine the shapes.<br />
does not clog the pores of the wood and it tones but does not<br />
discolor hardwoods. It is quick, and it burnishes the wood,<br />
adds luster and depth, and produces a hard, gem-like fmish.<br />
I use buffing wheels, compounds and waxes available from<br />
Pimo Pipe Supplies, Box 59211, Chicago, Ill. 60659. The<br />
wheels, designed for pipemakers, have a beveled edge that<br />
allows more detail in buffmg. I generally use a I-in. wide<br />
beveled buffmg wheel, 9 in. in diameter. Wider wheels work<br />
best on broad surfaces because they provide a consistent polish<br />
with less danger of removing soft areas in the wood's surface.<br />
All of these wheels are designed to run at 1725 RPM,<br />
either with a �-HP motor or on the lathe. The compounds are<br />
colored waxes-green, red and white-impregnated with abrasive<br />
grits equal to 700-, 800- and 900-grit. I use four wheels.<br />
The first is a firm sewn muslin, which I use with green compound.<br />
The second is a softer sewn flannel, used<br />
to<br />
with red<br />
compound. The third, a soft unsewn flannel, is used with<br />
white compound. The fourth, a vety soft flannel, is for the<br />
hard carnauba wax. It is important not to overload the wheels<br />
with abrasives.<br />
If all has gone well, you now have a spiraled bowl, the<br />
exterior of which is complete. Time now to return the lathe<br />
to hollow the bowl. I prefer a closed form for my spiralgrooved<br />
turnings because it allows me greater surface<br />
FWW<br />
area to<br />
explore sculptural techniques.<br />
I fmd it helpful to begin with a %-in. drill bit in the tailstock,<br />
to clear the center and defme the bottom of the piece. I<br />
hollow-turn with a combination of handmade chisels, using a<br />
spear point for clearing waste and a roundnose for fmishing.<br />
(For a detailed discussion of hollow-turning, see # 16,<br />
pp. 62�66.) Mter I'm satisfied with wall thickness, usually<br />
Va in. to X in., and that the last chisel cut is smooth, I cut the<br />
bowl from the faceplate, beginning with a parting tool and<br />
finishing with a backsaw. I finish the bottom on the disc and<br />
belt sanders.<br />
Freehand disc-sculpting is workmanship of risk. It takes<br />
hundreds of passes with the disc's edge before you capture the<br />
spiral and you hold the finished form in your hands. Then<br />
0<br />
you feel its weight for the first time, to know the thickness of<br />
its walls, and the piece comes to life.<br />
Bill Hunter is a professional turner in El Portal, Calif