Samsung 16ppm Multifonction laser mono SCX-4500 (SCX-4500/SEE ) - Manuel de l'utilisateur 7.21 MB, pdf, Anglais
Samsung 16ppm Multifonction laser mono SCX-4500 (SCX-4500/SEE ) - Manuel de l'utilisateur 7.21 MB, pdf, Anglais
Samsung 16ppm Multifonction laser mono SCX-4500 (SCX-4500/SEE ) - Manuel de l'utilisateur 7.21 MB, pdf, Anglais
Create successful ePaper yourself
Turn your PDF publications into a flip-book with our unique Google optimized e-Paper software.
1 Installing Printer<br />
Software in Windows<br />
This chapter inclu<strong>de</strong>s:<br />
• Installing Printer Software<br />
• Changing the Software Language<br />
• Reinstalling Printer Software<br />
• Removing Printer Software<br />
Installing Printer Software<br />
You can install the printer software for local printing. To install<br />
the printer software on the computer, perform the appropriate<br />
installation procedure <strong>de</strong>pending on the printer in use.<br />
A printer driver is software that lets your computer<br />
communicate with your printer. The procedure to install drivers<br />
may differ <strong>de</strong>pending on the operating system you are using.<br />
All applications should be closed on your PC before beginning<br />
installation.<br />
A local printer is a printer directly attached to your computer<br />
using the printer cable supplied with your printer, such as a USB<br />
or parallel cable.<br />
You can install the printer software using the typical or custom<br />
method.<br />
This is recommen<strong>de</strong>d for most users. All components necessary<br />
for printer operations will be installed.<br />
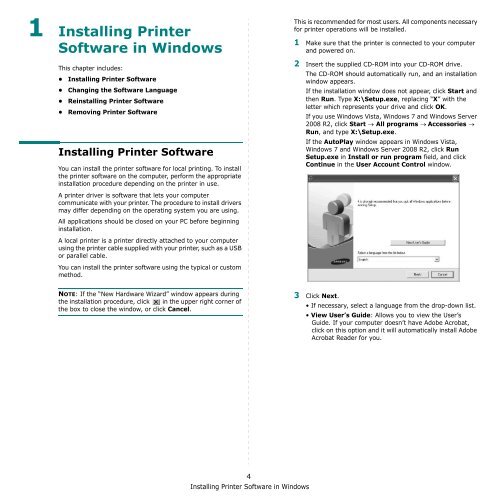
1 Make sure that the printer is connected to your computer<br />
and powered on.<br />
2 Insert the supplied CD-ROM into your CD-ROM drive.<br />
The CD-ROM should automatically run, and an installation<br />
window appears.<br />
If the installation window does not appear, click Start and<br />
then Run. Type X:\Setup.exe, replacing “X” with the<br />
letter which represents your drive and click OK.<br />
If you use Windows Vista, Windows 7 and Windows Server<br />
2008 R2, click Start → All programs → Accessories →<br />
Run, and type X:\Setup.exe.<br />
If the AutoPlay window appears in Windows Vista,<br />
Windows 7 and Windows Server 2008 R2, click Run<br />
Setup.exe in Install or run program field, and click<br />
Continue in the User Account Control window.<br />
NOTE: If the “New Hardware Wizard” window appears during<br />
the installation procedure, click in the upper right corner of<br />
the box to close the window, or click Cancel.<br />
3 Click Next.<br />
• If necessary, select a language from the drop-down list.<br />
• View User’s Gui<strong>de</strong>: Allows you to view the User’s<br />
Gui<strong>de</strong>. If your computer doesn’t have Adobe Acrobat,<br />
click on this option and it will automatically install Adobe<br />
Acrobat Rea<strong>de</strong>r for you.<br />
4<br />
Installing Printer Software in Windows


