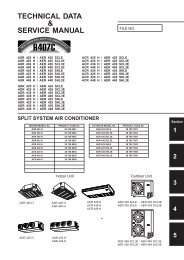
technical & service manual dc inverter multi-system air conditioner
technical & service manual dc inverter multi-system air conditioner
technical & service manual dc inverter multi-system air conditioner

Create successful ePaper yourself
Turn your PDF publications into a flip-book with our unique Google optimized e-Paper software.
English<br />
(4) With the “Lo” knob of the manifold valve open and high-pressure valve (“Hi”) closed completely, run the vacuum<br />
pump. Run the pump until the pressure is –101 kPa (–76 cmHg). The operation time for the vacuum pump varies<br />
with tubing length and the capacity of the pump. The following table shows the amount of time required for<br />
evacuation:<br />
Table 5<br />
NOTE<br />
Required time for evacuation when capacity<br />
of 100 liter/h vacuum pump is used<br />
The required time in the above table is calculated<br />
based on the assumption that the ideal (or target)<br />
vacuum condition is around 10 mmHg abs.<br />
(5) With the vacuum pump still running, close the “Lo” knob of the manifold valve. Then stop the vacuum pump.<br />
Fully close the low-pressure valve and stop the vacuum pump. (Wait 1 – 2 minutes and check that the manifold<br />
gauge pointer does not return. If it does return, find and rep<strong>air</strong> the leak, then apply the vacuum again.)<br />
(6) With a hex wrench, turn the valve stem on the narrow tube <strong>service</strong> valve counterclockwise by 90 degrees (1/4<br />
turn) for 10 seconds, and then turn the stem clockwise to close it again.<br />
CAUTION<br />
(7) With a standard screwdriver, turn the wide tube <strong>service</strong> valve stem counterclockwise to fully open the valve.<br />
(8) Turn the narrow tube <strong>service</strong> valve stem counterclockwise to fully open the valve.<br />
(9) Loosen the vacuum hose connected to the wide tube <strong>service</strong> port slightly to release the pressure. Then,<br />
remove the hose.<br />
(10) Leak test all joints at the tubing (both indoor and outdoors) with liquid soap. Bubbles indicate a leak. Be sure to<br />
wipe off the soap with a clean cloth.<br />
CAUTION<br />
20 min. or more<br />
(11) Replace the flare nut on the wide tube <strong>service</strong> port and fasten the flare nut securely with an adjustable wrench<br />
or box wrench. Next, mount the valve cap and tighten it with a torque wrench (the cap needs to be tightened<br />
with the torque of 19 N·m (190 kgf · cm) or 24 N·m (240 kgf · cm)). This process is very important to prevent<br />
gas from leaking from the <strong>system</strong>.<br />
(12) Test run the <strong>air</strong> <strong>conditioner</strong>. (See page 19.)<br />
(13) While the <strong>air</strong> <strong>conditioner</strong> is running, apply liquid soap to check for any gas leaks around the <strong>service</strong> valves or<br />
caps.<br />
(14) If there is no leakage, stop the <strong>air</strong> <strong>conditioner</strong>.<br />
(15) Wipe off the soap on the tubing.<br />
Be sure to completely insert<br />
the hex wrench before<br />
attempting to turn the valve.<br />
If a CFC gas detector is used,<br />
use a special detector for HFC<br />
refrigerant (such as R410A and<br />
R134a).<br />
This completes <strong>air</strong> purging with a vacuum pump and the <strong>air</strong> <strong>conditioner</strong> is ready for actual operation.<br />
14