Download MindView 5 Professional PDF - MatchWare
Download MindView 5 Professional PDF - MatchWare
Download MindView 5 Professional PDF - MatchWare

You also want an ePaper? Increase the reach of your titles
YUMPU automatically turns print PDFs into web optimized ePapers that Google loves.
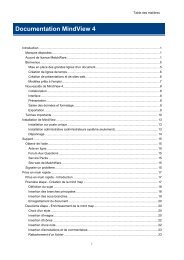
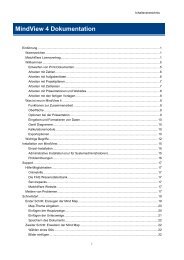
<strong>MindView</strong> Documentation<br />
Introduction ............................................................................................................................................. 1<br />
Trademarks ......................................................................................................................................... 1<br />
<strong>MatchWare</strong> License Agreement .......................................................................................................... 1<br />
Welcome .............................................................................................................................................. 5<br />
Outlining written documents ............................................................................................................ 5<br />
Working with timelines ..................................................................................................................... 6<br />
Working on presentations and web sites ......................................................................................... 6<br />
Using the ready-made templates ..................................................................................................... 6<br />
What's new in <strong>MindView</strong> 5 ................................................................................................................... 7<br />
Interface ........................................................................................................................................... 7<br />
Formatting ........................................................................................................................................ 7<br />
Presentation options ........................................................................................................................ 7<br />
Outline view ..................................................................................................................................... 8<br />
Timeline view ................................................................................................................................... 8<br />
Import and Export options ................................................................................................................ 8<br />
Important terms ................................................................................................................................... 9<br />
<strong>MindView</strong> Installation ............................................................................................................................ 11<br />
Stand-alone installation .................................................................................................................. 11<br />
Administrative installation (system administrators only) ................................................................ 11<br />
Troubleshooting ............................................................................................................................. 12<br />
Support .................................................................................................................................................. 13<br />
Getting help ....................................................................................................................................... 13<br />
Online Help .................................................................................................................................... 13<br />
The FAQ Knowledge Base ............................................................................................................ 13<br />
Service Packs ................................................................................................................................ 13<br />
<strong>MatchWare</strong> Web Site ..................................................................................................................... 13<br />
Reporting a problem .......................................................................................................................... 13<br />
Quick Start............................................................................................................................................. 14<br />
Quick Start ......................................................................................................................................... 14<br />
First step: Creating the mind map ..................................................................................................... 14<br />
Entering the subject ....................................................................................................................... 15<br />
Inserting the main branches .......................................................................................................... 15<br />
Inserting the sub-branches ............................................................................................................ 16<br />
Saving the document ..................................................................................................................... 17<br />
Second step: Enhancing the mind map ............................................................................................. 17<br />
Choosing a style ............................................................................................................................ 17<br />
Inserting pictures ............................................................................................................................ 17<br />
Inserting icons ................................................................................................................................ 19<br />
Inserting a text note ....................................................................................................................... 19<br />
Inserting comments ........................................................................................................................ 20<br />
i
<strong>MindView</strong> Documentation<br />
Attaching a file ............................................................................................................................... 20<br />
Creating a branch connection ........................................................................................................ 21<br />
Formatting the branches ................................................................................................................ 21<br />
User Guide ............................................................................................................................................ 23<br />
Setting up .......................................................................................................................................... 23<br />
Setting up your workspace ............................................................................................................ 23<br />
Setting up your preferences ........................................................................................................... 28<br />
Basic tasks ........................................................................................................................................ 31<br />
Creating a mind map ...................................................................................................................... 31<br />
Saving a mind map ........................................................................................................................ 33<br />
Opening a mind map ...................................................................................................................... 35<br />
Entering a branch label .................................................................................................................. 36<br />
Inserting branches ......................................................................................................................... 36<br />
Designing a mind map ................................................................................................................... 39<br />
Viewing a mind map ....................................................................................................................... 42<br />
Zooming in and out ........................................................................................................................ 44<br />
Inserting text notes ......................................................................................................................... 45<br />
Inserting comments ........................................................................................................................ 50<br />
Inserting icons ................................................................................................................................ 53<br />
Inserting pictures ............................................................................................................................ 54<br />
Inserting timeline data .................................................................................................................... 59<br />
Printing a mind map ....................................................................................................................... 62<br />
Further tasks ...................................................................................................................................... 65<br />
Formatting a branch ....................................................................................................................... 65<br />
Moving a branch ............................................................................................................................ 68<br />
Focusing on a branch .................................................................................................................... 70<br />
Filtering a mind map ...................................................................................................................... 71<br />
Attaching objects ............................................................................................................................ 72<br />
Inserting sounds ............................................................................................................................. 74<br />
Creating hyperlinks ........................................................................................................................ 75<br />
Creating branch connections ......................................................................................................... 77<br />
Using sources ................................................................................................................................ 79<br />
Using citations ................................................................................................................................ 84<br />
Finding and replacing text .............................................................................................................. 86<br />
Inserting a new root ....................................................................................................................... 88<br />
Detaching a branch ........................................................................................................................ 88<br />
Tracking changes ........................................................................................................................... 89<br />
Creating a legend ........................................................................................................................... 90<br />
Presenting a mind map .................................................................................................................. 90<br />
Checking a mind map .................................................................................................................... 92<br />
Packing a mind map ...................................................................................................................... 93<br />
Sending a mind map ...................................................................................................................... 94<br />
Using the Multimedia Catalog ........................................................................................................ 94<br />
Using the Properties dialog .......................................................................................................... 100<br />
Using the Overview panel ............................................................................................................ 101<br />
ii
iii<br />
Table of Contents<br />
Using the Object list ..................................................................................................................... 102<br />
Collaborating ................................................................................................................................... 103<br />
Accessing online workspaces ...................................................................................................... 103<br />
Managing online workspaces ...................................................................................................... 103<br />
Opening and saving online documents ........................................................................................ 104<br />
Collaborating on an online document .......................................................................................... 106<br />
Views ............................................................................................................................................... 109<br />
Using different views .................................................................................................................... 109<br />
Mind Mapping views .................................................................................................................... 110<br />
Timeline view ............................................................................................................................... 113<br />
Outline view ................................................................................................................................. 119<br />
Spellchecking .................................................................................................................................. 124<br />
Using the spellchecker ................................................................................................................. 124<br />
Spellchecking options .................................................................................................................. 126<br />
Exporting ......................................................................................................................................... 130<br />
Introduction .................................................................................................................................. 130<br />
Additional folders ......................................................................................................................... 130<br />
Exporting to Microsoft Word ........................................................................................................ 131<br />
Exporting to Microsoft PowerPoint ............................................................................................... 135<br />
Exporting to HTML ....................................................................................................................... 140<br />
Exporting to <strong>PDF</strong> .......................................................................................................................... 163<br />
Exporting to Mediator ................................................................................................................... 164<br />
Exporting to RTF .......................................................................................................................... 180<br />
Exporting as picture ..................................................................................................................... 183<br />
Importing .......................................................................................................................................... 185<br />
Introduction .................................................................................................................................. 185<br />
Importing from Microsoft Word .................................................................................................... 185<br />
Importing from Microsoft PowerPoint ........................................................................................... 187<br />
Importing from Mediator ............................................................................................................... 191<br />
Importing from other applications ................................................................................................ 193<br />
Pen Mode ........................................................................................................................................ 194<br />
Working in Pen Mode ................................................................................................................... 194<br />
Reference ............................................................................................................................................ 199<br />
Properties ........................................................................................................................................ 199<br />
Overview ...................................................................................................................................... 199<br />
View ............................................................................................................................................. 199<br />
Root .............................................................................................................................................. 201<br />
Branch .......................................................................................................................................... 203<br />
Branch Data ................................................................................................................................. 205<br />
Text note ...................................................................................................................................... 205<br />
Floating comment ........................................................................................................................ 205<br />
Floating picture ............................................................................................................................ 207<br />
Attachment ................................................................................................................................... 207<br />
Hyperlink ...................................................................................................................................... 208<br />
Branch connection ....................................................................................................................... 208
<strong>MindView</strong> Documentation<br />
Keyboard shortcuts ............................................................................................................................. 211<br />
Index .................................................................................................................................................... 213<br />
iv
Introduction<br />
Trademarks<br />
<strong>MatchWare</strong>, <strong>MatchWare</strong> Mediator, <strong>MatchWare</strong> <strong>MindView</strong> and <strong>MatchWare</strong> ScreenCorder are<br />
trademarks or registered trademarks of <strong>MatchWare</strong> A/S.<br />
Mind Map and Mind Mapping are registered trademarks of the Buzan Organisation.<br />
Microsoft, Microsoft Office, Microsoft Word, Microsoft PowerPoint, Microsoft Excel, Microsoft<br />
Project, Microsoft Outlook, Microsoft FrontPage, Microsoft Windows, Windows Media Player,<br />
Windows Explorer and Internet Explorer are trademarks or registered trademarks of Microsoft<br />
Corporation.<br />
The 2007 Microsoft Office Fluent User Interface is subject to protection under U.S. and<br />
international intellectual property laws and is used by <strong>MatchWare</strong> A/S under license from Microsoft.<br />
Netscape is a registered trademark of Netscape Communications.<br />
Flash is a trademark of Adobe Systems Inc. (formerly Macromedia, Inc.).<br />
WorldCat and the WorldCat logo are trademarks/service marks of OCLC Online Computer Library<br />
Center, Inc.<br />
Other brand or product names are trademarks or registered trademarks of their respective holders.<br />
This Product is copyrighted © 2002-2012 by <strong>MatchWare</strong> A/S. All rights reserved.<br />
<strong>MatchWare</strong> and <strong>MatchWare</strong> <strong>MindView</strong> are trademarks or registered trademarks of <strong>MatchWare</strong> A/S.<br />
Other brand or product names are trademarks or registered trademarks of their respective holders.<br />
Information given in this documentation can be changed and represents no obligation on<br />
<strong>MatchWare</strong>, its Publishers or Agents. This documentation is copyrighted © 2002-2012 by<br />
<strong>MatchWare</strong> A/S. All rights reserved. This documentation is not to be copied, photocopied,<br />
reproduced, translated or transferred to an electronic media or machine sensible form without a<br />
written authorization from <strong>MatchWare</strong> or its Publishers.<br />
IMPORTANT You should read the following <strong>MatchWare</strong> License Agreement (EULA) carefully. If<br />
you install, copy, download, or use this software Product, you agree to be bound by the terms of<br />
this agreement. If you do not agree with the conditions, you are not entitled to install and use the<br />
software, and should immediately return the software package and all other material in this<br />
package along with proof of payment, to the authorized dealer from whom you obtained it for a full<br />
refund of the price you paid. Do not make any illegal copies.<br />
<strong>MatchWare</strong> License Agreement<br />
USE<br />
This is a legal agreement between you, the end user, and <strong>MatchWare</strong> A/S ("<strong>MatchWare</strong>"). The<br />
enclosed software program ("Product") is licensed, not sold, to you by <strong>MatchWare</strong> for use under<br />
the term of this license.<br />
Prior to using the license to the Product you must assign it to a device, which becomes the<br />
"licensed device". A hardware partition, blade, external hard drive, Flash drive etc. is considered to<br />
be a separate device.<br />
You may install and use one copy of the Product on the licensed device. Further, the primary user<br />
of the licensed device may install and use another copy of the Product on a laptop.<br />
This Product may be freely moved from one computer or location to another, so long as there is no<br />
possibility of it being used by more than one person at a time. You may make one (1) backup copy<br />
of the Product.<br />
A Terminal Server is a computer allowing other Client computers to run applications on the<br />
Terminal Server such as but not limited to a Microsoft Terminal Server and a Citrix Server. If the<br />
1
<strong>MindView</strong> Documentation<br />
Product is installed on a Terminal Server you need a license for each Client computer that can run<br />
the Product.<br />
You may add users by paying for a separate license for each device you wish to add. When<br />
installing the Product on a server which allows multiple, concurrent users to access and run the<br />
Product, you must license (purchase) additional licenses for each computer.<br />
When using Remote Desktop technologies you may access and use the Product provided that only<br />
the primary user of the device hosting the remote desktop session accesses and uses the Product<br />
with a remote access device. You are not permitted to use the Product on both the device hosting<br />
the remote desktop session and the access device at the same time.<br />
You may not rent, lease, loan or license this Product or any copy.<br />
You may not reverse-engineer, disassemble, decompile, modify or create derivative work of this<br />
Product.<br />
ACTIVATION<br />
Mandatory activation is required when using the Product. When activating the Product certain<br />
information about the Product and the device will be sent to <strong>MatchWare</strong>. This information includes<br />
version, language, product ID of the Product, device internet protocol address and hardware<br />
configuration. By using the Product you consent to the transmission of this information.<br />
EDUCATIONAL LICENSES<br />
Commercial use of Educational Licenses of this Product is prohibited.<br />
You agree to not use an Educational License to engage in commercial activities including, without<br />
limitation, the following activities:<br />
offering for sale any products or services;<br />
soliciting for advertisers or sponsors;<br />
conducting raffles or contests that require any type of entry fee;<br />
displaying a sponsorship banner of any kind, including those that are generated by banner or<br />
link exchange services; and<br />
displaying banners for services that provide cash or cash-equivalent prizes to users in<br />
exchange for hyperlinks to their web sites.<br />
Some educational multi-user licenses offer home use rights for teachers (and students). Any<br />
additional DVDs purchased to facilitate such home use may not be installed or used on the<br />
respective educational institution premises, buildings or campus.<br />
If you are enrolled in the educational subscription program for the Product, the use of the Product<br />
is subject to the Subscription Agreement and this License Agreement.<br />
TRANSFER OF THE PRODUCT<br />
You may transfer all of your rights to use the Product to another person, provided that you transfer<br />
to that person the entire Product package, DVDs, documentation, and this statement, and transfer<br />
or destroy all copies in any form. Once you transfer the Product you no longer have any rights to<br />
use it. Only the person to whom the Product is transferred may use it in accordance with the<br />
copyright law, international treaty and this statement.<br />
If you have purchased an upgrade version of the Product, it constitutes a single product with the<br />
<strong>MatchWare</strong> Product that you upgraded. For instance, the upgrade and the Product that you<br />
upgraded cannot both be available for use by two different persons at the same time and cannot be<br />
transferred separately.<br />
OEM VERSIONS OF THE PRODUCT<br />
An OEM version is a license of the Product that is distributed with a hardware device by the device<br />
manufacturer. An OEM version of the Product is identified as an OEM version either on the cover<br />
of the DVD (or CD) and/or in the main title bar within the Product.<br />
You may transfer all of your rights to use the OEM version of the Product to another party only with<br />
the licensed hardware device, provided that you transfer to that person the entire Product package,<br />
DVDs, documentation, and this statement, and transfer or destroy all copies in any form. Once you<br />
transfer the Product you no longer have any rights to use it. The OEM version of the Product may<br />
not be transferred separately without the hardware device.<br />
2
3<br />
Introduction<br />
COPYRIGHT<br />
All intellectual property rights in the Product and user documentation are owned by <strong>MatchWare</strong> A/S<br />
or its suppliers and are protected by United Kingdom copyright laws, other applicable copyright<br />
laws and international treaty provisions. <strong>MatchWare</strong> A/S retains all rights not expressly granted.<br />
CLIPART<br />
This Product may contain clipart ("Clipart") such as images, sounds, video clips etc. All intellectual<br />
copyright for the Clipart is owned by <strong>MatchWare</strong> A/S or licensed by <strong>MatchWare</strong> A/S.<br />
<strong>MatchWare</strong> grants you a non-exclusive, non-sublicensable right to use the Clipart in presentations<br />
or web sites created with this Product, including in runtime versions of the Product. There is no<br />
royalty due for such use to <strong>MatchWare</strong>. The Clipart may not be sublicensed or made available to<br />
any person or entity that does not have a legal license of this Product.<br />
RUNTIME VERSIONS<br />
In some <strong>MatchWare</strong> products (including this Product) you have the opportunity to make runtime<br />
versions or web sites of your applications. Your runtime versions or web sites and the distribution<br />
of them are subject to all of the following conditions:<br />
You may not remove or alter any <strong>MatchWare</strong> copyright, trademark, or any other proprietary<br />
rights.<br />
You may not use <strong>MatchWare</strong>'s or any of its suppliers' names, logos, or trademarks to market<br />
your runtime version. You may state that your runtime version was made using this <strong>MatchWare</strong><br />
Product.<br />
You will remain solely responsible to anyone receiving your runtime versions or web site for<br />
support, service, upgrades, or technical assistance. The recipients will have no right to contact<br />
<strong>MatchWare</strong> for such services or assistance.<br />
You will indemnify and hold <strong>MatchWare</strong>, its related companies and its suppliers harmless from<br />
and against any claims or liabilities arising out of the distribution of your runtime versions.<br />
LIMITED WARRANTY<br />
<strong>MatchWare</strong> warrants the physical media and physical documentation provided by <strong>MatchWare</strong> to be<br />
free of defects in materials and workmanship for a period of ninety (90) days from the original<br />
purchase date. <strong>MatchWare</strong> will replace defective media or user documentation at no charge,<br />
provided you return the item within the warranty period. If <strong>MatchWare</strong> is unable to replace defective<br />
media or user documentation, <strong>MatchWare</strong> will refund the amount you paid for the Product. These<br />
are your sole remedies for any breach of warranty.<br />
LIMITATION OF LIABILITY<br />
The entire and exclusive liability and remedy for breach of the foregoing limited warranty shall be<br />
limited to replacement of defective media or documentation. In no event shall either party be liable<br />
to the other party for any special, indirect, consequential, exemplary, punitive, incidental, or similar<br />
damages, including but not limited to, loss of profit, data, or use of the Product, even if <strong>MatchWare</strong><br />
has been advised of the possibility of such damages. <strong>MatchWare</strong> makes no representation or<br />
warranty that the Product or documentation are "error free" or meet any of the user's particular<br />
standards, requirements, or needs. In no event shall <strong>MatchWare</strong>'s liability exceed the aggregate<br />
amounts paid by you pursuant to this Agreement. To the extent that applicable law does not allow<br />
the exclusion or limitation of implied warranties or limitation of liability for incidental or<br />
consequential damages the above limitation or exclusion may not apply to you.<br />
INTELLECTUAL PROPERTY INDEMNITY<br />
<strong>MatchWare</strong> will, at its expense, indemnify, defend and hold Customer harmless against any and all action<br />
brought against you to the extent that it is based on a claim that the <strong>MatchWare</strong> Product or any part thereof or<br />
any <strong>MatchWare</strong> trademark used in relation thereto, when used within the scope of this Agreement, infringes<br />
any trademark, copyright, trade secret, patent or other intellectual property right, and <strong>MatchWare</strong> will pay any<br />
costs, damages and/or attorneys' fees awarded against you in such action or payable pursuant to a settlement<br />
agreed to by <strong>MatchWare</strong>. The foregoing obligation shall be subject to you notifying <strong>MatchWare</strong> promptly in<br />
writing of the claim, giving <strong>MatchWare</strong> the exclusive control of the defense and settlement thereof, and<br />
providing all reasonable assistance in connection therewith.
<strong>MindView</strong> Documentation<br />
SUGGESTIONS<br />
<strong>MatchWare</strong> will have worldwide, irrevocable, royalty-free, perpetual license to use, develop and include in the<br />
Product any suggestions, recommendations or improvement requests or feedback from you, including users,<br />
to the Product.<br />
CUSTOMER REFERENCE<br />
Either party may include the other party in a customer or vendor list. You also agree to consider the following<br />
upon request from <strong>MatchWare</strong>: (i) participate in case studies and in Return of Investment studies, (ii) serve as<br />
a reference, link exchange and use of your logo as reference on <strong>MatchWare</strong>’s website, (iii) collaborate on<br />
press releases announcing the relationship.<br />
U.S. GOVERNMENT RESTRICTED RIGHTS<br />
This Product and documentation are provided with RESTRICTED RIGHTS. The Product and<br />
documentation are developed at private expense and no part of them is in the public domain. Use,<br />
duplication, or disclosure by the Government is subject to restrictions as set forth in subparagraph<br />
c(1) and (2) of the Commercial Computer Software Restricted Rights clause at FAR 52.277-19 or<br />
subparagraph c(1) (ii) of the Rights in Technical Data and Computer Software clause at DFARS<br />
252.227 - 7013. Manufacturer is <strong>MatchWare</strong> A/S, Vestergade 48F, 8000 Århus C, Denmark.<br />
GENERAL<br />
This agreement is governed by English law and any dispute connected with this agreement and/or<br />
the Software is subject to the exclusive jurisdiction of the English courts. The export of this product<br />
is governed by U.S and UK export regulations.<br />
4
Welcome<br />
5<br />
Introduction<br />
Welcome to <strong>MatchWare</strong>® <strong>MindView</strong>, the perfect tool for businesses, educators and students<br />
who need to organize information! Easy to learn and easy to use, <strong>MindView</strong> is a highly effective<br />
way of brainstorming, developing and structuring ideas visually. Ideal for use by individuals,<br />
small teams or large groups, <strong>MindView</strong> generates illustrated mind maps® which you can use in<br />
presentations, reports, web sites and more. With a comprehensive range of export options to<br />
Microsoft® Office applications, <strong>MatchWare</strong>® Mediator, HTML and other formats, <strong>MindView</strong> is an<br />
effective and versatile concept development tool.<br />
Mind maps are illustrated frameworks of organized, prioritized, linked ideas that develop or relate<br />
to a subject or concept.<br />
Mind maps have been demonstrated to help individuals and businesses achieve higher levels of<br />
performance by increasing productivity and organization skills.<br />
Outlining written documents<br />
Using the Mind Mapping technique makes it very easy to outline your written documents such as<br />
meeting agendas, proposals and marketing plans. <strong>MindView</strong> allows you to brainstorm ideas for<br />
your main topics in a completely free and non-linear way. One of the great benefits of using<br />
<strong>MindView</strong>, as opposed to brainstorming on a piece of paper, is that <strong>MindView</strong> allows you to<br />
reorganize your ideas in the right order by dragging and dropping them in the mind map once you<br />
have finished listing them.<br />
When you export your mind map to Microsoft® Word, you can choose from a variety of creative<br />
templates designed to give your document a professional look instantly. Main ideas are exported<br />
as main headings, sub-ideas are exported as sub-headings and so on. All the text notes,<br />
comments, pictures and other elements which you have placed on the mind map are also<br />
exported. This means that you can actually start writing your report while brainstorming in<br />
<strong>MindView</strong>, as the complete text is included in the exported Word document.
<strong>MindView</strong> Documentation<br />
Once you start developing your document in Word, you may realize that you have forgotten some<br />
key ideas that you would like to brainstorm in <strong>MindView</strong> first. All you need to do in that case is to<br />
import your Word document back into <strong>MindView</strong>, add the new ideas to your mind map, and then reexport<br />
to Word.<br />
Working with timelines<br />
The <strong>MindView</strong> Timeline view is a great way of displaying time-related information such as company<br />
history, marketing plans, production plans and historical data. Simply add dates or times to your<br />
branches and switch to the Timeline view to see the information displayed along a horizontal time<br />
axis. Different timescales (for example standard, weekly or daily) let you tailor the timeline to suit<br />
your needs. You can zoom in or out, expand or contract the timeline scale, and condense empty<br />
stretches of the timeline by inserting break marks.<br />
Working on presentations and web sites<br />
<strong>MindView</strong> has been optimized for storyboarding and planning web sites and multimedia<br />
presentations, which you can then export to Microsoft® PowerPoint, <strong>MatchWare</strong>® Mediator or<br />
HTML:<br />
When storyboarding presentations, an idea in your mind map represents a slide (PowerPoint)<br />
or a page (Mediator) in your presentation, a sub-idea represents a sub-page or sub-slide and<br />
so on.<br />
You can attach files to branches (ideas) in the mind map, such as Flash files, pictures, text,<br />
sounds and videos. These files are included when you export to PowerPoint, Mediator or<br />
HTML and displayed on their respective pages.<br />
<strong>MindView</strong> lets you create hyperlinks, branch connections and other interactivity that is also<br />
included when exporting.<br />
The Export Wizards include a range of ready-made templates with built-in navigation, which<br />
you are free to customize and save for further use.<br />
<strong>MindView</strong> allows basic web editing during the HTML export. You can for instance place the<br />
various elements where required on each individual page. No coding or scripting necessary!<br />
Once exported, you can import your Mediator or PowerPoint presentation back into <strong>MindView</strong> if<br />
you need to storyboard more pages or slides.<br />
Using the ready-made templates<br />
<strong>MindView</strong> provides you with detailed business and educational templates for use in any of the<br />
standard Mind Mapping views or the Timeline view.<br />
You can base your own documents on any of these templates, and customize them as required to<br />
meet your particular needs. Comments and suggestions for expansion are given in their notes and<br />
pop-up comments.<br />
6
What's new in <strong>MindView</strong> 5<br />
7<br />
Introduction<br />
<strong>MindView</strong> 5 has many new features, which are fully described in this documentation. Here<br />
is a brief description of the most important enhancements.<br />
Interface<br />
Microsoft Office 2013 interface: <strong>MindView</strong> has been updated with the new Office 2013 interface.<br />
For more information about the <strong>MindView</strong> interface, see "Setting up your workspace".<br />
Transitions: Screen transitions when zooming in and out, or navigating to different areas of the<br />
mind map, have been made smoother. For more information, see "Setting up your preferences".<br />
High Contrast mode: <strong>MindView</strong> 5 supports the standard High Contrast mode included in Windows<br />
and includes new map styles designed specifically to work in that mode.<br />
Formatting<br />
Templates: <strong>MindView</strong> 5 includes new customized templates for project management and study<br />
skills, on which to base your own projects. For more information about templates, see "Creating a<br />
mind map".<br />
Styles: <strong>MindView</strong> 5 includes new map styles that have been optimized for specific project types,<br />
letting you change the overall look of the map and apply branch shapes, branch colors and other<br />
coordinated attributes in one step. Simply hover over the contents of the Styles gallery to visualize<br />
the effect of the different options on your map, then click your choice to apply it.<br />
<strong>MindView</strong> 5 also lets you define your own customized styles. Just choose the ready-made style<br />
that is the closest to the effect you want to achieve, make your own changes, and save the style as<br />
a custom style for re-use later. To find out more about the Custom Style Designer, see "Designing<br />
a mind map".<br />
Branch pictures: <strong>MindView</strong> 5 allows you to paste pictures directly on branches. This means you<br />
can now use popular screen clipping tools like the Windows Snipping tool to add graphics to the<br />
branches of your mind map. For more information, see "Inserting pictures".<br />
Numbering scheme: When you use a numbering scheme to number the branches of your mind<br />
map sequentially, you can now choose whether the numbering should start from the root, or from<br />
the first main branch. For more information, see "Viewing a mind map".<br />
Document statistics: To help you overview the amount of data you have included in your mind<br />
map, <strong>MindView</strong> 5 lets you view document statistics such as word count, branch count and so on.<br />
For more information, see "Viewing a mind map".<br />
Presentation options<br />
Map Navigation: The Map Navigation feature allows you to set pins (bookmarks) on your<br />
branches, in order to locate them quickly again in your map. When you select a pinned branch in<br />
the Map Navigation menu, the branch is automatically selected and the map becomes centered on<br />
that branch. For more information, see "Viewing a mind map".<br />
Legend: <strong>MindView</strong> 5 now lets you add legends to your maps, to make them easier to read and<br />
interpret. You can for instance associate a particular color or a particular icon to some of the<br />
branches of your map to single them out, and then apply a legend to give the meaning of this color<br />
or icon. For more information, see "Creating a legend".<br />
Text to Speech: <strong>MindView</strong> 5 now supports a narrating function. Just select a branch label, a text<br />
note or a comment and click the Narrate button to have that element read aloud. For more<br />
information, see "Viewing a mind map".<br />
Printing: The printing options and print preview feature have been enhanced and integrated to the<br />
ribbon, making it much easier to use. For more information, see "Printing a mind map".
<strong>MindView</strong> Documentation<br />
Outline view<br />
The Outline view now has its own Tools tab, regrouping the most commonly used functions. You<br />
can use it for instance to indent, outdent, move up or move down the branches in the outline to rearrange<br />
the corresponding topics, number them, or choose the columns to be displayed. It is now<br />
also possible to show the text notes associated with the branches in the outline itself, just<br />
underneath each branch. Finally you can choose between different text sizes for the outline. For<br />
more details, see "Using the Outline view".<br />
Timeline view<br />
The Timeline view now also has its own Tools tab, allowing you to design your timeline and<br />
optimize its display without having to navigate between different ribbon tabs to find the commands<br />
you need. For more information, see "Using the Timeline view".<br />
Import and Export options<br />
Microsoft Word export: Microsoft Office files that have been added to the mind map as<br />
attachments are now automatically embedded in the .docx file produced by the export. For more<br />
information, see "Exporting to Microsoft Word".<br />
When exporting your document to Microsoft Word, you can also choose from a variety of<br />
bibliography styles, such as APA, MLA, Chicago and more, to reference your sources and<br />
citations. For more information about adding sources and citations in your documents, see "Using<br />
sources" and "Using citations".<br />
8
Important terms<br />
9<br />
Introduction<br />
Many of the terms used in <strong>MindView</strong> belong to the standard Windows terminology. Some terms,<br />
however, are specific to <strong>MindView</strong> or related to the Mind Map concept and may be unfamiliar to<br />
you.<br />
Attachments and hyperlinks<br />
<strong>MindView</strong> allows you to attach various objects to the root or branches of your mind map, such as<br />
text documents, pictures, videos, sounds, Flash files or URL links, which you can activate from<br />
within the mind map. These objects are listed in the <strong>MindView</strong> Object list, and can all be exported<br />
when exporting your map to a different format. See "Attaching objects" and "Creating hyperlinks"<br />
for more information.<br />
Branch connections<br />
A branch connection is used to indicate visually that two branches are conceptually related. This<br />
relationship is identified on a map by an arrow-headed line joining the source branch to the end<br />
branch. See "Creating branch connections" for more information.<br />
Comments<br />
Comments are short notes that you can add to the root of your map, to a branch or to the<br />
workspace itself. See "Inserting comments" for more information.<br />
Document<br />
Each <strong>MindView</strong> document you create opens in a separate tab bearing the name of the document.<br />
A <strong>MindView</strong> document can contain several maps. You can also keep several documents open at<br />
the same time in <strong>MindView</strong>. <strong>MindView</strong> documents are saved with the extension .mvdx. See<br />
"Creating a mind map" for more information.<br />
Export<br />
Once you have finished the design of your document, you can export it to other formats, such as a<br />
Microsoft® PowerPoint presentation, a Microsoft® Word or .RTF document, a <strong>MatchWare</strong> Mediator<br />
document or a picture. You can also export to HTML.<br />
See the section "Exporting" for more information.<br />
Import<br />
Not only can you export your document to PowerPoint, Word or Mediator, but you can re-import the<br />
exported document into <strong>MindView</strong> as a new document, while preserving much of the additional<br />
work you might have done on the document in these external applications. You can also import into<br />
<strong>MindView</strong> documents originally created in PowerPoint, Word or Mediator.<br />
See the section "Importing" for more information.<br />
Icons<br />
<strong>MindView</strong> lets you place icons on the branches of your mind map to attract attention or illustrate a<br />
particular idea. Using icons, you can for instance represent visually the status of a particular topic,<br />
its importance, and so on. See "Inserting icons" for more information.<br />
Left/Right view<br />
This view represents your mind map as a list of topics placed either on the right of the root (Right<br />
view) or on the left of the root (Left view). It is a good choice when you need to present data in a list<br />
form and want to be able to fully explore each point in the list before going on to the next point. See<br />
"Using different views" for more information.<br />
Main branch<br />
The main branches are the branches that are directly connected to the root. They represent the<br />
main topics related to the subject of your mind map. See "Inserting branches" for more information.<br />
Mind Map<br />
A mind map is made up of its root, all its branches and sub-branches and all inserted elements<br />
(icons, comments, text notes and so on) and attached objects (text files, picture files, video files,<br />
hyperlinks and so on). Note that <strong>MindView</strong> allows you to create several different maps in the same<br />
document.
<strong>MindView</strong> Documentation<br />
Mind Map view<br />
This is the default view when creating a new mind map. It represents the map with the root in the<br />
center, and all the main branches radiating from it in a clockwise direction. This is a good view to<br />
use when brainstorming ideas for a mind map without worrying about evaluating or structuring<br />
them. See "Using different views" for more information.<br />
Outline view<br />
The Outline view represents the map as a hierarchical list which you can expand and collapse as<br />
required. It allows easy navigation through the document from top to bottom and gives you another<br />
way to brainstorm ideas. For detailed information about working in the Outline view, see "Using the<br />
Outline view".<br />
Pack & Unpack<br />
This feature allows you to distribute your mind map to other users very easily. With a few mouse<br />
clicks, you can create a packed map containing all the pictures and files you may have attached to<br />
it, ready to be accessed over the network or distributed by email. See "Packing a mind map" for<br />
more information.<br />
Pre-branch<br />
A pre-branch is a branch that you insert before the currently selected branch. See "Inserting<br />
branches" for more information.<br />
Root<br />
The root is the central block that appears when you create a new mind map. It represents the<br />
subject of the map. Any branch that you attach directly to the root is a main branch. See "Inserting<br />
branches" for more information.<br />
Sub-branch<br />
Any branch belonging to a main branch is called a sub-branch. Each sub-branch can have its own<br />
sub-branches. Sub-branches represent various levels of sub-topics. See "Inserting branches" for<br />
more information.<br />
Templates<br />
<strong>MindView</strong> comes with a large number of educational, business and personal templates on which<br />
you can base your own mind maps. You can also save your own mind maps as templates for<br />
future use. See "Saving a mind map" for more information. Templates are saved with the extension<br />
.mvtx.<br />
Text notes<br />
Text notes, unlike comments, are comprehensive notes that you can enter using the Text Note<br />
editor and associate with the root or any branch of your map. See "Inserting text notes" for more<br />
information.<br />
Timeline view<br />
The Timeline view lets you see all the branches of your mind map that contain time information<br />
displayed in chronological order along a horizontal time axis. Different timescales (for example<br />
standard, geological and historic) let you tailor the timeline to suit your needs. For more information<br />
on the Timeline, see "Using the Timeline view".<br />
Top Down view<br />
This view represents your mind map as a hierarchical pyramid, with the root at the top, the main<br />
branches underneath, the sub-branches below the main branches and so on. It is a useful<br />
representation for structured data which needs to be viewed in a hierarchical manner, in other<br />
words from the higher level to the lowest levels. See "Using different views" for more information.<br />
10
<strong>MindView</strong> Installation<br />
Stand-alone installation<br />
Insert the DVD in the drive.<br />
Follow the instructions on the screen when the <strong>MindView</strong> Install program starts.<br />
If the <strong>MindView</strong> Install program does not start automatically:<br />
Choose Start - Run.<br />
Type the following:<br />
X:\start.exe<br />
where X represents the DVD drive letter.<br />
Administrative installation (system administrators only)<br />
The Windows® Installer can perform an administrative installation of an application or product to a<br />
network for use by a workgroup. An administrative installation installs a source image of the<br />
application onto the network that is similar to a source image on a DVD. The administrative<br />
installation package can then be pushed by system administrators to client computers in a domain<br />
via Group Policies. This is only possible from Windows 2000 Server onwards.<br />
To find out more about Windows® Installer and administrative installations, please refer to the<br />
Microsoft web site.<br />
Creating an administrative installation<br />
Administrators can create an administrative installation from the command line by using the /a<br />
command line option.<br />
Choose Start - Run.<br />
Type the following:<br />
msiexec.exe /a X:\install\setup.msi<br />
where X represents the DVD drive letter.<br />
(please check the location of the setup.msi on the DVD)<br />
Specify the following in the dialog that appears:<br />
Where you want to unpack the .msi file<br />
The user name and company name to use as default<br />
The serial number<br />
(optional) Check 'Force activation when <strong>MindView</strong> is run' if you want <strong>MindView</strong> to be<br />
automatically activated the first time the program runs.<br />
(optional) Check 'Automatically activate during installation' if you want to activate <strong>MindView</strong><br />
during installation.<br />
These two activation options are "silent" (i.e. they do not display any messages).<br />
The above options are stored in a file called "admin.ini" in the destination folder. You can edit<br />
this file using a text editor like Notepad if you want to change the options without making a new<br />
administrative installation.<br />
Applying a patch package to an administrative installation<br />
Choose Start - Run.<br />
Type:<br />
msiexec.exe /p /a <br />
11
<strong>MindView</strong> Documentation<br />
Members of the workgroup using <strong>MindView</strong> must then reinstall the application from the new<br />
administrative source image to receive the update.<br />
To completely reinstall the application and cache the updated .msi file on their computer, users<br />
may enter either of the following commands:<br />
msiexec.exe /fvomus //server/<br />
msiexec.exe /I //server// REINSTALL=ALL<br />
REINSTALLMODE=vomus<br />
Troubleshooting<br />
Changing the location of the activation file<br />
By default, the activation data is stored in:<br />
C:\Documents and Settings\All Users\Application<br />
Data\mwas\<strong>MindView</strong>5.0.mwas<br />
(Windows 2000 and Windows XP), or<br />
C:\ProgramData\mwas\<strong>MindView</strong>5.0.mwas<br />
(Windows 7 and Vista)<br />
In some rare situations, client computers may be setup with restricted access to the above folder,<br />
and this will cause the activation file not to be saved. If you have a client server system setup in<br />
this way, you can move the activation file to another location by adding an entry to the admin.ini file<br />
as follows:<br />
[Activation]<br />
mwas=c:\different folder with write access\<strong>MindView</strong>5.0.mwas<br />
Storing several activation files on the server<br />
You can store several activation files in the same folder of the server by adding an entry to the<br />
admin.ini file as follows:<br />
Where:<br />
[Activation]<br />
mwas=\\server\activations\<strong>MindView</strong>5.0_%COMPUTERNAME%.mwas<br />
server = the name of the server<br />
activations = the share name on the server<br />
%COMPUTERNAME% will be replaced with the client computer name<br />
Problem applying a patch<br />
Q. Nothing happens when I double-click the patch file (ex. patch.msp).<br />
A. The .msp file extension may be allocated to an application other than the Windows installer.<br />
In this case, you can apply the patch as follows:<br />
Chose Start - Run.<br />
Type the following command:<br />
msiexec.exe /p c:\temp\patch.msp<br />
(assuming that you have copied the .msp file to c:\temp)<br />
12
Support<br />
Getting help<br />
The <strong>MindView</strong> documentation is provided as online help in the program.<br />
Online Help<br />
You can access the online help system by pressing F1 or by clicking the small question mark<br />
on the top right of the <strong>MindView</strong> window.<br />
To obtain help on a particular dialog, click the small question mark on the top right of<br />
the dialog in question.<br />
The FAQ Knowledge Base<br />
For additional information, please refer to our FAQ Knowledge Base:<br />
http://faq.matchware.com/en/<br />
As well as answering the most commonly asked technical questions concerning the <strong>MatchWare</strong><br />
products, this database allows you to post comments and send questions to <strong>MatchWare</strong>.<br />
Service Packs<br />
If you encounter a problem that you are not able to solve by referring to the FAQ, check that you<br />
have installed the latest <strong>MindView</strong> service pack available. <strong>MatchWare</strong> releases service packs<br />
regularly to provide enhancements and correct errors reported by its users.<br />
You can find service packs for <strong>MatchWare</strong> products at:<br />
http://www.matchware.com/en/support/default.htm<br />
<strong>MatchWare</strong> Web Site<br />
The <strong>MatchWare</strong> web site contains extensive information on all the products offered, as well as<br />
tutorials, templates and reviews. Updates are posted regularly. To see what is currently available,<br />
please visit:<br />
http://www.matchware.com/en<br />
Reporting a problem<br />
To report a problem, bug or any other error in <strong>MindView</strong>, please send a message to <strong>MatchWare</strong> via<br />
our FAQ Knowledge Base:<br />
http://faq.matchware.com/en/<br />
<strong>MatchWare</strong> is registered with the Windows® Quality Online Services. In the unfortunate event of<br />
an application failure, the Windows Error Reporting system will capture relevant product data and<br />
enable you to forward this data to <strong>MatchWare</strong> automatically.<br />
13
Quick Start<br />
Quick Start<br />
This Quick Start takes you through all the basic steps required to build a mind map from scratch<br />
and enhance it with design effects, icons, comments, pictures, attachments and so on.<br />
The map we are going to create here is about planning a weekly meeting.<br />
The complete mind map, "Weekly Meeting.mvdx", can be found in the <strong>MindView</strong> program folder, in<br />
"…\<strong>MatchWare</strong>\<strong>MindView</strong> 5.0\QuickStart".<br />
First step: Creating the mind map<br />
In this first step of our Quick Start example, we are going to create all the branches we require for<br />
our meeting agenda.<br />
We start by creating a new <strong>MindView</strong> document.<br />
Start <strong>MindView</strong> and choose New Document in the Welcome dialog.<br />
If you have closed the Welcome dialog, you can create a new document by pressing Ctrl + N.<br />
The New Document dialog opens.<br />
14
In this Quick Start, we will use the Mind Map view, which is the default view in <strong>MindView</strong>.<br />
Select the Mind Map thumbnail and click Open.<br />
Your new map appears with the root block ready for you to fill in.<br />
Entering the subject<br />
Type "Weekly Meeting" and press Enter.<br />
The default file name "Weekly Meeting" is now shown on the document tab.<br />
15<br />
Quick Start<br />
The asterisk to the right of the name indicates that the document contains data which has not yet<br />
been saved.<br />
Inserting the main branches<br />
We are now going to insert a few branches, corresponding to various topics we would like to<br />
include in our agenda, namely:<br />
A section for the opening remarks<br />
A section on budget issues<br />
A section on the upcoming office relocations<br />
A section for the closing remarks
<strong>MindView</strong> Documentation<br />
Let's start by inserting the first branch.<br />
Press Enter.<br />
The first branch is now visible. Its default label is "Idea".<br />
Type "Opening remarks" and press Enter.<br />
Press Enter again to insert the second branch.<br />
Type "Budget" and press Enter.<br />
Insert two more branches by pressing Enter and label them "Relocations" and "Closing<br />
remarks".<br />
As you can see, branches are inserted in a clockwise direction around the root.<br />
Inserting the sub-branches<br />
We now want to insert some sub-branches, corresponding to the sub-topics of our main<br />
topics.<br />
To add the first sub-branch to the Opening remarks topic, click the corresponding branch to<br />
select it and press Insert.<br />
Type "Welcome" and press Enter.<br />
Press Enter again to add the second sub-branch.<br />
Type "Objectives" and press Enter.<br />
Type "Previous minutes" and press Enter.<br />
Now select the "Budget" branch and press Insert to add its first sub-branch.<br />
Continue in the same way until you have added all the other sub-branches shown below.<br />
To correct typing errors, select the relevant branch and click the label. Then place the cursor<br />
at the required position, press Delete or Backspace to remove the incorrect characters, type the<br />
correct ones and press Enter.<br />
16
Saving the document<br />
Let us save the work we have done so far before going on to the second step.<br />
Click the Save Document icon in the Quick Access Toolbar or press Ctrl + S.<br />
17<br />
Quick Start<br />
In the Save As dialog that opens, choose a folder, enter a file name for your new mind map<br />
and click Save.<br />
The default file name, derived from the subject of the map, is "Weekly Meeting.mvdx".<br />
Second step: Enhancing the mind map<br />
In this second step of our Quick Start example, we are going to enhance our meeting agenda by<br />
adding a variety of visual elements and multimedia objects to it.<br />
Choosing a style<br />
<strong>MindView</strong> contains galleries of predefined layouts and styles, which allow you to apply branch<br />
shapes, branch colors and other coordinated attributes in one step.<br />
Click the Design tab in the main menu.<br />
This tab contains all the design options applicable to the current view, in this case the Mind Map<br />
view.<br />
Browse through the Layouts gallery to choose your preferred layout.<br />
As you browse through the options, <strong>MindView</strong> shows you an immediate preview of their effect on<br />
the map. To apply a particular option, just click it. As we are designing a standard mind map, we<br />
are going to keep the default layout.<br />
Browse through the Styles gallery to choose your preferred style.<br />
(optional) To further customize the visual aspect of your map, explore the options available in<br />
the Effects and Properties panels.<br />
All the design options you choose here apply to the entire map. You can come back to this Design<br />
tab at any stage to change or add design options to your map. You might even prefer to leave the<br />
design phase to the end, once you have put in place all the contents of your map.<br />
As well as specifying global design options, <strong>MindView</strong> lets you apply different design effects to<br />
individual branches of the map, as we will see at the end of this Quick Start.<br />
Inserting pictures<br />
It is considered good Mind Mapping practice to insert a picture in the root block to illustrate<br />
the theme of the map, so we are going to do just that:<br />
Click the View tab in the main menu.<br />
Click Show/Hide | Multimedia Catalog.<br />
The Multimedia Catalog opens.<br />
Click the Search for field of the Multimedia Catalog and type "meeting".<br />
Various pictures appear in the Multimedia Catalog display area.
<strong>MindView</strong> Documentation<br />
Drag the picture of the meeting over the root block and let go of the mouse button.<br />
The root block now contains a picture of a meeting.<br />
This type of picture, which "sits" on the branch to which it belongs, is called a "branch picture".<br />
We also have a picture of a removal truck which we are going to insert as a "floating picture" to<br />
illustrate the Relocations branch.<br />
Click the Relocations branch to select it.<br />
Click the Insert tab in the main menu.<br />
Choose Pictures | Floating Picture.<br />
Browse to "…\<strong>MatchWare</strong>\<strong>MindView</strong> 5.0\QuickStart" in the Program Files folder, select the file<br />
"Truck.png" and click Open.<br />
A picture of a truck now appears on the map. You can move this picture wherever convenient by<br />
dragging it with the mouse. Note that a thin line connects it to the branch to which it belongs.<br />
18
Inserting icons<br />
idea.<br />
19<br />
Quick Start<br />
Inserting icons on the map is a useful way of attracting attention or illustrating a particular<br />
Select the Budget branch.<br />
Click the Insert tab in the main menu.<br />
Click the small arrow under the Icons icon at the far right.<br />
Click the dollar sign icon in the Standard icon palette.<br />
The icon now appears next to the branch label name.<br />
Select the Relocations branch and add the red flag icon to it to indicate that the deadline for the<br />
office move is approaching.<br />
Inserting a text note<br />
map.<br />
The <strong>MindView</strong> Text Note editor lets you add comprehensive text notes to any branch of your<br />
We want to add a note to the Closing remarks branch to explain why we might want to broaden the<br />
list of attendees for the next meeting.<br />
If it is not already visible, open the Text Note editor by choosing View | Show/Hide | Text Note<br />
Editor.<br />
Select the Closing remarks branch and type the following text (or any other) in the Text Note<br />
editor.<br />
As soon as you click the Text Note editor window, an Edit tab appears at the right of the<br />
ribbon to help you format your note.<br />
Format the text to your liking and click outside the Text Note editor.<br />
A paperclip icon now appears to the right of the Closing remarks branch label, indicating<br />
that this branch contains an object.
<strong>MindView</strong> Documentation<br />
Inserting comments<br />
We would also like to insert a couple of shorter comments and reminders in our map.<br />
We start by adding a "floating comment" to the Relocations branch to indicate that the planning<br />
deadline is approaching. Floating comments stay visible on the screen at all times.<br />
Click the Relocations branch to select it.<br />
Choose Insert | Text | Floating Comment in the main menu.<br />
A floating comment box opens with the default text "Insert Floating Comment".<br />
Enter the text of the floating comment as shown below and press Enter.<br />
(optional) Move the floating comment by dragging it wherever convenient.<br />
We are now going to insert a "pop-up" comment in our Opening remarks branch as a reminder to<br />
welcome new staff. Pop-up comments are normally hidden.<br />
Select the Opening remarks branch. This time, rather than using the main menu, press F11<br />
(<strong>MindView</strong>'s more commonly used commands have function key equivalents).<br />
A yellow comment box opens.<br />
Enter the text of the comment as shown below and click outside the yellow box.<br />
The comment box disappears, but a yellow comment icon now appears next to the<br />
branch label, indicating that this branch contains a pop-up comment. You can view the<br />
comment at any time by moving the mouse pointer over the icon, and edit it by clicking the<br />
icon.<br />
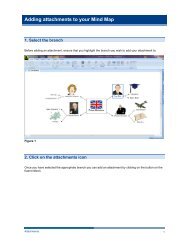
Attaching a file<br />
Since we have developed a spreadsheet to help us plan next year's budget, we are going to<br />
include it as a file attachment on our map.<br />
Click the Budget branch to select it.<br />
Choose Insert | Links | Attachment in the main menu.<br />
Browse to "…\<strong>MatchWare</strong>\<strong>MindView</strong> 5.0\QuickStart", select "Budget.xls" and click OK.<br />
A paperclip icon now appears to the right of the Budget branch label, indicating that this<br />
branch contains attached objects.<br />
To view the attachment, move the pointer over the paperclip icon.<br />
The object pop-up list appears.<br />
20
Assuming Microsoft® Excel is installed on your computer, all you have to do to view the<br />
spreadsheet is to click the attachment in this list.<br />
The attachment is also listed in the Object list for the branch.<br />
To view the Object list, choose View | Show/Hide | Object List in the main menu.<br />
Creating a branch connection<br />
21<br />
Quick Start<br />
Since we want to consider this year's underspent areas when planning next year's budget,<br />
we want to create a visual link between the two topics on the map.<br />
Choose Insert | Links | Branch Connection in the main menu.<br />
The mouse pointer changes shape.<br />
Move the mouse pointer to the Underspent areas branch, click it, drag the pointer to the Next<br />
year branch until it gets highlighted and let go of the mouse button.<br />
A line now joins the Underspent areas branch to the Next year branch, indicating that the two<br />
branches are related.<br />
The paperclip icon appears to the right of the Underspent areas branch, denoting the presence of<br />
the branch connection.<br />
If you select the Underspent areas branch again, you will notice that the branch connection is also<br />
listed in its Object list. By default, it bears the name of the branch where the connection ends.<br />
Formatting the branches<br />
To finish off our map, we are going to add boundaries around the main branches.<br />
At the start of this topic, we have seen how to choose global design options for the view using the<br />
Design tab.<br />
If required, you can also apply specific design options to individual branches using the Format tab.<br />
Click the Opening remarks branch to select it.<br />
Click the Format tab that appears at the right of the ribbon.<br />
This tab contains all the commands that are specific to the selected object, in this case the<br />
Opening remarks branch.
<strong>MindView</strong> Documentation<br />
Click the Boundary icon in the Boundary group.<br />
(optional) To choose a fill color for the boundary, click the small arrow under the Fill Color<br />
icon. This also lets you apply a color gradient, choose the direction of the gradient and change<br />
the start and end color of the gradient.<br />
(optional) To choose an outline style for the boundary, click the small arrow under the Outline<br />
icon. This lets you choose a different color for the outline, a different width or a different line<br />
type.<br />
You can of course also use the Format tab to customize your branches further, by changing their<br />
shape, the color of their background and/or outline, the color and width of the line joining the<br />
branch to its parent branch and so on.<br />
If after experimenting with all these options, you want to restore your branches to the default<br />
style you chose for the view at the start of this topic, just press Reset Style.<br />
Our simple Quick Start example is now complete. In a very short time you have created and<br />
enhanced your first <strong>MindView</strong> mind map. You have also learnt the most common operations in<br />
<strong>MindView</strong>. Please refer to the User Guide for more information about any of the features described<br />
here.<br />
22
User Guide<br />
Setting up<br />
Setting up your workspace<br />
The <strong>MindView</strong> window is made up of several components:<br />
The File menu is displayed in the upper left corner of the <strong>MindView</strong> window. It contains<br />
commands affecting the entire document, such as New, Open, Save, Print or Export.<br />
The Quick Access Toolbar is a component of the Microsoft Office interface. It is a<br />
customizable toolbar that is available at all times, regardless of the menu tab currently open on<br />
the ribbon. By default, it is located in the top left corner of the <strong>MindView</strong> window.<br />
The Ribbon is also a component of the Microsoft Office interface. Its tabs, corresponding to<br />
the main activities in <strong>MindView</strong>, contain all the necessary commands, options and icons,<br />
organized in groups. It is designed to help you quickly find the commands that you need to<br />
complete a task.<br />
The Design tab that appears at the right of the ribbon is a special tab. It contains all the<br />
design options applicable to the current view.<br />
When a particular branch or map element is selected, a Format tab may appear after the<br />
Design tab. It contains all the commands that are specific to the selected object.<br />
Two Panels can be displayed on the right of the <strong>MindView</strong> window.<br />
The Workspace is the area you use to design your document.<br />
Customizing the Quick Access Toolbar<br />
The Quick Access Toolbar contains the most frequently used commands. By default, it is located in<br />
the top left corner of the <strong>MindView</strong> window.<br />
23
<strong>MindView</strong> Documentation<br />
To move the Quick Access Toolbar closer to the workspace area:<br />
Click the Customize Quick Access Toolbar arrow on the right of the toolbar.<br />
Choose Show Below the Ribbon.<br />
You can also add the commands you use most frequently to the Quick Access Toolbar, or remove<br />
commands you use less often. See "Setting up your preferences" for more information.<br />
Minimizing the ribbon<br />
<strong>MindView</strong> lets you minimize the ribbon to increase the workspace available:<br />
Click the Customize Quick Access Toolbar arrow on the right of the toolbar.<br />
Choose Minimize the Ribbon.<br />
To use the ribbon while it is minimized, click the tab you want to use, and then click the<br />
command you want to use.<br />
As soon as you have made your choice, the ribbon returns to its minimized form.<br />
To restore the ribbon, click the Customize Quick Access Toolbar arrow again and uncheck<br />
Minimize the Ribbon.<br />
You can also minimize the ribbon as follows:<br />
Double-click the current tab.<br />
To restore the ribbon, just double-click any of its tabs.<br />
You can also press Ctrl + F1 to minimize or restore the ribbon.<br />
The layout of the commands, options and icons in the ribbon changes when the width of the<br />
<strong>MindView</strong> application window is reduced. Controls normally represented by large icons may for<br />
instance now be represented by small icons. If the width of the application window is greatly<br />
reduced, a group may be represented only by its icon.<br />
To view the contents of such a collapsed group, just click its icon.<br />
Using access keys and shortcut keys<br />
To select a command from the ribbon, all you need to do is click the relevant tab to open it, then<br />
choose the command.<br />
You can also use access keys for this purpose. Access keys are different from shortcut keys.<br />
Access keys are used to navigate through the interface and select its different commands<br />
using the keyboard. Each command shown in the File menu, the Quick Access Toolbar and<br />
the Ribbon has an access key.<br />
Shortcut keys are key combinations such as F1 or Ctrl + O used to perform frequently used<br />
commands. Shortcut keys are not related to the organization of the commands in the interface.<br />
You will find a list of all the shortcut keys used in <strong>MindView</strong> in "Keyboard shortcuts".<br />
To select a command using an access key, start by pressing the Alt or F10 key. You will now<br />
see the first layer of access keys you can use at that point displayed as small labels<br />
underneath each tab or command.<br />
24
25<br />
User Guide<br />
Press the access key for the tab or command you require to see the second layer of access<br />
keys.<br />
For instance, pressing H above will open the Home tab and display its access keys, as<br />
shown below.<br />
Press the key or keys corresponding to the command you want to select.<br />
For instance, pressing B above will insert a branch in your map.<br />
Using the <strong>MindView</strong> panels<br />
Two panels can be opened on the right of the <strong>MindView</strong> window:<br />
The Timeline panel<br />
This panel lets you enter dates and times on the branches of your mind map to create<br />
timelines.<br />
For more information on this panel, see "Inserting timeline data".<br />
The Multimedia Catalog<br />
This catalog contains an extensive collection of high quality clipart pictures which you can<br />
add to your map to illustrate the topics.<br />
See "Inserting pictures" and "Using the Multimedia Catalog" for more information.<br />
<strong>MindView</strong> includes other panels which you can show or hide using the View | Show/Hide<br />
command.<br />
The Legend panel<br />
This panel lets you add a legend to your map, to make it easier to read and interpret. For<br />
more information, see "Creating a legend".<br />
The Text Note editor<br />
The Text Note editor, which is placed by default at the bottom of the workspace, lets you<br />
associate comprehensive notes to the root or any branch of your map.<br />
See "Inserting text notes" for more information.<br />
The Changes panel<br />
This panel lists all the changes made to your map, by yourself or any other user who has<br />
access to it, provided that change tracking has been enabled.<br />
See "Tracking changes" for more information.
<strong>MindView</strong> Documentation<br />
The Timeline Outline<br />
This panel is only used in the Timeline view. It shows all the branches of your map as a<br />
hierarchical list which you can expand and collapse as required.<br />
The Properties dialog<br />
This dialog shows the properties of the <strong>MindView</strong> element currently selected, for example the<br />
root, a branch or a floating comment. If nothing is selected the properties of the current view<br />
are shown.<br />
See "Using the Properties dialog" for more information.<br />
The Overview panel<br />
The Overview panel allows you to bring the different parts of your map into view.<br />
See "Using the Overview panel" for more information.<br />
The Object list<br />
This lists all the objects placed on the currently selected branch of your map.<br />
See "Using the Object list" for more information.<br />
Resizing panels<br />
To resize a panel, move the pointer on one of its edges until it changes to a double arrow and<br />
drag with the mouse in the required direction.<br />
Undocking panels<br />
The Timeline panel and the Multimedia Catalog panel are always anchored on the right of the<br />
workspace.<br />
All the other panels open by default on the left of the workspace, except for the Text Note editor,<br />
which opens at the bottom.<br />
You can however move any of these panels freely on the workspace or dock them to a different<br />
position:<br />
To undock a panel, just drag its title bar away from its current position until it is completely free,<br />
then let go of the mouse button.<br />
You can also double-click the title bar of the panel to undock it and double-click it again to<br />
redock it. If you want to undock a panel and move it freely on the workspace without it "snapping"<br />
to a docked position, press the Ctrl key and hold it down while dragging the title bar of the panel.<br />
Docking panels<br />
You can dock an undocked panel to the left, top or bottom edge of the workspace as follows:<br />
Drag the title bar of the panel and move it in the direction required until you see the arrow<br />
shapes left , up and down appear on the edges of the workspace.<br />
Drag the panel on top of the required arrow until you see a darker shade of blue outline the<br />
new position. Release the mouse button if you are happy with this new position, else continue<br />
dragging to the required position.<br />
You can also dock a panel above, below or on the side of another panel. To do this:<br />
Drag the title bar of the panel and move it in the direction of the target panel until you see a<br />
three-arrow shape appear.<br />
26
You now have different possibilities:<br />
27<br />
User Guide<br />
Moving the panel over the left, up or down arrow will dock it on the corresponding side of the<br />
underlying panel.<br />
Here for instance, the Object list is being docked to the left of the Properties dialog.<br />
Moving the panel to the middle square will integrate it as a tab of the underlying panel,<br />
converting it to a multi-tab panel.<br />
Here, the Object list is being integrated with the Properties dialog as a tabbed panel.<br />
To free such a tabbed panel, drag it by clicking its tab, not its title bar.<br />
To separate the Object list from the Properties dialog in the example below, you would<br />
therefore click the Object List tab.
<strong>MindView</strong> Documentation<br />
Resetting panels to their default position<br />
If necessary, you can reset all the panels to the default position they had when you first installed<br />
<strong>MindView</strong>:<br />
Click the File tab.<br />
Click <strong>MindView</strong> Options in the bottom right of the dialog.<br />
Click Preferences on the left.<br />
Set Reset Interface to Yes.<br />
Click OK.<br />
When using this command, note that other components, such as the Quick Access Toolbar or the<br />
list of recently opened files, are also restored to their defaults.<br />
Setting up your preferences<br />
The <strong>MindView</strong> Options dialog lets you customize your environment and gives you access to<br />
external web resources.<br />
Click the File tab.<br />
Click <strong>MindView</strong> Options in the bottom right of the panel.<br />
The <strong>MindView</strong> Options dialog that opens contains several panels, corresponding to different<br />
options.<br />
Proofing<br />
This dialog contains various options which you can set to determine the type of errors reported by<br />
the spellchecker.<br />
It is described in detail in the topic "Spellchecking options".<br />
Save<br />
Create backup of document files: Creates a backup of the <strong>MindView</strong> file and saves it as a *.bak<br />
file. The *.bak file is a copy of the last saved version of your document. See "Saving a mind map"<br />
for more information on this feature.<br />
Save auto-recovery info: <strong>MindView</strong> automatically saves a copy of your open documents at<br />
regular intervals in a temporary backup file. If a problem occurs that prevents <strong>MindView</strong> from<br />
closing properly, you can choose to auto-recover your file from this backup file when next starting<br />
<strong>MindView</strong>. This field allows you to set the interval between automatic saves.<br />
28
Preferences<br />
Display options<br />
29<br />
User Guide<br />
Enable live preview: When this option is enabled, <strong>MindView</strong> shows a preview of how particular<br />
choices affect the map as you browse through them. When designing a mind map for instance, you<br />
can browse through the different styles shown in the Styles gallery to choose your favorite style. If<br />
this option is enabled, you see an immediate preview of the result on your mind map as you hover<br />
over each style.<br />
Draw map antialiased: Antialiasing improves the appearance of your map by smoothing its edges.<br />
This option is enabled by default. However, antialiasing makes a heavy use of the computer<br />
resources. If your computer has limited power, you might prefer to disable this option to speed up<br />
the display of the map.<br />
Draw text antialiased: This option is disabled by default. However, text looks smoother when it is<br />
antialiased. Enable this option if your computer resources allow it.<br />
Show Welcome dialog on startup: If you disable this option, <strong>MindView</strong> displays an empty<br />
workspace when starting rather than the Welcome dialog. See "Creating a mind map" for more<br />
information.<br />
Show Interactive Whiteboard Help dialog: This option is only relevant when you are working in<br />
pen mode using an interactive white board. When it is enabled, a help message appears every<br />
time you put a pen back in the tray if the workspace still contains ink data that has not yet been<br />
added to the document. For more information, see "Working in Pen Mode".<br />
Show simplified user interface: This option, of particular interest to novice users and younger<br />
students, restricts the user interface to the most commonly used menus and commands. You can<br />
return to the full interface at any time by disabling it. You can also switch to the simplified interface<br />
by choosing View | Window | Simple Interface.<br />
Reset Multimedia Catalog: Setting this to Yes restores the original contents of the Multimedia<br />
Catalog. Your User Area is left unchanged, but all the elements you might have added to any other<br />
category are removed. See "Using the Multimedia Catalog" for more information.<br />
Reset Interface: Setting this to Yes resets all the panels to their default positions. When using this<br />
command, note that other components, such as the Quick Access Toolbar or the list of recently<br />
opened files, are also restored to their defaults. See "Using the <strong>MindView</strong> panels" for more<br />
information on resizing and docking panels.<br />
Animation options<br />
These options allow you to disable the animation effects used by <strong>MindView</strong> if your computer is not<br />
powerful enough to produce a good result. If the animation effects appear slow and jerky rather<br />
than fast and smooth, you can disable them.<br />
Comments: This relates to the way the comment window opens when you insert or edit a<br />
yellow pop-up comment .<br />
Object list pop-up: This relates to the way the Object list pop-up opens when you move the<br />
mouse pointer over the paperclip icon shown next to the label of any branch containing<br />
attached objects.<br />
The next three options are only available in Windows Vista and above:<br />
Zoom: This relates to the way the map is displayed by increments when zooming in and out.<br />
Animation time: This is the time (in milliseconds) a scroll or zoom animation will take.<br />
Animation distance factor: This factor makes the duration of the scroll or zoom animation<br />
proportional to its distance. For instance, when scrolling from one branch to another branch<br />
placed some distance away on the screen, the higher this factor, the longer the animation will<br />
take.
<strong>MindView</strong> Documentation<br />
Text Note editor options<br />
Default font: This field lets you specify a default font, text style, text size and text color for all the<br />
text notes you enter using the Text Note editor. To access these options, just select the field and<br />
click the three dots that appear at its right end. You can of course change these settings for<br />
individual text notes when working in the editor. For more information about the Text Note editor,<br />
see "Inserting text notes".<br />
Undo options<br />
The Undo feature lets you reverse any operation you have performed on your map. This gives you<br />
the freedom to experiment, as you can easily undo the last change made by choosing Undo in<br />
the Quick Access Toolbar (or Ctrl + Z), and reapply the change if necessary with Redo or (Ctrl<br />
+ Y).<br />
Note that you can also click the arrow to the right of the Undo icon to select a number of changes<br />
to undo. Similarly, the Redo icon allows you to restore the last change or changes undone.<br />
Undo levels: This field lets you specify the maximum number of changes that you want to be able<br />
to undo. If for instance you set the number of Undo levels to 5, you will be able to reverse up to 5<br />
changes by selecting the changes in the Undo list or pressing Ctrl + Z several times. Note that<br />
increasing the number of undo levels increases the amount of memory used.<br />
Updates options<br />
Check for program updates: This option allows <strong>MindView</strong> to check automatically for program<br />
updates on the <strong>MatchWare</strong> web site at the start of the program.<br />
Frequency of the checks: Specify here how often the checks should occur (in days).<br />
Customize<br />
This panel lets you add the commands you use most frequently to the Quick Access Toolbar, or<br />
remove commands you use less often.<br />
In the field Choose commands from, choose the ribbon tab containing the required<br />
command.<br />
Choose the required command in the Commands field and click Add.<br />
You can also add entire groups to the Quick Access Toolbar. Groups are denoted by a drop-<br />
down symbol .<br />
A quicker way to add a command to the Quick Access Toolbar is to click the ribbon tab<br />
containing the command you want to add, right-click the command and choose Add to Quick<br />
Access Toolbar.<br />
Clicking Reset will restore the original contents of the Quick Access Toolbar.<br />
You can also access this panel by clicking the Customize Quick Access Toolbar arrow<br />
on the right of the toolbar.<br />
Pen Input<br />
This dialog is only displayed if your operating system supports pen input. It lets you choose<br />
different input options when working in Pen Mode. For more information, see "Working in Pen<br />
Mode".<br />
Resources<br />
This dialog lets you access the <strong>MatchWare</strong> web site and obtain the latest product updates.<br />
It also lets you enter a different serial number, for instance for converting a demonstration version<br />
of <strong>MindView</strong> to a full version, or for converting a standard version to the Business Edition.<br />
30
Basic tasks<br />
Creating a mind map<br />
When you start <strong>MindView</strong>, the first screen you see is the Welcome dialog.<br />
Here you can select to:<br />
Create a new document from scratch<br />
Create a new document based on a template<br />
Open an existing document<br />
Open a recently used document<br />
31<br />
User Guide<br />
You can check 'Do not show this dialog again' to bypass this dialog next time you start<br />
<strong>MindView</strong>. If you want to show the Welcome dialog again at a later stage, click 'Show Welcome<br />
dialog on startup' in the <strong>MindView</strong> Options dialog. See "Setting up your preferences" for more<br />
information.<br />
Choose New Document to create a new mind map document.<br />
Although the topics in the "Basic tasks" and "Further tasks" sections of this documentation<br />
assume that you are using one of the standard Map views, namely Mind Map, Top Down or<br />
Left/Right, most of the procedures they describe apply equally to all views. Procedures that are<br />
specific to particular views are described in the topics dealing with these views in the Views section<br />
of this documentation.<br />
Creating a new document<br />
The New Document dialog allows you to create an empty document based on one of the six views<br />
provided, namely Mind Map, Top Down, Left, Right, Timeline and Outline.<br />
See "Using different views" for more information about each view.
<strong>MindView</strong> Documentation<br />
If you have closed the Welcome dialog, you can also display this dialog by pressing Ctrl + N.<br />
Once you have created your document, you can display it at any time in another view by choosing<br />
that view in the Home | View or View | View panels in the main menu or by right-clicking the<br />
workspace and choosing View Map As in the local menu.<br />
Going from one view to another only affects the way the document is displayed. The contents of<br />
the document are not modified, unless you edit them yourself while working in the new view.<br />
Click one of the thumbnails.<br />
Click Open.<br />
The map appears with the root block ready for you to fill in.<br />
See "Entering a branch label" to find out how to do this.<br />
Using a template<br />
The New from Template option of the Welcome dialog allows you to create a document<br />
based on one of the many educational, business and personal templates included in <strong>MindView</strong>, or<br />
on one of your own templates. The curriculum-aligned educational templates cover a range of<br />
learning levels and are supported by over a thousand high quality clipart images created<br />
specifically to match all areas of the curriculum.<br />
Once you have created your mind map from one of these templates, you can easily tailor it to meet<br />
your particular needs. Ideas and suggestions for expansion are given in text notes and pop-up<br />
comments.<br />
If you have already created and saved your own templates, you can base your new mind map on<br />
one of them by selecting it in the My Templates category. See "Saving a mind map" for more<br />
information on how to save templates.<br />
32
33<br />
User Guide<br />
You can see a preview of each template by moving the pointer over its name on the right part of<br />
the dialog.<br />
You can also display this dialog by clicking the File tab and choosing New | New From<br />
Template.<br />
Saving a mind map<br />
<strong>MindView</strong> documents are saved as .mvdx files.<br />
To save a document:<br />
Click the File tab.<br />
You can now choose either:<br />
Save to save your document under its existing name and continue working in <strong>MindView</strong>.<br />
Save As | <strong>MindView</strong> Document to save your document under a different name. This is also a<br />
way of creating a copy of your document.<br />
Save Online to save your document to a shared online workspace. For more information about<br />
online workspaces, see "Setting up an online workspace" and the other topics of the<br />
"Collaborating" chapter of this documentation.<br />
To save your document, you can also just click the Save icon in the Quick Access Toolbar<br />
or press Ctrl + S.<br />
You can get <strong>MindView</strong> to save the previous version of your document automatically as a .bak<br />
file by enabling Create backup of document files in the Save panel of the <strong>MindView</strong> Options<br />
dialog. For more information on that dialog, see "Setting up your preferences".<br />
Recovering a backup file (*.bak)<br />
If you save a document after having made some changes which you wish you had not made, you<br />
can restore the previous version of the document as follows:<br />
Click the File tab and choose Open.
<strong>MindView</strong> Documentation<br />
Browse to the folder containing your <strong>MindView</strong> document and enter the file name *.* in the<br />
Open dialog to view the list of all the files contained in that folder.<br />
Select the filename.bak file, where filename is the name of your <strong>MindView</strong> document and click<br />
Open.<br />
Click the File tab and choose Save As | <strong>MindView</strong> Document to save the .bak file under its<br />
original .mvdx name to overwrite the incorrect version of the document.<br />
Auto-recovery<br />
By default, a temporary copy of your document is also saved automatically at regular intervals to<br />
allow auto-recovery in the event of a program failure. To disable automatic saving of auto-recovery<br />
information, uncheck Save auto-recovery info in the Save panel of the <strong>MindView</strong> Options dialog.<br />
Saving your document as a template<br />
You can also save your document as a custom template for future use. This allows you to<br />
create new documents based on your existing ones. To do this:<br />
Click the File tab.<br />
Choose Save As | <strong>MindView</strong> Template.<br />
The Save as Template dialog appears.<br />
If you have already saved some documents as templates, they will be listed in the left part of the<br />
dialog. Clicking a template gives you a preview of it on the right part of the dialog.<br />
To create a sub-folder in the My Templates folder:<br />
Click Create Folder and enter the name of your sub-folder.<br />
To save a document as a template:<br />
Click the name of the folder in which you want to save the template.<br />
Enter the name of your new template in the Filename field at the bottom of the dialog and click<br />
Save.<br />
To overwrite an existing template:<br />
Select the existing template and click Save to overwrite it with your new template.<br />
To rename a folder or template:<br />
Select the folder or template to rename and click Rename.<br />
To delete a folder or template:<br />
Select the folder or template to be deleted and click Delete.<br />
34
Custom templates are saved with the extension .mvtx.<br />
Opening a mind map<br />
35<br />
User Guide<br />
When you start <strong>MindView</strong>, the first screen you see is the Welcome dialog. This dialog lets<br />
you browse for an existing document or select a recently used document.<br />
If you have closed the Welcome dialog, you can open an existing document as follows:<br />
Click the File tab.<br />
Choose Open.<br />
You can also press Ctrl + O.<br />
<strong>MindView</strong> also lets you open online documents. For more information about working<br />
collaboratively on documents hosted on a shared online workspace, see "Setting up an online<br />
workspace" and the other topics of the "Collaborating" chapter of this documentation.<br />
Note that you can open several mind maps in <strong>MindView</strong> at the same time. Each one is displayed in<br />
a separate tab in the <strong>MindView</strong> workspace and is treated as a separate document.<br />
An asterisk on the right of the document name indicates that you have made changes to the<br />
document which you have not yet saved.<br />
You can easily go from one document to the other by clicking the relevant tab or pressing Ctrl<br />
+ Tab.<br />
Notes:<br />
If you are trying to open a password-protected document created with <strong>MindView</strong> Business<br />
Edition, you will need to enter the password before proceeding.<br />
If the document you are opening was saved with a branch focus or a filter to restrict the display<br />
of the map to specific branches, a message warns you that you may be viewing only part of the<br />
map. Click the Clear Branch Focus or Clear Filter button next to the message to see the<br />
entire map. For more information about branch focus and filters, see "Focusing on a branch"<br />
and "Filtering a mind map" respectively.<br />
If you open a document created with <strong>MindView</strong> Business Edition in the standard version of<br />
<strong>MindView</strong>, any data relating to <strong>MindView</strong> Business Edition features which are not supported in<br />
the standard version (such as task data or calculation values) will not be visible. If you then<br />
save the file in the standard version of <strong>MindView</strong>, this data will be lost. If the file has been<br />
password-protected in <strong>MindView</strong> Business Edition, this password will also be removed when<br />
saving the file in the standard version.<br />
<strong>MindView</strong> also lets you open MindManager® files (with extension .mmap) from version X5<br />
onwards.<br />
Opening documents created with previous versions of <strong>MindView</strong><br />
<strong>MindView</strong> 5 lets you open documents created with previous versions of <strong>MindView</strong>. However once<br />
you make changes to the document and save it with <strong>MindView</strong> 5, the document is no longer<br />
compatible with the previous version.
<strong>MindView</strong> Documentation<br />
Entering a branch label<br />
By default, the root of a newly created mind map contains the label "Subject" and new branches<br />
appear with the label "Idea".<br />
Replacing the default label<br />
Just click the root or branch to select it and start typing.<br />
When you have finished, press Enter or click outside the root or branch.<br />
Unless your label is quite short, a resizing handle appears when you hover the right side of the<br />
frame surrounding the label. You can use this handle to resize the branch label by dragging it in the<br />
direction required.<br />
By default, the text wraps around automatically when you type long labels. If you want to force<br />
the next part of your label to start on a new line, press Ctrl + Enter at the end of the line. You can<br />
disable the automatic text wrapping by unchecking the relevant property in the View properties.<br />
See "View properties: General tab" for more information.<br />
Your map will be clearer if you keep your root and branch labels short. If you need to enter<br />
longer notes, use the Text Note editor. You can also enter comments to serve as reminders while<br />
you build up your map. See "Inserting text notes" and "Inserting comments" for more information.<br />
Branch labels can be read aloud. To do this, click the branch to select it and choose Review |<br />
Proofing | Narrate (or press F5). You can stop the narrating by clicking the icon or pressing F5<br />
again. To resume, hold down Ctrl while clicking the icon or pressing F5.<br />
Editing a label<br />
To replace the existing label, just click the branch to select it and start typing the new label.<br />
You can also edit the existing label. Here are different ways of entering Edit mode:<br />
Select the branch and click the label, or<br />
Select the branch and press F2, or<br />
Right-click the branch and choose Edit Text in its local menu.<br />
Once you are in Edit mode:<br />
Place the cursor at the required position and start typing.<br />
When you have finished, press Enter or click outside the label.<br />
Pressing Esc while in Edit mode will leave the existing label unchanged.<br />
Inserting branches<br />
<strong>MindView</strong> lets you insert main branches, sub-branches and pre-branches in your mind map:<br />
A main branch is a branch directly connected to the root.<br />
Main branches represent the main topics related to the subject of your map.<br />
A sub-branch is a branch belonging either to a main branch or to a sub-branch of<br />
higher level.<br />
Sub-branches represent the various levels of sub-topics in your map.<br />
A pre-branch is a branch you insert before a sub-branch.<br />
36
37<br />
User Guide<br />
<strong>MindView</strong> automatically arranges the main branches, sub-branches and pre-branches as you insert<br />
them to prevent any overlap.<br />
You can however choose to reposition the main branches yourself after their insertion by<br />
disabling Auto-layout mode. See "Moving a branch" for more information.<br />
As soon as you add a branch, sub-branch or pre-branch, the new branch appears with the default<br />
label "Idea". The procedure for replacing the default label is the same as for the root. See "Entering<br />
a branch label" for more information.<br />
Inserting a main branch<br />
To insert a main branch:<br />
Click the root and press Enter or Insert.<br />
You can also:<br />
Double-click the root, or<br />
Click the root and choose Home | Insert | Branch or Home | Insert | Sub-Branch, or<br />
Click the root and choose Insert | Branches | Branch or Insert | Branches | Sub-Branch, or<br />
Right-click the root and choose Insert | Branch or Insert | Sub-Branch in its local menu.<br />
Inserting branches at the same level<br />
To add a branch at the same level as an existing branch:<br />
Click the existing branch and press Enter.<br />
You can also:<br />
Click the branch and choose Home | Insert | Branch, or<br />
Click the branch and choose Insert | Branches | Branch, or<br />
Right-click the branch and choose Insert | Branch in its local menu.<br />
Inserting a sub-branch<br />
To add a sub-branch to an existing branch:<br />
Click the existing branch and press Insert.<br />
You can also:<br />
Double-click the branch, or<br />
Click the branch and choose Home | Insert | Sub-Branch, or<br />
Click the branch and choose Insert | Branches | Sub-Branch, or
<strong>MindView</strong> Documentation<br />
Right-click the branch and choose Insert | Sub-Branch in its local menu.<br />
Inserting a pre-branch<br />
To insert a branch between an existing branch and its parent branch, you can:<br />
Click the branch and press Shift + Enter, or<br />
Click the branch and choose Insert | Branches | Pre-Branch, or<br />
Right-click the branch and choose Insert | Pre-Branch in its local menu.<br />
Formatting a branch<br />
As soon as you insert a branch in the map, a Format tab appears at the right of the ribbon.<br />
This tab lets you perform different operations on the branch, such as changing its shape, choosing<br />
a different fill color, defining a branch boundary, or selecting different text attributes. See<br />
"Formatting a branch" for more information.<br />
To apply the same formatting attributes to all the branches, it is however much easier to use the<br />
Design tab, whose predefined styles and design options apply to the entire map. See "Designing a<br />
mind map" for more information.<br />
Copying branches from an external application<br />
You can easily create a branch structure with main branches and sub-branches by copying several<br />
lines of text from an external document, such as a Microsoft Word document, a Notepad text file or<br />
a Microsoft Excel spreadsheet, and pasting them into your <strong>MindView</strong> document. Any line indented<br />
with spaces or tabs in the external application will be inserted as a sub-branch of the higher level<br />
line.<br />
Similarly, you can copy a <strong>MindView</strong> branch structure to another application by copying it from<br />
<strong>MindView</strong> and pasting it in the external application.<br />
Expanding and collapsing a branch<br />
As soon as you add a sub-branch to a main branch or to another sub-branch, a small minus sign<br />
appears between it and the higher-level branch. This allows you to hide the newly inserted subbranch<br />
and any further sub-branches and concentrate on the higher-level branches. There are<br />
several ways to do this:<br />
Click the minus sign , or<br />
Right-click the higher-level branch and choose Collapse in its local menu, or<br />
Press Ctrl + Shift + "-".<br />
The sub-branch is now hidden, and the minus sign changes to a plus sign .<br />
38
To redisplay the sub-branch with all its sub-branches, do one of the following:<br />
Click the plus sign , or<br />
Right-click the higher-level branch and choose Expand in its local menu, or<br />
Press Ctrl + Shift + "+".<br />
Navigating between branches<br />
To select a branch, all you need to do is click its label.<br />
The following keyboard shortcuts allow you to navigate easily from one branch to the other:<br />
Up Select the branch placed above the currently selected branch.<br />
Down Select the branch placed below the currently selected branch.<br />
Left Select the branch to the left of the currently selected branch.<br />
Right Select the branch to the right of the currently selected branch.<br />
Deleting a branch<br />
There are several ways of doing this:<br />
Click the branch you want to delete and press Delete, or<br />
Click the branch and choose Home | Editing | Delete in the main menu, or<br />
Right-click the branch and choose Delete | Entire Branch in its local menu.<br />
39<br />
User Guide<br />
If a branch contains sub-branches, you can delete it without deleting its sub-branches by choosing<br />
Delete | Branch Section in its local menu. This causes the sub-branches to move up one level in<br />
the hierarchy to become sub-branches of the parent branch.<br />
Remember that if you delete a branch by accident, you can always cancel the deletion by<br />
clicking Undo in the Quick Access Toolbar or pressing Ctrl + Z.<br />
Designing a mind map<br />
You can customize the look of your map at any time by applying design options to it.<br />
Most design options give you a live preview of their effect on the map. It is therefore easier to<br />
judge the overall effect once you have entered a few branches and sub-branches in the map.<br />
Click the Design tab at the right of the ribbon.<br />
This tab contains all the design options applicable to the current view.<br />
Browse through the Layouts gallery to choose your preferred layout.<br />
For more information about these views, see "Using different views".
<strong>MindView</strong> Documentation<br />
The layouts available depend on the view you are using. If you are using one of the<br />
three Map views for instance, you can choose between the traditional Mind Map layout, the<br />
Left or Right layout or the Top Down layout.<br />
Browse through the Styles gallery to choose your preferred style.<br />
<strong>MindView</strong> also lets you design your own style, using the Style Designer. For more<br />
information, see "Creating a custom style" below.<br />
(optional) To further customize the visual aspect of your map, explore the options available in<br />
the Effects and Properties panels.<br />
If necessary, you can undo your changes and return the map to the initial style by choosing<br />
Effects | Reset Style.<br />
All the design options you choose here apply to the entire map. You can however apply<br />
different design options to selected branches. To find out how to do this, refer to "Formatting a<br />
branch".<br />
By default, <strong>MindView</strong> organizes the map so that the bounding areas containing the branches<br />
and their sub-branches do not overlap with each other. For some map layouts, this may create<br />
large empty spaces between branches which make the map harder to overview. In those cases,<br />
the Compact Map option may produce a better layout by bringing the branches as close to each<br />
other as possible, as shown in the examples below. Note however that the compact mode is more<br />
demanding on computer performance.<br />
Mind map before compacting:<br />
Mind map after compacting:<br />
40
Creating a custom style<br />
You can create your own custom style, for re-use later, as follows:<br />
41<br />
User Guide<br />
Choose Custom Style at the bottom of the Styles gallery, and choose New in the menu that<br />
opens.<br />
The Custom Style Designer window opens.<br />
You can now make design changes applicable to the entire map, as described above. You<br />
can also make changes to specific branch levels, by selecting one branch at that level, and<br />
using the Format tab to choose the relevant attributes.<br />
You can also customize the branch boundary shown around the first main branch by<br />
choosing a different fill color and outline for it. Just select the branch, click the Format tab,<br />
and select the required options in the Boundary panel. When applying this custom style to<br />
one of your maps in the future, branch boundaries will automatically adopt the boundary style<br />
created here.<br />
Similarly, you can customize the floating comment shown by selecting it, and using the<br />
options of the Format tab. When applying this custom style in the future, all the floating<br />
comments of your map will automatically inherit the attributes you choose here.<br />
When you have finished, click Close Style Designer in the Style Designer tab. A message<br />
appears to ask you if you want to keep your new style.<br />
Once saved, your new custom style appears at the end of the Styles panel of the Design tab,<br />
after all the standard <strong>MindView</strong> styles. You can now select this custom style to apply it to your<br />
maps just as would chose one of the standard styles.<br />
You can return to your custom style at any time to edit it further by choosing Custom Style | Edit,<br />
or delete it with Custom Style | Delete.
<strong>MindView</strong> Documentation<br />
View properties<br />
In addition to the design options available on the Design tab, the view also has properties that you<br />
can edit in the Properties dialog. The Properties dialog always lists all the properties applicable to<br />
the element currently selected in the workspace.<br />
Click the workspace so that no other element is selected.<br />
Choose View | Show/Hide | Properties to open the Properties dialog.<br />
See "Using the Properties dialog" for a general description of the Properties dialog.<br />
See "View properties: General tab" in the Reference section for a detailed description of the<br />
general properties applicable the view and "View properties: Branches tab" for a description of the<br />
default properties applicable to branches.<br />
Viewing a mind map<br />
As your map grows, parts of it may fall outside the display area and no longer be visible.<br />
Scrolling the map<br />
You can use the scroll bars or your mouse scroll button to bring them back into view:<br />
To scroll your map vertically, use the vertical scroll bar or the scroll button of your mouse.<br />
To scroll your map horizontally, use the horizontal scroll bar or press Ctrl while using the scroll<br />
button of your mouse.<br />
Panning the map<br />
You can also pan the view to reach different areas as follows:<br />
Press the Shift key and drag the area of the view that you want to reposition within the<br />
workspace.<br />
When you pan the view in this way, you will notice that the shape of the mouse pointer changes<br />
from an arrow to a hand.<br />
You can also easily move the map within the workspace by dragging its root to the position of your<br />
choice.<br />
Viewing map details<br />
There are other viewing options available to you:<br />
You can use the Zoom slider or the Zoom icons of the View tab to<br />
change the level of magnification of your map. See "Zooming in and out" for more information.<br />
You can view the map in full screen mode by choosing View | Zoom | Full Screen or<br />
pressing F9. To return to normal viewing mode, choose Close Full Screen in the floating Full<br />
Screen toolbar, press Esc or press F9 again.<br />
If you want to present your map to others, you can focus on one branch at a time while you<br />
discuss the issues related to that branch by choosing View | Detail | Focus Mode or<br />
pressing F3. As soon as you click the branch you want to concentrate on, the map becomes<br />
centered on that branch. If necessary, you can select a different zoom factor for maximum<br />
legibility by clicking the lower part of the Focus Mode icon.<br />
42
43<br />
User Guide<br />
To recenter the map on its root so that you can select other branches that may no longer be<br />
visible, just click anywhere on the workspace.<br />
To return to the normal mode of working at the end of your presentation, click the Focus<br />
Mode icon again to deselect it or press F3.<br />
The Detail Level icons of the View tab let you collapse the entire mind map to just one<br />
level of branches, two levels, three levels or four levels. To show all levels, click the All Levels<br />
icon .<br />
You can also press Ctrl + 1 to display just one level of branches, Ctrl + 2 to show two<br />
levels etc. Ctrl + 5 shows all levels.<br />
The Apply Branch Focus icon of the View tab allows you to restrict the display to a<br />
particular branch or set of branches. See "Focusing on a branch" for more information.<br />
The Map Navigation feature allows you to set pins (bookmarks) on your branches, in order to<br />
locate them quickly again in your map. To set a pin on a branch, select the branch, click the<br />
button View | Navigation | MapNav and choose Add Pin in its drop-down menu (or right-click<br />
the branch and choose Insert | Navigation Pin in its local menu).<br />
The Navigation Pin icon appears on the branch, and the branch name is now shown in<br />
the list that opens when you click the MapNav button.<br />
When you are viewing another part of the map, you can now quickly navigate to the pinned<br />
branch by clicking again the MapNav button and selecting the branch name in the list. This<br />
selects the branch, and re-centers the map on the branch.<br />
To remove a branch from the list of pinned branches, select it on the map, click the MapNav<br />
button and choose Remove Pin (or right-click the branch and choose Delete | Navigation<br />
Pin in its local menu).<br />
The Numbering Scheme icon of the Home tab lets you apply sequential numbers to the<br />
branches of the mind map (starting from the top right in a clockwise direction) and choose<br />
between various numbering styles.<br />
The Filter icon of the View tab lets you define criteria, and then locate the branches of<br />
your document that meet these criteria by hiding all the other branches. Using filters, you can<br />
for instance display only branches containing a specific label or timeline events starting at a<br />
specific date.<br />
See "Filtering a mind map" for more information.<br />
The Overview panel allows you to concentrate on particular areas of your map. See "Using the<br />
Overview panel" for more information.
<strong>MindView</strong> Documentation<br />
Branch labels, text notes and comments can be read aloud. To do this, select the element and<br />
choose Review | Proofing | Narrate (or press F5). You can stop the narrating by clicking<br />
the icon or pressing F5 again. To resume, hold down Ctrl while clicking the icon or pressing<br />
F5.<br />
Viewing map statistics<br />
You can also find out general information about your map, such as its total number of branches, its<br />
word count and its character count. You can do this in two ways:<br />
Choose Review | Proofing | Document Statistics, or<br />
Click the File tab and choose Prepare | Properties.<br />
The second method gives you additional information, such as the document's author, its creation<br />
date, and other document properties.<br />
Zooming in and out<br />
This topic describes the zoom features provided by <strong>MindView</strong> to let you change the level of<br />
magnification of your mind map.<br />
Other <strong>MindView</strong> options let you focus on particular areas by hiding all the other branches, apply a<br />
filter based on the conditions you define, or choose the number of levels of branches to display.<br />
For a description of these options, see "Viewing a mind map".<br />
The easiest way to change the level of magnification of your map is to use the Zoom slider shown<br />
in the bottom right of the workspace.<br />
Zooming in<br />
There are several ways of zooming in on an area of your map:<br />
Click the Zoom In icon of the Zoom slider shown in the bottom right of the workspace, or<br />
Press Ctrl + "+", or<br />
Press Alt or Shift while scrolling your mouse wheel.<br />
The maximum zoom factor is 400%.<br />
Zooming out<br />
Conversely, you can zoom out in several ways:<br />
Click the Zoom Out icon of the Zoom slider shown in the bottom right of the workspace, or<br />
Press Ctrl + "-", or<br />
Press Alt or Shift while scrolling your mouse wheel.<br />
The minimum zoom factor is 5%.<br />
Viewing the map at 100%<br />
To view the map in its default zoom factor of 100%:<br />
Choose View | Zoom | 100% in the main menu.<br />
Fitting the map to the workspace<br />
To make the best possible use of the space available, you can resize the map so that it completely<br />
fills the workspace:<br />
Choose View | Zoom | Fit All , or press F4.<br />
44
Selecting a zoom factor<br />
You can also choose a predefined zoom factor or enter your own zoom factor as follows:<br />
Choose View | Zoom | Zoom in the main menu.<br />
The Zoom dialog opens.<br />
Choose one of the predefined zoom factors or enter your own value.<br />
Fit all resizes the map so that it completely fills the workspace.<br />
45<br />
User Guide<br />
Fit selection resizes the map so that the selected branch together with its sub-branches<br />
completely fills the workspace.<br />
You can also open the Zoom dialog by clicking the left part of the Zoom slider<br />
Viewing the map in full screen mode<br />
.<br />
To give your map as much screen space as possible, you can temporarily hide all the menus and<br />
panels by viewing the map in full screen mode:<br />
Choose View | Zoom | Full Screen , or press F9.<br />
To return to normal viewing mode, choose Close Full Screen in the floating Full Screen<br />
toolbar, press Esc or press F9 again.<br />
Inserting text notes<br />
The <strong>MindView</strong> Text Note editor is a powerful tool which lets you add comprehensive text<br />
notes to the root and any branch or sub-branch of your map. You can add as many different text<br />
notes as you like to any of these elements.<br />
If the Text Note editor is not already visible, choose View | Show/Hide | Text Note Editor to<br />
open it.<br />
You can resize, dock and undock the Text Note editor according to your needs. See "Using<br />
the <strong>MindView</strong> panels" in the topic "Setting up your workspace" for more information.<br />
In addition to text notes, you can also associate brief comments to the branches of your map.<br />
For more information on comments, see "Inserting comments". You can also attach an entire text<br />
file to a branch by using the Home | Insert | Attachment command. For more information on<br />
attaching text files, see "Attaching objects".
<strong>MindView</strong> Documentation<br />
Once created, a text note can be read aloud. To do this, click the Text Note editor window<br />
containing your note and choose Review | Proofing | Narrate (or press F5). You can stop the<br />
narrating by clicking the icon or pressing F5 again. To resume, hold down Ctrl while clicking the<br />
icon or pressing F5.<br />
Creating a text note<br />
The easiest way to add a text note to a root or branch is as follows:<br />
Select the root or branch to which you want to add a text note.<br />
Click the Text Note editor window (or press F8) and start entering your note.<br />
As soon as you click the Text Note editor window, an Edit tab appears at the right of the ribbon to<br />
help you format your note.<br />
You can now type text, paste text from the clipboard or even import text from an RTF file using<br />
the local menu.<br />
If necessary, click Undo in the Quick Access Toolbar (or press Ctrl + Z) to undo the last<br />
change(s) made.<br />
Once you have finished editing your text, simply click outside the Text Note editor or select<br />
another branch.<br />
Once you are out of text editing mode, clicking Undo will undo all the changes made in the text<br />
note since entering text editing mode.<br />
As soon as you select another branch or element in the map, the text note is automatically saved<br />
and added to the Object list of the root or branch. A paperclip icon also appears to the right of<br />
the root or branch label to indicate the presence of an attached object. Moving the mouse pointer<br />
over the icon displays a pop-up list of all the objects attached.<br />
Adding a text note<br />
You can attach an additional text note to a root or branch as follows:<br />
Click the New Text Note tab at the bottom of the Text Note editor or press Ctrl + F8.<br />
When the Text Note editor is not visible, you can also enter a text note by selecting the<br />
relevant root or branch and choosing Home | Insert | Text Note | New or Insert | Text | Text Note<br />
| New in the main menu or Insert | Text Note | New in the local menu.<br />
Formatting a text note<br />
Text editing in <strong>MindView</strong> works in the same way as with most word processors and you will<br />
recognize many of the commands below. Some of these commands are also included in the mini<br />
toolbar that appears when you select text with the mouse.<br />
To see what a particular icon does, place the mouse pointer over it until you see its descriptive<br />
label appear.<br />
To select the entire contents of your text note, press Ctrl + A.<br />
the currently selected text.<br />
These fields let you view and change the font and font size of<br />
Note that you can set a default font, text size and text color for all the text notes you enter in the<br />
<strong>MindView</strong> Options dialog as follows:<br />
Click the File tab.<br />
46
Click <strong>MindView</strong> Options in the bottom right.<br />
Click Preferences on the left.<br />
Choose the required options in the Text Note editor section.<br />
47<br />
User Guide<br />
These icons let you increase and decrease the font size from their current values. If a<br />
piece of text is selected, the size of each character is increased (or decreased) individually from its<br />
current value.<br />
These icons help you set and remove formatting attributes in the usual<br />
way. You can set the selected characters as superscript or subscript by clicking the relevant icon.<br />
The first of these icons let you change the color of the background of the selected text<br />
so that it looks highlighted. The second icon lets you change the color of the text itself.<br />
Use these icons to create bulleted lists or numbered lists. Place the pointer in the<br />
relevant paragraph or at the beginning of a new line and click the appropriate icon. Clicking the<br />
arrow next to the icon lets you choose between different bullet styles and numbering formats.<br />
Clicking the icon again removes the formatting.<br />
Use these icons to increase or decrease the indent level of the selected paragraph.<br />
To adjust margins and indents, click the ruler icon (if the ruler is not already displayed). Drag<br />
the margin markers at the left and right ends of the ruler to change the left and right<br />
margins. Drag the indent marker (which by default is shown directly below the left margin marker<br />
on the ruler) to set the indent margin. To indent an entire paragraph (including the first line), set the<br />
indent marker to the required position and type a tab character at the beginning of the paragraph.<br />
You can insert standard tab stops by clicking the ruler and then dragging them into position. To<br />
remove tab stops, drag them away from the ruler.<br />
These icons let you align the current paragraph within the text note. You can<br />
align it to the left margin, center it, align it to the right margin or justify it so that it is aligned with<br />
both left and right margins.<br />
Clicking this icon displays all the special marks and symbols within your text note, such as<br />
line feeds and spaces. Click it again to hide these symbols.<br />
Click this icon to insert a picture in the text note.<br />
Creating a hyperlink<br />
To convert the selected text to a hyperlink, click or press Ctrl + H. This lets you create a<br />
link between the selected text and an external element such as a URL.<br />
To edit the hyperlink, press Ctrl + H again or choose Edit Hyperlink in its local menu.<br />
To delete a hyperlink, choose Delete Hyperlink it its local menu.<br />
To activate a hyperlink, press Ctrl while clicking the link.<br />
You can set the format of the selected hyperlink as default for all hyperlinks by choosing Default<br />
Hyperlink Style in its local menu.
<strong>MindView</strong> Documentation<br />
If you select No change, the hyperlink keeps the current italic, bold or underline attribute.<br />
Set applies the relevant formatting (e.g. italic, bold or underline) to the hyperlink.<br />
Clear removes the relevant formatting from the hyperlink.<br />
You can also select a font, size and color for the text by choosing a value and checking the box to<br />
the left of the relevant option to apply it.<br />
The Change All button allows you to apply the options selected to all the existing hyperlinks.<br />
Creating a table<br />
The next group of icons relates to tables.<br />
To insert a table in your text note, click the Table icon and choose the initial number of rows<br />
and columns required. The table is inserted at the cursor position. To change the height of<br />
table rows, or the width of table columns, drag the row or column dividers. You can add and<br />
remove rows and columns later using the Insert commands.<br />
To delete the entire table, click the upper part of the Delete icon.<br />
To delete the selected cell(s), row(s) or column(s), click the arrow in the lower part of the<br />
Delete icon and choose the relevant command.<br />
To insert a row or column, place the cursor at the point of insertion, and choose the relevant<br />
Insert command.<br />
To change the interior color of the selected cell(s), choose Shading and select your preferred<br />
color.<br />
To add and remove borders or change the border color, choose Borders.<br />
You can also change the interior and border colors of the cells by choosing Borders and<br />
Shading to open the dialog below.<br />
48
49<br />
User Guide<br />
You can assign a background color to all the cells in the table or to the selected cells only.<br />
You can also assign a border width and color to the left, right, top or bottom edges of the<br />
entire table or to each of the selected cells. To keep the current border width, just leave the<br />
Width field empty. Similarly, to keep the current colors, leave the Color field(s) unchanged<br />
(diagonal line on a white background).<br />
To merge cells, select them and choose Merge Cells.<br />
To split a cell into two, select it and choose Split Cell.<br />
Adding a citation<br />
<strong>MindView</strong> lets you add citations in your text notes to refer to the bibliography sources you have<br />
been using. For more information on this, refer to "Using sources" and "Using citations".<br />
Spellchecking a text note<br />
To check the spelling of the text contained in your text note, choose Spelling.<br />
Clicking the lower part of the icon will enable you to choose a different language and set the<br />
spelling options. See "Using the spellchecker" for more information about this feature.<br />
Selecting a text note<br />
When several text notes are attached to a root or branch, you can display the one you want to view<br />
as follows:<br />
Click the tab corresponding to the required text note at the bottom of the Text Note editor, or<br />
Move the mouse pointer over the paperclip icon to the right of the root or branch label and<br />
click the required text note in the pop-up list, or<br />
Click the required text note in the Object list of the root or branch.<br />
Deleting a text note<br />
To delete a text note, move the mouse pointer over the paperclip icon to the right of the<br />
root or branch label, select the required text note in the pop-up list and choose Delete in its<br />
local menu.<br />
You can also select it in the Object list and press Delete or choose Delete in its local menu.<br />
Remember that if you delete a text note by accident, you can always cancel the deletion by<br />
clicking Undo in the Quick Access Toolbar or pressing Ctrl + Z.
<strong>MindView</strong> Documentation<br />
Inserting comments<br />
<strong>MindView</strong> lets you associate comments with the elements of your map, including the workspace<br />
itself, the root and any branch or sub-branch. There are two kinds of comments:<br />
Floating comments<br />
Pop-up comments<br />
In addition to these types of comments, you can also associate longer text notes with the<br />
branches of your map. For more information on text notes, see "Inserting text notes".<br />
Once created, both types of comments can be read aloud. To do this, click the comment<br />
window and choose Review | Proofing | Narrate (or press F5). You can stop the narrating by<br />
clicking the icon or pressing F5 again. To resume, hold down Ctrl while clicking the icon or<br />
pressing F5.<br />
Floating comments<br />
Floating comments are brief notes that stay visible on the screen at all times. You can add<br />
as many floating comments as you like to the workspace itself, the root or any branch of your map.<br />
Inserting a floating comment on a root or branch<br />
Select the root or branch to which you want to add a floating comment and choose Insert |<br />
Text | Floating Comment in the main menu or Insert | Floating Comment in the local menu.<br />
A small window opens to let you type your comment, and a Format tab specific to the<br />
comment appears at the right of the ribbon.<br />
By default, the text wraps around automatically after a certain number of characters. If<br />
you want to force the next part of the comment to start on a new line, press Ctrl + Enter at<br />
the end of the first line.<br />
Once you've finished typing, press Enter or click outside the comment window.<br />
A thin line now connects your new comment with the root or branch you attached it to.<br />
If necessary, you can move your comment to a more convenient place by dragging it with the<br />
mouse or by using the arrow keys of the keyboard.<br />
(optional) Click the Format tab at the right of the ribbon.<br />
This tab contains formatting options applicable to the floating comment.<br />
50
51<br />
User Guide<br />
Browse through the options available in the different panels, checking their effect on your<br />
floating comment as you go.<br />
As well as the Format tab, you can also use the Properties dialog to make changes to the floating<br />
comment.<br />
See "Floating comment properties: General tab" and "Floating comment properties: Text tab" in the<br />
Reference section for a detailed description of the properties applicable to a floating comment. For<br />
a general description of the Properties dialog, see "Using the Properties dialog".<br />
Inserting a floating comment on the workspace<br />
Right-click the workspace and choose Insert | Floating Comment in its local menu.<br />
When you add a floating comment to the workspace in this way, the comment is not attached to<br />
anything and no connecting line is visible.<br />
If necessary, you can then move your comment by dragging it with the mouse or by using the<br />
arrow keys of the keyboard. You can even connect it to a particular branch by moving it on top of<br />
its label.<br />
Editing a floating comment<br />
To replace the existing comment, just click it to select it and start typing the new comment.<br />
You can also edit the existing comment. As for branch labels, there are several ways of entering<br />
Edit mode:<br />
Select the comment and click its text, or<br />
Select the comment and press F2, or<br />
Right-click the comment and choose Edit Text in its local menu.<br />
Once you are in Edit mode:<br />
Place the cursor at the required position to edit the existing comment.<br />
When you have finished, press Enter or click outside the comment window.<br />
Pressing Esc while in Edit mode will leave the existing comment unchanged.<br />
Detaching a floating comment<br />
To detach a floating comment from a root or branch, select the comment and choose Detach<br />
in its local menu.<br />
The comment now belongs to the workspace itself rather than to the root or any of its branches.<br />
Deleting a floating comment<br />
To delete a floating comment, select it and do one of the following:<br />
Press Delete, or<br />
Choose Home | Editing | Delete in the main menu, or<br />
Choose Delete in its local menu.
<strong>MindView</strong> Documentation<br />
Pop-up comments<br />
By contrast with floating comments, pop-up comments are normally hidden. You can add a<br />
pop-up comment to the root or to any branch of your map, but not to the workspace itself. This type<br />
of comment can be very useful as a "designer note" while you build your map. You could for<br />
instance insert a pop-up comment on a branch to list all the elements that you still need to add to<br />
that branch.<br />
Inserting a pop-up comment<br />
Select the root or branch to which you want to add a pop-up comment choose Insert | Text |<br />
Comment in the main menu or Insert | Comment in the local menu.<br />
You can also just press F11.<br />
The comment window opens to let you type your comment.<br />
(optional) Resize the comment window by placing the mouse pointer on one of its edges or<br />
corners and dragging in the required direction.<br />
Once you've finished typing, press Esc, click outside the comment window or click the Close<br />
icon in the top right corner of the comment window.<br />
A yellow comment icon now appears next to the branch name, indicating that there is a<br />
comment associated with this branch. Moving the mouse pointer over this yellow comment icon reopens<br />
the comment window so that you can read the comment. As soon as you move the mouse<br />
pointer away from it, <strong>MindView</strong> hides the comment window again.<br />
If necessary, you can easily move your comment to a more convenient place by dragging its title<br />
bar with the mouse.<br />
Editing a pop-up comment<br />
There are several ways of entering Edit mode:<br />
Click the yellow comment icon on the right of the root or branch name, or<br />
Move the mouse pointer over the yellow comment icon and click the comment window, or<br />
Right-click the root or branch containing the pop-up comment and choose Insert | Edit<br />
Comment in its local menu.<br />
You can also just press F11.<br />
Deleting a pop-up comment<br />
There are two ways of doing this:<br />
Right-click the branch containing the comment and choose Delete | Comment in its local<br />
menu.<br />
Right-click the title bar of the comment window and choose Delete in its local menu.<br />
52
Inserting icons<br />
<strong>MindView</strong> lets you place icons on the branches of your mind map to attract attention or<br />
illustrate a particular idea.<br />
53<br />
User Guide<br />
You could for instance use one of the Team icons for all the topics of your map involving a<br />
discussion with others, or the Clock icon for all topics associated with a deadline. Make sure<br />
however that you use such icons consistently and sparingly to avoid overloading the map.<br />
Inserting a <strong>MindView</strong> icon on a branch<br />
Select the branch to which you want to add an icon.<br />
Choose Insert | Icons to open the gallery of icons.<br />
Click the required icon.<br />
The selected icon appears on the left of the branch name.<br />
You can choose as many icons as you like in the Standard set. However, you can only choose<br />
one icon in each of the other sets. If for instance you have attached a Priority 3 icon to your branch,<br />
choosing a Priority 5 icon for the same branch will remove the Priority 3 icon and replace it with the<br />
Priority 5 icon.<br />
Once you have inserted an icon from a set other than the Standard set on a branch, clicking<br />
that icon on the branch replaces it with the next icon in the set. If for instance you have inserted a<br />
Priority 3 icon on a branch, clicking it replaces it with the Priority 4 icon and so on until Priority 9,<br />
then Priority 1 again.
<strong>MindView</strong> Documentation<br />
Deleting an icon<br />
You can delete an icon in two ways:<br />
Click the icon to select it, then choose Delete Icon in its local menu.<br />
You can also choose Delete All Icons to remove all the icons from the branch.<br />
Right-click the branch, choose Delete | Icons and select the icon to be deleted.<br />
Managing your own sets of icons<br />
<strong>MindView</strong> also lets you create and modify your own sets of icons.<br />
Choose Insert | Icons to open the gallery of icons.<br />
Click Custom Icons at the bottom of the gallery.<br />
The Manage Custom Icons dialog appears.<br />
Click the Create Set icon to create a new set of icons.<br />
(optional) If you want your new icon set to contain mutually exclusive icons (meaning that a<br />
particular branch can only contain one icon from the set), check Define as set of mutually<br />
exclusive icons.<br />
Click the Add Icon icon to browse through your folders and select an icon to add to the set.<br />
(optional) To rename your custom icon, right-click it and choose Rename.<br />
Your new set of icons now appears in the Icons gallery.<br />
If you distribute to other users a mind map in which you have inserted custom icons, the other<br />
users will be able to view the custom icons as usual when they open the mind map on their<br />
computer. The custom icons are added to the bottom of the Icons gallery in a special set called<br />
"Other Icons".<br />
Inserting pictures<br />
<strong>MindView</strong> lets you add pictures to the workspace itself, the root and any branch or sub-branch.<br />
As all the research done in this area indicates that the use of pictures significantly enhances<br />
memory retention, you should try to use pictures wherever possible to illustrate your map.<br />
54
Three different types of pictures are available:<br />
Branch pictures<br />
A branch picture "sits" on the root or branch to which it belongs. You can only add one<br />
branch picture to a particular root or branch.<br />
55<br />
User Guide<br />
It is considered good practice to insert a branch picture on the root to illustrate the subject of<br />
a map, as shown below.<br />
Floating pictures<br />
Unlike branch pictures, floating pictures can be moved wherever convenient on the<br />
workspace. Floating pictures can be connected to the root or particular branches, or just<br />
"float" freely on the workspace.<br />
Attached picture files<br />
<strong>MindView</strong> also allows you to attach various objects to the root and branches of your map,<br />
such as text files, picture files, video files, Flash files and so on. Not only can you activate<br />
these objects from within <strong>MindView</strong>, but you can also choose to include them when exporting<br />
your map to a different format, such as HTML or Mediator. See "Attaching objects" for more<br />
information on attached picture files.<br />
Inserting a picture<br />
Inserting a branch picture on a root or branch<br />
Select the root or branch to which you want to add a branch picture and choose Insert |<br />
Pictures | Branch Picture in the main menu or Insert | Branch Picture in the local menu.<br />
You can also choose Home | Insert | Branch Picture in the main menu.<br />
Choose the picture required in the Open dialog.<br />
The picture is now inserted by the root or branch label, at a position determined by the style<br />
applied to the map.<br />
You can also paste a branch picture from the clipboard: select the root or branch, then choose<br />
Paste or press Ctrl + V.<br />
(optional) Resize the picture as necessary: first click the picture itself to select it, then move the<br />
mouse pointer on the required edge until it changes to a double arrow and drag with the mouse<br />
until the picture reaches the correct size.
<strong>MindView</strong> Documentation<br />
If necessary, you can reset the picture to its original size by using its aspect ratio property.<br />
See "Picture properties" below.<br />
You can also change the position of the branch picture with respect to the branch label, so that<br />
instead of being shown above the branch label for example, the picture is shown on its right or on<br />
its left:<br />
Click the branch picture to select it, then drag it over the branch label, using the preview shown<br />
in the bounding area to determine its new position. Drop the picture in one of the blue areas on<br />
the right or on the left of the branch label to position it accordingly.<br />
Dropping the picture in the left part of the blue area shown below the branch label converts it<br />
to a floating picture.<br />
Dropping the picture in the right part of the blue area shown below the branch label converts<br />
it to an attached picture file.<br />
56
You can also use this method to drag the branch picture to a different branch.<br />
Inserting a floating picture on a root or branch<br />
57<br />
User Guide<br />
Select the root or branch to which you want to add a floating picture and choose Insert |<br />
Pictures | Floating Picture in the main menu or Insert | Floating Picture in the local menu.<br />
Choose the picture required in the Open dialog.<br />
The picture appears on the screen, scaled down from its original size if necessary.<br />
(optional) You can resize the picture as described above. You can also move the picture to a<br />
more convenient place by dragging it with the mouse or by using the arrow keys of the<br />
keyboard.<br />
A thin line now connects your new picture with the root or branch you attached it to.<br />
Inserting a floating picture on the workspace<br />
Click the workspace and choose Insert | Pictures | Floating Picture in the main menu or<br />
Insert | Floating Picture in the local menu.<br />
Choose the picture required in the Open dialog.<br />
When you add a floating picture to the workspace in this way, the picture is not attached to<br />
anything and no connecting line is visible.<br />
(optional) As above, you can resize or move the picture as necessary. You can even connect it<br />
to a particular branch by moving it on top of the branch.<br />
Dragging a picture<br />
Instead of using the <strong>MindView</strong> commands described above, you can also add a picture by dragging<br />
it from the Multimedia Catalog, Windows Explorer or the Windows Desktop.<br />
For a full description of the Multimedia Catalog, see "Using the Multimedia Catalog".<br />
Dragging a picture on a root or branch<br />
Just drag the picture from the Multimedia Catalog, from Windows Explorer or from the<br />
Windows Desktop and drop it on the relevant root or branch when it becomes highlighted.<br />
By default, this creates a branch picture. If necessary, you can convert this branch picture to<br />
a floating picture by right-clicking the branch picture and choosing Detach | Branch Picture<br />
in its local menu.<br />
Dragging a picture on the workspace<br />
Just drag the picture from the Multimedia Catalog, from Windows Explorer or from the<br />
Windows Desktop and drop it on the workspace at the required position.<br />
Moving a picture<br />
If necessary, you can easily move a picture from one branch to another branch:<br />
To move a branch picture to another branch, click the branch picture to select it, drag it to the<br />
other branch, and drop it in one of the blue areas of the preview bounding area described<br />
above, on the left, on the right or above the branch label.<br />
You can also convert the branch picture to a floating picture by dropping it in the left part of<br />
the blue area shown below the branch label, or convert it to an attached picture file by<br />
dropping it in the right part of the blue area shown below the branch label.<br />
Dragging a branch picture away from its branch and dropping it on an empty area of the<br />
workspace will create a freely floating picture not belonging to any of the branches.<br />
To move a floating picture from one branch to another branch, click the floating picture to<br />
select it, drag it to the other branch until the pointer changes shape, and drop it in the left part<br />
of the blue area shown below the branch label.
<strong>MindView</strong> Documentation<br />
You can also convert the floating picture to a branch picture by dropping it in one of the blue<br />
areas on the left, on the right or above the branch label, or convert it to an attached picture<br />
file by dropping it in the right part of the blue area shown below the branch label.<br />
Detaching a picture<br />
Detaching a branch picture<br />
To detach a branch picture and convert it to a floating picture, select the branch to which it<br />
belongs and choose Detach | Branch Picture in its local menu.<br />
Detaching a floating picture<br />
To detach a floating picture from a root or branch, select the picture and choose Detach in its<br />
local menu.<br />
The picture now belongs to the workspace itself rather than to the root or any of its branches.<br />
Replacing a picture<br />
Replacing a branch picture<br />
You can replace a branch picture by another picture as follows:<br />
Select the branch to which the picture belongs.<br />
Press the Ctrl key while double-clicking the branch picture.<br />
The Open dialog appears, letting you choose a different picture.<br />
Replacing a floating picture<br />
Double-click the floating picture.<br />
The Open dialog appears, letting you choose a different picture.<br />
Deleting a picture<br />
Deleting a branch picture<br />
You can delete a branch picture in two ways:<br />
Start by selecting the branch to which the picture belongs, and then either:<br />
Click the branch picture itself (resizing handles appear around it) and press Delete, or<br />
Choose Delete | Branch Picture in the branch local menu.<br />
If you press the Delete key by mistake, the whole branch will be deleted. You can restore it by<br />
clicking Undo in the Quick Access Toolbar or pressing Ctrl + Z.<br />
Deleting a floating picture<br />
To delete a floating picture, select it and do one of the following:<br />
Press Delete, or<br />
Choose Home | Editing | Delete in the main menu, or<br />
Choose Delete in its local menu.<br />
Picture properties<br />
Pictures have properties, which you can edit with the Properties dialog.<br />
Branches containing branch pictures have an extra Picture tab in their Properties dialog containing<br />
the picture properties. See "Branch properties: Picture tab" for a detailed description of the<br />
properties applicable to branch pictures.<br />
See "Floating picture properties: General tab" and "Floating picture properties: Picture tab" for a<br />
detailed description of the properties applicable to floating pictures.<br />
58
See "Using the Properties dialog" for a general description of the Properties dialog.<br />
If the Properties dialog is not visible, choose View | Show/Hide | Properties to open it.<br />
Inserting timeline data<br />
59<br />
User Guide<br />
This topic explains how to enter time information on the branches of your document in order to<br />
create a timeline.<br />
Entering time information on the branches of your document allows you to display these branches<br />
as chronological events along a horizontal axis in the Timeline view, as shown here:<br />
For a full description of the Timeline view, see the topic "Using the Timeline view". This topic also<br />
explains how you can present and export your timelines.<br />
Although you can work directly in the Timeline view when creating a timeline, the Timeline panel<br />
described here allows you to enter time information on your branches while brainstorming your<br />
document in one of the standard Map views.<br />
Choosing a timescale<br />
Regardless of whether you are working in one of the Map views or in the Timeline view, the first<br />
thing you need to do when you are creating a timeline is to define the timescale of your document.<br />
Click the Timeline tab on the right of the workspace or choose View | Show/Hide | Timeline<br />
Panel to open the panel.<br />
Select a timescale for the document. The default timescale is Standard.<br />
<strong>MindView</strong> lets you choose between several timescales to cater for different timeline projects:<br />
Standard: Use this timescale for normal dates and times. It is also suitable for historical times<br />
where you do not need to show BC dates. You can specify the year, month, day and time. The<br />
range is 1 AD to 3,000 AD.<br />
Historic: Use this timescale for historical dates. You can specify the year (BC or AD), month and<br />
day (not the time). The range is 5,000,000 BC to 3,000 AD.
<strong>MindView</strong> Documentation<br />
Geological: Use this for plotting astronomical, geological or prehistoric events. You can specify<br />
dates in thousands or millions of years. Decimal numbers are allowed. The range is<br />
±20,000,000,000.<br />
Daily: Use this timescale to plot time by day number, without reference to specific dates or days of<br />
the week. For example, you could use it to chart the life cycle of an insect or to map out a process.<br />
You can specify day number and time: Day 1 is the first day, Day 17 the seventeenth, Day -3 the<br />
third day before the first day, and so on. The range is ±1,000,000.<br />
Weekly: Use this timescale to plot time by week number, without reference to specific dates. You<br />
can specify week number, day (Monday to Sunday) and time. The range is ±100,000.<br />
It is worth taking trouble to choose the timescale that is most appropriate for your subject. If<br />
you change the timescale later, you will have to re-enter the time information on all the branches.<br />
Entering dates and times<br />
Select a branch for which you want to add time information.<br />
Click the button at the right of the Start time field in the Timeline panel (or press F12).<br />
Specify a Start time for the event in the dialog that opens. You do not have to make selections<br />
in all the boxes. For example, if you are using the Standard timescale, you can choose just a<br />
year, or just a year and month, without specifying an exact date or time.<br />
If you make a mistake or enter a date that in hindsight is too specific for your needs, you can<br />
click Reset one or more times to undo your choices one by one. If for instance, you specify a<br />
date by selecting '2001', 'January' and '22', clicking Reset will remove the information about<br />
the day to leave the date as 'January 2001'.<br />
Alternatively, you can just type in the date and time directly in the Start time field. You can<br />
use various shortcuts and abbreviations, depending on the timescale.<br />
<strong>MindView</strong> interprets what you type and shows the results in pop-ups as you type: at any time<br />
you can click one of these to select it.<br />
Here are some examples (displayed dates will depend on your machine’s settings and so<br />
may be different from those shown here):<br />
Standard:<br />
'12 25 11', '12/25/11', '12-25-11' and '122511’ all become Dec 25, 2011 (US settings);<br />
'25 12 11', '25/12/11', '25-12-11' and ‘251211’ all become 25 Dec 2011 (UK settings);<br />
‘3 3’ becomes 3 Mar of the current year;<br />
60
61<br />
User Guide<br />
You can also specify a time after the date, separating the date and the time with a space. For<br />
instance, '2:00 pm' becomes 14:00.<br />
Historic: ‘1211’ becomes 1211 AD; ‘-490’ becomes 490 BC;<br />
Geological: ‘100m’ becomes 100,000,000; '-5000' becomes -5,000 (i.e. 5,000 years ago);<br />
‘50t’ becomes 50,000.<br />
Daily: ‘20’ becomes Day 20; ‘-20’ becomes Day -20; ‘2 10:pm’ becomes Day 2, 22:00.<br />
Weekly: ‘3’ becomes Week 3; ‘3.0’ becomes Week 3, Monday; ‘-2.6 3:’ becomes Week -2,<br />
Sunday, 3:00.<br />
Click OK.<br />
If necessary, you can specify an End time by clicking the End time field or pressing Ctrl + F12.<br />
You do not need to specify an end time if your event has no extended duration. For example,<br />
to enter the date of an event that happened on a particular day, all you need to do is to specify<br />
the date as the Start time.<br />
Repeat the procedure to add time information to other branches.<br />
(optional) To display the time information you just entered on the branches of the map, choose<br />
View | Data | Show Time Info (or right-click the workspace and choose Show Time Info)<br />
and check Start/End time in the sub-menu.<br />
You can hide or show the time information on individual branches with the Show Time<br />
Info icon of the Format tab (or the Show Time Info option in the branch local menu).<br />
It is also possible to format the time information shown on the map in different ways. For<br />
more information, see "Formatting a branch".<br />
You can delete the time information inserted on a branch at any time by selecting it and clicking the<br />
Delete Times button.<br />
As well as using this panel, you can also enter time information on branches from the Outline<br />
view or from the Timeline Outline panel shown in the Timeline view. Just double-click the relevant<br />
Start Time or End Time cell and fill in the time picker as described above.<br />
Advanced options<br />
The End Times Definitions dialog which opens when you click the Advanced button at the bottom<br />
of the panel allows you to specify the way <strong>MindView</strong> should handle end times. These settings are<br />
only relevant when viewing the document in the Timeline view.<br />
The simplest way to explain how this works is by means of an example. Suppose you are entering<br />
dates for a branch concerning World War II. As start date you specify 1939, so the branch<br />
displayed on the timeline will start at the beginning of 1939. As end date you enter 1945. There are<br />
now two possibilities:
<strong>MindView</strong> Documentation<br />
If the setting for End time year on this dialog is set to Is included, the end time will be the end<br />
of 1945. In other words the duration bar for the World War II branch will stretch from the<br />
beginning of 1939 to the end of 1945.<br />
If the setting for End time year on this dialog is set to Is not included, the end time will be the<br />
beginning of 1945. In other words the duration bar will stretch from the beginning of 1939 to the<br />
beginning of 1945.<br />
The settings for the other time periods, namely month, week and day, work in the same way.<br />
Important: The choices you make in this dialog will apply only to the end times you insert from<br />
now on, and only for the current timeline. The next time you create a timeline, the settings of this<br />
dialog will revert to their default values. You are therefore free to choose different options for<br />
different timelines.<br />
Printing a mind map<br />
To print your map:<br />
Click the File tab.<br />
Choose Print.<br />
You can also press Ctrl + P.<br />
This opens the Print Preview window, which shows you what your map will look like on paper.<br />
The preview of the map immediately reflects the changes you make in this window, allowing you to<br />
experiment with the various settings.<br />
The preview area always shows the map exactly as it is shown on the workspace. This means<br />
that if you have restricted the display of the map in some way, for instance by showing only 2 levels<br />
of branches, focusing on a particular branch or using an advanced filter, only the part of the map<br />
shown in the preview area (and the workspace) will be printed. See "Viewing a mind map",<br />
"Focusing on a branch" and "Filtering a mind map" to learn more about these display options.<br />
62
Customizing the printing<br />
Apart from the usual print operations, the Print Preview window lets you choose settings to<br />
optimize the printing of your map.<br />
63<br />
User Guide<br />
Fit to Page: This resizes the map so that its entire contents fit on the single page or page spread<br />
chosen.<br />
Page Spread: These options allow you to spread your map on several pages, which is useful for<br />
large maps. If for instance your map is quite wide (as may be the case in Top Down view), you can<br />
click Increase Width to add one or more pages horizontally, thereby ensuring that its entire<br />
contents will be easily legible. Similarly, if your map is quite tall, you can click Increase Height to<br />
add one or more pages vertically. Whenever you increase or decrease the page spread, the map is<br />
automatically resized to occupy all the space available.<br />
Logo: These options let you display a company logo or any other logo on the printed page or page<br />
spread, at the position defined by the placement icons shown on the right of the panel.<br />
Moving or resizing the map<br />
When moving the mouse pointer over the map in the Preview area, a red outline appears around it.<br />
You can move the map within the page or page spread by dragging the outlined area with the<br />
mouse.
<strong>MindView</strong> Documentation<br />
You can also resize the map within the page or page spread by moving the mouse pointer to one<br />
of its edges until it becomes a double arrow (the red outline becomes a blue outline), and dragging<br />
the edge in the direction required.<br />
64
Further tasks<br />
Formatting a branch<br />
65<br />
User Guide<br />
<strong>MindView</strong> lets you perform various operations on the root of your map or any of its branches, such<br />
as changing their shape, choosing a different fill color, defining a branch boundary, or selecting<br />
different text attributes. All these formatting options help you add visual interest to your map.<br />
Select the root or branch you want to format.<br />
To apply the same formatting attributes to all the branches, it is much easier to use the<br />
Design tab, whose predefined styles and design options apply to the entire map. See "Designing a<br />
mind map" for more information.<br />
You can however select several branches to give them the same formatting attributes. See<br />
"Selecting several branches" below for more information.<br />
Click the Format tab that appears at the right of the ribbon.<br />
This tab contains formatting options applicable to the selected root or branch.<br />
Browse through the options available in the different panels, checking their effect on your<br />
branches as you go.<br />
A quick way of copying the formatting attributes from one branch to another is to use the<br />
Format Painter . Select the branch whose formatting you want to copy and choose Home |<br />
Clipboard | Format Painter or press Ctrl + Shift + C. The cursor changes to a paintbrush icon<br />
. Click the branch you want to copy the formatting to. Pressing Ctrl while clicking the branch will let<br />
you continue copying the format to other branches by clicking each one in turn. To return the icon<br />
to its normal shape after the copying, click the Format Painter icon again.<br />
If necessary, you can undo your changes and return the branch to the original map style defined in<br />
the Design tab by choosing Effects | Reset Style.<br />
To return all the branches to the initial style, select them all (Ctrl + A), and choose Effects |<br />
Reset Style in the Format tab.<br />
To return the entire map to the initial style (i.e. not only the branches, but also the global map<br />
properties such as page color or page pattern), choose Effects | Reset Style in the Design tab.<br />
Selecting several branches<br />
Selecting several branches at once allows you to apply the same change to all of them<br />
simultaneously.<br />
Click the first branch, then press and hold down the Ctrl key while clicking the other branches<br />
one by one.<br />
Each of the branches you click becomes highlighted to indicate that it is selected.<br />
To deselect one or more branches simply click them again while holding down the Ctrl key.<br />
You can also select several branches by drawing a frame around them with the mouse. All the<br />
branches contained within the frame become selected.
<strong>MindView</strong> Documentation<br />
Press Ctrl + A to select all branches.<br />
When you select several branches in this way, the header of the Format tab changes to<br />
Multiple Branches, indicating that any changes you make will apply to all the selected branches. If<br />
the branches you selected belong to different levels (for instance, some main branches as well as<br />
some sub-branches), only the options that the different levels have in common are shown in the<br />
Format tab.<br />
Formatting branch data<br />
If you have added timeline data on your branches, you can display this data directly on the<br />
branches:<br />
Choose View | Data | Show Time Info (or right-click the workspace and choose Show Time<br />
Info) and check the fields you want to see in the sub-menu.<br />
You can hide or show the fields on individual branches with the Show Time Info icon of<br />
the Format tab (or the Show Time Info option in the branch local menu).<br />
You can also specify how this data should be represented.<br />
66
Select the branch whose data you want to format by clicking it.<br />
Click the block of branch data displayed below the branch.<br />
Click the Format tab that appears at the right of the ribbon.<br />
This tab contains formatting options applicable to the branch data of the selected branch.<br />
67<br />
User Guide<br />
Browse through the options available in the different panels, checking their effect on the branch<br />
data as you go.<br />
You can also give specific text attributes to the different elements of the branch data. To do this,<br />
click the particular element within the block of branch data, and choose the required attributes in<br />
the Format tab.<br />
Once you have formatted the branch data to your liking, you can easily apply that formatting to<br />
the data of all the other branches by clicking the Set as Default icon.<br />
Branch properties<br />
As well as the Format tab, you can also use the Properties dialog to make changes to the selected<br />
root or branch. The Properties dialog always lists all the properties applicable to the element<br />
currently selected in the workspace.<br />
Select the root or branch you want to format, or the block of branch data you want to format.<br />
Choose View | Show/Hide | Properties to open the Properties dialog.
<strong>MindView</strong> Documentation<br />
See "Using the Properties dialog" for a general description of the Properties dialog.<br />
See "Root properties: General tab" and "Branch properties: General tab" in the Reference section<br />
for a detailed description of the general properties applicable to a root or branch.<br />
See "Root properties: Text tab" and "Branch properties: Text tab" for a description of the properties<br />
applicable to the branch label.<br />
See "Branch data properties: General tab" in the Reference section for a detailed description of the<br />
properties applicable to branch data.<br />
Moving a branch<br />
As your map grows and you start analyzing its various topics, you may realize that some of them<br />
don't in fact belong to the branch you first allocated them to, but should be moved to a different<br />
branch.<br />
This topic describes how to perform the following operations:<br />
Moving a main branch or a sub-branch and inserting it at a different hierarchical level in the<br />
mind map<br />
Cutting, copying and pasting a branch in the same document or in another document<br />
Moving a main branch manually to a different position by disabling the Auto-layout mode<br />
Moving a main branch or a sub-branch and inserting it at a different level<br />
You can move an entire branch, including any sub-branches and objects attached to it, to a<br />
different branch of your map. As you work on organizing your ideas, you can for instance decide to<br />
convert a sub-topic to a main topic by moving the corresponding sub-branch to the root, or allocate<br />
a sub-topic to a different main topic by moving the corresponding sub-branch to a different main<br />
branch.<br />
Select the branch you want to move to a different location by clicking it with the left mouse<br />
button.<br />
While keeping the left mouse button down, drag the branch to the required location.<br />
The mouse pointer changes to a different shape and a line shows you where the branch will<br />
be inserted when you let go of the mouse button.<br />
68
Release the mouse button to insert the branch at the required location.<br />
69<br />
User Guide<br />
If you are viewing your map in the Mind Map or Left/Right views, you can also use the Ctrl +<br />
Up and Ctrl + Down keyboard shortcuts to move the currently selected branch up or down in the<br />
map. Similarly, the Ctrl + Right and Ctrl + Left keyboard shortcuts allow you to move a branch<br />
right or left in the Top Down view.<br />
Cutting, copying and pasting a branch<br />
You can apply the standard Cut, Copy and Paste functions to any branch of your mind map. This<br />
allows you to copy or move an entire branch, including all its sub-branches and attached objects, to<br />
a different part of your map, at the same hierarchical level or at a higher or lower level, in the same<br />
document or in a different document.<br />
You can also apply the Cut, Copy and Paste functions to the root itself. This allows you for instance<br />
to copy an entire map from one document and add it as a main branch or a sub-branch in a<br />
different document. This is a very useful feature if you need to consolidate several different<br />
documents into a master document, as described in "Packing a mind map".<br />
To cut a root or a branch with all its sub-branches and attached objects to the clipboard (in<br />
other words to place the root or branch on the clipboard while removing it from your map), you<br />
first need to select it. You can then either:<br />
Choose Home | Clipboard | Cut in the main menu, or<br />
Choose Cut in the local menu of the branch, or<br />
Press Ctrl + X.<br />
To copy a root or a branch and all its sub-branches and attached objects to the clipboard (in<br />
other words to place the root or branch on the clipboard while leaving it in place in your map),<br />
you first need to select it. You can then either:<br />
Choose Home | Clipboard | Copy in the main menu, or<br />
Choose Copy in the local menu of the branch, or<br />
Press Ctrl + C.<br />
To paste a root or a branch and all its sub-branches and attached objects, you first need to<br />
select its new location, either in the same document or in a different document. You can then<br />
either:<br />
Choose Home | Clipboard | Paste in the main menu, or<br />
Choose Paste in the local menu of the destination branch, or<br />
Press Ctrl + V.<br />
The clipboard root or branch is added as a sub-branch of the destination branch you<br />
selected.<br />
If you cut and paste a branch that is the starting point of a branch connection (see "Creating<br />
branch connections"), the branch connection will be moved with the branch. However if you cut and<br />
paste a branch that is the end point of a branch connection, the branch connection is not kept.
<strong>MindView</strong> Documentation<br />
Moving a main branch to a different position by disabling Auto-layout<br />
By default, <strong>MindView</strong> automatically arranges the main branches as you insert them to prevent any<br />
overlap. You can however choose to reposition the main branches yourself after their insertion by<br />
disabling Auto-layout mode.<br />
Click the workspace so that no other element is selected.<br />
Choose View | Show/Hide | Properties to open the Properties dialog for the view.<br />
Click the Branches tab.<br />
Uncheck Auto-layout.<br />
You can now position the main branches of your map as you wish by dragging them with the<br />
mouse.<br />
Note that this only applies to main branches. <strong>MindView</strong> always arranges sub-branches<br />
automatically.<br />
Important: If you re-enable Auto-layout mode at any point while still working on your map, the<br />
main branches you repositioned will be placed back in their default position. You can however click<br />
Undo in the Quick Access Toolbar (or press Ctrl + Z) to cancel the re-enabling of Auto-layout<br />
and revert the display of the main branches to your own positioning.<br />
Focusing on a branch<br />
As your map grows, you might find it useful to concentrate on a particular area by<br />
viewing only a chosen branch or set of branches. This also gives you more workspace to add<br />
comments, text notes, icons and other objects on the particular branch or set of branches you are<br />
viewing.<br />
Click the branch that you want to isolate.<br />
Choose View | Detail | Apply Branch Focus in the main menu or Apply Branch Focus in<br />
its local menu.<br />
You can also just press F6.<br />
Now only the branch you selected is shown on the workspace, together with any sub-branches it<br />
may have.<br />
To focus on one of the sub-branches, just select it and click Apply Branch Focus again.<br />
Note that when restricting the display in that way, any branch connections leading to branches<br />
outside the area shown are not represented.<br />
To display the entire map again, you can either:<br />
Click the Clear Branch Focus icon in the main menu, or<br />
Select the branch again and choose Clear Branch Focus in its local menu, or<br />
Right-click the workspace and choose Clear Branch Focus in its local menu, or<br />
Press Ctrl + Shift + F6.<br />
If you save and close a document to which you have applied a branch focus to concentrate on<br />
a specific branch or set of branches, next time you open the document, a message warns you that<br />
you may be viewing only part of the map. Click the Clear Branch Focus button next to the<br />
message to see the entire map again.<br />
70
71<br />
User Guide<br />
You can also collapse the entire mind map to just one level of branches, two levels, three<br />
levels or four levels by using the Detail Level icons of the View tab. The All Levels icon<br />
expands the mind map so that it shows all its branches down to the last level.<br />
You can also press Ctrl + 1 to display just one level of branches, Ctrl + 2 to show two levels<br />
etc. Ctrl + 5 shows all levels.<br />
Filtering a mind map<br />
<strong>MindView</strong> lets you filter your map to only display branches that meet specific criteria. Using a<br />
filter, you can for instance show only the branches that contain the word "budget", or, if you are<br />
working on a timeline, events starting at a given date. You can also combine different criteria, so<br />
that only the branches that meet all or some of these criteria are shown.<br />
All the filters you define are saved with the <strong>MindView</strong> document. It is also possible to import and<br />
export filters for use in other <strong>MindView</strong> documents.<br />
If you save and close a document to which you have applied a filter to show only specific<br />
branches, next time you open the document, a message warns you that you may be viewing only<br />
part of the map. Click the Clear Filter button next to the message to see the entire map again.<br />
Defining a filter<br />
Choose View | Filter and click the down arrow at the bottom of the Filter icon.<br />
Choose New in the sub-menu.<br />
The Filter dialog opens.<br />
Enter a name for your filter in the 'Filter name' field.
<strong>MindView</strong> Documentation<br />
Click Add Level to define your first condition.<br />
Click the Property field and choose the branch element that you want to use to filter the map.<br />
If for instance you want to restrict the display to all the branches on which you have placed a<br />
Priority 1 icon, select the entry "Branch icons" in the list.<br />
Click the Condition field and choose the required condition. In our example, you would choose<br />
the entry "Equal to" or "Contains" (in case some branches contain more than one icon).<br />
Click the Value field to define the condition to be applied to the branch. In our example, you<br />
would choose the Priority 1 icon in the icon gallery that opens when you click the Value field.<br />
(optional) Click Add Level again to define a second condition, using the And/Or field to<br />
indicate whether both conditions must be met for the branch to display, or whether meeting just<br />
one of the two conditions is enough for the branch to display.<br />
(optional) Continue adding conditions as required and click OK.<br />
The mind map now only shows the branches that meet the criteria you have defined.<br />
The Filter icon stays highlighted to remind you that you are only viewing part of the map.<br />
If necessary, you can add further criteria to the filter by editing it (see below) or define new filters.<br />
Clearing a filter<br />
To go back to the full map display, just choose View | Filter | Filter again to clear the filter.<br />
The Filter icon goes back to its normal state, indicating that the map is no longer filtered.<br />
Applying a filter<br />
When you have several filters, you can apply any one of them as follows:<br />
Choose View | Filter and click the down arrow at the bottom of the Filter icon.<br />
Click the required filter from the list shown at the bottom of the sub-menu.<br />
Editing a filter<br />
Choose View | Filter and click the down arrow at the bottom of the Filter icon.<br />
Choose Edit in the sub-menu, select the filter you want to edit and proceed as described<br />
above.<br />
Deleting a filter<br />
You can also delete a filter previously defined permanently from the <strong>MindView</strong> document if you no<br />
longer need it:<br />
Choose View | Filter and click the down arrow at the bottom of the Filter icon.<br />
Choose Delete in the sub-menu and select the required filter.<br />
Attaching objects<br />
One of the strengths of <strong>MindView</strong> is that it allows you to attach objects to the root or any<br />
branch or sub-branch of your mind map. This means that you can enhance your map with a variety<br />
of multimedia features, such as sounds, video sequences or Flash animations, as well as add all<br />
the relevant backing documents to each of your branches (e.g. Microsoft Excel spreadsheets,<br />
Microsoft Word documents, etc.)<br />
Not only can you activate these objects from within <strong>MindView</strong>, but you can also choose to include<br />
them when exporting your map to a different format, such as a web site or a Microsoft PowerPoint<br />
presentation.<br />
Although <strong>MindView</strong> does not apply any restriction on the type of files it is possible to attach to<br />
a branch, you will only be able to open an attached file from the mind map if a program associated<br />
with its file type (e.g. bmp, doc, xls etc.) is installed on your computer.<br />
72
73<br />
User Guide<br />
By default, when you attach a file to a branch in this way, it is added to the mind map as a link<br />
to the file stored on your hard disk. If you intend to distribute your mind map to others, you should<br />
first use the Pack feature to pack all the attached files into the mind map, thereby ensuring that<br />
your colleagues have access to all the files you are using. See "Packing a mind map" for more<br />
information. If you want to send your mind map by e-mail, you can use the Send feature to create<br />
this packed version automatically. See "Sending a mind map" for more information.<br />
<strong>MindView</strong> also allows you to create a link between a branch and an external element such as a<br />
URL. See "Creating hyperlinks" for more information on links.<br />
Attaching an object to a root or branch<br />
There are two ways of attaching an object:<br />
Select the required root or branch, choose Home | Insert | Attachment in the main menu or<br />
Insert | Attachment in the local menu, and select the object you want to add.<br />
Drag the required file from Windows Explorer and drop it on the root or branch.<br />
You can also attach a picture from the clipboard: select the root or branch, press and keep the<br />
Shift key down, and choose Paste.<br />
As soon as you add an object to a root or branch, a paperclip icon appears to the right of its<br />
label to indicate the presence of the attached object. Moving the mouse pointer over this paperclip<br />
icon displays a pop-up list of all the objects attached.<br />
The attachment is also added to the Object list of the root or branch, giving you a complete<br />
overview of the objects you have attached to it.<br />
See "Using the Object list" for more information.<br />
Activating an object<br />
Once attached, there are several ways to activate an object:<br />
Double-click the object in the Object list, or<br />
Select the object in the Object list and choose Execute in its local menu, or<br />
Display the object pop-up list by moving the mouse pointer over the paperclip icon and<br />
click the object required.<br />
These actions all activate the object, which opens in the viewer associated with its extension type.<br />
For instance, if the attached object is a Word document, it will open in Microsoft Word. If it is a<br />
video, it will open in the video playing software installed on your computer, and so on.<br />
Moving an object<br />
You can easily move or copy an attached object from one branch to another.<br />
To move an object, select it in the Object list of the original branch and drag it to the branch<br />
you want to move it to.<br />
To copy an object, select it in the Object list of the original branch, press the Ctrl key and drag<br />
it to the branch you want to copy it to while keeping the Ctrl key down.
<strong>MindView</strong> Documentation<br />
Deleting an object<br />
To delete an object, select it in the Object list and do one of the following:<br />
Press Delete, or<br />
Choose Delete in its local menu.<br />
Remember that if you delete an attached object by accident, you can always cancel the<br />
deletion by clicking Undo in the Quick Access Toolbar or pressing Ctrl + Z.<br />
Object properties<br />
Objects have properties, which you can edit in the Properties dialog.<br />
See "Attachment properties: General tab" for a detailed description of the properties applicable to<br />
objects and "Using the Properties dialog" for a general description of the Properties dialog.<br />
If the Properties dialog is not visible, choose View | Show/Hide | Properties to open it.<br />
Inserting sounds<br />
<strong>MindView</strong> lets you record sounds directly from within the program and add them to the<br />
branch or sub-branch of your choice.<br />
Select the root or branch to which you want to add a sound.<br />
Choose Insert | Links | Sounds.<br />
The Sound Recording toolbar appears.<br />
Press the Record button to start recording.<br />
Press the Play button to playback and check your recording.<br />
When you are satisfied with your recording, press the Save button (on the right) to save it in<br />
the folder of your choice.<br />
A paperclip icon now appears to the right of the branch label to indicate the presence of an<br />
attached object. Moving the mouse pointer over this paperclip icon displays a pop-up list of all the<br />
objects attached.<br />
The sound is also added to the Object list of the root or branch, giving you a complete overview of<br />
the objects you have attached to it.<br />
See "Using the Object list" for more information.<br />
Playing a sound<br />
Once attached, there are several ways to playback a sound:<br />
Double-click the sound in the Object list, or<br />
Select the sound in the Object list and choose Execute in its local menu, or<br />
Display the object pop-up list by moving the mouse pointer over the paperclip icon and<br />
click the sound.<br />
74
Moving a sound<br />
You can easily move or copy a sound from one branch to another.<br />
75<br />
User Guide<br />
To move a sound, select it in the Object list of the original branch and drag it to the branch you<br />
want to move it to.<br />
To copy a sound, select it in the Object list of the original branch, press the Ctrl key and drag it<br />
to the branch you want to copy it to while keeping the Ctrl key down.<br />
Deleting a sound<br />
To delete a sound, select it in the Object list and do one of the following:<br />
Press Delete, or<br />
Choose Delete in its local menu.<br />
Remember that if you delete a sound by accident, you can always cancel the deletion by<br />
clicking Undo in the Quick Access Toolbar or pressing Ctrl + Z.<br />
Sound properties<br />
Like all objects, sounds have properties, which you can edit in the Properties dialog.<br />
See "Attachment properties: General tab" for a detailed description of the properties applicable to<br />
sounds and "Using the Properties dialog" for a general description of the Properties dialog.<br />
If the Properties dialog is not visible, choose View | Show/Hide | Properties to open it.<br />
Creating hyperlinks<br />
The Hyperlink command lets you create a link between a branch and external elements,<br />
such as a URL, an external file or an email address. Once the hyperlink is inserted, activating it<br />
automatically opens the viewer associated with the linked element on your computer (such as<br />
browser, application or email program).<br />
Inserting a hyperlink on a root or branch<br />
Select the required root or branch and choose Home | Insert | Hyperlink in the main menu or<br />
Insert | Hyperlink in the local menu.<br />
The Hyperlink dialog opens.<br />
Type a name for your hyperlink. If you export your map, this is the text that will make up the<br />
hyperlink.<br />
Enter the required URL. To enter other elements, click the down arrow at the right of the input<br />
field and choose the required prefix.<br />
You can open this dialog again at any time to change its settings by choosing Edit Link in the<br />
hyperlink local menu.<br />
To insert a web page hyperlink onto a branch, just drag the link from the web page displayed<br />
in your Internet browser. The Hyperlink dialog is then automatically filled in with the URL of the link.
<strong>MindView</strong> Documentation<br />
As soon as you add a hyperlink to a root or branch, a paperclip icon appears to the right of its<br />
label to indicate the presence of the hyperlink. Moving the mouse pointer over this paperclip icon<br />
displays a pop-up list of all the objects attached.<br />
The hyperlink is also added to the Object list of the root or branch, giving you a complete overview<br />
of the objects you have attached to it.<br />
See "Using the Object list" for more information.<br />
Activating a hyperlink<br />
There are several ways of activating a link from within <strong>MindView</strong>:<br />
Double-click the hyperlink in the Object list, or<br />
Select the hyperlink in the Object list and choose Execute in its local menu, or<br />
Display the object pop-up list by moving the pointer over the paperclip icon and click the<br />
hyperlink.<br />
These actions all activate the linked element:<br />
If your hyperlink contains a URL, the web page opens in your default browser.<br />
If your hyperlink contains a path to a file, the application associated with the file type on your<br />
computer opens and displays the contents of the file.<br />
If your hyperlink contains an email address, a message window opens in your default email<br />
program, with the address supplied already filled in.<br />
Moving a hyperlink<br />
You can easily move or copy a hyperlink from one branch to another.<br />
To move a hyperlink, select it in the Object list of the original branch and drag it to the branch<br />
you want to move it to.<br />
To copy a hyperlink, select it in the Object list of the original branch, press the Ctrl key and<br />
drag it to the branch you want to copy it to while keeping the Ctrl key down.<br />
Deleting a hyperlink<br />
To delete a hyperlink, select it in the Object list and do one of the following:<br />
Press Delete, or<br />
Choose Delete in its local menu.<br />
Remember that if you delete a hyperlink by accident, you can always cancel the deletion by<br />
clicking Undo in the Quick Access Toolbar or pressing Ctrl + Z.<br />
Hyperlink properties<br />
Hyperlinks have properties, which you can edit in the Properties dialog.<br />
See "Hyperlink properties: General tab" for a detailed description of the properties applicable to<br />
hyperlinks and "Using the Properties dialog" for a general description of the Properties dialog.<br />
If the Properties dialog is not visible, choose View | Show/Hide | Properties to open it.<br />
76
Creating branch connections<br />
<strong>MindView</strong> allows you to indicate visually that two or more branches of your map are<br />
conceptually related by adding branch connections between them.<br />
You can create two types of branch connections:<br />
Internal branch connections, which connect two branches of the same map, or<br />
77<br />
User Guide<br />
External branch connections, which connect two branches belonging to two different maps.<br />
To create an external branch connection, both maps must be open. You must also make sure<br />
that the map where you want the connection to end has already been saved at least once.<br />
Creating a branch connection<br />
Choose Insert | Links | Branch Connection.<br />
The mouse pointer changes to a different shape.<br />
Click the branch or sub-branch you want the connection to start from.<br />
A thin line appears connecting the branch you selected and the mouse pointer.<br />
Click the branch where you want the connection to end.<br />
If you are creating an external branch connection, you will first need to click the tab of<br />
the second map in order to display it.<br />
A line ending with an arrow now connects your start branch with your end branch.<br />
A paperclip icon appears to the right of the start branch label to indicate the presence of an<br />
attached object. Moving the mouse pointer over this paperclip icon displays a pop-up list of all the<br />
objects attached. The branch connection also appears in the Object list of the start branch. By<br />
default, its name is the name of the end branch.<br />
(optional) Click the Format tab that appears at the right of the ribbon.<br />
This tab contains formatting options applicable to the branch connection.<br />
Browse through the options available in the different panels, checking their effect on the branch<br />
connection as you go.<br />
As well as the Format tab, you can also use the Properties dialog to make changes to the branch<br />
connection.<br />
See "Branch connection properties: General tab" in the Reference section for a detailed description<br />
of the properties applicable to branch connections and "Using the Properties dialog" for a general<br />
description of the Properties dialog.<br />
To create several branch connections quickly, keep the Ctrl key down while connecting the<br />
various branches.<br />
Changing the curve of a branch connection<br />
You can change the curve of a branch connection as follows:
<strong>MindView</strong> Documentation<br />
Click the branch connection to select it, either directly on the map or in the Object list of the<br />
start branch.<br />
A handle appears at each end of the connection, made up of a straight line and a square.<br />
Click the square of one of the handles and start dragging it.<br />
The shape of the branch connection changes as you move the handle. As you extend the handle,<br />
the branch connection becomes more curved. Conversely, if you reduce the length of the handle,<br />
the branch connection becomes flatter.<br />
Move each handle in turn until you are satisfied with the shape of the branch connection curve.<br />
Activating a branch connection<br />
If you are working on a large map, you can quickly go to the end point of a branch connection as<br />
follows:<br />
Select the start branch, then :<br />
Double-click the branch connection in the Object list, or<br />
Select the branch connection in the Object list and choose Execute in its local menu.<br />
If the connection ends in a different map, <strong>MindView</strong> opens it automatically in a separate tab.<br />
Making a branch connection start or end on a different branch<br />
You can easily change the start or end point of a branch connection without having to delete the<br />
existing branch connection and create a new one. To do this:<br />
Click the branch connection to select it, either directly on the map or in the Object list of the<br />
start branch.<br />
To make the branch connection start from a different branch, drag the dot placed at the start of<br />
the connection to the new start branch.<br />
To make the branch connection end on a different branch, drag the arrow placed at the end of<br />
the connection to the new end branch.<br />
Deleting a branch connection<br />
To delete a branch connection, select it in the Object list and do one of the following:<br />
Press Delete, or<br />
Choose Delete in its local menu.<br />
Remember that if you delete a branch connection by accident, you can always cancel the<br />
deletion by clicking Undo in the Quick Access Toolbar or pressing Ctrl + Z.<br />
78
Using sources<br />
79<br />
User Guide<br />
If you are working on a research project or writing a paper, you will probably want to include a<br />
bibliography in your finished work. <strong>MindView</strong> can help you compile and maintain bibliography<br />
entries (known as sources in <strong>MindView</strong>) that you can use in your maps. When you export a map to<br />
Microsoft® Word, the sources used in the map are also exported and included in the resulting<br />
Word file as a bibliography.<br />
If you want to add citations to particular elements of the map, you will have to create one or more<br />
sources first. It is not, however, necessary to use citations; you may create any number of sources<br />
without necessarily referring to them in any of the map elements, and just use them as a<br />
bibliography when you export your map. See "Using citations" for more information on inserting<br />
citations.<br />
Adding sources<br />
Choose Review | Sources and click Add New Source in the submenu.<br />
The Add New Source dialog opens.<br />
You can now search for sources online or enter source information manually.<br />
Searching for sources online<br />
Select the Source Results tab.<br />
Enter search criteria (e.g. an author's name or a publication title) in the search field.<br />
Select the source type and source language to search for on the drop-down lists.<br />
Click Search.
<strong>MindView</strong> Documentation<br />
<strong>MindView</strong> searches the online library catalog WorldCat. Search results are shown in the<br />
dialog.<br />
The source types found are indicated using icons:<br />
Book<br />
Film<br />
Journal article<br />
Use the Previous and Next buttons to navigate between result pages, if applicable.<br />
Click the Select button for the source you want to include.<br />
You may also click the WorldCat icon to see the entry for the result on the WorldCat<br />
web site.<br />
The application switches to the Manual Entry Mode tab where you may add information<br />
about the selected source.<br />
80
Click OK to add the source to the map.<br />
Manually entering source information<br />
Click the Manual Entry Mode tab.<br />
81<br />
User Guide
<strong>MindView</strong> Documentation<br />
Select the source type to add on the Type drop-down list: Book, Video, Internet site, Journal<br />
article.<br />
Enter the desired information about the new source in the fields below the drop-down list.<br />
The fields available depend on the source type chosen.<br />
Click OK to add the source to the map.<br />
Viewing and managing sources<br />
Choose Review | Sources and click Manage Sources in the submenu.<br />
The Sources dialog opens. Sources that have already been added to the map are displayed under<br />
Existing Sources.<br />
82
Editing a source<br />
Select the source to be edited in the Sources dialog.<br />
Click Edit.<br />
The Add New Source dialog opens on its Manual Entry Mode tab.<br />
83<br />
User Guide
<strong>MindView</strong> Documentation<br />
Edit the desired information about the source.<br />
The fields available depend on the source type chosen.<br />
Click OK to update the source in the map when you have finished editing all fields.<br />
Deleting a source<br />
Select the source to be deleted in the Sources dialog.<br />
Click Delete.<br />
If you delete a source that is cited on a branch or other element of the map, the actual citation<br />
is not deleted but the connection between citation and source is lost. If you then export the map to<br />
Microsoft® Word, the exported document will contain an error message because Word cannot find<br />
a source for the citations.<br />
Adding a source<br />
Click Add New and follow the procedure described under "Adding sources" above.<br />
Using citations<br />
A citation is a reference to a published work. Citations may be handled in a number of ways but the<br />
standard method is to provide a page number and the name or author(s) of the source cited in<br />
parentheses, possibly preceded by a direct quotation from the source in quotation marks as in the<br />
following example:<br />
"Everyday life presents itself as a reality interpreted by men and subjectively meaningful to<br />
them as a coherent world" (Berger & Luckmann, 33)<br />
The text in quotation marks is a quotation while the text in parentheses is a citation. Full details of<br />
the source cited must then be provided in the bibliography (as the basic information provided in<br />
parentheses is not sufficient to properly identify the book (or other work) cited).<br />
<strong>MindView</strong> cannot automatically insert quotations. If you need to enter a quotation (which is only<br />
possible in text notes), you must enter it manually. <strong>MindView</strong> can be used, however, to insert<br />
citations in text notes to link your quotation to a source. You can also insert citations directly on the<br />
branches of the map, on attachments and on hyperlinks.<br />
If you export your map to Microsoft® Word, all the citations you have added are automatically<br />
placed in the correct location of the Word document. The full details of the corresponding sources<br />
are included in the Bibliography section located at the end of the Word document.<br />
To insert a citation you must first create a source in the map. See "Using sources" for more<br />
information.<br />
Inserting a citation in a text note<br />
Open the text note where the citation is to be inserted.<br />
Place the cursor at the position where the citation is to be inserted in the note.<br />
(Optional) Type a quotation from the source.<br />
Choose Insert | Links | Citation and click Insert Citation in the submenu.<br />
The Insert Citation dialog opens.<br />
84
Select a source in the Existing Sources list.<br />
85<br />
User Guide<br />
If you have not created any sources yet, you can click Manage Sources to do so. See<br />
"Using sources" for more information.<br />
(Optional; citations from books or articles only) Insert page numbers in the Page numbers<br />
field.<br />
Click Insert.<br />
The citation is now inserted in the note.<br />
Inserting a citation on a branch<br />
You can also insert citations directly on branches.<br />
To do this, select the branch, then follow the procedure described above for text notes.<br />
When inserting a citation on a branch, the citation is not visible on the branch itself. To see a<br />
list of the citations you have inserted on a branch, select the branch, choose Insert | Links |<br />
Citation and click Manage Citations.<br />
Inserting a citation on an attachment or a hyperlink<br />
You can also insert citations on attachments and hyperlinks.<br />
To do this:<br />
Select the branch containing the attachment or hyperlink.<br />
Move the mouse pointer over the paperclip icon shown on the right of the branch label to<br />
indicate the presence of the attachment or hyperlink.<br />
Right-click the attachment or hyperlink in the pop-up list that opens and choose Citation |<br />
Insert Citation in the local menu.<br />
Follow the rest of the procedure described above for text notes.
<strong>MindView</strong> Documentation<br />
As is the case for branches, citations inserted on attachments and hyperlinks are not visible.<br />
To see a list of the citations you have inserted on an attachment or a hyperlink, right-click that<br />
attachment or hyperlink and choose Citation | Manage Citations in its local menu.<br />
Viewing and managing citations<br />
Select the element containing the citation as follows:<br />
For text notes and branches, choose Insert | Links | Citation and click Manage<br />
Citations in the submenu.<br />
For attachments and hyperlinks, choose Citation | Manage Citations in the local menu.<br />
The Manage Citations dialog opens.<br />
You can now:<br />
Add a new citation by clicking the Add button at the top of the dialog.<br />
Remove a citation by selecting it, then clicking the Remove button at the top of the<br />
dialog.<br />
This deletes the citation, but does not delete the corresponding source, which stays<br />
included in the map.<br />
Edit the citation's page numbers (books and articles only).<br />
Click Done to save your changes.<br />
Finding and replacing text<br />
<strong>MindView</strong> lets you search for every occurrence of a specific word or phrase and replace<br />
these automatically with a new word or phrase you specify.<br />
You can find and replace text in the following elements:<br />
Branch names<br />
Floating comments<br />
Pop-up comments<br />
86
Text notes<br />
Object names<br />
Finding text<br />
Choose Review | Editing | Find/Replace or press Ctrl + F.<br />
Enter the text that you want to search for in the Find what field of the Find dialog.<br />
Select the search options required in the Options group.<br />
Select the elements that you want <strong>MindView</strong> to search in the Look in group.<br />
Click Find Next.<br />
87<br />
User Guide<br />
<strong>MindView</strong> goes through your document, looking for the text you specified in the elements you<br />
selected. As soon as it finds an occurrence of the text, it selects the element containing the text<br />
and highlights it.<br />
You can now:<br />
Close the Find dialog and continue your work.<br />
Look for the next occurrence of the text by clicking Find Next.<br />
Replace the text with another word or phrase you specify in the Find dialog.<br />
Replacing text<br />
Type the replacement text in the Replace with field.<br />
Click Replace to replace the current occurrence only or Replace All to replace all occurrences<br />
throughout the document.<br />
To cancel a search in progress, press Esc.<br />
Desktop search<br />
<strong>MindView</strong> supports Windows Search on Windows XP and above, letting you locate specific data<br />
within all the mind maps stored on your hard disk and identify the relevant files instantly. All the<br />
data contained within your <strong>MindView</strong> documents is searched, including branch text, comments and<br />
searchable embedded files (such as Word documents).<br />
To search file contents in Windows Vista, perform an Advanced Search and check the option<br />
"Include non-indexed files".<br />
For more information on how to use Windows Search to locate information stored in your<br />
documents, please refer to your Windows help system.
<strong>MindView</strong> Documentation<br />
Inserting a new root<br />
<strong>MindView</strong> allows you to create several maps in the same view by inserting several roots in it.<br />
This can be useful if, while working on your map, you have ideas as yet unrelated to your existing<br />
topics (i.e. branches). Once you have decided how they should be related, you can convert your<br />
new maps into branches of your existing map, or even move them to new documents altogether,<br />
as described below.<br />
This procedure is only relevant to the standard Map views, namely Mind Map, Top Down and<br />
Left/Right.<br />
Inserting a new root in the view<br />
You can do this in two ways:<br />
Choose Insert | Branches | New Root in the main menu, or<br />
Right-click the workspace and choose Insert | New Root in its local menu.<br />
You can also create a new map by detaching a branch of your existing map, either to the<br />
same document or to a new document. See "Detaching a branch" for more information.<br />
Attaching a newly created map to an existing map<br />
If you have created a second map in your document by inserting a new root into it, you can<br />
integrate it to your original map as follows:<br />
To attach it as a main branch, drag its root to the original root.<br />
To attach it as a sub-branch, drag its root to the branch or sub-branch you want to attach it to.<br />
Moving a newly created map in a separate document<br />
Select the root of your new map and choose Cut in its local menu or Home | Clipboard | Cut<br />
in the main menu (or press Ctrl + X).<br />
Create a new document (click the File tab and choose New or press Ctrl + N).<br />
Once the new document tab opens, right-click the workspace and choose Paste in its local<br />
menu or Home | Clipboard | Paste in the main menu (or press Ctrl + V).<br />
(optional) Delete the default root created automatically in the new document.<br />
Detaching a branch<br />
<strong>MindView</strong> allows you to create several maps in the same view by inserting several roots, as<br />
described in "Inserting a new root". You can also create a second map by detaching an existing<br />
branch of your mind map, either to the same document, or to a new document. This can be useful<br />
when you realize that one of your existing topics (i.e. branch) does not in fact belong to your map,<br />
or if you want to consider a particular branch as the source of a new map.<br />
88
89<br />
User Guide<br />
This procedure is only relevant to the standard Mind Map views, namely Mind Map, Top Down<br />
and Left/Right.<br />
Detaching a branch to the same document<br />
Select the branch you want to detach and choose Detach | Branch in its local menu.<br />
Detaching a branch to a new document<br />
Select the branch you want to detach and choose Detach | Branch as New Document in its<br />
local menu.<br />
In both cases, the selected branch and all its sub-branches, inserted elements and attached<br />
objects becomes a new mind map.<br />
Tracking changes<br />
<strong>MindView</strong> lets you track all the changes that have been made to your document, by yourself<br />
or any other user who has access to it. This is particularly useful if you are sharing your document<br />
with other colleagues or students, or if you are working on an online document, as it allows you to<br />
review all the changes made by other people.<br />
To enable the tracking of changes, choose Review | Track Changes.<br />
(optional) Click the down arrow at the bottom of the Track Changes menu and choose Show<br />
Changes to display the Changes Review panel.<br />
All the significant changes you make to your document from this point are now listed in this panel<br />
as soon as you complete them.<br />
To see on the mind map what branch or <strong>MindView</strong> element a particular change relates to, just click<br />
its entry in the Changes panel. You can also use the Next and Previous icons to navigate<br />
from one change to the other.<br />
By default, new changes are added at the bottom of the Changes panel. You can however resort<br />
the list in reverse date order by clicking the arrow next to the Date header, or sort the list by<br />
Description or User.<br />
As long as the tracking of changes is enabled, any change made to the document by anyone gets<br />
added to the Changes panel, even if the document is closed by its current user and re-opened by<br />
the same user or a different user at a later date. To stop the tracking of changes, you need to click<br />
Review | Track Changes again to disable it.<br />
If you want to reset the list of changes, you can empty it by clicking the down arrow at the bottom of<br />
the Track Changes menu and choosing Delete Changes History.
<strong>MindView</strong> Documentation<br />
Creating a legend<br />
Adding a legend to your map can make it much easier to read and interpret. You can for<br />
instance apply a particular color to some of the branches of your map, and then use a legend to<br />
give the meaning of this color.<br />
In the example below showing the tasks to be considered when organizing an event, the tasks that<br />
have been completed have been tagged with a tick icon, and the next tasks that need to be done<br />
urgently have been highlighted using a red outline.<br />
Adding a legend entry<br />
Choose View | Show/Hide | Legend to display the Legend window.<br />
Move the mouse cursor over the Legend window.<br />
Click Add Item.<br />
Choose Add Color or Add Icon depending on whether you want to define your legend entry<br />
with a color or an icon.<br />
Choose the required color or icon in the dialogs that open.<br />
Replace the default label with the label of your choice.<br />
You can now apply that color or icon to the branches that you want to single out.<br />
Removing a legend entry<br />
To remove a legend entry, just click the cross shown to the right of its name in the Legend<br />
window.<br />
Presenting a mind map<br />
The <strong>MindView</strong> presentation mode lets you present your mind map to your audience branch<br />
by branch in full screen mode. To do this:<br />
Choose View | Window | Presentation Mode.<br />
Your mind map is now displayed in full screen mode, and a small toolbar of icons appears.<br />
90
These icons let you perform the following actions:<br />
91<br />
User Guide<br />
Clicking the Back icon lets you present your mind map in reverse (anti-clockwise) branch<br />
order by displaying the branch preceding the selected branch in the hierarchy.<br />
Clicking the Next icon lets you present your mind map in normal (clockwise) branch order<br />
by displaying the branch following the selected branch in the hierarchy.<br />
Clicking the Settings icon lets you configure the presentation mode.<br />
Clicking the Exit icon lets you return to the normal Mind Mapping design mode.<br />
Configuring the presentation mode<br />
When you click the Settings icon , the following dialog appears.<br />
Present up to: This field lets you specify the number of branch levels to present when using the<br />
Next and Back icons. For example, if you choose to present your mind map up to Branch level 2,<br />
clicking the Next icon will select all the main branches and their first level of sub-branches, one<br />
after the other, but not their second and further levels of sub-branches.<br />
Expand sub-branches of the selected branch: This field lets you specify how many levels of<br />
sub-branches of a particular branch should be displayed when that branch is selected. For<br />
example, if you choose to expand the sub-branches of the selected branch by 2 levels, when you<br />
present a main branch (i.e. that main branch is currently selected), <strong>MindView</strong> automatically<br />
expands its sub-branches (the first level) and their own sub-branches (the second level).
<strong>MindView</strong> Documentation<br />
Auto-collapse: This field lets you specify how much of the branches of the mind map other than<br />
the selected branch should be visible, in other words how many levels of their sub-branches should<br />
be displayed on the mind map at any time. For instance, if you choose to auto-collapse the<br />
branches to Branch level 3, <strong>MindView</strong> always displays 3 levels of branches for all the branches<br />
other than the selected branch (whose behavior is controlled by the "Expand sub-branches"<br />
parameter above). Therefore when you enter presentation mode, you will see the root, the main<br />
branches and their first level of sub-branches.<br />
Set zoom level: This setting allows you to adapt the zoom factor used while presenting your mind<br />
map. If for instance you have chosen to present all the levels of sub-branches, lowering the zoom<br />
factor will ensure that all the branches to be presented are always visible on the screen, without<br />
any need for horizontal or vertical scrolling.<br />
Checking a mind map<br />
Before you export your map to other formats, or send it to colleagues, you may find it useful<br />
to check the list of all the files that you have included in it. This will also help you identify potential<br />
problems, for instance when a data file that you added to a particular branch as an attachment is<br />
no longer located in the folder you indicated when adding it.<br />
Click the File tab.<br />
Choose Prepare | Data Files to open the following dialog:<br />
This dialog is made up of several columns:<br />
A Warning icon in the first column highlights a particular problem. Move your pointer on top<br />
of this icon to obtain more information about the problem.<br />
The second column contains icons that represent the nature of the data files that are listed:<br />
branch picture, floating picture, attachment and so on.<br />
The third column lists the names of the data files.<br />
The fourth column lists their respective paths.<br />
To replace a file by another or change its location, select the file in the list and click Replace<br />
File. You can also just double-click the file name in the dialog and browse to the new file or<br />
location.<br />
92
Packing a mind map<br />
This feature makes it very easy to distribute your mind map to other users.<br />
93<br />
User Guide<br />
With a few mouse clicks, you can create a complete packed version of your mind map, ready to be<br />
sent via email, shared over the network or distributed via DVD or CD-ROM.<br />
Click the File tab.<br />
Choose Prepare | Pack.<br />
As soon as you click OK in the message dialog that appears, <strong>MindView</strong> integrates all the external<br />
files that are attached to the mind map document (floating pictures, branch pictures, attachments<br />
and so on) within the .mvdx map file.<br />
Once a map is packed, you can continue working with it as normal. Any attached file you activate<br />
from within the map opens in the relevant external application, letting you edit it as you wish. When<br />
you close this external application, all the changes you have made to the attachment are saved in<br />
the version of the attachment that is integrated to the .mvdx map file.<br />
Notes:<br />
Once you have packed a mind map, all the files you subsequently add to it (floating pictures,<br />
branch pictures, attachments and so on) are automatically packed in the .mvdx map file.<br />
If you have used the Additional Folders command to specify a list of folders to include when<br />
exporting to HTML, all the files contained in these folders are also integrated in the .mvdx file<br />
when packing the map. See "Additional folders" for more information about that command.<br />
If the <strong>MindView</strong> view contains several maps (i.e. several roots), they are all packed within the<br />
.mvdx file.<br />
When <strong>MindView</strong> opens a packed map, it starts by checking all the attached files that are<br />
packed in it. If the original version of any of these files has been updated since you packed the<br />
map, meaning that the version contained in the mind map is no longer the most up to date<br />
version, it displays a message to that effect, giving you the option of updating the mind map to<br />
the latest version.<br />
Unpacking a mind map<br />
Although you can work in a packed map as normal as mentioned above, you also have the<br />
possibility of unpacking it. This may be useful if you want to retrieve the individual files that may<br />
have been attached to it, or to reduce the size of the .mvdx map file.<br />
To do this:<br />
Click the File tab.<br />
Choose Prepare | Unpack.<br />
Choose a folder in which to place all the files attached to the map.<br />
Merging packed mind maps in a master map<br />
You can easily merge into a master map several mind maps that have been packed using the Pack<br />
feature:<br />
Open your master map in <strong>MindView</strong>.<br />
Open each packed map in turn. Each document opens in a separate tab in <strong>MindView</strong>.<br />
Merge each packed map into your master map by copying its root (Ctrl + C) and pasting it onto<br />
the relevant branch of your master map. See "Moving a branch" for more information about<br />
copying and pasting branches.<br />
While performing this operation, make sure you do not close any of the packed maps before<br />
you have saved the master map.
<strong>MindView</strong> Documentation<br />
Sending a mind map<br />
This feature makes it very easy to send your mind map to other users via e-mail.<br />
Click the File tab.<br />
Choose Send.<br />
A message appears, asking you if you want the map to be packed into a single file before sending<br />
it:<br />
Choose Yes if you want to integrate all the external files that are attached to the mind map<br />
document (floating pictures, branch pictures, attachments and so on) within the .mvdx map file.<br />
For more information about the packing feature, see "Packing a mind map".<br />
Choose No if you only want to send the .mvdx map file, without the files that you may have<br />
attached to it.<br />
A message is created in your default mail program, containing the mind map and a link to a free<br />
<strong>MindView</strong> viewer in case the recipients of your message do not have <strong>MindView</strong> installed on their<br />
computer. All you have to do is fill in the name of the recipients and the subject of your mail<br />
message before sending it.<br />
Using the Multimedia Catalog<br />
The Multimedia Catalog contains a vast collection of high quality clipart pictures organized in<br />
many different categories or themes.<br />
As well as business and web-related pictures, the Multimedia Catalog contains a large number of<br />
pictures created specifically to support both the curriculum-aligned templates included in <strong>MindView</strong><br />
and your own curriculum-based mind maps.<br />
All the Multimedia Catalog elements are free for you to use in your mind maps.<br />
You can also store your own elements in the Multimedia Catalog. This enables you to re-use them<br />
whenever needed by dragging them from the Multimedia Catalog into your mind maps.<br />
Finally, you can connect one or more of your User Area categories to one of your hard disk folders<br />
or to a shared network folder in order to view and use their contents. This feature is particularly<br />
useful when several users want to make use of the same multimedia elements stored on a shared<br />
network folder.<br />
You can for instance connect one of your user categories to a folder containing different types of<br />
elements, such as videos, sounds or Flash files, which you can then drop onto your branches as<br />
attached objects.<br />
Click the Multimedia Catalog tab on the right of the workspace or choose View | Show/Hide |<br />
Multimedia Catalog to open it.<br />
94
95<br />
User Guide<br />
You can resize the Multimedia Catalog window by placing the mouse pointer on one of its<br />
edges until it changes to a double arrow and dragging with the mouse.<br />
Overview of the Multimedia Catalog<br />
User Area: This area is reserved for your own use. You can add or drag any element to it,<br />
create as many sub-categories as needed and even connect one or more of your user<br />
categories to an external folder. See "Adding elements to the Multimedia Catalog" below for<br />
more information.<br />
Clipart: Contains more than 1500 high quality illustrations covering many different educational<br />
fields, as well as business and web-related illustrations.<br />
Favorites: Place in this category any element you want to be able to find again quickly.<br />
Recent: When you add a Multimedia Catalog element to your document, this element is<br />
automatically copied to the Recent category. This allows you to quickly find recently used<br />
multimedia elements in case you want to use them again.<br />
Search Results: This category only appears once you have done a search in the Multimedia<br />
Catalog. It shows all the elements of the catalog that correspond to your search criteria.<br />
Browsing the Multimedia Catalog<br />
To see the contents of a category, select it by clicking it or by pressing the up or down arrow<br />
key on the keyboard.<br />
A right-pointing arrow next to a category name indicates that this category contains subcategories.<br />
Click this arrow or press the right arrow key on the keyboard to show the list of sub-categories.
<strong>MindView</strong> Documentation<br />
You can collapse a category again by clicking its arrow or by pressing the left arrow key on<br />
the keyboard.<br />
To examine a particular multimedia element more closely, place the mouse pointer over it.<br />
This shows an enlargement of the element as well as relevant information such as its name<br />
and size.<br />
To insert a Multimedia Catalog element in your mind map, just drag it from the catalog.<br />
Using the Favorites category<br />
If you often use the same elements, placing them in the Favorites category allows you to find them<br />
again very quickly. You can do this in two ways:<br />
Right-click the relevant element and choose Add to Favorites in its local menu.<br />
Drag the element from one of the Multimedia Catalog categories to the Favorites category.<br />
The element is now copied to the Favorites category. If you want to remove it from this category at<br />
a later stage, right-click it again and choose Remove from Favorites in its local menu.<br />
Searching the Multimedia Catalog<br />
If you need a picture related to a particular theme (for instance Europe), you can search the entire<br />
catalog for that theme:<br />
Type a search word in the Search for field. For instance, if you are working on a map<br />
describing various countries and want to insert their flags on the map, start typing the word<br />
"flags". As soon as you enter the 3rd character (i.e. the letter "a"), pictures of flags appear in<br />
the Search Results category.<br />
(optional) If you want to restrict the search to a particular category, select this category in the<br />
Search in field and click the Search icon to restart the search.<br />
Scroll down the Search Results category until you find the flag you require.<br />
96
97<br />
User Guide<br />
During a search, the Search icon changes to . You can interrupt a search at any time by<br />
clicking this icon.<br />
Searches in the Multimedia Catalog are keyword-based. Many different keywords have been<br />
associated with the Multimedia Catalog elements to help you find rapidly what you need. By way of<br />
example, here is a small selection of the many different keywords you can search for:<br />
people, men, women, children, buildings, symbols, countries, maps, flags, animals, plants,<br />
computing, transport<br />
When you enter the first few characters of a word or a full word in the 'Search for' field, <strong>MindView</strong><br />
goes through all the keywords that have been associated with the Multimedia Catalog elements. All<br />
the elements which have one or more keywords containing the characters you entered appear in<br />
the Search Results category.<br />
You can view the keywords associated to a particular element and even add your own as follows:<br />
Right-click the element in the Multimedia Catalog display area.<br />
Choose Properties in its local menu.<br />
The Properties dialog appears.<br />
Type the new keywords you want to associate with this element, separating them with semicolons.<br />
The Properties dialog also lets you edit or remove unwanted keywords or change the<br />
description that appears when you view an enlargement of the element.<br />
Adding elements to the Multimedia Catalog<br />
You can keep your own elements in the Multimedia Catalog for future use, either in an existing<br />
category or in the User Area. You are also free to create your own categories within the User Area,<br />
rename them or delete them.<br />
Any element you add to one of the existing categories of the Multimedia Catalog is identified by<br />
a small shortcut icon, indicating that the element is not actually copied to the Multimedia<br />
Catalog, but only inserted as a link to the actual element.<br />
Any element you add to one of the User Area categories is identified by a small gray arrow.
<strong>MindView</strong> Documentation<br />
There are different ways of adding an element to the Multimedia Catalog. Here is one of them:<br />
Select the category to which you want to add the element.<br />
Right-click the category and choose Add Element in its local menu.<br />
Choose the required element in the Open dialog.<br />
You can also add elements by dragging them from the Windows Explorer or the desktop.<br />
Renaming an element<br />
You can give relevant names to all the elements you add to the Multimedia Catalog or rename<br />
existing elements as follows:<br />
Right-click the element you wish to rename and choose Properties in its local menu.<br />
Enter a new description for the element.<br />
The new description will appear whenever you view the enlargement of the element.<br />
Deleting an element<br />
You can delete any element you have added to the Multimedia Catalog as follows:<br />
Right-click it and choose Delete in its local menu or select it and press Delete.<br />
Creating a category within the User Area<br />
You can create your own categories within the User Area as follows:<br />
Right-click the User Area or the sub-category of the User Area in which you want to create a<br />
category.<br />
Choose Create Category in the local menu.<br />
Type the new category name in the white box that appears.<br />
You can also rename or delete any category in the User Area by right-clicking it and choosing<br />
Rename Category or Delete Category respectively in its local menu.<br />
Connecting a category to an external folder within the User Area<br />
<strong>MindView</strong> allows you to connect one or more of your user categories to one of your hard disk<br />
folders or a shared network folder. This feature is particularly useful when several users want to<br />
make use of the same multimedia elements stored on a shared network folder.<br />
You could also connect one of your user categories to a folder containing different types of<br />
elements, such as videos, sounds or Flash files, which you can then drop onto your branches as<br />
attached objects.<br />
Right-click the main User Area or one of its sub-categories.<br />
Choose Connect to Folder in its local menu.<br />
The Connect Category to Folder dialog appears.<br />
98
99<br />
User Guide<br />
Type the path of the folder you want to connect to or use the Browse button to locate it.<br />
Choose the required filter. If for instance you only want to view the available videos, choose the<br />
Video filter.<br />
Note that you can also type your own filter, such as *.bmp; *.jpg (separating the formats with<br />
a semi-colon as shown here) to see only pictures using these file formats or *.* to view all the<br />
files contained in the connected folder.<br />
(optional) Check the 'Include sub-folders' option if you also want to see the contents of all the<br />
sub-folders of the connected folder.<br />
A new category is now created within the User Area, filled with all the contents of the connected<br />
folder that match the filter you specified. The new category takes the name of the folder that you<br />
connected it to. It is identified by a special icon to show that it is a connected category.<br />
If the contents of the connected folder are likely to change while you are working with the<br />
Multimedia Catalog, for instance if the connected folder is a shared network folder to which other<br />
users have access, you can refresh the connected category to make sure you see the latest<br />
contents.<br />
Right-click the connected category and choose Refresh in its local menu.<br />
Note that you can also refresh any of the sub-folders of the connected category.<br />
If the connected folder is very large, the Refresh operation may take a long time. You can<br />
interrupt it by right-clicking the connected category and choosing Stop Refresh in its local menu.<br />
Finally you can change the filter used to view the contents or even change the connection by<br />
connecting to a different folder as follows:<br />
Right-click the connected category and choose Modify in its local menu.<br />
Choose a different path and/or a different filter in the Connect to Category Folder dialog as<br />
described above.<br />
You can disconnect a connected category at any time as follows:<br />
Right-click the connected category and choose Disconnect in its local menu.<br />
Disconnecting a connected category removes the link between your User Area and the folder<br />
you connected to, but does not affect the external folder or its contents in any way.<br />
Resetting the Multimedia Catalog<br />
You can restore the original contents of the Multimedia Catalog at any time as follows:<br />
Click the File tab.<br />
Click <strong>MindView</strong> Options in the bottom right.<br />
Click Preferences on the left.<br />
Set Reset Multimedia Catalog to Yes.<br />
Click OK.
<strong>MindView</strong> Documentation<br />
This will leave your User Area untouched, but removes all the elements you might have added to<br />
any other category.<br />
Using the Properties dialog<br />
The Properties dialog shows the properties of the <strong>MindView</strong> element currently selected, for<br />
example the root, a branch or a floating comment. If nothing is selected the properties of the<br />
current view are shown.<br />
You can use the Properties dialog to make fine-tuning changes to these elements.<br />
Rather than applying properties one by one to enhance the visual aspect of your branches, it<br />
is normally easier to use the Format tab shown at the right of the ribbon when the branch is<br />
selected. Using this tab, you can apply branch shapes, branch colors and other coordinated<br />
attributes in one step. Similarly, the Design tab lets you apply predefined layouts and styles to the<br />
entire map in one step.<br />
Notes:<br />
If the Properties dialog is not visible, choose View | Show/Hide | Properties to open it.<br />
The properties described are not always applicable to all views. The Properties dialog only lists<br />
the properties applicable to the selected element in the current view.<br />
You can resize, dock and undock the Properties dialog according to your needs. See "Using<br />
the <strong>MindView</strong> panels" in the topic "Setting up your workspace" for more information.<br />
The Properties dialog shown below illustrates the general properties applicable to a branch. To see<br />
the properties applicable to the branch label, you would click its Text tab.<br />
For a complete description of all the properties available for the various <strong>MindView</strong> elements, see<br />
the Reference section.<br />
You can make the same change to several elements at once by selecting all the elements required<br />
first. Let's suppose for instance that you want to change the branch color of three of your 10<br />
branches. All you have to do is to select the three branches before choosing the color with the 'Fill<br />
color' property.<br />
100
Editing properties in the Properties dialog<br />
The way you edit a property depends on its type as follows:<br />
Label: Type in the new name or edit the existing name in the input field.<br />
Number: Type in the new value in the input field.<br />
Check box: Click the box to select it, click it again to deselect it.<br />
101<br />
User Guide<br />
Path: Type in a new folder and/or file name or edit the existing one, or click the Browse button<br />
on the right side of the input field.<br />
Color: Click the small rectangle and choose the new color in the Windows Color dialog. The<br />
upper left corner of the dialog shows all the predefined colors. To define your own color, click<br />
the required area of the color matrix on the right and use the slider on the extreme right of the<br />
dialog to adjust the color attributes. You can also enter the RGB values (Red, Green, Blue) or<br />
the Hue, Saturation and Luminosity values manually. The easiest way to experiment with<br />
different colors is to press and hold the mouse button and move the mouse pointer around the<br />
color matrix. To save a color for future use, click Add to Custom Colors.<br />
Once you have made the required change, press Enter to save the edited property.<br />
You can also use the Up and Down arrow keys to move between properties and press Enter<br />
to start editing.<br />
Using the Overview panel<br />
The Overview panel gives you a miniature view of your entire document.<br />
To display the Overview panel, choose View | Show/Hide | Overview.<br />
The Overview panel is not available in the Outline view.<br />
You can resize, dock and undock the Overview panel according to your needs. See "Using the<br />
<strong>MindView</strong> panels" in the topic "Setting up your workspace" for more information.<br />
If your map is very large, the Overview panel can be a very useful tool to reach its different areas.<br />
Move the mouse pointer over the gray rectangle contained in the Overview panel until it takes<br />
the shape of a hand.<br />
Drag it in the direction of the map you want to explore and release the mouse button.<br />
The main view changes to reflect the new position of the gray rectangle. Note that the positions of<br />
the elevators in the workspace scroll bars also change accordingly.<br />
You can achieve the same effect by using the workspace scroll bars, but the Overview panel<br />
has the advantage of giving you a complete representation of your map.
<strong>MindView</strong> Documentation<br />
Using the Object list<br />
The Object list gives you a complete overview of the objects placed on the selected branch.<br />
It allows you to perform various operations on them, such as activating them, deleting them or<br />
displaying their properties in the Properties dialog.<br />
If the Object list is not visible, choose View | Show/Hide | Object List to open it.<br />
You can resize, dock and undock the Object list according to your needs. See "Using the<br />
<strong>MindView</strong> panels" in the topic "Setting up your workspace" for more information.<br />
Manipulating objects in the Object list<br />
The Object list allows you to perform the following operations:<br />
Select an object by clicking its name.<br />
The contents of the Properties dialog immediately changes to reflect the properties of the<br />
selected object, which you can then edit as required.<br />
Activate an object by double-clicking its name or choosing Execute in its local menu.<br />
Move an object up or down the list by drag and drop. This is only relevant if you intend to<br />
export your document and want the objects to be exported in a particular order, as it is the<br />
order of the objects in the Object list that dictates the order in which they are exported.<br />
Delete an object by choosing Delete in its local menu.<br />
102
Collaborating<br />
Accessing online workspaces<br />
103<br />
User Guide<br />
An online workspace is a remote site on the web where you can work collaboratively. Your<br />
documents are stored in the workspace where other users, such as colleagues or fellow students,<br />
can also access them provided they have your permission. You assign permissions (read only<br />
access, read/write access) to other users as necessary.<br />
<strong>MindView</strong> supports two types of online workspaces:<br />
Microsoft SharePoint®<br />
When you open a shared document in SharePoint, it is locked so that other users cannot<br />
make changes while you are working on it.<br />
For information about Microsoft SharePoint, see the Microsoft web site.<br />
<strong>MatchWare</strong> Shared Workspace<br />
This workspace, specific to <strong>MatchWare</strong>, lets several users access a shared <strong>MindView</strong><br />
document at the same time. Changes to the document are updated continuously as you work<br />
so that other users can see the changes you make. If necessary you can assign permissions<br />
to individual branches of your own shared mind maps so that, for example, only particular<br />
users can make changes to particular branches.<br />
The <strong>MatchWare</strong> Shared Workspace is hosted at: https://workspace.matchware.com. It is a<br />
service that is integrated with <strong>MatchWare</strong> <strong>MindView</strong>, but subject to its own Terms of Service.<br />
Accounts on the <strong>MatchWare</strong> Shared Workspace can be purchased from <strong>MatchWare</strong> as a<br />
yearly subscription. The service is also available as a 30-day free trial.<br />
It is possible for organizations to host their own <strong>MatchWare</strong> Shared Workspace server. For<br />
more information, please contact <strong>MatchWare</strong> directly.<br />
To find out how to open an online document, see "Opening and saving online documents".<br />
To find out how to manage online workspaces, see "Managing online workspaces".<br />
Managing online workspaces<br />
To add, change or delete connection details for an online workspace:<br />
Click the File tab or the Share tab on the ribbon.<br />
Choose Open Online or Save Online and then Manage Online Accounts. You can then:<br />
Create new workspace access details by clicking Add. On the Edit Workspace dialog,<br />
enter a name for the workspace, its URL, and your user name and password. You can<br />
click Test to check that the access details are correct. Click Save.<br />
Modify an existing workspace entry by selecting it and clicking Edit. The procedure is as<br />
described in the previous paragraph.<br />
Delete a workspace entry by selecting it and clicking Delete.<br />
Click OK.<br />
To find out how to open an online document, see "Opening and saving online documents".
<strong>MindView</strong> Documentation<br />
Opening and saving online documents<br />
This topic explains how to open <strong>MindView</strong> documents hosted on an online workspace and<br />
how to save documents on the workspace, whether they were initially located on the workspace or<br />
not.<br />
Opening an online document<br />
Click the File tab or the Share tab on the ribbon.<br />
Choose Open Online.<br />
Choose the relevant workspace.<br />
If your documents are hosted on a SharePoint server, please see the Microsoft documentation<br />
or web site for information about how to use the SharePoint interface.<br />
If you have chosen to work on documents hosted on the <strong>MatchWare</strong> Shared Workspace, the<br />
following dialog appears:<br />
Enter your <strong>MatchWare</strong> Shared Workspace user name and password and click Connect.<br />
If you don't have a user name and password, click Need an account?. This will take you to the<br />
<strong>MatchWare</strong> Shared Workspace, where you will be able to create an account, provided that you or<br />
your organization are an authorized subscriber to this service. The service is also available as a<br />
30-day free trial.<br />
The <strong>MatchWare</strong> Workspace dialog now opens.<br />
The upper part of this dialog lists all the workspace folders and documents which belong to you,<br />
whereas the lower part lists the workspace folders and documents which belong to other users, but<br />
to which you have been given access.<br />
104
The icon on the left of a folder name indicates the sharing status of the folder:<br />
denotes a folder belonging to you, that you have not shared with anyone.<br />
denotes a folder belonging to you, that you have shared with others.<br />
105<br />
User Guide<br />
denotes a folder belonging to someone else, but that has been shared by its owner with you.<br />
The name of the owner of the folder or document, and the sharing attributes you have to that<br />
element, are shown in the Owner and Sharing columns respectively.<br />
The access rights (Read Only or Read/Write) you have to the folder or document are shown in the<br />
Access column.<br />
If you see a folder identified as "not shared" listed in the "Shared With Me" section, it means that<br />
although the folder itself is not shared, it contains one or more document that the owner of the<br />
folder has shared with you specifically. To access these documents, double-click the folder to open<br />
it.<br />
Access rights to <strong>MindView</strong> documents and folders are managed online from the <strong>MatchWare</strong><br />
Online Workspace. For more information, see the online help available on the workspace itself.<br />
If necessary, open the appropriate folder<br />
Select a document and click Open.<br />
To find out how to work on a shared online document, see "Collaborating on an online document".<br />
Saving an online document<br />
Click the File tab or the Share tab on the ribbon.<br />
Choose Save Online.<br />
Select the relevant workspace.<br />
If you have chosen to save your document on the <strong>MatchWare</strong> Shared Workspace, the<br />
<strong>MatchWare</strong> Workspace dialog described above now opens.<br />
Select the folder in which to save your document and supply a filename.<br />
Click Save.
<strong>MindView</strong> Documentation<br />
A document that is held on the <strong>MatchWare</strong> Shared Workspace is saved automatically<br />
whenever you make a change to it, so you do not need to save it explicitly, unless you want to save<br />
under a different name or to a different folder.<br />
Collaborating on an online document<br />
The procedures described here apply only to mind maps held on the <strong>MatchWare</strong> Shared<br />
Workspace. For information about using Microsoft SharePoint, refer to the Microsoft documentation<br />
or web site.<br />
Any document held on the <strong>MatchWare</strong> Shared Workspace can be worked on from within <strong>MindView</strong><br />
by several people at once, provided that the folder containing the document, or the document itself,<br />
has been shared by its owner and that all collaborating users have been given appropriate access<br />
rights.<br />
Each time a user makes a change to the document using <strong>MindView</strong>, the change is automatically<br />
saved to the workspace and made visible to the other users of the document in <strong>MindView</strong>.<br />
Consequently, all users see the changes made by others as work progresses.<br />
Access rights to <strong>MindView</strong> documents and folders are managed online from the <strong>MatchWare</strong> Online<br />
Workspace. For more information, see the online help available on the workspace itself.<br />
Branch locking<br />
As well as determining who can access their folders and documents, the owner of a shared<br />
document can also assign permissions to individual branches of the mind map from within<br />
<strong>MindView</strong>, so that only particular users can make changes to particular branches.<br />
Such restrictions are denoted by the presence of a Lock icon to the right of the branch label.<br />
Moving the pointer over this icon gives you additional information about the operations you are<br />
allowed to perform on the branch.<br />
If you are the owner of a shared document, this is how you can assign permissions to individual<br />
branches of the mind map to particular users:<br />
Choose Open Online and select the document from the <strong>MatchWare</strong> Shared Workspace.<br />
Select the relevant branch.<br />
Choose Share | Manage Locks.<br />
The Branch Locking dialog opens.<br />
Click Add and select the user or users to whom you want to grant specific branch permissions.<br />
106
107<br />
User Guide<br />
The Document Access column records the access right that each user has to the<br />
document itself on the shared workspace. This access right must match the branch<br />
permission you are intending to give to the selected users. Let us suppose you intend to<br />
grant a Write permission to user Mike for the branch. If Mike only has Read access to the<br />
document, you can still grant him a Write permission to the branch, but he will not be able to<br />
edit that branch until you give him a Write access to the document from the shared<br />
workspace. For more information about granting access rights to documents from the shared<br />
workspace, see the online help available on the workspace itself.<br />
Click OK.<br />
In the Branch Locking dialog, give each user the appropriate permission, Read Only or Write<br />
(read/write). The permissions you assign apply to the branch you selected and all its subbranches.<br />
If you give a particular user a Write permission on a branch, all the other authorized users<br />
(except for yourself as the document owner) are automatically restricted to a Read Only<br />
permission on that branch. There is therefore no need for you to give them each individually a<br />
Read Only permission.<br />
You can of course grant a Write permission on that same branch, or some of its subbranches,<br />
to one or more other users individually, thereby allowing these users to work on<br />
the same branch at the same time, in true multi-editing mode.<br />
As the owner of the document, you are not restricted by any Write permission given to other<br />
users, and are always able to edit the branch.
<strong>MindView</strong> Documentation<br />
If a user does not have sufficient access rights to the document itself to grant him or her<br />
the branch permissions you have selected here, a warning icon appears next to his or<br />
her name. As explained above, <strong>MindView</strong> allows you to grant such permissions, but they only<br />
become operational once you have given the required access rights to these users from the<br />
shared workspace.<br />
Click OK.<br />
The Lock icon now appears to the right of the branch label. Hovering that icon gives you a<br />
reminder of the permissions you have granted.<br />
As owner, you can make changes to the permissions at any time by selecting the branch and<br />
clicking Manage Locks.<br />
You can also remove all permissions on a locked branch at any time by selecting it and clicking<br />
Remove All Locks.<br />
Document locking<br />
As well as locking specific branches, the owner of a document can also apply a lock to the entire<br />
document, by granting a Write permission to the document to a particular user. This will prevent all<br />
the other users from making any changes at all to the document, including inserting pictures and<br />
comments floating freely on the workspace.<br />
As the owner of the document, you are not restricted by any Write permission given to other users,<br />
and are always able to edit the document.<br />
You can however prevent all the other users from editing the document by giving yourself a Write<br />
permission to it.<br />
The procedure to follow is almost identical to the procedure described above:<br />
Choose Open Online and select the document from the <strong>MatchWare</strong> Shared Workspace.<br />
Click the workspace to make sure no branch is selected.<br />
Choose Share | Manage Locks.<br />
Follow the rest of the procedure described above.<br />
108
Views<br />
Using different views<br />
<strong>MindView</strong> allows you to view your mind map in different ways, depending on your personal<br />
preference, the nature of your data and the use you want to make of it.<br />
109<br />
User Guide<br />
The first four views, collectively referred to as "Map Views", are traditional Mind Mapping views:<br />
The Mind Map view represents the map with the root in the center, and all the main<br />
branches radiating from it in a clockwise direction. See "Using the Mind Map view" for more<br />
information.<br />
The Top Down view represents your map as a hierarchical pyramid, with the root at the<br />
top, the main branches underneath, the sub-branches below the main branches, and so on.<br />
See "Using the Top Down view" for more information.<br />
The Left view represents your map as a list of topics placed on the left of the root. See<br />
"Using the Left/Right view" for more information.<br />
The Right view represents your map as a list of topics placed on the right of the root.<br />
See "Using the Left/Right view" for more information.<br />
The remaining views are specific views adapted to a particular purpose:<br />
The Timeline view lets you display the branches of your map that contain time<br />
information in chronological order on a horizontal time axis. See "Using the Timeline view" for<br />
more information.<br />
The Outline view represents the map as a hierarchical list which you can expand and<br />
collapse as required. See "Using the Outline view" for more information.<br />
Once you have created your document, you can display it at any time in another view by choosing<br />
that view in the Home | View or View | View panels in the main menu or by right-clicking the<br />
workspace and choosing View Map As in the local menu.<br />
Going from one view to another only affects the way the document is displayed. The contents of<br />
the document are not modified, unless you edit them yourself while working in the new view.
<strong>MindView</strong> Documentation<br />
Mind Mapping views<br />
Using the Mind Map view<br />
This view represents the map with the root in the center, and all the main branches radiating<br />
from it in a clockwise direction. This is a good view to use when brainstorming all the ideas related<br />
to the main subject of the map without worrying about evaluating them or structuring them.<br />
To display your mind map in this view, you can:<br />
Choose View | MapView | Mind Map in the Home or View tabs of the main menu, or<br />
Right-click the workspace and choose View Map As Mind Map in the local menu, or<br />
Press Ctrl + Shift + 1.<br />
To find out how to use this view, refer to the "Basic tasks" and "Further tasks" sections of this<br />
documentation.<br />
Using the Top Down view<br />
This view represents your map as a hierarchical pyramid, with the root at the top, the main<br />
branches underneath, the sub-branches below the main branches, and so on. It is a useful<br />
representation for structured data which needs to be viewed in a hierarchical manner, in other<br />
words from the higher level to the lowest levels.<br />
110
To display your mind map in this view, you can:<br />
Choose View | MapView | Top Down in the Home or View tabs of the main menu, or<br />
Right-click the workspace and choose View Map As Top Down in the local menu, or<br />
Press Ctrl + Shift + 2.<br />
To find out how to use this view, refer to the "Basic tasks" and "Further tasks" sections of this<br />
documentation.<br />
While in that view, you can change the display so that the sub-branches are displayed<br />
vertically by choosing that display in the Layout gallery of the Design tab.<br />
Using the Left/Right view<br />
111<br />
User Guide<br />
This view represents your map as a list of topics placed on the right of the root. It is a good<br />
choice when you need to present structured data in list form (for instance a list of steps) and want<br />
to be able to fully explore each point in the list before going on to the next point.
<strong>MindView</strong> Documentation<br />
To display your mind map in this view, you can:<br />
Choose View | MapView | Left/Right in the Home or View tabs of the main menu, or<br />
Right-click the workspace and choose View Map As Left/Right in the local menu, or<br />
Press Ctrl + Shift + 3.<br />
To find out how to use this view, refer to the "Basic tasks" and "Further tasks" sections of this<br />
documentation.<br />
While in that view, you can change the display from Right to Left by choosing that orientation<br />
in the Layout gallery of the Design tab.<br />
112
Timeline view<br />
Using the Timeline view<br />
113<br />
User Guide<br />
The Timeline view displays all the branches of your document that contain time information<br />
in chronological order along a horizontal time axis. The different timescales available (standard,<br />
historic, geological, daily and weekly) let you represent a variety of different events, such as the<br />
planning of a product launch, the life cycle of a bee or the rise and fall of an ancient civilization.<br />
The date formats you see in <strong>MindView</strong> will depend on your computer's settings.<br />
Accessing the Timeline view<br />
You can access the Timeline view in different ways:<br />
To create a new timeline from scratch, click the File tab and choose New | New Timeline.<br />
Choose a timescale from your map in the Select Timescale dialog that opens. For information<br />
about the different timescales available, see "Inserting timeline data".<br />
You can also display an existing map in timeline form in the Timeline view. To do this:<br />
Choose Home | View | Timeline or View | View | Timeline in the main menu, or<br />
Right-click the workspace and choose View Map as Timeline in the local menu, or<br />
Press Ctrl + Shift + 4.<br />
Going to the Timeline view from another view only affects the way the mind map is displayed. The<br />
contents of the mind map are not modified, unless you edit them yourself while working in the<br />
Timeline view.<br />
Elements of the Timeline view<br />
As all the other views, the Timeline view is made up of several components:<br />
The Timeline Outline<br />
This panel, which is displayed by default on the left of the Timeline view, shows all the<br />
branches of your map as a hierarchical list which you can expand and collapse as required.<br />
All the branches are listed, including those that do not contain time information.
<strong>MindView</strong> Documentation<br />
The Timeline Outline works exactly as the main Outline view.<br />
You can close the Timeline Outline by clicking its Close icon . To re-open it, choose View |<br />
Timeline Outline in the Timeline Tools tab.<br />
You can also click the Auto Hide pin to make the Timeline Outline only appear<br />
when you hover its tab on the left side of the workspace.<br />
The Timeline<br />
The Timeline area shows all the branches of your map that contain time information,<br />
arranged in chronological order along a time axis.<br />
All the branches and sub-branches that contain time information are represented, regardless<br />
of the hierarchical structure of the map.<br />
Note that if none of your branches contain time information when you switch to Timeline view,<br />
the timeline will be empty.<br />
The Timeline Panel<br />
This panel is displayed on the right of the workspace. It lets you define the timescale of your<br />
document and enter time information on its branches.<br />
Both of these operations are described in detail in the topic "Inserting timeline data".<br />
As well as using the Timeline panel, you can also enter time information for your branches<br />
directly in the Timeline Outline or in the main Outline view.<br />
If the Timeline panel is not visible, click the Timeline tab on the right of the workspace or<br />
choose View | Show/Hide | Timeline Panel.<br />
The Timeline Tools Tab<br />
This toolbar appears as soon as you switch to the Timeline view. Its icons allow you to<br />
perform various actions on your timeline, as described below.<br />
114
Using the Timeline Outline<br />
115<br />
User Guide<br />
The Timeline Outline shows all the branches of your map, including those that do not contain time<br />
information. The timeline itself however only shows the branches containing time information.<br />
The branches are listed in the Timeline Outline in their order of creation. This means that if you<br />
created them in another view such as the Mind Map view, they will be listed in the Timeline Outline<br />
in the same order as in the Mind Map view (going clockwise from the top right), rather than in<br />
chronological order.<br />
Selecting a branch in the Timeline Outline automatically selects it on the timeline. If necessary, the<br />
timeline is scrolled to bring the branch into view. Conversely, selecting a branch on the timeline<br />
selects it in the Timeline Outline.<br />
The Timeline Outline looks and works exactly as the main Outline view. When working in the<br />
Timeline Outline, you can for instance:<br />
Add, delete, move, cut, copy and paste branches in exactly the same way as in the main<br />
Outline view.<br />
Add branch pictures, icons, text notes and pop-up comments to any of your tasks.<br />
Attach objects such as text files, video files, sound files, hyperlinks and so on.<br />
For a description of the Outline view and how to perform these operations, see "Using the Outline<br />
view".<br />
You can enter time information on a branch from the Timeline Outline by double-clicking the<br />
relevant Start Time or End Time cell (or pressing F12 or Ctrl + F12 respectively) and filling in the<br />
time picker as described in "Inserting timeline data".<br />
Any change you make in the Timeline Outline is immediately reflected on the timeline itself.<br />
Using the Timeline<br />
By default, the timeline shows all the branches of your map that contain time information arranged<br />
in chronological order along a time axis.<br />
Choosing a layout and style<br />
<strong>MindView</strong> lets you define the visual aspect of your timeline at any time by applying design options<br />
to it.<br />
Click the Design tab at the right of the ribbon.<br />
Browse through the Layouts gallery to choose your preferred layout.<br />
Browse through the Styles gallery to choose your preferred style.<br />
(optional) To further customize the visual aspect of your timeline, explore the options available<br />
in the Effects and Properties panels.
<strong>MindView</strong> Documentation<br />
Inserting branches<br />
As well as using the Timeline Outline, you can enter events (branches) directly on the timeline<br />
itself:<br />
Double-click the workspace.<br />
Fill in the relevant details in the Insert Event dialog and click OK.<br />
The branch is now inserted at the correct place in the timeline.<br />
Clicking Next instead of OK keeps the dialog open, ready for you to insert more branches.<br />
Moving branches<br />
<strong>MindView</strong> also lets you move branches on the timeline by dragging them to a different start time.<br />
Note that if an end time had been specified for the branch, this end time is also moved so that the<br />
duration remains the same.<br />
For more precise positioning, double-click the relevant Start Time or End Time cell in the<br />
Timeline Outline (or press F12 or Ctrl + F12 respectively) to open the time picker.<br />
Adding objects and elements<br />
When working in the Timeline view, you can add icons, pictures, text notes, comments and branch<br />
connections on any of the branches displayed in the timeline, just as in all the other views. You can<br />
also attach objects such as text files, video files, sound files and hyperlinks.<br />
Select the required branch on the timeline.<br />
Choose the relevant command, using either the main menu or the local menu of the branch.<br />
116
117<br />
User Guide<br />
For more information on these procedures, see the topics "Inserting icons", "Inserting pictures",<br />
"Inserting text notes", "Inserting comments", "Attaching objects", "Creating hyperlinks" and<br />
"Creating branch connections".<br />
Viewing the Timeline<br />
Viewing the events<br />
To display the start and end times of the timeline events underneath their label, choose View |<br />
Data | Show Time Info (or right-click the workspace and choose Show Time Info) and<br />
check Start/End time in the sub-menu.<br />
You can hide or show the time information on individual branches with the Show Time<br />
Info icon of the Format tab (or the Show Time Info option in the branch local menu).<br />
If you have entered both a start time and an end time for a particular event, you can show the<br />
duration of this event as a bar below the time axis by clicking View | Show Duration Bars in<br />
the Timeline Tools tab.<br />
You can view pop-up comments and attached objects by clicking the comment icon or<br />
paperclip icon just as in the other views.<br />
The Numbering Scheme icon of the Timeline Tools tab or Home tab lets you apply<br />
sequential numbers to the branches of the Timeline according to their order in the Timeline<br />
Outline. When your timeline has several levels of branches, it will help you identify which main<br />
branch the different sub-branches belong to.<br />
As in the other views, you can also use the Apply Branch Focus icon of the View tab to<br />
restrict the display to a particular branch. Click the Clear Branch Focus icon to view the<br />
entire timeline again.<br />
If the branch you selected does not have any sub-branches, or if its sub-branches do not<br />
contain time information, the timeline will be empty.<br />
For more information about this procedure, see the topic "Focusing on a branch" of the<br />
"Further tasks" section.<br />
Finally the Filter icon of the View tab lets you hide all the timeline branches that do not<br />
meet the filter criteria you have defined.<br />
For more information about this procedure, see the topic "Filtering a mind map" of the "<br />
Further tasks" section.<br />
Zooming in and out<br />
You can change the level of magnification of your entire timeline as follows:<br />
Click the Zoom In icon of the Zoom slider shown in the bottom right of the workspace (or<br />
press Ctrl + "+") to increase the level of magnification of your timeline.<br />
When you zoom in, everything gets bigger, including the text, the boxes and the pictures<br />
included on your timeline.<br />
Click the Zoom Out icon (or press Ctrl + "-") to decrease it.<br />
When you zoom out everything gets smaller.<br />
Choose View | Zoom | Fit All or press F4 to see the entire timeline.<br />
You can also view your timeline in full screen mode, to give it as much screen space as possible:<br />
Choose View | Zoom | Full Screen or press F9.<br />
To return to normal viewing mode, choose Close Full Screen in the floating Full Screen<br />
toolbar, press Esc or press F9 again.<br />
See "Zooming in and out" for more information on zooming.
<strong>MindView</strong> Documentation<br />
Expanding and compressing<br />
You can also increase or decrease the level of detail on the time axis as follows:<br />
To increase the scale on the time axis, click View | Expand in the Timeline Tools tab.<br />
To decrease the scale, click View | Compress.<br />
Expanding the scale makes the timeline less crowded as a given period of time occupies more<br />
horizontal space. As a result, you may start seeing more detail on the time axis. For instance,<br />
instead of having ticks every 5 years, you might now have a tick for every year. As you continue<br />
expanding the scale, you might see months and days appear on the time axis.<br />
Events on the timeline do not change size when you expand the scale: they move apart<br />
horizontally, and they may also move vertically nearer the time axis as more space becomes<br />
available. Contracting the scale has the reverse effect.<br />
Inserting time breaks<br />
You can also replace empty space on the time axis with one or more break marks by clicking View<br />
| Show Time Breaks in the Timeline Tools tab.<br />
This optimizes the use of the horizontal space when events are not evenly distributed along the<br />
timeline.<br />
To remove these time breaks, just click the icon again.<br />
Exporting the Timeline<br />
When working in the Timeline view, the only export methods available are:<br />
Export to HTML<br />
This export method works in exactly the same way as when you export the document from<br />
one of the standard Mind Mapping views. The only difference is that the Home page of your<br />
web site contains an interactive view of the timeline, allowing you to display each of its pages<br />
with a simple click wherever the mouse pointer changes to a hand. A Timeline button is<br />
inserted in all the pages of the site to let you return quickly to this interactive view.<br />
118
For more information about this export method, see "Exporting to HTML".<br />
Export to picture<br />
For more information about this export method, see "Exporting as picture".<br />
Printing the Timeline<br />
You can print your timeline in the same way as in the Map views.<br />
119<br />
User Guide<br />
<strong>MindView</strong> enables you to spread your printout on several pages, which is very useful in the case of<br />
timelines. Increasing the horizontal page spread number, for instance, will allow you to create a<br />
legible printout of your entire timeline, spread over several pages.<br />
For a full description of the printing options, see "Printing a mind map".<br />
Outline view<br />
Using the Outline view<br />
The Outline view represents the map as a hierarchical list which you can expand and<br />
collapse as required. It allows easy navigation through the document from top to bottom and gives<br />
you another way to brainstorm ideas.<br />
Accessing the Outline view<br />
You can access the Outline view in different ways:<br />
To create a new outline from scratch, click the File tab and choose New | Outline.<br />
To display an existing map in outline form in the Outline view, you can either:<br />
Choose Home | View | Outline or View | View | Outline in the main menu, or<br />
Right-click the workspace and choose View Map as Outline in the local menu, or<br />
Press Ctrl + Shift + 5.
<strong>MindView</strong> Documentation<br />
Going to the Outline view from another view only affects the way the mind map is displayed. The<br />
contents of the mind map are not modified, unless you edit them yourself while working in the<br />
Outline view.<br />
Elements of the Outline view<br />
The Outline view shown above is made up of several columns:<br />
A pin icon in the first column indicates that the branch has been singled out using the<br />
MapNav feature so that you can locate it quickly again within your map. For more information<br />
about this feature, see "Viewing a mind map".<br />
A picture icon in the next column denotes the presence of a branch picture. Just move the<br />
pointer over the icon to see a preview of the picture. Double-click the icon to display the picture<br />
in the image viewer associated with its file extension on your computer.<br />
A yellow comment icon in the next column indicates that the corresponding branch<br />
contains a pop-up comment. Just move the pointer over the icon to open the comment window.<br />
A paperclip icon in the next column indicates that the corresponding branch contains<br />
attached objects (text notes, text files, video files and so on) or that it is linked to another<br />
branch via a branch connection. To view an attached object, move the pointer over the icon to<br />
display the pop-up list of attached objects and click the required object to open it in the<br />
associated viewer.<br />
If you have inserted one or more icons on the corresponding branch, these are shown in the<br />
last column before the branch name.<br />
If you are working on a timeline, the columns on the right of the view show the Start Time and<br />
End Time associated with each timeline event. See "Inserting timeline data" for details about<br />
these fields.<br />
You can hide and show the columns of the Outline view as you wish:<br />
Click the Outline Tools tab.<br />
Choose View | Columns.<br />
Select or deselect the column headers as required.<br />
120
You can also right-click the header at the top of the Outline view and select/deselect the<br />
column headers as required.<br />
Using the Outline<br />
Choosing a color scheme<br />
<strong>MindView</strong> lets you apply different color schemes to your outline:<br />
121<br />
User Guide<br />
To choose a different color scheme, click the Design tab and check the effect produced by the<br />
different options of the Color Scheme gallery before clicking your preferred option.<br />
Inserting a branch<br />
You can add and delete main branches, pre-branches and sub-branches in the Outline view in just<br />
the same way as in the Map views.<br />
Moving a branch<br />
You can move an entire branch, including any sub-branches and objects attached to it, to a<br />
different branch of your outline. As you work on organizing your ideas, you can for instance decide<br />
to convert a sub-topic to a main topic by moving the corresponding sub-branch to the root, or<br />
allocate a sub-topic to a different main topic by moving the corresponding sub-branch to a different<br />
main branch.<br />
Select the branch you want to move to a different location by clicking it with the left mouse<br />
button.<br />
While keeping the left mouse button down, drag the branch to the required location.<br />
The mouse pointer changes to a different shape to show you where the branch will be<br />
inserted when you let go of the mouse button.<br />
In the example below, dropping the "Planning" branch at the position shown in red by the<br />
Move icon will make it a sub-branch of the "Discussion" branch.<br />
=><br />
Dragging the "Planning" branch to the left until the Move icon reaches the left dot will keep it<br />
at the same hierarchical level (i.e. as sub-branch of "1st Issue") and insert it between<br />
"Discussion" and "Problem solving".<br />
=><br />
You can also choose the Indent icon of the Outline Tools tab (or press the keys Alt + Shift<br />
+ right arrow) to move the selected branch or branches to the next level down in the<br />
hierarchy, so that they become sub-branches of the preceding branch in the Outline.
<strong>MindView</strong> Documentation<br />
Conversely, you can choose the Outdent icon (or press the keys Alt + Shift + left arrow)<br />
to move the selected branch or branches to the next level up in the hierarchy.<br />
Finally, you can choose the Move Up and Move Down icons (or press the keys Ctrl +<br />
Up or Ctrl + Down) to move the selected branch up or down within the same level.<br />
Cutting, copying and pasting branches<br />
You can apply the standard Cut, Copy and Paste functions to any branch or set of branches of<br />
your outline, as described in "Moving a branch". You can for instance copy or move an entire<br />
branch or set of branches, including all their sub-branches and attached objects, to a different part<br />
of the outline, at the same hierarchical level or at a higher or lower level.<br />
To perform these operations on a set of branches, you first need to select them:<br />
To select a range of branches listed one after the other, select the first branch, press and hold<br />
down the Shift key and select the last branch in the range.<br />
To select several isolated branches, select the first branch, press and hold down the Ctrl key<br />
and select the other branches one by one.<br />
Adding objects and elements<br />
You can add branch pictures, icons, text notes and pop-up comments on a branch in the same way<br />
as in the Map views. For more information on these procedures, see the topics "Inserting pictures",<br />
"Inserting icons", "Inserting text notes" and "Inserting comments" in the "Basic tasks" section.<br />
You can also attach objects such as text files, video files, sound files, hyperlinks and so on just as<br />
in the Map views. For more information, see "Attaching objects" and "Creating hyperlinks".<br />
There are however some limitations that apply when you work in the Outline view:<br />
You cannot add or view floating pictures.<br />
You cannot add or view floating comments.<br />
You cannot create branch connections, although existing branch connections are listed in the<br />
pop-up list identified by the paperclip icon and can be activated from that list.<br />
Viewing the Outline<br />
You can choose the text size to be used in the Outline view by clicking one of the Text Size<br />
icons of the Outline Tools tab.<br />
You can show or hide the text notes associated with each branch in the outline itself by<br />
choosing View | Show Text Notes in the Outline Tools tab. Longer text notes can be scrolled<br />
up and down by clicking the small icons shown at the bottom of the note.<br />
You can expand or collapse a particular branch or set of branches by clicking the small plus<br />
and minus signs on the left of the branch name or by pressing the keys Ctrl + right<br />
arrow to expand and Ctrl + left arrow to collapse.<br />
The Numbering Scheme icon of the Outline Tools tab or Home tab lets you apply<br />
sequential numbers to the branches of the outline and choose between various numbering<br />
styles.<br />
As in all the other views, the Detail Level icons of the View tab let you collapse the entire<br />
outline to just one level of branches, two levels, three levels or four levels. To show all the<br />
branches down to the last level, click the All Levels icon .<br />
You can also press Ctrl + 1 to display just one level of branches, Ctrl + 2 to show two<br />
levels etc. Ctrl + 5 shows all levels.<br />
122
123<br />
User Guide<br />
As in the other views, you can use the Apply Branch Focus icon of the View tab to restrict<br />
the display to a particular branch. Click the Clear Branch Focus icon to view the entire<br />
outline again.<br />
For more information about this procedure, see the topic "Focusing on a branch" of the<br />
"Further tasks" section.<br />
Finally the Filter icon of the View tab lets you hide all the branches of the outline that do<br />
not meet the filter criteria you have defined.<br />
For more information about this procedure, see the topic "Filtering a mind map" of the<br />
"Further tasks" section.<br />
Printing the Outline<br />
You can print your outline in the same way as in the Map views.<br />
For a full description of the printing options available, see "Printing a mind map".
<strong>MindView</strong> Documentation<br />
Spellchecking<br />
Using the spellchecker<br />
<strong>MindView</strong> allows you to find and correct spelling errors in your entire document as well as in<br />
the currently selected element. The <strong>MindView</strong> spellchecker is able to detect misspelled words and<br />
automatically correct common misspellings in the following elements:<br />
Branch names<br />
Floating comments<br />
Pop-up comments<br />
Text notes<br />
Object names<br />
In addition to looking up words in its own dictionaries, the spellchecker also references custom<br />
dictionaries to determine whether a particular word is correctly spelt or not. You can customize<br />
these dictionaries by adding, replacing or deleting words.<br />
The spellchecker also uses an AutoCorrect list to correct common mistakes automatically. Again,<br />
you can customize this list by adding, replacing or deleting word pairs.<br />
Finally the spellchecker allows you to spellcheck your documents in several languages, including<br />
American and British English, French, German, Italian, Spanish, Dutch and Danish.<br />
Spellchecking as you type<br />
By default, <strong>MindView</strong> checks for spelling errors as you type, underlining in red any mistakes found.<br />
You have the option of correcting the mistake straight away by right-clicking the misspelled word.<br />
This opens the local menu, in which you can choose any of the following commands:<br />
Corrections<br />
This lets you choose one of the suggestions listed, which then replaces the misspelled word.<br />
Ignore All<br />
Choose this command to ignore the currently highlighted occurrence of the word and all other<br />
such occurrences in the document and any other document opened during this <strong>MindView</strong><br />
session.<br />
Add to Dictionary<br />
Choose this command to add the underlined word to your default custom dictionary, thereby<br />
making it a valid word which the spellchecker will no longer report as a mistake. See the topic<br />
"Spellchecking options" for more information on custom dictionaries.<br />
AutoCorrect<br />
This lets you choose one of the suggestions listed. In addition, the misspelled word and its<br />
corrected equivalent will be added to the AutoCorrect list. This means that whenever you type<br />
this misspelled word in the future, it will be automatically replaced by its corrected equivalent.<br />
See the topic "Spellchecking options" for more information on the AutoCorrect list.<br />
Spelling<br />
This opens the Spelling dialog, which allows you to spellcheck the entire selected element.<br />
Spellchecking the document<br />
Choose Review | Proofing | Spellcheck Document or press F7.<br />
<strong>MindView</strong> goes through your document, examining branch names, floating comments, popup<br />
comments, text notes and object names for spelling mistakes. As soon as it detects a spelling<br />
mistake in one of these elements, <strong>MindView</strong> selects the element containing the mistake and opens<br />
the Spelling dialog.<br />
124
125<br />
User Guide<br />
The top field shows the phrase containing the misspelling, with the first misspelled word<br />
highlighted. The bottom field shows a list of suggestions from which you can choose an alternative<br />
spelling for the highlighted word.<br />
You can choose one of the following options:<br />
Ignore Once<br />
This will ignore the currently highlighted occurrence of the word.<br />
Ignore All<br />
This will ignore the currently highlighted occurrence of the word as well as any other such<br />
occurrences during the entire <strong>MindView</strong> session.<br />
Add to Dictionary<br />
This will add the misspelled word to your default custom dictionary.<br />
Change<br />
If you have edited the misspelled word in the top field, this replaces it with the edited word.<br />
Otherwise the misspelled word is replaced by the alternative spelling chosen in the<br />
Suggestions field. Only this occurrence of the misspelled word is corrected. If you also want<br />
all following occurrences of the word replaced, click Change All.<br />
Change All<br />
If you have edited the misspelled word in the top field, this replaces it with the edited word.<br />
Otherwise the misspelled word is replaced by the alternative spelling chosen in the<br />
Suggestions field. This replaces all the occurrences of the misspelled word in the entire<br />
document.<br />
AutoCorrect<br />
This replaces the misspelled word by the alternative spelling chosen in the Suggestions field.<br />
In addition, the misspelled word and its corrected equivalent are added to the AutoCorrect<br />
list.<br />
Dictionary language<br />
This lets you choose a different language for the spellchecker to use to check your document.<br />
Options<br />
This opens the Spellchecking Options dialog, which lets you set various options to control the<br />
way the spellchecking is done. See the topic "Spellchecking options" for a full description of<br />
this dialog.
<strong>MindView</strong> Documentation<br />
Spellchecking the currently selected element<br />
Choose Review | Proofing | Spellcheck Selection or press Ctrl + F7.<br />
<strong>MindView</strong> goes through the currently selected element, looking for spelling mistakes. As<br />
soon as it detects a spelling mistake, <strong>MindView</strong> selects the phrase containing the spelling error,<br />
highlights the error and opens the Spelling dialog described above.<br />
Choosing a different dictionary<br />
Choose Review | Proofing | Set Language and select the language dictionary you would like<br />
to use to spellcheck your document.<br />
Spellchecking options<br />
This dialog contains various options which you can set to determine the type of errors<br />
reported by the spellchecker.<br />
You can access it in several ways:<br />
By choosing Review | Proofing | Spelling Options.<br />
By clicking Options in the Spelling dialog.<br />
By clicking the File tab, then <strong>MindView</strong> Options and Proofing.<br />
126
127<br />
User Guide<br />
Check spelling as you type: If you disable this option, the misspelled words will not be<br />
automatically underlined in red as you type them. You will need to use the Spellcheck commands<br />
to spellcheck your mind map at a later stage.<br />
Ignore words in uppercase: When enabled, this option causes any word written entirely in upper<br />
case to be ignored by the spellchecker and skipped. It is useful to keep this option enabled if your<br />
document contains many acronyms.<br />
Ignore words with numbers: When enabled, this option causes any word containing numbers to<br />
be ignored by the spellchecker and skipped. It is useful to keep this option enabled if your<br />
document contains many words or symbols including numbers, such as Q4.<br />
Ignore Internet and file addresses: When enabled, this option causes any words that appear to<br />
make up an Internet domain name, a URL or an email address to be ignored and skipped.<br />
Phonetic suggestions (English only): When enabled, this option causes suggestions to be made<br />
on the basis of their phonetic similarity to the misspelled word. This option tends to improve<br />
suggestions for badly misspelled words.<br />
Typographical suggestions: This is the default option. It causes suggestions to be made on the<br />
basis of the similarity of their spelling to that of the misspelled word. Note that the spellchecker<br />
does not offer suggestions if you disable both this option and the 'Phonetic suggestions' option.<br />
Case sensitive: When enabled, this option causes the spellchecker to distinguish between<br />
capitalized and non-capitalized letters. The word "europe" for instance would be considered as a<br />
mistake. If you disable this option, "europe" and "Europe" would be considered identical and both<br />
regarded as correct.<br />
AutoCorrect: If you disable this option, even if a misspelled word is included together with its<br />
correct equivalent in the AutoCorrect list, the misspelled word will not be automatically replaced by<br />
its equivalent.<br />
Correct two initial capitals: If you type the first two letters of a word in upper case, this option<br />
causes the 2nd letter to be automatically converted from upper case to lower case. The word<br />
"EUrope" for instance would be automatically replaced by "Europe".<br />
Capitalize first letter of sentences: Automatically converts the 1st letter of a sentence to upper<br />
case.<br />
You can also click AutoCorrect List or Custom Dictionaries to open the corresponding dialogs.<br />
Both dialogs are described below.<br />
Default language: This lets you choose the default language which you want the spellchecker to<br />
use to check your documents.<br />
Using the AutoCorrect list<br />
This list contains all the misspelled words which you have corrected by using the AutoCorrect<br />
feature described above. Each line is made up of the originally misspelled word in the 'Replace'<br />
column on the left, together with the suggestion you chose to replace it with in the 'With' column on<br />
the right.
<strong>MindView</strong> Documentation<br />
If you work with different languages, the spellchecker maintains one such AutoCorrect list per<br />
language.<br />
You can customize the AutoCorrect list in various ways:<br />
You can add new AutoCorrect pairs by typing a commonly misspelled word in the 'Replace'<br />
field followed by its correct equivalent in the 'With' field and clicking Add.<br />
You can replace the correct equivalent of a misspelled word by selecting this misspelled word<br />
in the 'Replace' list, typing the new equivalent in the 'With' field and clicking Replace.<br />
You can delete an AutoCorrect pair by selecting the corresponding row in the list and clicking<br />
Delete.<br />
Using the custom dictionaries<br />
This dialog contains a list of all your custom dictionaries as well as several buttons allowing you to<br />
customize them.<br />
128
129<br />
User Guide<br />
Custom dictionaries contain all the words reported as misspelled by the spellchecker that you<br />
decided to accept as valid by clicking Add to Dictionary during spellchecking. This means that a<br />
word included in any of the custom dictionaries is no longer reported as a misspelling by the<br />
spellchecker.<br />
The Custom Dictionaries dialog allows you to:<br />
Modify one of the custom dictionaries by clicking it, then selecting Modify. You can then add<br />
new words to the dictionary or remove existing words.<br />
Set one of the custom dictionaries as default by selecting it and clicking Default. Any new word<br />
you now accept as valid by clicking Add to Dictionary while spellchecking will be automatically<br />
added to this dictionary.<br />
Create a new custom dictionary by clicking New.<br />
Add an existing custom dictionary by clicking Add.<br />
Remove an existing custom dictionary by selecting it and clicking Remove.
<strong>MindView</strong> Documentation<br />
Exporting<br />
Introduction<br />
<strong>MindView</strong> lets you export your document to other applications, including Microsoft® Word,<br />
Microsoft® PowerPoint and <strong>MatchWare</strong> Mediator. You can also export it to HTML, or as a <strong>PDF</strong> or<br />
RTF document.<br />
These export possibilities mean that you can use <strong>MindView</strong> to brainstorm your ideas, organize<br />
them visually and collect all the associated material, and then convert the map into the format you<br />
require. In this way, you immediately obtain a professional-looking document, which you can<br />
process further if necessary using tools such as FrontPage® (for HTML export), Microsoft® Word,<br />
Microsoft® PowerPoint, <strong>MatchWare</strong> Mediator and so on.<br />
Once you have exported your document and worked on it in one of these applications (for instance<br />
Word, PowerPoint or Mediator), you can re-import it back into <strong>MindView</strong> if necessary, while<br />
preserving much of the work done in the external application. The branch structure, layout and<br />
contents of the original mind map are also preserved as far as possible. For more information<br />
about importing a document into <strong>MindView</strong>, see the "Importing" section of this documentation.<br />
The export options offered by <strong>MindView</strong> are all described in detail in the next topics.<br />
Additional folders<br />
When you export your document to one of the export formats available, <strong>MindView</strong><br />
automatically includes and references all the files you have used in the document.<br />
If however you have created a particular folder structure for the external files used by your<br />
document, you can ensure that <strong>MindView</strong> preserves this structure when exporting to HTML by<br />
specifying the list of folders that need to be included in the export folder as follows:<br />
Click the File tab.<br />
Choose Prepare | Additional Folders to open the following dialog:<br />
Click the Add button and select the first folder you wish to include in the export.<br />
Repeat for all the folders you would like to include.<br />
Note that you can enlarge the dialog by dragging one of its corners if the folder paths are not fully<br />
visible.<br />
130
131<br />
User Guide<br />
In the exported version of your document, all references to external files are automatically modified<br />
to point to the correct output folder.<br />
Exporting to Microsoft Word<br />
This export method lets you export your mind map as a Microsoft® Word document. If for<br />
instance you have created a mind map to brainstorm the structure of a report, this export mode<br />
provides you with a ready-made outline of your map as a Word document, which you can then turn<br />
into a fully blown report by working directly in Word.<br />
If after working for some time on your Word document, you realize you need to review the structure<br />
of your map in <strong>MindView</strong> before doing any further work in Word, you can re-import it back into<br />
<strong>MindView</strong> without losing any new text or formatting you might have added in Word. See "Importing<br />
from Microsoft Word" for more information.<br />
You do not need to have Microsoft Word installed on your computer in order to use this export<br />
mode. However, on versions of Windows prior to Windows 7, you need Word 2007 and above to<br />
open the exported document. You can also open the document in an earlier version of Word if you<br />
have installed the Microsoft Office Compatibility pack, available free from the Microsoft web site.<br />
From Windows 7 you can open .docx files directly in the default editor in Windows without having<br />
Word installed, although some of the more advanced content of the docx file cannot be shown.<br />
Each branch is exported as a paragraph heading at the relevant level, in other words Heading 1 for<br />
main branches, Heading 2 for sub-branches, Heading 3 for sub-sub-branches and so on, using<br />
hierarchical numbering (unless you disable it in Advanced Export). Attached objects and inserted<br />
elements are listed below the heading.<br />
As Microsoft Word only supports 9 heading levels, any <strong>MindView</strong> branch deeper than 9 levels<br />
is exported as Heading 9.<br />
By default, <strong>MindView</strong> automatically includes an overall picture of your map on the first page of the<br />
document, followed by a Table of Contents.<br />
If you add new headings to the document when working directly in Microsoft Word, you can<br />
easily update this Table of Contents by right-clicking it and choosing Update Field in the Word local<br />
menu. If you don't need the Table of Contents, you can delete it by selecting it and pressing Delete.<br />
The branches of the map are exported to Word in the order in which they are displayed in the Mind<br />
Map view, starting from the top right in a clockwise direction.<br />
You can however exclude entire branches and sub-branches from the export by disabling their<br />
'Include in export' property in the Properties dialog.<br />
Only the branches displayed on the workspace when you start the export procedure are<br />
exported. This means that if you are focusing on a particular branch or set of branches (see<br />
"Focusing on a branch") or if you are filtering the map to display only branches that meet specific<br />
criteria (see "Filtering a mind map"), only the branches visible on the workspace will be exported.<br />
To export the entire map, you need to go back to the full display by clearing the branch focus or<br />
filter applied.<br />
Export modes<br />
There are two export modes available:<br />
Quick Export<br />
The Quick Export mode allows you to export your map quickly using the <strong>MindView</strong><br />
defaults or the last Advanced Export settings you chose if you have already used that mode.
<strong>MindView</strong> Documentation<br />
Advanced Export<br />
The Advanced Export mode allows you to choose a template for your Word document.<br />
You can also specify the elements of your map to be exported and how they should be<br />
treated.<br />
The export settings you choose in Advanced Export are saved with the <strong>MindView</strong> document<br />
and re-used next time you export your map using Quick Export or Advanced Export. This<br />
means you do not have to redefine them every time you make a small alteration to your map<br />
and want to export it again to Word.<br />
When exporting a mind map to Word, <strong>MindView</strong> inserts bookmarks in the Word document to<br />
keep track of how the various elements should be re-imported back into <strong>MindView</strong> if you choose to<br />
do so. You should take care not to delete these bookmarks, which are hidden by default. To make<br />
them visible while you work, check 'Show bookmarks' in the Advanced panel of the Word Options<br />
dialog.<br />
Relationship between <strong>MindView</strong> and Word elements and objects<br />
The following table indicates how <strong>MindView</strong> treats the various inserted elements and attached<br />
objects contained in your map when exporting it to Microsoft Word.<br />
<strong>MindView</strong> element Exported to Word as<br />
Branch name Heading at relevant level with hierarchical numbering<br />
(3 levels by default)<br />
Hierarchical numbering can be disabled in Advanced Export.<br />
Text note Text inserted under the branch heading<br />
Branch picture Picture inserted under the branch heading<br />
Floating picture If connected to a branch, inserted under the branch heading<br />
Floating comment As for Floating picture<br />
If not connected to a branch, not exported<br />
Pop-up comment Word comment on the branch heading<br />
Branch connection Cross-reference prefixed by "See" under the start branch<br />
heading, pointing to the end branch heading<br />
<strong>MindView</strong> object Exported to Word as<br />
Text file Hyperlink<br />
Picture file Picture inserted in the Word document<br />
Video file Hyperlink<br />
Sound file Hyperlink<br />
Hyperlink Hyperlink<br />
Flash file Hyperlink<br />
Using Quick Export<br />
Click the File tab.<br />
In Advanced Export, you can choose instead to insert the file as<br />
a hyperlink.<br />
Choose Export | Microsoft Word | Quick Word Export.<br />
If your <strong>MindView</strong> view contains several maps (i.e. several roots), choose the map you want to<br />
export in the 'Select Map to Export' dialog and click OK.<br />
Specify a folder and a file name for the new Word document in the Save As dialog.<br />
132
<strong>MindView</strong> starts exporting your mind map to Microsoft Word and displays a message<br />
informing you that export is complete.<br />
Click OK in that dialog to open the document in Word.<br />
133<br />
User Guide<br />
Word then displays the following message, indicating that it needs to update the Table of<br />
Contents.<br />
Click OK to update the Table of Contents.<br />
You are now ready to work in your Word document.<br />
Using Advanced Export<br />
Click the File tab.<br />
Choose Export | Microsoft Word | Advanced Word Export.<br />
If your <strong>MindView</strong> view contains several maps (i.e. several roots), choose the map you want to<br />
export in the 'Select Map to Export' dialog and click OK.<br />
Choose your preferred template in the Templates tab of the Advanced Microsoft Word Export<br />
dialog or browse for one of the templates supplied with Microsoft Word or one of your own<br />
templates.<br />
The APA and MLA templates supplied with <strong>MindView</strong> are designed to help you format your<br />
documents according to the APA (American Psychological Association) and MLA (Modern<br />
Language Association) standards, commonly used in the United States. The MLA template
<strong>MindView</strong> Documentation<br />
contains further styles which you can use when finalizing your document, such as "block<br />
quotes" and "works cited".<br />
You can easily define your own Word template to be used when exporting from<br />
<strong>MindView</strong>. All you need to do is to define the Title style as well as styles for Headings 1 to 9<br />
and save the document as a Word template (.dotx or .docx). You must also make sure the<br />
template does not contain any text.<br />
In the General tab, choose the required general export settings and specify which elements of<br />
your map you want to export.<br />
The export of bibliography sources and citations is only supported from Microsoft® Office<br />
2007. For more information about this topic, see "Using sources" and Using citations".<br />
If you exclude some elements from the export by deselecting them here, none of the<br />
elements of this type will be exported, regardless of the value of their individual 'Include in<br />
export' property in the Properties dialog. Let's suppose for instance your map contains a<br />
floating picture whose 'Include in export' property is enabled. If you choose to exclude floating<br />
pictures from the export here, your floating picture will not be exported. Conversely, if you<br />
specify here that floating pictures should be exported, only the floating pictures whose<br />
'Include in export' property is enabled will be exported.<br />
Choose the required export settings for any attached object in the Attached Objects tab.<br />
134
Click Export.<br />
Specify a folder and a file name for the new Word document in the Save As dialog.<br />
135<br />
User Guide<br />
If you had left the option Embed attached files above checked and your map contains<br />
attached files that cannot be embedded in the Word document, you will be prompted to<br />
choose a folder where to copy these attached files to avoid overwriting files with the same<br />
name in the destination folder.<br />
As for Quick Export, <strong>MindView</strong> starts exporting your mind map to Microsoft Word as a new<br />
document and displays the same messages once the export is complete.<br />
Exporting to Microsoft PowerPoint<br />
This export method lets you export your mind map as a Microsoft® PowerPoint presentation.<br />
If for instance you have created a mind map to brainstorm the structure of a business presentation,<br />
this export mode allows you to transfer it to PowerPoint in order to refine it further before delivering<br />
it to your audience.<br />
If after working for some time on your PowerPoint presentation, you realize you need to review the<br />
structure of your map in <strong>MindView</strong> before doing any further work in PowerPoint, you can re-import<br />
it back into <strong>MindView</strong> without losing the layout work done in PowerPoint. See "Importing from<br />
Microsoft PowerPoint" for more information.<br />
You must have Microsoft PowerPoint installed on your computer in order to use this export<br />
mode. <strong>MindView</strong> supports all Microsoft PowerPoint versions from 2000 onwards.<br />
The root makes up the first slide, with the root label as the slide heading, followed by a list of the<br />
main branches.<br />
Each branch is then exported as a slide, with any sub-branches listed below the slide heading.<br />
Inserted elements and hyperlinks are placed on the right side or at the bottom of the slide.
<strong>MindView</strong> Documentation<br />
The branches of the map are exported to PowerPoint in the order in which they are displayed in the<br />
Mind Map view, starting from the top right in a clockwise direction.<br />
You can however exclude entire branches and sub-branches from the export by disabling their<br />
'Include in export' property in the Properties dialog.<br />
Only the branches displayed on the workspace when you start the export procedure are<br />
exported. This means that if you are focusing on a particular branch or set of branches (see<br />
"Focusing on a branch") or if you are filtering the map to display only branches that meet specific<br />
criteria (see "Filtering a mind map"), only the branches visible on the workspace will be exported.<br />
To export the entire map, you need to go back to the full display by clearing the branch focus or<br />
filter applied.<br />
Export modes<br />
There are two export modes available:<br />
Quick Export<br />
The Quick Export mode allows you to export your map quickly using the <strong>MindView</strong><br />
defaults or the last Advanced Export settings you chose if you have already used that mode.<br />
Advanced Export<br />
The Advanced Export mode lets you choose a PowerPoint template for your<br />
presentation. It also allows you to specify the elements of your map to be exported and how<br />
they should be treated.<br />
The export settings you choose in Advanced Export are saved with the <strong>MindView</strong> document<br />
and re-used next time you export your map using Quick Export or Advanced Export. This<br />
means that you do not have to redefine them every time you make a small amendment to<br />
your map and want to export it again to PowerPoint.<br />
Relationship between <strong>MindView</strong> and PowerPoint elements and objects<br />
The following table indicates how <strong>MindView</strong> treats the various inserted elements and attached<br />
objects contained in your map when exporting it to PowerPoint.<br />
<strong>MindView</strong> element Exported to PowerPoint as<br />
Branch name Slide heading<br />
Text note Text object<br />
Due to PowerPoint limitations, if the text note contains tables or<br />
bulleted lists, these elements will be exported as regular text.<br />
Similarly, if the text note contains a hyperlink, the formatting of<br />
the hyperlink will be preserved, but not the link itself.<br />
Branch picture Picture on the right of the slide<br />
In Advanced Export, you can choose instead to insert the<br />
branch picture as a hyperlink.<br />
Floating picture If connected to a branch, inserted as a picture on the right<br />
or at the bottom of the slide<br />
If not connected to a branch, not exported<br />
Floating comment If connected to a branch, inserted on the slide as a<br />
PowerPoint comment<br />
If not connected to a branch, not exported<br />
Pop-up comment PowerPoint note in the bottom Notes pane<br />
136
Branch connection Hyperlink in a text object<br />
<strong>MindView</strong> object Exported to PowerPoint as<br />
Text file Hyperlink in a text object<br />
Picture file Picture on the right or at the bottom of the slide<br />
Video file Hyperlink in a text object<br />
Sound file Hyperlink in a text object<br />
Hyperlink Hyperlink in a text object<br />
Flash file Hyperlink in a text object<br />
Using Quick Export<br />
Click the File tab.<br />
In Advanced Export, you can choose instead to insert the file as<br />
a hyperlink in a text object<br />
In Advanced Export, you can choose instead to embed the<br />
video directly on the slide<br />
Choose Export | Microsoft PowerPoint | Quick PowerPoint Export.<br />
137<br />
User Guide<br />
If your <strong>MindView</strong> view contains several maps (i.e. several roots), choose the map you want to<br />
export in the 'Select Map to Export' dialog and click OK.<br />
<strong>MindView</strong> starts exporting your mind map to Microsoft PowerPoint as a new presentation, and<br />
displays a message once the export is complete. You can then start working directly in PowerPoint<br />
on your new presentation and save it with the name of your choice.<br />
Using Advanced Export<br />
Click the File tab.<br />
Choose Export | Microsoft PowerPoint | Advanced PowerPoint Export.<br />
If your <strong>MindView</strong> view contains several maps (i.e. several roots), choose the map you want to<br />
export in the 'Select Map to Export' dialog and click OK.<br />
Choose your preferred template in the Templates tab of the Advanced Microsoft PowerPoint<br />
Export dialog or browse for one of the templates supplied with Microsoft PowerPoint.
<strong>MindView</strong> Documentation<br />
In the General tab, choose the required general export settings and specify which elements of<br />
your map you want to export.<br />
138
139<br />
User Guide<br />
If you exclude some elements from the export by deselecting them here, none of the<br />
elements of this type will be exported, regardless of the value of their individual 'Include in<br />
export' property in the Properties dialog. Let's suppose for instance your map contains a<br />
floating picture whose 'Include in export' property is enabled. If you choose to exclude floating<br />
pictures from the export here, your floating picture will not be exported. Conversely, if you<br />
specify here that floating pictures should be exported, only the floating pictures whose<br />
'Include in export' property is enabled will be exported.<br />
Choose the required export settings for any attached object in the Attached Objects tab.
<strong>MindView</strong> Documentation<br />
Click Export.<br />
As for Quick Export, <strong>MindView</strong> starts exporting your mind map to PowerPoint as a new<br />
presentation, and displays a message once the export is complete.<br />
Exporting to HTML<br />
Overview<br />
This export method lets you export your mind map as a set of web pages in HTML format. It<br />
allows you to obtain a professional-looking web site very quickly, without having to worry about<br />
web design techniques.<br />
Although you do not need to have a web browser installed on your machine in order to use<br />
this export method, you obviously need one to view the web site created. Among the web browsers<br />
supported by the <strong>MindView</strong> HTML export are Internet Explorer version 6.0 or above and Firefox 3.0<br />
and above.<br />
The exported HTML pages are placed in a sub-folder named 'MVHtmlExport' in the folder of your<br />
choice.<br />
All the pictures you have included in your document are placed in a sub-folder of 'MVHtmlExport'<br />
named 'img', whereas the picture files used by the <strong>MindView</strong> export template are placed in a subfolder<br />
named 'mvfiles'. All other external files used in your document are placed directly in<br />
'MVHtmlExport'. As it creates the HTML pages, <strong>MindView</strong> automatically modifies all the references<br />
to external files contained in your document so that they point to the correct output folder.<br />
Each branch, including the root, is exported as a HTML page of the same name as the branch, and<br />
each page contains a menu of all its sub-branches and optionally, a menu of the main branches.<br />
140
141<br />
User Guide<br />
By default, a Home button taking you back to the root page is included on each HTML page. A Site<br />
Map button containing a link to an interactive picture of your entire map and a 'You are here'<br />
locator showing you the complete path from the root are also included on each HTML page.<br />
Unless you define a different arrangement in the Export Wizard, all the objects attached to a<br />
branch are exported below each other and left aligned on the page.<br />
The branches of the map are exported to HTML in the order in which they are displayed in the<br />
Mind Map view, starting from the top right in a clockwise direction.<br />
You can however exclude entire branches and sub-branches from the export by disabling their<br />
'Include in export' property in the Properties dialog.<br />
If you are filtering the map to display only branches that meet specific criteria (see "Filtering a<br />
mind map"), only the branches visible on the workspace will be exported. To export the entire map,<br />
you need to go back to the full display by clearing the filter applied.<br />
If you want a specific description to appear when the user hovers a picture from your map in<br />
the browser, you can enter this description in the Name property of the relevant picture (root<br />
picture, branch picture, floating picture or attached picture file). This description is then converted<br />
by <strong>MindView</strong> to an HTML Alt tag during the export.<br />
Export modes<br />
There are two export modes available:<br />
Quick Export<br />
The Quick Export mode allows you to export your map quickly using the <strong>MindView</strong><br />
defaults or the last export settings you chose.<br />
Export Wizard<br />
The HTML Export Wizard lets you choose from a number of professional ready-made<br />
templates with various navigation layouts which you can customize to your liking. You can<br />
also specify the elements of your map to be exported and how they should be treated.<br />
Moreover, if you have created a particular folder structure for the external files used by your<br />
document, you can ensure that <strong>MindView</strong> preserves this structure when exporting to HTML<br />
by specifying the list of folders that need to be included in the export folder. Finally the Export<br />
Wizard lets you export you map as a SCORM (Sharable Content Object Reference Model)<br />
compatible package and specify its characteristics such as name, title, description, keywords<br />
and manifest identifier.<br />
The export settings you choose are saved with the <strong>MindView</strong> document and re-used next<br />
time you export your map to HTML. This means that you do not have to redefine them every<br />
time you make a small alteration to your map.<br />
Relationship between <strong>MindView</strong> and HTML elements and objects<br />
The following table indicates how the various <strong>MindView</strong> elements and objects are exported on the<br />
HTML page.<br />
<strong>MindView</strong> element Exported to HTML as<br />
Branch name Page title<br />
Text note Inserted as text<br />
Branch picture Inserted as picture<br />
Floating picture If connected to a branch, inserted as a picture<br />
If not connected to a branch, not exported
<strong>MindView</strong> Documentation<br />
Floating comment If connected to a branch, inserted as text<br />
Pop-up comment Inserted as text<br />
If not connected to a branch, not exported<br />
Branch connection Depending on your choice in the export dialog, inserted as a<br />
button link or as a hyperlink<br />
<strong>MindView</strong> object Exported to HTML as<br />
Text file Depending on your choice in the export dialog, inserted as a<br />
button link or as a hyperlink<br />
Picture file Inserted as a picture<br />
Video file Inserted as a Media Player object<br />
Sound file Depending on your choice in the export dialog, inserted as a<br />
button link or as a hyperlink<br />
Hyperlink Inserted as a hyperlink<br />
Flash file Inserted as a Flash file (embedded)<br />
Exporting to HTML: Quick Export<br />
Click the File tab.<br />
Choose Export | HTML | Quick HTML Export.<br />
If your <strong>MindView</strong> view contains several maps (i.e. several roots), choose the map you want to<br />
export in the 'Select Map to Export' dialog and click OK.<br />
The HTML Quick Export dialog appears.<br />
Choose a path for your new web site.<br />
<strong>MindView</strong> will create a sub-folder named 'MVHtmlExport' in the folder you specify, and place<br />
all the files making up your web site in this sub-folder.<br />
Choose whether to use:<br />
The template you last used in the Export Wizard if you have already used that export<br />
mode for your map.<br />
The <strong>MatchWare</strong> predefined export template (with top and side navigation menu)<br />
(optional) Click Options to define further export options:<br />
The Select Objects tab allows you to specify the elements of the map to include in the<br />
export.<br />
142
143<br />
User Guide<br />
If you exclude some elements from the export by deselecting them here, none of the<br />
elements of this type will be exported, regardless of the value of their individual 'Include in<br />
export' property in the Properties dialog. Let's suppose for instance your map contains a<br />
floating picture whose 'Include in export' property is enabled. If you choose to exclude floating<br />
pictures from the export here, your floating picture will not be exported. Conversely, if you<br />
specify here that floating pictures should be exported, only the floating pictures whose<br />
'Include in export' property is enabled will be exported.<br />
The Select Link Types tab only appears if your map contains branch connections and/or<br />
attached sound files or text files. It lets you choose whether these elements should be placed<br />
on HTML hyperlinks or buttons.
<strong>MindView</strong> Documentation<br />
Click Export.<br />
Once the export is completed, <strong>MindView</strong> displays a dialog giving you the choice of immediately<br />
viewing your web site in your default browser or uploading it to Internet using the <strong>MatchWare</strong> FTP<br />
Upload Manager. For more information on this tool, see "FTP Upload Manager".<br />
To open your exported web site from within Windows Explorer at a later date, double-click the<br />
file index.htm in the sub-folder 'MVHtmlExport'.<br />
Exporting to HTML: Export Wizard<br />
Click the File tab.<br />
Choose Export | HTML | Advanced HTML Export.<br />
If your <strong>MindView</strong> view contains several maps (i.e. several roots), choose the map you want to<br />
export in the 'Select Map to Export' dialog and click Next.<br />
The Export Wizard now displays a series of dialogs, the first of which is the Select Template<br />
dialog.<br />
Selecting a template<br />
This dialog allows you to select a navigation layout for the pages of your web site.<br />
144
Predefined Templates: This lets you choose one of the professional <strong>MindView</strong> export<br />
templates with ready-made top and side navigation.<br />
These templates are available in the following navigation styles :<br />
145<br />
User Guide<br />
Tree List: With this design, the list of side links is shown as a tree whose levels you can<br />
expand and collapse as in Windows Explorer. All the pages of the web site are available from<br />
the Tree List.<br />
Level List: With this type of navigation, you only see a maximum of three levels of links on<br />
the side: the current page, any pages at the level just above it, and any pages at the level just<br />
below it.
<strong>MindView</strong> Documentation<br />
Preview<br />
Buttons: In this design, the side bar contains a list of links, where each link represents a subbranch<br />
of the branch corresponding to the current page.<br />
To see a larger preview of the templates shown on the right of the window, just place the<br />
mouse pointer over the relevant thumbnail. Note that you will be able to go back to this step<br />
of the wizard at any time to choose a different template if you are not satisfied with your<br />
original choice.<br />
User Templates: This lets you choose one of your own previously saved export templates.<br />
See further down for information on how to save your own export template.<br />
Select a template on the right and click Next.<br />
The Export Wizard opens the Preview dialog, which lets you customize the various areas of the<br />
navigation layout chosen in the first step.<br />
146
You can customize each area in turn by clicking the Customize buttons, namely:<br />
General<br />
Top Bar<br />
Side Bar<br />
Content Area<br />
147<br />
User Guide<br />
Feel free to experiment with the various customization options. At any time, you can obtain a full<br />
size preview of your design reflecting any changes made by clicking the Preview button. Note<br />
however that this Preview does not allow you to navigate the site.<br />
Customizing the General properties (optional)<br />
Click General in the Preview dialog.
<strong>MindView</strong> Documentation<br />
This dialog gives you the following options:<br />
Include 'Home' button: This inserts a Home hyperlink or button on each of your web pages,<br />
allowing you to return to the page corresponding to the root of your map in just one click.<br />
This option is not available if you have chosen a Tree List design, as this design always allows you<br />
to return to the root of your map in one click. A 'Home' button is therefore superfluous in this case.<br />
Include 'Site Map' button: This inserts a Site Map hyperlink or button on each of your web pages.<br />
Clicking it will display an interactive picture of the entire web site.<br />
Include 'Timeline' button: This option is only available if you are exporting a document from the<br />
Timeline view. It inserts a Timeline button on each of your web pages. Clicking it will display an<br />
interactive representation of the timeline as shown in the Timeline view. For more information<br />
about working with timelines, see "Using the Timeline view".<br />
Include 'You are here' locator: This inserts a dynamic link on each page of the web site to show<br />
the complete path from the root web page to that particular page.<br />
You can also enter meta-tags for your web site as follows:<br />
Description: Any text entered here will be inserted in the tag of each of the HTML<br />
pages created.<br />
Keywords: Similarly, any keywords entered here (separated by commas) will be inserted in the<br />
tag of each of the HTML pages created.<br />
Customizing the Top Bar (optional)<br />
Click the Top Bar button or double-click the top bar area in the Preview dialog.<br />
The Top Bar Properties dialog opens on its Title tab.<br />
148
149<br />
User Guide<br />
By default, the title displayed on each web page is the branch name. Here you can change the<br />
font, attributes and color for this title or even enter your own title, which will be displayed on all the<br />
pages of the web site.<br />
Click the Background tab.<br />
This tab lets you select a plain color or a different background picture for the top bar.<br />
If you want to change the background picture, the best approach is to make a copy of the existing<br />
picture and edit its design to suit your requirements, making sure that the picture size stays<br />
unchanged so that it still fits the template.<br />
Click the Links tab.
<strong>MindView</strong> Documentation<br />
The Links tab is only available if the top bar of the template chosen contains buttons or<br />
hyperlinks.<br />
This tab lets you select different colors for the top bar links depending on their state, i.e. "Normal",<br />
"Pressed" (the link is clicked) or "Hovered" (the mouse pointer is placed on the link).<br />
You can also choose to make all the links the same width, or have their width vary according to the<br />
length of their label.<br />
Customizing the Side Bar (optional)<br />
Click the Side Bar button or double-click the side bar area in the Preview dialog.<br />
The Side Bar Properties dialog opens on its Background tab.<br />
This tab lets you select a plain color or a different background picture for the side bar.<br />
As for the top bar, the best approach if you want to change the background picture is to make a<br />
copy of the existing picture and edit its design to suit your requirements.<br />
150
The second tab of the Side Bar Properties dialog varies depending on the type of navigation<br />
template you chose in the first screen of the Export Wizard. The three possibilities are:<br />
Tree list<br />
Level list<br />
Links<br />
We will now look at each of these possibilities in turn.<br />
Tree List<br />
This is the tab displayed if you have chosen a Tree List design in the first step of the Export<br />
Wizard.<br />
151<br />
User Guide<br />
With this design, the list of side page links is shown as a tree whose levels you can expand and<br />
collapse as in Windows Explorer. All the pages of the web site are available from the Tree List.<br />
This tab lets you modify the default font, attributes, size and color of the links.
<strong>MindView</strong> Documentation<br />
Level List<br />
This tab is displayed if you have chosen a Level List design.<br />
With this type of navigation, you only see a maximum of three levels of links on the side: the<br />
current page, any pages at the level just above it, and any pages at the level just below it.<br />
The Level list tab lets you choose how many levels the list should show. You can also define the<br />
font and color of the links.<br />
Links<br />
This tab is displayed if you have chosen a Buttons design in the first screen of the Export Wizard.<br />
With this design, the side bar contains a list of links, where each link represents a sub-branch of<br />
the branch corresponding to the current page. The Links tab lets you select different colors for the<br />
side bar links depending on their state, i.e. "Normal", "Pressed" (the link is clicked) or "Hovered"<br />
(the mouse pointer is placed on the link).<br />
152
Customizing the Content Area (optional)<br />
Click the Content Area button or double-click the middle area in the Preview dialog.<br />
The Content Area properties dialog opens on its Background tab.<br />
153<br />
User Guide<br />
This tab lets you select a plain color or a different background picture for the body of the page. Feel<br />
free to experiment with the image placement options by checking the effect in the Full Size<br />
Preview.<br />
Click the Link Type tab.<br />
If your map contains branch connections, sound files or attached text documents, this tab lets you<br />
decide whether you want to place these objects on hyperlinks or on buttons.<br />
Click the Link Style tab.
<strong>MindView</strong> Documentation<br />
This tab lets you choose styles for any buttons or hyperlinks created on your web pages.<br />
Define the hyperlink style required by selecting a font, attribute and size. You can also define<br />
different colors depending on the state of the hyperlink, i.e. "Normal", "Pressed" (the link is<br />
clicked) or "Hovered" (the mouse pointer is placed on the link).<br />
Scroll through the various buttons available to choose the type you like best.<br />
Previewing the customized template (optional)<br />
Click the Preview button in the Preview dialog to obtain a 800x600 real-time preview of your<br />
design reflecting any changes made so far.<br />
Check how your web site will look in different browser resolutions by resizing the window.<br />
Reducing the window size might for instance cause the top buttons or hyperlinks to spread<br />
onto two rows. Conversely enlarging the window might cause them to arrange themselves on<br />
one row only.<br />
Saving the customized template (optional)<br />
You can save your customized export template for later use by clicking the Save Template<br />
button of the Preview dialog. The Save User Template dialog that opens contains a list of the<br />
export templates you have already saved. Enter the name of your new export template and<br />
click Save.<br />
Once you are satisfied with the design of all the page components, click Next.<br />
Selecting the objects to export<br />
The Export Wizard now opens the Select Objects to Export dialog.<br />
154
Select the <strong>MindView</strong> objects which you want to export to HTML.<br />
155<br />
User Guide<br />
If you exclude some elements from the export by deselecting them here, none of the<br />
elements of this type will be exported, regardless of the value of their individual 'Include in<br />
export' property in the Properties dialog. Let's suppose for instance your map contains a<br />
floating picture whose 'Include in export' property is enabled. If you choose to exclude floating<br />
pictures from the export here, your floating picture will not be exported. Conversely, if you<br />
specify here that floating pictures should be exported, only the floating pictures whose<br />
'Include in export' property is enabled will be exported.<br />
If you have created a particular folder structure for the external files used by your document, you<br />
can ensure that <strong>MindView</strong> preserves this structure when exporting to HTML by specifying the list of<br />
folders that need to be included in the export folder as follows:<br />
Click the Select Folders button to open the following dialog:
<strong>MindView</strong> Documentation<br />
Click the Add button and select the first folder you wish to include in the export.<br />
Repeat for all the folders you would like to include.<br />
Note that you can enlarge the dialog by dragging one of its corners if the folder paths are not fully<br />
visible.<br />
As it creates the HTML pages, <strong>MindView</strong> automatically modifies all the references to external files<br />
contained in your document so that they point to the correct output folder.<br />
Click Next.<br />
Placing the objects on the page<br />
The Export Wizard now opens the Select Placement dialog, which allows you to define where the<br />
various objects attached to each branch should be placed on the corresponding HTML page.<br />
156
You can either:<br />
157<br />
User Guide<br />
Choose a default placement of Left, Center or Right and click Next. In that case, the objects<br />
will be placed one after the other on each page according to their order in the Object list, either<br />
on the left, the center or the right of the page.<br />
Choose a default placement, and then click the Place Objects button to arrange the objects<br />
manually on the page as you wish.<br />
If you have already exported your map to HTML, you can check Only show updated<br />
pages. In that case, the Export Wizard only shows you the pages which you have edited<br />
since the last export. If your map contains a large number of branches, this saves time as you<br />
do not have to review the object positioning on all the unchanged pages.<br />
Positioning the objects manually (optional)<br />
If you have chosen to place the objects manually by clicking 'Place Objects' in the previous dialog,<br />
the Export Wizard now shows the Object Positioning window.
<strong>MindView</strong> Documentation<br />
This is based on a default grid containing 5 columns, each representing 20% of the width of the<br />
HTML page, and divided in a number of cells.<br />
All the objects associated with the first branch of your map are identified on the grid by a small icon<br />
bearing their name, in the default position chosen in the previous dialog. You can now reposition<br />
these objects or resize them by manipulating the grid cells as follows:<br />
To move an object on the page, drag it from one cell to the other.<br />
To resize a column on the grid, drag its edge until it reaches the required size.<br />
To merge two or more cells so that the object is stretched across them, select the cells by<br />
dragging the mouse pointer across them and click the Merge Cells button (or right-click and<br />
choose Merge Cells in its local menu).<br />
To split a cell made up of merged cells, select it and click Split Cells (or right-click it and<br />
choose Split Cells in the local menu).<br />
To align objects horizontally or vertically within a cell, select the relevant cells by dragging the<br />
mouse pointer across them, right-click and choose Alignment in the local menu. Then select<br />
an Alignment option by clicking a square in the menu (these represent top left alignment, top<br />
center alignment, top right alignment and so on). Note that you can also perform this operation<br />
on empty cells before moving objects into them.<br />
To add an empty row, right-click the row above which you want to insert a row and choose Add<br />
Row in its local menu.<br />
To delete a row, right-click it and choose Delete Row in its local menu.<br />
To increase or decrease the space between each cell, click the up or down arrows of the 'Cell<br />
spacing' option.<br />
All the objects that are excluded from the export, either because you have disabled their 'Include in<br />
export' property or because you have chosen to exclude them in the 'Select Objects to Export'<br />
dialog described above, are listed in the 'Exclude from export' area in the bottom left of the grid.<br />
You are free to drag any of these objects back onto the HTML page.<br />
You can also exclude particular objects from the export by dragging them to the 'Exclude from<br />
export' area, and drag them back to the HTML page later if you change your mind.<br />
Click Preview to visualize the effect of your changes on the actual page.<br />
158
159<br />
User Guide<br />
When you are satisfied with the positioning of the objects on the page, click the right double<br />
arrow button to go to the next page, or choose another page in the Branch list shown on the<br />
left of the dialog.<br />
Repeat the operation until you have reviewed all the pages that needed revisiting.<br />
Once you have reviewed all the pages, click Finish.<br />
Exporting<br />
You are now ready to export your map to HTML.<br />
Choose a destination folder for your new web site.<br />
(optional) You can optimize your pictures for web export by checking the option Automatically<br />
optimize pictures. This has two effects:<br />
All .bmp pictures used on your map are converted to .jpg to reduce their file size.<br />
Any .bmp or .jpg picture used on your map that is larger than the dimensions allocated to<br />
it on the HTML page is scaled down to these dimensions.<br />
(optional) To export the map as a SCORM package, check Create SCORM Package and<br />
select the relevant SCORM version.<br />
(optional) Click SCORM Settings.<br />
The SCORM Manifest Settings dialog opens to let you specify additional information about<br />
the package.
<strong>MindView</strong> Documentation<br />
The SCORM Manifest file is automatically created by <strong>MindView</strong>. Among other things, it<br />
includes details about the package that enable students and teachers to search for specific<br />
learning content with the use of keywords.<br />
Catalog name: This specifies the name of the Learning Management System (LMS) group or<br />
category of courses (e.g. Maths, Physics, Chemistry, etc.) in which the SCORM package<br />
should be placed.<br />
Course title: This specifies the name used to identify the course within the LMS.<br />
Course description: This is used to provide a description of the course, and its intended<br />
use.<br />
Comma separated keywords: This field can be used to enter keywords (which must be<br />
separated by commas) which the students and teachers will be able to use to locate the<br />
package once it is deployed on the LMS.<br />
Manifest identifier: This compulsory ID uniquely identifies the package among all the other<br />
packages deployed on the LMS.<br />
The output of the export will be a zip file containing all the HTML content and other SCORM<br />
related helper files. This package can then be uploaded to the LMS (which must be SCORM<br />
1.2 or SCORM 2004 compliant). How the package is placed on the LMS depends on the<br />
specific LMS, but generally it is done by a teacher using the web-based interface of the LMS.<br />
Please refer to the documentation of the LMS in question for information about this.<br />
Click Finish.<br />
Once the export is completed, <strong>MindView</strong> displays a dialog giving you the choice of immediately<br />
viewing your web site in your default browser or uploading it to Internet using the <strong>MatchWare</strong> FTP<br />
Upload Manager. For more information on this tool, see "FTP Upload Manager".<br />
To open your exported web site from within Windows Explorer at a later date, double-click the<br />
file index.htm in the sub-folder 'MVHtmlExport'.<br />
FTP Upload Manager<br />
To help you get your HTML site on the web as quickly and effortlessly as possible, <strong>MindView</strong><br />
comes with a built-in FTP program, the <strong>MatchWare</strong> FTP Upload Manager.<br />
Starting the FTP Upload Manager<br />
Before you can use the FTP Upload Manager you must export your <strong>MindView</strong> document to HTML<br />
(see "Exporting to HTML: Quick Export" or "Exporting to HTML: Export Wizard"). At the end of the<br />
export the following dialog appears:<br />
160
To open the FTP Upload Manager click Upload with FTP.<br />
The FTP Upload Manager dialog appears.<br />
161<br />
User Guide<br />
In the FTP server address field, enter the FTP upload address that you have received from<br />
your Internet Service Provider (ISP).<br />
Enter your User name and Password in their respective fields.<br />
If you do not have an FTP address, user name or password or have lost them, contact<br />
your ISP.<br />
Clicking the Browse button next to Destination folder will connect you to the Internet. Once<br />
online, search for the remote folder you wish to upload your web site to.
<strong>MindView</strong> Documentation<br />
Select the folder required and click OK to return to the Upload Manager dialog.<br />
If you would like to upload the web site to a new folder, click New Folder to create a new<br />
remote folder on the server. Click OK to return to the Upload Manager dialog.<br />
To quickly create a new remote folder enter a forward slash and the name of the new folder in<br />
the Destination folder field.<br />
If your Internet connection goes down often, you are advised to check the option Attempt to<br />
reconnect in the Upload Manager dialog to guarantee a successful upload.<br />
You can also set the number of reconnection attempts you want the Upload Manager to perform for<br />
a given file. If upload is still unsuccessful after this number of attempts, it is cancelled.<br />
Uploading your web site<br />
If you are uploading your web site for the first time, click Upload entire project to connect to<br />
the FTP server and upload all the files.<br />
You can follow the progress of the upload in the Upload dialog.<br />
162
If upload is completed successfully, the following dialog appears:<br />
Click Close to return to <strong>MindView</strong>.<br />
163<br />
User Guide<br />
The FTP Upload Manager remembers your FTP address, Username, Password and Destination. If<br />
you make changes to your web site and would like to upload it again, click Update existing<br />
project to upload only the files that have changed since your last upload.<br />
Exporting to <strong>PDF</strong><br />
This export method lets you export your mind map in <strong>PDF</strong> format.<br />
It works in exactly the same way as the Microsoft Word export method. For more information, see<br />
"Exporting to Microsoft Word".
<strong>MindView</strong> Documentation<br />
Exporting to Mediator<br />
Overview<br />
This export method lets you export your mind map as a Mediator document.<br />
Combining <strong>MindView</strong> and Mediator is a powerful way to create web sites and multimedia<br />
presentations. Once you have finished brainstorming and organizing your ideas in <strong>MindView</strong>, you<br />
can export your map to Mediator and turn it into an interactive CD presentation or a set of dynamic<br />
Flash or HTML pages by adding Mediator events and actions to it.<br />
If after working for some time on your Mediator presentation, you realize you need to review the<br />
structure of your map in <strong>MindView</strong> before doing any further work in Mediator, you can re-import it<br />
back into <strong>MindView</strong> without losing the work already done in Mediator. See "Importing from<br />
Mediator" for more information.<br />
You do not need to have Mediator installed on your computer to use this export mode.<br />
However, you will need Mediator 9 or above to open the exported Mediator document.<br />
The exported Mediator document is placed in the folder of your choice, and all relevant external<br />
files are placed in a sub-folder named MD8 within that folder.<br />
Each branch, including the root, is exported as a Mediator page of the same name as the branch.<br />
The sub-branches belonging to a particular branch are exported as sub-pages of the<br />
corresponding Mediator page.<br />
By default, a Home button, taking you back to the root page, and a Back button, taking you back to<br />
the previous page, are included in all the pages of your Mediator document.<br />
All the objects attached to a particular branch are listed in the Mediator Object list of the<br />
corresponding Mediator page and tiled on the page on top of each other.<br />
The branches of the map are exported to Mediator in the order in which they are displayed in the<br />
Mind Map view, starting from the top right in a clockwise direction.<br />
You can however exclude entire branches and sub-branches from the export by disabling their<br />
'Include in export' property in the Properties dialog.<br />
If you are filtering the map to display only branches that meet specific criteria (see "Filtering a<br />
mind map"), only the branches visible on the workspace will be exported. To export the entire map,<br />
you need to go back to the full display by clearing the filter applied.<br />
If your <strong>MindView</strong> document was created by importing a Mediator presentation, a dialog might<br />
appear at the end of the export procedure, listing all the branches corresponding to pages created<br />
directly in Mediator. Because you might not want to change the appearance of these pages in the<br />
new Mediator presentation, you can deselect them in this dialog to indicate that the export template<br />
should not be applied to them.<br />
When exporting the mind map to Mediator, <strong>MindView</strong> places special tags formatted with #<br />
signs in the Notes tab of the Properties dialog of particular elements of the new Mediator<br />
presentation, including the pages themselves. These tags contain information required by<br />
<strong>MindView</strong> to re-import the Mediator presentation, should you decide to do so at a later stage. You<br />
should take care not to delete these tags if you want to preserve the structure and layout of the<br />
original mind map.<br />
Export modes<br />
There are two export modes available:<br />
Quick Export<br />
The Quick Export mode allows you to export your map quickly using the <strong>MindView</strong><br />
defaults or the last export settings you chose.<br />
164
Export Wizard<br />
165<br />
User Guide<br />
The Mediator Export Wizard lets you choose from a number of professional readymade<br />
templates with various navigation layouts which you can customize as you wish. You<br />
can also specify the elements of your map to be exported and how they should be treated.<br />
The export settings you choose are saved with the <strong>MindView</strong> document and re-used next<br />
time you export your map to Mediator. This means that you do not have to redefine them<br />
every time you make a small alteration to your map.<br />
Relationship between <strong>MindView</strong> and Mediator elements and objects<br />
The following table indicates how the various <strong>MindView</strong> elements and objects are exported on the<br />
Mediator page.<br />
<strong>MindView</strong> element Exported to Mediator as<br />
Branch name Page description. If the branch name is unique, the branch<br />
name is also the page name. Otherwise, page names are<br />
numbered sequentially, i.e. Idea, Idea01, Idea02 and so on.<br />
Text note Mediator text object<br />
Branch picture Mediator picture object<br />
Note that if the <strong>MindView</strong> text note contains one or more<br />
hyperlinks, these hyperlinks retain their color and underline<br />
attributes in the Mediator text object, but are not converted to<br />
Mediator hypertext objects. This means that they do not retain<br />
their link information.<br />
Floating picture If connected to a branch, inserted as a Mediator picture<br />
object on the page<br />
If not connected to a branch, not exported<br />
Floating comment If connected to a branch, inserted as a Mediator text object<br />
on the page<br />
If not connected to a branch, not exported<br />
Pop-up comment Text note in the Notes tab of the Properties dialog for the page<br />
Branch connection Mediator button, looking either like a standard button or a<br />
hypertext link, depending on your choice in the export dialog<br />
<strong>MindView</strong> object Exported to Mediator as<br />
Text file Mediator button, looking either like a standard button or a<br />
hypertext link, depending on your choice in the export dialog<br />
Picture file Mediator picture object<br />
Video file Mediator Media Player object<br />
Sound file Mediator button, looking either like a standard button or a<br />
hypertext link, depending on your choice in the export dialog<br />
Hyperlink Mediator button looking like a hypertext link<br />
Flash file Mediator Flash object<br />
Exporting to Mediator: Quick Export<br />
Click the File tab.<br />
Choose Export | <strong>MatchWare</strong> Mediator | Quick Mediator Export.
<strong>MindView</strong> Documentation<br />
If your <strong>MindView</strong> view contains several maps (i.e. several roots), choose the map you want to<br />
export in the 'Select Map to Export' dialog and click OK.<br />
The <strong>MatchWare</strong> Mediator Quick Export dialog appears.<br />
Choose a path and file name for your new Mediator document.<br />
Choose the window size that corresponds to your screen resolution or the screen resolution of<br />
the intended users of your Mediator document.<br />
Choose whether to use:<br />
The template you last used in the Export Wizard if you have already used that export<br />
mode for your map. If you choose this option, the window size options become inactive<br />
as the window size is already defined.<br />
The <strong>MatchWare</strong> predefined export template (with top and side menu)<br />
Blank pages (without any menu structure or graphic design elements)<br />
(optional) Click Options to define further export options:<br />
The Select Objects tab allows you to specify the elements of the map to include in the<br />
export. You can also disable 'Insert Home button' and/or 'Insert Back button' if you do not<br />
want these buttons on the pages of your Mediator document.<br />
166
167<br />
User Guide<br />
If you exclude some elements from the export by deselecting them here, none of the<br />
elements of this type will be exported, regardless of the value of their individual 'Include in<br />
export' property in the Properties dialog. Let's suppose for instance your map contains a<br />
floating picture whose 'Include in export' property is enabled. If you choose to exclude floating<br />
pictures from the export here, your floating picture will not be exported. Conversely, if you<br />
specify here that floating pictures should be exported, only the floating pictures whose<br />
'Include in export' property is enabled will be exported.<br />
The Select Link Types tab only appears if your map contains branch connections and/or<br />
attached sound files or text files. It lets you choose whether these elements should be placed<br />
on Mediator hypertext or button objects.
<strong>MindView</strong> Documentation<br />
Click Export.<br />
If your <strong>MindView</strong> document was created by importing a Mediator presentation, a dialog might<br />
appear at this point, listing all the branches corresponding to pages created directly in Mediator.<br />
Because you might not want to change the appearance of these pages in the new Mediator<br />
presentation, you can deselect them in this dialog to indicate that the export template should not be<br />
applied to them.<br />
Once the export is completed, <strong>MindView</strong> lets you either view your presentation straight away in<br />
Mediator or continue working in <strong>MindView</strong>.<br />
When exporting the mind map to Mediator, <strong>MindView</strong> places special tags formatted with #<br />
signs in the Notes tab of the Properties dialog of particular elements of the new Mediator<br />
presentation, including the pages themselves. These tags contain information required by<br />
<strong>MindView</strong> to re-import the Mediator presentation, should you decide to do so at a later stage. You<br />
should take care not to delete these tags if you want to preserve the structure and layout of the<br />
original mind map.<br />
Exporting to Mediator: Export Wizard<br />
Click the File tab.<br />
Choose Export | <strong>MatchWare</strong> Mediator | Advanced Mediator Export.<br />
If your <strong>MindView</strong> view contains several maps (i.e. several roots), choose the map you want to<br />
export in the 'Select Map to Export' dialog and click Next.<br />
The Export Wizard now displays a series of dialogs, the first of which is the Select Window Size<br />
dialog.<br />
168
Selecting the window size<br />
169<br />
User Guide<br />
Choose the window size corresponding to your screen resolution or the screen resolution of<br />
the intended users of your Mediator document and click Next.<br />
Selecting a template<br />
This dialog allows you to select a navigation layout for the pages of your Mediator document.
<strong>MindView</strong> Documentation<br />
Predefined Templates: This lets you choose one of the professional <strong>MindView</strong> export<br />
templates with ready-made top and side navigation.<br />
These templates are available in the following navigation styles:<br />
Level List: With this type of navigation, you only see a maximum of three levels of links on<br />
the side: the current page, any pages at the level just above it, and any pages at the level just<br />
below it.<br />
Buttons: In this design, the side bar contains a list of links, where each link represents a subbranch<br />
of the branch corresponding to the current page.<br />
170
Preview<br />
171<br />
User Guide<br />
To see a larger preview of the templates shown on the right of the window, just place the<br />
mouse pointer over the relevant thumbnail. Note that you will be able to go back to this step<br />
of the wizard at any time to choose a different template if you are not satisfied with your<br />
original choice.<br />
User Templates: This lets you choose one of your own previously saved export templates.<br />
See further down for information on how to save your own export template.<br />
Select a template on the right and click Next.<br />
The Export Wizard opens the Preview dialog, which lets you customize the various areas of the<br />
navigation layout chosen in the first step.
<strong>MindView</strong> Documentation<br />
You can customize each area in turn by clicking the Customize buttons, namely:<br />
General<br />
Top Bar<br />
Side Bar<br />
Content Area<br />
Feel free to experiment with the various customization options. At any time, you can obtain a full<br />
size preview of your design reflecting any changes made by clicking the Preview button. Note<br />
however that this Preview does not allow you to navigate the document.<br />
Customizing the General properties (optional)<br />
Click General in the Preview dialog.<br />
This dialog gives you the following options:<br />
Include 'Home' button: This inserts a Home hyperlink or button on each of your Mediator pages,<br />
allowing you to return to the page corresponding to the root of your map in just one click.<br />
Include 'Back' button: This inserts a Back hyperlink or button on each of your Mediator pages,<br />
enabling you to go back to the last page visited.<br />
You can also enter meta-tags for your Mediator document as follows:<br />
Description: Any text entered here will be inserted in the Description tag of the Mediator document<br />
(visible by clicking the HTML tab of the Document Properties dialog in Mediator).<br />
Keywords: Similarly, any keywords entered here (separated by commas) will be inserted in the<br />
Keywords tag of the Mediator document (also visible by clicking the HTML tab of the Document<br />
Properties dialog in Mediator).<br />
Customizing the Top Bar (optional)<br />
Click the Top Bar button or double-click the top bar area in the Preview dialog.<br />
The Top Bar Properties dialog opens on its Title tab.<br />
172
173<br />
User Guide<br />
By default, the title displayed on each Mediator page is the branch name. Here you can change the<br />
font, attributes and color for this title or even enter your own title, which will be displayed on all the<br />
pages of the document.<br />
Click the Background tab.<br />
This tab lets you select a plain color or a different background picture for the top bar.<br />
If you want to change the background picture, the best approach is to make a copy of the existing<br />
picture and edit its design to suit your requirements, making sure that the picture size stays<br />
unchanged so that it still fits the template.<br />
Click the Links tab.
<strong>MindView</strong> Documentation<br />
The Links tab is only available if the top bar of the template chosen contains buttons or<br />
hyperlinks.<br />
This tab lets you select different colors for the top bar links depending on their state, i.e. "Normal",<br />
"Pressed" (the link is clicked) or "Hovered" (the mouse pointer is placed on the link).<br />
You can also choose to make all the links the same width, or have their width vary according to the<br />
length of their label.<br />
Customizing the Side Bar (optional)<br />
Click the Side Bar button or double-click the side bar area in the Preview dialog.<br />
The Side Bar Properties dialog opens on its Background tab.<br />
This tab lets you select a plain color or a different background picture for the side bar.<br />
As for the top bar, the best approach if you want to change the background picture is to make a<br />
copy of the existing picture and edit its design to suit your requirements.<br />
174
The second tab of the Side Bar Properties dialog varies depending on the type of navigation<br />
template you chose in the first screen of the Export Wizard. The possibilities are:<br />
Level list<br />
Links<br />
We will now look at each of these possibilities in turn.<br />
Level List<br />
This tab is displayed if you have chosen a Level List design.<br />
With this type of navigation, you only see a maximum of three levels of links on the side: the<br />
current page, any pages at the level just above it, and any pages at the level just below it.<br />
175<br />
User Guide<br />
The Level list tab lets you choose how many levels the list should show. You can also define the<br />
font and color of the links.<br />
Links
<strong>MindView</strong> Documentation<br />
This tab is displayed if you have chosen a Buttons design in the first screen of the Export Wizard.<br />
With this design, the side bar contains a list of links, where each link represents a sub-branch of<br />
the branch corresponding to the current page. The Links tab lets you select different colors for the<br />
side bar links depending on their state, i.e. "Normal", "Pressed" (the link is clicked) or "Hovered"<br />
(the mouse pointer is placed on the link).<br />
Customizing the Content Area (optional)<br />
Click the Content Area button or double-click the middle area in the Preview dialog.<br />
The Content Area properties dialog opens on its Background tab.<br />
This tab lets you select a plain color or a different background picture for the body of the page. Feel<br />
free to experiment with the image placement options by checking the effect in the Full Size<br />
Preview.<br />
Click the Link Type tab.<br />
176
177<br />
User Guide<br />
If your map contains branch connections, sound files or attached text documents, this tab lets you<br />
decide whether you want to place these objects on Mediator hypertext or button objects.<br />
Click the Link Style tab.<br />
This tab lets you choose styles for any buttons or hyperlinks created on your Mediator pages.<br />
Define the hypertext style required by selecting a font, attribute and size. You can also define<br />
different colors depending on the state of the hyperlink, i.e. "Normal", "Pressed" (the link is<br />
clicked) or "Hovered" (the mouse pointer is placed on the link).<br />
Scroll through the various buttons available to choose the type you like best.<br />
Previewing the customized template (optional)<br />
Click the Preview button in the Preview dialog to obtain a real-time preview of your design<br />
reflecting any changes made so far.<br />
Saving the customized template (optional)<br />
You can save your customized export template for later use by clicking the Save Template<br />
button of the Preview dialog. The Save User Template dialog that opens contains a list of the<br />
export templates you have already saved. Enter the name of your new export template and<br />
click Save.<br />
Once you are satisfied with the design of all the page components, click Next.<br />
Selecting the objects to export<br />
The Export Wizard now opens the Select Objects to Export dialog.
<strong>MindView</strong> Documentation<br />
Select the <strong>MindView</strong> objects which you want to export to Mediator.<br />
If you exclude some elements from the export by deselecting them here, none of the<br />
elements of this type will be exported, regardless of the value of their individual 'Include in<br />
export' property in the Properties dialog. Let's suppose for instance your map contains a<br />
floating picture whose 'Include in export' property is enabled. If you choose to exclude floating<br />
pictures from the export here, your floating picture will not be exported. Conversely, if you<br />
specify here that floating pictures should be exported, only the floating pictures whose<br />
'Include in export' property is enabled will be exported.<br />
Click Next.<br />
Exporting<br />
You are now ready to export your map to Mediator.<br />
178
Choose a path and file name for your new Mediator presentation.<br />
179<br />
User Guide<br />
If you want <strong>MindView</strong> to place a copy of all the external files used in your map (such as text<br />
files, sound files, video files and so on) in the export folder, check the option Copy linked files<br />
to export folder. Such files will then be placed in the sub-folder named MD8 of your export<br />
folder. This will allow you to distribute or transfer your Mediator presentation easily by copying<br />
the actual Mediator file as well as the entire MD8 sub-folder.<br />
Click Finish.<br />
If your <strong>MindView</strong> document was created by importing a Mediator presentation, a dialog might<br />
appear at this point, listing all the branches corresponding to pages created directly in Mediator.<br />
Because you might not want to change the appearance of these pages in the new Mediator<br />
presentation, you can deselect them in this dialog to indicate that the export template should not be<br />
applied to them.<br />
Once the export is completed, <strong>MindView</strong> lets you either view your presentation straight away in<br />
Mediator or continue working in <strong>MindView</strong>.<br />
When exporting the mind map to Mediator, <strong>MindView</strong> places special tags formatted with #<br />
signs in the Notes tab of the Properties dialog of particular elements of the new Mediator<br />
presentation, including the pages themselves. These tags contain information required by<br />
<strong>MindView</strong> to re-import the Mediator presentation, should you decide to do so at a later stage. You<br />
should take care not to delete these tags if you want to preserve the structure and layout of the<br />
original mind map.
<strong>MindView</strong> Documentation<br />
Exporting to RTF<br />
This export method lets you export your mind map in RTF format. This may be useful if you<br />
want to process your document further in a word processor, but do not have Microsoft Word<br />
installed on your computer.<br />
Each branch is exported as a paragraph heading at the relevant level, in other words Heading 1 for<br />
main branches, Heading 2 for sub-branches, Heading 3 for sub-sub-branches and so on, using<br />
hierarchical numbering (unless you disable it in Advanced Export). Attached objects and inserted<br />
elements are listed below the heading.<br />
By default, <strong>MindView</strong> automatically includes an overall picture of your map on the first page of the<br />
document.<br />
The branches of the map are exported to RTF in the order in which they are displayed in the Mind<br />
Map view, starting from the top right in a clockwise direction.<br />
You can however exclude entire branches and sub-branches from the export by disabling their<br />
'Include in export' property in the Properties dialog.<br />
Only the branches displayed on the workspace when you start the export procedure are<br />
exported. This means that if you are focusing on a particular branch or set of branches (see<br />
"Focusing on a branch") or if you are filtering the map to display only branches that meet specific<br />
criteria (see "Filtering a mind map"), only the branches visible on the workspace will be exported.<br />
To export the entire map, you need to go back to the full display by clearing the branch focus or<br />
filter applied.<br />
Export modes<br />
There are two export modes available:<br />
Quick Export<br />
The Quick Export mode allows you to export your map quickly using the <strong>MindView</strong><br />
defaults or the last Advanced Export settings you chose if you have already used that mode.<br />
Advanced Export<br />
The Advanced Export mode allows you to specify the elements of your map to be<br />
exported and how they should be treated.<br />
The export settings you choose in Advanced Export are saved with the <strong>MindView</strong> document<br />
and re-used next time you export your map using Quick Export or Advanced Export. This<br />
means that you do not have to redefine them every time you make a small amendment to<br />
your map and want to export it again to RTF.<br />
Relationship between <strong>MindView</strong> and RTF elements and objects<br />
The following table indicates how <strong>MindView</strong> treats the various inserted elements and attached<br />
objects contained in your map when exporting it to RTF.<br />
<strong>MindView</strong> element Exported to RTF as<br />
Branch name Heading at relevant level with hierarchical numbering<br />
(3 levels by default)<br />
Hierarchical numbering can be disabled in Advanced Export.<br />
Text note Text inserted under the branch heading<br />
Branch picture Picture inserted under the branch heading<br />
180
Floating picture If connected to a branch, inserted under the branch heading<br />
Floating comment As for Floating picture<br />
If not connected to a branch, not exported<br />
Pop-up comment Text under the branch heading<br />
Branch connection Cross-reference prefixed by "See section" under the start<br />
branch heading, pointing to the end branch heading<br />
<strong>MindView</strong> object Exported to RTF as<br />
Text file Object name followed by hyperlink to file<br />
Picture file Picture embedded in the RTF document<br />
In Advanced Export, you can choose instead to insert the file as<br />
an object name followed by a hyperlink to the file.<br />
Video file Object name followed by hyperlink to file<br />
Sound file Object name followed by hyperlink to file<br />
Hyperlink Object name followed by hyperlink to file<br />
Flash file Object name followed by hyperlink to file<br />
Using Quick Export<br />
Click the File tab.<br />
Choose Export | RTF | Quick RTF Export.<br />
181<br />
User Guide<br />
If your <strong>MindView</strong> view contains several maps (i.e. several roots), choose the map you want to<br />
export in the 'Select Map to Export' dialog and click OK.<br />
Specify a folder and a file name for the new RTF document in the Save As dialog.<br />
Once the export is complete, <strong>MindView</strong> lets you view the document in the viewer associated with<br />
the .RTF extension on your computer.<br />
Using Advanced Export<br />
Click the File tab.<br />
Choose Export | RTF | Advanced RTF Export.<br />
If your <strong>MindView</strong> view contains several maps (i.e. several roots), choose the map you want to<br />
export in the 'Select Map to Export' dialog and click OK.<br />
In the General tab, choose the required general export settings and specify the elements of the<br />
map to export.
<strong>MindView</strong> Documentation<br />
If you exclude some elements from the export by deselecting them here, none of the<br />
elements of this type will be exported, regardless of the value of their individual 'Include in<br />
export' property in the Properties dialog. Let's suppose for instance your map contains a<br />
floating picture whose 'Include in export' property is enabled. If you choose to exclude floating<br />
pictures from the export here, your floating picture will not be exported. Conversely, if you<br />
specify here that floating pictures should be exported, only the floating pictures whose<br />
'Include in export' property is enabled will be exported.<br />
Choose the required export settings for any attached object in the Attached Objects tab.<br />
182
Click Export.<br />
183<br />
User Guide<br />
As for Quick Export, <strong>MindView</strong> starts exporting your mind map to RTF as a new document. Once<br />
the export is complete, <strong>MindView</strong> lets you view the document in the viewer associated with the<br />
.RTF extension on your computer.<br />
Exporting as picture<br />
This export method lets you save your mind map as a picture file.<br />
Click the File tab.<br />
Choose Save As | Picture.<br />
The following dialog appears to let you choose the required export settings.
<strong>MindView</strong> Documentation<br />
Enter the path and file name for the picture in the 'Save as' field or click the Browse button to<br />
choose an existing path.<br />
If you do not want to display branch connections, floating pictures and floating comments in the<br />
picture, clear the corresponding check mark.<br />
Since this export method creates a picture of your entire map, all elements chosen<br />
above are displayed on the picture, regardless of the value of their individual 'Include in<br />
export' property in the Properties dialog. Similarly, all branches will be visible, regardless of<br />
the value of their individual 'Include in export' property.<br />
If you want to display the object indicator and/or the comment indicator next to each<br />
branch containing attached objects and/or comments, click the relevant check box.<br />
Choose the required picture format.<br />
If you choose the .jpg format, you can use the 'JPG quality' slider to define the level of quality<br />
needed. Note that decreasing the level of quality increases the level of compression, and<br />
therefore reduces the file size.<br />
(optional) Preview the effect of your settings on the picture by clicking Preview.<br />
Click Export.<br />
Note that icons and branch pictures are always displayed and that it is not possible to display text<br />
notes.<br />
The export settings you choose are saved with the <strong>MindView</strong> document. This means that you will<br />
not have to specify these settings again if you make changes to the map and want to re-export it as<br />
a picture.<br />
184
Importing<br />
Introduction<br />
185<br />
User Guide<br />
<strong>MindView</strong> lets you import documents from Microsoft® Word, Microsoft® PowerPoint and<br />
<strong>MatchWare</strong> Mediator.<br />
The import options offered by <strong>MindView</strong> are all described in detail in the next topics.<br />
Importing from Microsoft Word<br />
<strong>MindView</strong> lets you import Microsoft® Word documents.<br />
This is particularly useful when:<br />
You have a Word document which you would like to restructure using the brainstorming<br />
capabilities and features of <strong>MindView</strong> before exporting it again to Word.<br />
You have exported a <strong>MindView</strong> mind map to Word, developed some of the topics in Word, but<br />
then realized you need to review the structure of your map in <strong>MindView</strong> before doing any<br />
further work in Word.<br />
In both cases, <strong>MindView</strong> allows you to import the Word document into a new mind map, preserving<br />
the text added in Word together with its formatting as far as possible. Pictures, comments and<br />
hyperlinks added in Word are also preserved wherever possible.<br />
If the Word document was created by exporting a <strong>MindView</strong> mind map to Word, the new mind map<br />
will have the same branch structure and layout as the original mind map.<br />
If you then re-export the new mind map to Word after having made the required changes in<br />
<strong>MindView</strong>, any elements added in <strong>MindView</strong> are exported to the new document.<br />
For more information about the elements that <strong>MindView</strong> is not able to preserve, see "Limitations"<br />
below.<br />
You do not need to have Microsoft Word installed on your computer in order to import a Word<br />
document into <strong>MindView</strong>. <strong>MindView</strong> can import documents created with Microsoft Word 2007 and<br />
above in the .docx format. If you are using an earlier version of Word, you can use the free<br />
Microsoft Office Compatibility pack to convert the document from its .doc format to the newer .docx<br />
format prior to importing.<br />
Although <strong>MindView</strong> can import any Word document, a useful branch structure can only be created<br />
if the document is organized in paragraphs containing headings defined with the Microsoft Word<br />
heading styles "Heading 1" through to "Heading 9".<br />
<strong>MindView</strong> imports each paragraph of the Word document as a branch at the relevant level. In other<br />
words paragraphs with a Heading 1 title become main branches, paragraphs with a Heading 2 title<br />
become sub-branches, paragraphs with a Heading 3 title become sub-sub-branches and so on.<br />
If the Word document starts with a main heading with the style "Title", then this heading is used as<br />
the root name. Otherwise the name of the Word document is used as the root name.<br />
Procedure<br />
Click the File tab.<br />
Choose Import | Microsoft Word.<br />
Select the Word document you want to import.<br />
Specify a destination folder and file name for the <strong>MindView</strong> document to be created.
<strong>MindView</strong> Documentation<br />
Click Import.<br />
There may be elements of the Word document that <strong>MindView</strong> is not able to import. If this is the<br />
case, <strong>MindView</strong> displays a Warning dialog listing these elements. See "Limitations" below for more<br />
information.<br />
When exporting a mind map to Word, <strong>MindView</strong> inserts bookmarks in the Word document to<br />
keep track of how the various elements should be re-imported back into <strong>MindView</strong> if you choose to<br />
do so. You should take care not to delete these bookmarks, which are hidden by default. To make<br />
them visible while you work, check 'Show bookmarks' in the Advanced panel of the Word Options<br />
dialog.<br />
Relationship between Word and <strong>MindView</strong> elements and objects<br />
The following table indicates how <strong>MindView</strong> converts the various elements of your Word document<br />
to <strong>MindView</strong> elements and objects.<br />
Word element Imported in <strong>MindView</strong> as<br />
Title<br />
(with Title style)<br />
Heading 1<br />
(with Heading 1 style)<br />
Heading 2<br />
(with Heading 2 style)<br />
and so on until…<br />
Heading 9<br />
(with Heading 9 style)<br />
Root of the mind map<br />
If the Word document does not contain a Title heading at its<br />
very top, the name of the Word document is used as root<br />
name.<br />
If the Word document contains more than one Title<br />
heading, each such heading is imported as a text note of<br />
the corresponding higher level branch.<br />
Main branch<br />
Sub-branch of the corresponding higher level branch<br />
Sub-branch of the corresponding higher level branch<br />
186
Regular text If the document was created in Word, imported as a text<br />
note of the corresponding branch<br />
Picture embedded in<br />
paragraph heading<br />
Picture embedded in<br />
body text<br />
If the document was created by exporting an original<br />
<strong>MindView</strong> mind map, imported as text note or floating<br />
comment of the corresponding branch as in the original<br />
document<br />
Floating picture of the corresponding branch<br />
If the document was created in Word, imported as a picture<br />
embedded in a text note of the corresponding branch<br />
If the document was created by exporting an original<br />
<strong>MindView</strong> mind map, imported as branch picture, floating<br />
picture or attached picture file of the corresponding branch<br />
as in the original document<br />
Comment Pop-up comment for the corresponding branch<br />
Intra-document cross<br />
reference to heading<br />
with style Title or<br />
Heading 1 to 9<br />
Branch connection between the relevant branches<br />
Hyperlink Hyperlink in text note of the corresponding branch<br />
Limitations<br />
The following limitations apply when importing a Word document into <strong>MindView</strong>:<br />
187<br />
User Guide<br />
Indexes, tables of contents, tables of authorities, tables of figures, headers and footers are not<br />
imported.<br />
Note that you can choose to have the Table of Contents regenerated automatically when reexporting<br />
the mind map to Word.<br />
Sounds and videos that are embedded in the Word document are not imported in <strong>MindView</strong>.<br />
To import such elements in the <strong>MindView</strong> mind map, make sure they are inserted in the Word<br />
document as hyperlinks.<br />
Editable Word shapes such as AutoShapes, Text Effects (WordArt) and diagrams are imported<br />
in the <strong>MindView</strong> document as pictures. This means that when re-exported to Word, they<br />
become standard pictures and do not keep their original editable properties.<br />
Mathematical symbols are not imported.<br />
In addition, if you are importing a document created from an original <strong>MindView</strong> mind map, the<br />
following limitations apply:<br />
Pop-up comments will not retain their original size and position.<br />
Pictures embedded in the Word document as a result of the export from <strong>MindView</strong> do not<br />
retain their file name information. When re-importing the document, <strong>MindView</strong> creates new files<br />
for these pictures.<br />
If you chose to include a picture of the whole mind map in the Word document when exporting<br />
from <strong>MindView</strong>, this picture is not re-imported back into <strong>MindView</strong>.<br />
Importing from Microsoft PowerPoint<br />
<strong>MindView</strong> lets you import Microsoft® PowerPoint presentations.<br />
This is particularly useful when:<br />
You have a PowerPoint presentation which you would like to expand using the brainstorming<br />
capabilities and features of <strong>MindView</strong> before exporting it again to PowerPoint.
<strong>MindView</strong> Documentation<br />
You have exported a <strong>MindView</strong> mind map to PowerPoint, worked on the layout in PowerPoint,<br />
but then realized you need to review the structure of your map in <strong>MindView</strong> before doing any<br />
further work in PowerPoint.<br />
In both cases, <strong>MindView</strong> allows you to import the PowerPoint presentation into a new mind map,<br />
preserving as much of the layout and contents of the PowerPoint presentation as possible.<br />
If the PowerPoint presentation was created by exporting a <strong>MindView</strong> mind map to PowerPoint, the<br />
new mind map will have the same branch structure and layout as the original mind map.<br />
If you then re-export the new mind map to PowerPoint after having made the required changes in<br />
<strong>MindView</strong>, any elements added in <strong>MindView</strong> are exported to the new presentation.<br />
For more information about the elements that <strong>MindView</strong> is not able to preserve, see "Limitations"<br />
below.<br />
You must have Microsoft PowerPoint installed on your computer in order to import a<br />
PowerPoint presentation into <strong>MindView</strong>. <strong>MindView</strong> supports all Microsoft PowerPoint versions from<br />
2000 onwards.<br />
Procedure<br />
Click the File tab.<br />
Choose Import | Microsoft PowerPoint.<br />
Select the PowerPoint presentation you want to import.<br />
Select the destination folder, i.e. the folder for the <strong>MindView</strong> document created from the<br />
PowerPoint presentation.<br />
(optional) If you want to import the bullet lists that may be included on the PowerPoint slides as<br />
sub-branches of the corresponding branches, check Import bullets as branches. If you leave<br />
this box unchecked, the bullet lists that may be included on the PowerPoint slides are inserted<br />
as text notes on the corresponding <strong>MindView</strong> branches.<br />
Click Import.<br />
<strong>MindView</strong> creates a sub-folder named 'MVPPImport' within the destination folder and places in it<br />
the new <strong>MindView</strong> document as well as any pictures or other objects such as sounds or videos<br />
embedded in the PowerPoint presentation.<br />
There may be elements of the PowerPoint presentation that <strong>MindView</strong> is not able to import. If this<br />
is the case, <strong>MindView</strong> displays a 'PowerPoint Import Warnings' dialog listing these elements. See<br />
"Limitations" below for more information.<br />
188
Import modes<br />
189<br />
User Guide<br />
The Import operation has two modes depending on how the PowerPoint presentation was created:<br />
The PowerPoint presentation was originally created in PowerPoint<br />
In this mode, the title of the first slide becomes the root name of the new <strong>MindView</strong><br />
document. If you have checked the 'Import bullets as branches' option, each bullet list item of<br />
that first slide becomes a new main branch. If not, the entire bullet list is imported as a text<br />
note for the root.<br />
All the other slides are imported as further main branches. If you have checked the 'Import<br />
bullets as branches' option and some of those slides contain bullet lists, each bullet list item<br />
becomes a sub-branch of the corresponding <strong>MindView</strong> branch. If not, the entire bullet list is<br />
imported as a text note for the branch.<br />
The PowerPoint presentation was created by exporting a <strong>MindView</strong> document<br />
In this mode, the original branch structure of the <strong>MindView</strong> document is preserved, provided<br />
that you have not removed any slide. If you have added new slides, they are imported as<br />
main branches.<br />
Relationship between PowerPoint and <strong>MindView</strong> elements and objects<br />
The following table indicates how <strong>MindView</strong> converts the various elements of your PowerPoint<br />
presentation to <strong>MindView</strong> elements and objects.<br />
PowerPoint element Imported in <strong>MindView</strong> as<br />
Slide Branch<br />
Slide title Branch title<br />
Slide sub-title Text note<br />
Slide body text Text note<br />
Slide bullet list If the presentation was created in PowerPoint and you<br />
checked 'Import bullets as branches' in the Import dialog,<br />
each bullet is imported as a sub-branch. If you didn't check<br />
'Import bullets as branches', the entire bullet list is imported<br />
as a text note for the branch.<br />
Slide comment Floating comment<br />
Slide notes Pop-up comment<br />
If the presentation was created by exporting an original<br />
<strong>MindView</strong> document, the branch structure of the mind map<br />
is recreated from the slide titles, not from the bullet list. The<br />
text of the bullet list is therefore ignored.<br />
Embedded picture If the presentation was created in PowerPoint, imported as<br />
an attached picture object stored in the 'MVPPImport' folder<br />
If the presentation was created by exporting an original<br />
<strong>MindView</strong> document, imported as a branch picture or<br />
floating picture as in the original document<br />
Autoshape Attached picture object stored in the 'MVPPImport' folder
<strong>MindView</strong> Documentation<br />
Linked picture Attached picture object pointing to the original path<br />
Embedded video Attached video object pointing to the original path<br />
Embedded sound Attached sound object stored in the 'MVPPImport' folder<br />
Link to slide Branch connection<br />
Limitations<br />
The following limitations apply when importing a PowerPoint presentation into <strong>MindView</strong>:<br />
The formatting of the slide title and of any slide notes included is not preserved.<br />
If the layout of the PowerPoint slide contains more than one bullet list, only the first bullet list is<br />
taken into account by the import.<br />
When importing bullets as branches, indented bullets within the main bullet list are imported as<br />
branches of the same level as the main bullets, not as sub-branches.<br />
PowerPoint master slides are not taken into account by <strong>MindView</strong>. Their contents are therefore<br />
not imported into the <strong>MindView</strong> document.<br />
Although hyperlinks contained in PowerPoint text objects are imported into the corresponding<br />
<strong>MindView</strong> text note, only their formatting is preserved. The links themselves are not preserved.<br />
The following PowerPoint objects are imported as pictures in the <strong>MindView</strong> document and<br />
listed in the 'PowerPoint Import Warnings' dialog:<br />
AutoShapes<br />
OLE controls, embedded OLE objects and linked OLE objects<br />
Diagrams<br />
Tables<br />
Text Effects (WordArt)<br />
All other unknown shapes also cause the display of the 'PowerPoint Import Warnings' dialog,<br />
but are otherwise ignored.<br />
If you are using PowerPoint 2003 and above, the picture files that are created in the<br />
'MVPPImport' folder have the .png extension. This means they can be stretched with<br />
antialiasing, resulting in higher quality. With PowerPoint 2000, the picture file format used is<br />
.gif. This file format cannot be stretched with antialiasing.<br />
In addition, if you are importing a presentation created by exporting a <strong>MindView</strong> document, the<br />
following limitations apply:<br />
If you delete one or more slides while working in PowerPoint, <strong>MindView</strong> is not able to recreate<br />
the branch structure exactly as in the original mind map:<br />
If you delete the slide corresponding to the root branch, all the slides are imported as<br />
main branches, as if you had created the presentation from scratch in PowerPoint.<br />
If you delete slides corresponding to branches with sub-branches, <strong>MindView</strong> cannot<br />
recreate the structure of these sub-branches.<br />
Similarly, if you rearrange the slides in a different order in PowerPoint, <strong>MindView</strong> does not take<br />
the new order into account.<br />
Since <strong>MindView</strong> uses the PowerPoint slide titles to recreate the branch structure, any changes<br />
you make to the bullet list text in PowerPoint will not be preserved in <strong>MindView</strong>.<br />
Pop-up comments will not retain their original size and position.<br />
Pictures embedded in the PowerPoint presentation as a result of the export from <strong>MindView</strong> do<br />
not retain their original file name or path information. When re-importing the presentation,<br />
<strong>MindView</strong> creates new files for these pictures in the 'MVPPImport' folder.<br />
If you chose to include a picture of the whole mind map in the PowerPoint presentation when<br />
exporting from <strong>MindView</strong>, the slide containing this picture is not re-imported back into<br />
<strong>MindView</strong>.<br />
190
Importing from Mediator<br />
<strong>MindView</strong> lets you import Mediator presentations.<br />
This is particularly useful when:<br />
191<br />
User Guide<br />
You have a Mediator presentation which you would like to expand using the brainstorming<br />
capabilities and features of <strong>MindView</strong> before exporting it again to Mediator.<br />
You have exported a <strong>MindView</strong> mind map to Mediator, added interactivity to it in Mediator<br />
using events and actions, but then realized you need to review the structure of your map in<br />
<strong>MindView</strong> before doing any further work in Mediator.<br />
In both cases, <strong>MindView</strong> allows you to import the Mediator presentation into a new mind map,<br />
preserving as much of the structure and contents of the Mediator presentation as possible.<br />
If the Mediator presentation was created by exporting a <strong>MindView</strong> mind map to Mediator, the new<br />
mind map will have the same branch structure and layout as the original mind map.<br />
If you re-export the new mind map to Mediator after having made the required changes in<br />
<strong>MindView</strong>, any elements added in <strong>MindView</strong> are exported to the new presentation. Note that<br />
although <strong>MindView</strong> creates a new Mediator presentation when re-exporting, the original Mediator<br />
document must remain accessible. If it is no longer accessible, <strong>MindView</strong> cannot preserve the<br />
elements of the original presentation that are specific to Mediator (such as events and actions or<br />
Mediator objects that have no equivalent in <strong>MindView</strong>).<br />
For more information about the elements that <strong>MindView</strong> is not able to preserve, see "Limitations"<br />
below.<br />
You must have Mediator 8 with Service Pack 3 or above installed on your computer in order to<br />
import a Mediator presentation into <strong>MindView</strong>.<br />
This free Mediator 8 update is available on the <strong>MatchWare</strong> web site at:<br />
http://www.matchware.com/en/support/servicepacks/mediator8.htm<br />
If the Mediator presentation was created by exporting a <strong>MindView</strong> mind map to Mediator, you will<br />
need to have Mediator 9 or above installed in order to re-import it into <strong>MindView</strong>.<br />
<strong>MindView</strong> imports the first Mediator page as the root of the new <strong>MindView</strong> document, and all the<br />
other Mediator pages of the same level as further main branches. Mediator sub-pages become<br />
sub-branches of the corresponding <strong>MindView</strong> branch and so on.<br />
Procedure<br />
Make sure the Mediator presentation to be imported is not already open in Mediator.<br />
Click the File tab.<br />
Choose Import | <strong>MatchWare</strong> Mediator.<br />
Select the Mediator presentation and click Open.<br />
<strong>MindView</strong> creates a new document and import the Mediator presentation into it.<br />
Relationship between Mediator and <strong>MindView</strong> elements and objects<br />
The following table indicates how <strong>MindView</strong> converts the various elements of your Mediator<br />
presentation to <strong>MindView</strong> elements and objects.<br />
Mediator element Imported in <strong>MindView</strong> as<br />
Page Branch<br />
Page note<br />
(Notes tab of the<br />
Properties dialog)<br />
Note that the Mediator page description is used as the branch<br />
name. If the Description field is empty, then the page name is<br />
used.<br />
Pop-up comment
<strong>MindView</strong> Documentation<br />
Picture object If the presentation was created in Mediator, imported as an<br />
attached picture object<br />
If the presentation was created by exporting an original<br />
<strong>MindView</strong> document, imported as a branch picture, floating<br />
picture or attached picture object as in the original<br />
document<br />
Text object If the presentation was created in Mediator, imported as a<br />
text note for the branch<br />
Hypertext object Text note<br />
If the presentation was created by exporting an original<br />
<strong>MindView</strong> document, imported as a text note or as a<br />
floating comment as in the original document<br />
Button object If the presentation was created in Mediator, not imported<br />
Flash object Attached Flash object<br />
Media Player object Attached video object<br />
All other Mediator<br />
objects and elements<br />
Limitations<br />
If the presentation was created by exporting an original<br />
<strong>MindView</strong> document, imported as a branch connection, an<br />
attached text object or an attached sound object as in the<br />
original document<br />
These are not imported. They are however preserved if you reexport<br />
the <strong>MindView</strong> document to Mediator, provided that the<br />
original Mediator document is still accessible.<br />
The following limitations apply when importing a Mediator presentation into <strong>MindView</strong>:<br />
If the first page in the Mediator presentation contains sub-pages, these sub-pages are not<br />
imported.<br />
When importing a Mediator hypertext object into <strong>MindView</strong>, the hypertext object is converted to<br />
a text note. This means that any events and actions that may be associated with it in the<br />
original Mediator presentation are not preserved when re-exporting the <strong>MindView</strong> document to<br />
Mediator.<br />
Once the presentation is imported into <strong>MindView</strong>, if you change the name of a branch and reexport<br />
the presentation, the Description field of the corresponding Mediator page will be<br />
changed to the new name, but the Page name will remain unchanged.<br />
In addition, if you are importing a Mediator presentation created by exporting an original <strong>MindView</strong><br />
mind map to Mediator, the following limitations apply:<br />
When exporting a mind map to Mediator, <strong>MindView</strong> places special tags formatted with # signs<br />
in the Notes tab of the Properties dialog of particular elements of the new Mediator<br />
presentation, including the pages themselves. These tags contain information required by<br />
<strong>MindView</strong> to re-import the Mediator presentation. If you delete one or more of these tags by<br />
accident, <strong>MindView</strong> will not be able to recreate the corresponding element(s) exactly as in the<br />
original mind map.<br />
When exporting a mind map to Mediator, <strong>MindView</strong> hyperlinks, branch connections, attached<br />
text files and attached sound files are converted to Mediator buttons containing the relevant<br />
events and actions. An attached sound object in the <strong>MindView</strong> document for instance becomes<br />
a button with a Mouse Click event and a Sound action in the Mediator presentation. If you<br />
delete or move these events and actions while working in Mediator, although <strong>MindView</strong> will be<br />
able to recreate the original object, the link path will be lost.<br />
192
Importing from other applications<br />
193<br />
User Guide<br />
<strong>MindView</strong> lets you import documents from other Mind Mapping applications, namely Mindjet<br />
MindManager (from version X5 onwards) and FreeMind, so that you can develop them further in<br />
<strong>MindView</strong>.<br />
Click the File tab.<br />
Choose Import | Other Mind Mapping Applications.<br />
Choose Import from Mindjet MindManager or Import from FreeMind.<br />
Select the document you want to import.<br />
Specify a destination folder and file name for the <strong>MindView</strong> document to be created.
<strong>MindView</strong> Documentation<br />
Pen Mode<br />
Working in Pen Mode<br />
<strong>MindView</strong> supports pen input as well as standard keyboard/mouse input, letting you insert<br />
digital ink data such as handwritten text and hand-drawn pictures on your branches. Although<br />
<strong>MindView</strong>'s pen input features let you treat your computer mouse as a pen, they are designed for<br />
use with dedicated pen input devices such as tablet PC's, external digitizers, touch screens and<br />
interactive whiteboards. The only requirement is that the operating system on which <strong>MindView</strong> is<br />
installed must also support pen input (e.g. Windows XP Tablet PC Edition, all editions of Windows<br />
Vista with the exception of the Home Basic and Starter editions, Windows 7).<br />
Once attached to a branch, the ink data is treated just as any other branch element.<br />
You can use pen input only in the standard Mind Map views, namely Mind Map, Top Down<br />
and Left/Right.<br />
Enabling pen input<br />
Before you can use your mouse or pen as input device, you must enable pen input.<br />
If your computer supports pen input, the <strong>MindView</strong> Options dialog contains an extra panel for the<br />
pen input options.<br />
To access this tab:<br />
Click the File tab.<br />
Click <strong>MindView</strong> Options in the bottom right.<br />
Click the panel Pen Input.<br />
194
195<br />
User Guide<br />
Enable pen input: Check this box to enable pen input. When pen input is enabled, a Pen Mode<br />
button appears in the bottom right corner of the <strong>MindView</strong> status bar, allowing you to set Pen Mode<br />
on and off.<br />
Enable gestures: When this option is enabled, you can perform the <strong>MindView</strong> actions listed in the<br />
paragraph "Using gestures" below by making the corresponding gesture with your input device.<br />
Defaults for hand-drawn branch labels: When you use your pen to draw text for your branch<br />
labels, it is often easier to write using large characters. You can use the Size (%) field to define a<br />
factor which <strong>MindView</strong> will automatically use to reduce your hand-drawn text before inserting it on<br />
the branch as branch label. Conversely, when you click a hand-drawn branch label to edit it,<br />
<strong>MindView</strong> automatically expands the label if necessary to allow for easier editing. You can use the<br />
Width and Line Height fields to define the initial size of this edit box. If the hand-drawn branch<br />
label is wider or taller than the size chosen here, <strong>MindView</strong> automatically adjusts the size of the<br />
edit box to the size of the label.<br />
Default picture size for hand-drawn floating pictures: When you use your pen to draw floating<br />
pictures, it is often easier to make large drawings. You can use this field to define a factor which<br />
<strong>MindView</strong> will automatically use to reduce your hand-drawn pictures before attaching them to the<br />
selected branch.<br />
Default edit box size for hand-drawn pictures: When you double-click a hand-drawn picture to<br />
edit it, <strong>MindView</strong> automatically expands it to allow for easier editing. You can use the Width and<br />
Height fields to define the initial size of this edit box. If the hand-drawn picture is wider or taller<br />
than the size chosen here, <strong>MindView</strong> automatically adjusts the size of the edit box to the size of the<br />
picture.<br />
Using Pen Mode<br />
When pen input is enabled, a Pen Mode button is shown in the bottom right corner of the status<br />
bar.<br />
Click it to enable Pen Mode.<br />
The Ink Tools tab appears in front of the Home tab on the ribbon.<br />
You can now use your input device to start writing or drawing on the free space available in the<br />
view (i.e. not on top of a branch, floating comment, floating picture or other <strong>MindView</strong> element).<br />
Before you start writing or drawing, you can use your input device to select the branch to<br />
which you want to add the ink data. After your first stroke, you are free to draw anywhere on the<br />
workspace, including on top of branches or other <strong>MindView</strong> elements.<br />
As you start writing or drawing, <strong>MindView</strong> attempts to interpret the ink data as text and displays<br />
the result in the "Ink to Text" field shown just below the ribbon. This lets you correct any<br />
misinterpretation by deleting the last stroke or strokes until you obtain the required result. You can<br />
also click the down arrow shown at the right of the field to view all the possible interpretations of the<br />
ink data and choose the relevant one.<br />
When trying to interpret the ink data, <strong>MindView</strong> assumes that you are writing in the same<br />
language as that defined as your input language in the Windows settings of your computer. If you<br />
want your ink data to be interpreted using a different language, set your input language to that<br />
language in the Windows Control Panel.
<strong>MindView</strong> Documentation<br />
Here is a short description of the tools contained in the Ink Tools tab:<br />
As in the Home and Insert tabs, the Branch icon lets you add a branch at the same level<br />
as the selected branch, and the Sub-Branch icon lets you add a sub-branch to the<br />
selected branch.<br />
The Select icon in the Pens group lets you select and/or move branches with your input device<br />
rather than write or draw. The other icons contained in the Pens group let you choose the pen<br />
to be used to write or draw: Ballpoint Pen lets you draw in black thin ink, Felt Tip Pen uses a<br />
thicker red, and the Erase Tool lets you select and delete any of the strokes.<br />
Rather than trying to select the stroke to be deleted, an easier way of using the Erase<br />
tool is to drag the mouse across the workspace as you would use a rubber until the pointer<br />
hits the stroke. Unlike a rubber however, the Erase tool deletes the entire stroke.<br />
The icons contained in the Add Ink to Selected Branch group let you convert and transfer the<br />
ink data to different elements of the map. Some of them are only enabled when you have<br />
selected a branch and drawn at least one stroke:<br />
Branch Label: Using this icon, you can choose to convert the ink data to text and use it<br />
as branch label for the selected branch (Branch Label as Text) or to keep the ink data and<br />
use it unchanged as branch label (Branch Label as Ink). If you choose to keep the ink data<br />
as is, you can convert it to text at any time by selecting the branch and clicking Convert<br />
Branch Ink to Text.<br />
Comment: Click this icon to convert the ink data to text and add it to the selected branch<br />
as pop-up comment.<br />
Floating Comment: Click this icon to convert the ink data to text and add it to the<br />
selected branch as floating comment. You can then move the floating comment on the<br />
workspace just as you would in standard mouse input mode.<br />
Text Note: Click this icon to convert the ink data to text and add it to the selected branch<br />
as text note.<br />
Branch Picture: This icon lets you convert the ink data to a picture (.png) and insert it on<br />
the selected branch as branch picture.<br />
Floating Picture: This icon lets you convert the ink data to a picture (.png) and add it to<br />
the selected branch as a floating picture. The picture is reduced by a predefined factor, which<br />
you can modify in the <strong>MindView</strong> Options dialog as described above in the paragraph<br />
"Enabling pen input". You can then move the floating picture on the workspace just as you<br />
would in standard mouse input mode.<br />
In large or crowded maps, it is not always easy to find enough free space to draw. If this<br />
is the case, it may be easier to click the Branch Picture or Floating Picture icon before<br />
starting to draw. This causes <strong>MindView</strong> to open an edit box on top of the selected branch, in<br />
which you can draw freely. When you have finished, just click outside the box. The ink data is<br />
then automatically added to the branch.<br />
The Color and Weight icons of the Format group let you redefine respectively the color and<br />
the width of the pen.<br />
To delete the last stroke drawn, click the Delete Last Stroke icon .<br />
The Delete All Strokes icon removes from the workspace all the ink data that has not yet<br />
been converted to a <strong>MindView</strong>.<br />
Using gestures<br />
As well as using the commands above, you can use pen movements, also called "gestures", to<br />
perform particular actions on <strong>MindView</strong> elements (branches, sub-branches and so on). For this to<br />
work, you must enable gestures in the <strong>MindView</strong> Options dialog, as described above in the<br />
paragraph "Enabling pen input".<br />
196
To use a gesture:<br />
197<br />
User Guide<br />
Select the relevant <strong>MindView</strong> element. For example, if you want to insert a sub-branch select<br />
the parent branch; to delete a picture (which may have created by converting a pen tool<br />
drawing), select the picture.<br />
Use the pen tool to draw the gesture.<br />
Gestures are only recognized when done as a first stroke. They are not available when you are<br />
editing ink data.<br />
Here is a list of the gestures you can use:<br />
Gesture Name Action Drawing Method<br />
Scratch-out Delete Draw at least 3 strokes, as<br />
horizontal as possible.<br />
Curlicue Cut Draw the curlicue at an<br />
angle, from bottom left to<br />
top right.<br />
Double-<br />
Curlicue<br />
Copy Draw the double-curlicue at<br />
an angle, from bottom left<br />
to top right.<br />
Caret Paste Draw both sides with<br />
equal length, with a sharp<br />
angle. You can draw in<br />
either direction.<br />
Left-semicircle Undo Draw the semicircle from<br />
right to left. The two ends<br />
should be on the same<br />
horizontal line.<br />
Rightsemicircle<br />
Redo Draw the semicircle from<br />
left to right. The two ends<br />
should be on the same<br />
horizontal line.<br />
Right Insert Branch Draw a single line from left<br />
to right.<br />
Down-right Insert Sub-<br />
Branch<br />
Start with the down stroke,<br />
without lifting the pen. Draw<br />
the two sides with equal<br />
length and at a right angle.
<strong>MindView</strong> Documentation<br />
Using the Tablet PC Input Panel<br />
Square Insert New Root Draw the square from the<br />
upper left corner, without<br />
lifting the pen. You can<br />
draw in either direction.<br />
As well as using your pen to input text into <strong>MindView</strong>, you can also use the Windows built-in Tablet<br />
PC Input Panel. On Microsoft Vista and Windows 7, this panel can also be used to edit existing<br />
text.<br />
If for instance you use your pen to select a part of a branch label that you want to edit, the text will<br />
be shown in the Windows Tablet PC Input Panel. Conversely any change you make to the text<br />
shown in the panel is reflected on the branch label.<br />
You can use the same method for text notes, comments and anywhere else in <strong>MindView</strong> where<br />
you can input text, including all edit fields.<br />
Using an interactive whiteboard<br />
<strong>MindView</strong> is able to detect and support interactive whiteboards. All the operations described above<br />
are supported.<br />
If you are using a SMART Board, <strong>MindView</strong> automatically switches to Pen Mode when you pick up<br />
a pen from the pen tray. In addition, <strong>MindView</strong> automatically sets its pen color and width to the<br />
color and width of the pen you picked up. Picking up the SMART Board eraser automatically<br />
selects the Erase Tool in <strong>MindView</strong>. When no pen has been picked up, a default black color is<br />
used.<br />
The pen can also be used to navigate the <strong>MindView</strong> ribbon and menus in the same way as when<br />
using a mouse.<br />
To do a right click, you can press the right click button of the pen tray, use the SMART Board Tools<br />
menu, or do a slow click with the pen by pressing it and holding it down for a few seconds.<br />
198
Reference<br />
The reference section contains a description of the following <strong>MindView</strong> features:<br />
Properties<br />
These topics give a full description of the properties applicable to each of the <strong>MindView</strong><br />
elements, such as the view itself, the root, the branches and the various objects.<br />
Shortcuts<br />
Properties<br />
This topic lists all the keyboard shortcuts provided by <strong>MindView</strong>.<br />
Overview<br />
The Properties dialog shows the properties of the <strong>MindView</strong> element currently selected, for<br />
example the root, a branch or a floating comment. If nothing is selected the properties of the<br />
current view are shown.<br />
You can use the Properties dialog to make fine-tuning changes to these elements, as described in<br />
"Using the Properties dialog."<br />
Rather than applying properties one by one to enhance the visual aspect of your branches, it<br />
is normally easier to use the Format tab shown at the right of the ribbon when the branch is<br />
selected. Using this tab, you can apply branch shapes, branch colors and other coordinated<br />
attributes in one step. Similarly, the Design tab lets you apply predefined layouts and styles to the<br />
entire map in one step.<br />
The topics of this section describe in detail the properties shown in the Properties dialog for the<br />
various <strong>MindView</strong> elements.<br />
Notes:<br />
If the Properties dialog is not visible, choose View | Show/Hide | Properties to open it.<br />
The properties described are not always applicable to all views. The Properties dialog only lists<br />
the properties applicable to the selected element in the current view.<br />
View<br />
View properties: General tab<br />
When you click the workspace (in other words away from the root or any branch), the following<br />
properties are shown in the Properties dialog.<br />
Page Color: Click the small rectangle to choose a new color for the workspace.<br />
Word Wrap Text: Check this box if you want the text to wrap automatically to the next line when<br />
you enter long branch names. This setting applies to all the branches of your document.<br />
199
<strong>MindView</strong> Documentation<br />
Show Duration Bars: (Timeline view only) If you have entered both a start time and an end time<br />
for a particular event, you can use this property to show the duration of the event as a bar below<br />
the time axis.<br />
Show Bar Text: (Timeline view only) Check this box to display the label of each branch at the end<br />
of the corresponding bar on the timeline. This option is only available for timeline designs showing<br />
duration bars under the time axis.<br />
Show Title: (Timeline view only) By default, the timeline displays the root name as title, or, if you<br />
are focusing on a particular branch, the name of that branch. You can use this property to change<br />
the title position or to remove the default title altogether.<br />
Show Time Breaks: (Timeline view only) You can use this property to replace any empty space on<br />
the time axis with one or more break marks. This optimizes the use of the horizontal space when<br />
events are not evenly distributed along the timeline.<br />
View properties: Branches tab<br />
The Branches tab of the View properties dialog allows you to define default properties for the<br />
branches of your map.<br />
Vertical Branch Gap: This value represents the vertical spacing between each set of branches.<br />
The default value depends on the view used.<br />
Horizontal Branch Gap: This value represents the horizontal spacing between each set of<br />
branches. The default value depends on the view used.<br />
Show Branch Connections: This box is checked by default. Uncheck it if you do not want branch<br />
connections to be visually represented on your map. See "Creating branch connections" for more<br />
information.<br />
Auto-Layout: By default, <strong>MindView</strong> automatically arranges the main branches as you insert them<br />
to prevent any overlap. You can however choose to reposition the main branches yourself after<br />
their insertion by unchecking this box to disable the auto-layout mode. See "Moving a branch" for<br />
more information.<br />
View properties: Branch Data tab<br />
The Branch Data tab of the View properties dialog allows you to define the default properties of the<br />
branch data shown on the branches of your map.<br />
The branch data is the block of data that may be displayed below particular branch labels on your<br />
map (containing for instance start and end dates related to a timeline).<br />
200
These properties behave in the same way as the properties of the branch itself. For more<br />
information, see "Branch properties: General tab" and "Branch properties: Text tab".<br />
Root<br />
Root properties: General tab<br />
201<br />
Reference<br />
When you select the main root or any other root contained on your map, the following properties<br />
are shown in the Properties dialog.<br />
Text: This property shows the label of the currently selected root. You can edit it or enter a new<br />
label by typing in the input field. If you have split a long label on several lines by pressing Ctrl +<br />
Enter at the end of each line when creating the branch (rather than let the label wrap<br />
automatically), this field will not be editable and will only contain the first line of the label.<br />
Fill Type: Choose the fill type required for the space enclosed by the root outline.<br />
Fill Color 1: Click the small rectangle to choose a new fill color.<br />
Fill Color 2: This property only appears if you have chosen a gradient fill type. It lets you choose<br />
the end color for the gradient.<br />
Fill Mode: This property only appears if you have chosen a gradient fill type. It lets you choose the<br />
direction of the gradient.<br />
Outline Color: Click the small rectangle to choose a new outline color.<br />
Outline Width: This value defines the width of the outline.<br />
Root properties: Text tab<br />
The Text tab of the Root properties dialog allows you to define all the properties related to the root<br />
label.
<strong>MindView</strong> Documentation<br />
Font Name: Click this field to choose a new font for the label.<br />
Font Size: Use this field to specify the font size.<br />
Bold/Italic/Underline/Strikethrough: Check the relevant box to enable the corresponding effect.<br />
Text Highlight Color: Click the small rectangle to choose a new color for the label background.<br />
Text Color: Click the small rectangle to choose a new color for the label.<br />
Alignment: This property lets you right-align, left-align or center the label within the root shape.<br />
Root properties: Picture tab<br />
The Properties dialog of the root only contains a Picture tab if you have inserted a branch picture<br />
on the root. The Picture tab allows you to define the properties related to the branch picture.<br />
Picture Name: By default, this field shows the name of the picture file. You can however replace it<br />
with a name of your choice.<br />
If you export your document to HTML, this picture name will also be inserted in the Alt meta-tag<br />
for the picture in the .html file. When viewing the HTML page in the browser and moving the<br />
mouse pointer over the picture, you will therefore see the name of the picture appear in a small<br />
frame under the picture.<br />
Similarly, if you export your document to Mediator, the picture name will be inserted in the<br />
Notes tab of the Properties dialog of the picture in Mediator.<br />
Path: This shows the path of the picture. Enter a new folder and/or file name or click the Browse<br />
button to choose a different picture.<br />
Width: This field shows the current width of the picture. You can resize the picture by entering a<br />
different value.<br />
Height: This field shows the current height of the picture. You can resize the picture by entering a<br />
different value.<br />
Aspect Ratio: This box is checked by default. Uncheck it if you do not want to preserve the<br />
proportions of the picture (in other words, the ratio between its width and its height) when resizing<br />
it.<br />
To reset the picture to its initial size, uncheck the box and check it again.<br />
202
203<br />
Reference<br />
Opacity: By default, this field has the value 100, which means that the picture is 100% visible. You<br />
can give it a transparency effect by entering a lower value, thereby decreasing its opacity. The<br />
value 1 means that the picture is completely transparent.<br />
Include in Export: This box is checked by default. Uncheck it if you intend to export your map to<br />
another format (HTML, Mediator, Word and so on) but do not want the branch picture to be<br />
exported.<br />
Branch<br />
Branch properties: General tab<br />
When you select a branch or sub-branch on your map, the following properties are shown in the<br />
Properties dialog.<br />
Text: This property shows the label of the currently selected branch. You can edit it or enter a new<br />
label by typing in the input field. If you have split a long label on several lines by pressing Ctrl +<br />
Enter at the end of each line when creating the branch (rather than let the label wrap<br />
automatically), this field will not be editable and will only contain the first line of the label.<br />
Fill Type: Choose the fill type required for the space enclosed by the branch outline.<br />
Fill Color 1: Click the small rectangle to choose a new fill color.<br />
Fill Color 2: This property only appears if you have chosen a gradient fill type. It lets you choose<br />
the end color for the gradient.<br />
Fill Mode: This property only appears if you have chosen a gradient fill type. It lets you choose the<br />
direction of the gradient.<br />
Outline Color: Click the small rectangle to choose a new outline color.<br />
Outline Width: This value defines the width of the outline.<br />
Bar Hidden: (Timeline view only) Check this option to hide the bar representing the event from the<br />
timeline.<br />
Line Color: Click the small rectangle to choose new color for the line connecting the branch to its<br />
parent branch.<br />
Line Width: Enter a value between 1 and 5 to specify the width of the line connecting the branch<br />
to its parent branch.
<strong>MindView</strong> Documentation<br />
Boundary: Check this box to show a boundary around the branch and all its sub-branches.<br />
The next fields only appear if you have checked the Boundary property.<br />
Boundary Fill Type: Choose the fill type required for the space enclosed by the boundary.<br />
Boundary Fill Color 1: Click the small rectangle to choose a new fill color.<br />
Boundary Fill Color 2: This property only appears if you have chosen a gradient fill type. It lets<br />
you choose the end color for the gradient.<br />
Boundary Fill Mode: This property only appears if you have chosen a gradient fill type. It lets you<br />
choose the direction of the gradient.<br />
Boundary Outline Color: Click the small rectangle to choose a new color for the boundary outline.<br />
Boundary Outline Width: Enter a value between 1 and 5 to define the width of the boundary.<br />
Boundary Outline Roundness: Enter a value between 1 and 50 to define how rounded the<br />
corners of the boundary should be.<br />
Boundary Outline Dash Style: Click the down arrow to choose a style for the boundary.<br />
Include in Export: This box is checked by default. Uncheck it if you intend to export your map to<br />
another format (HTML, Mediator, Word and so on) but do not want the branch and all its subbranches<br />
to be exported.<br />
Branch properties: Text tab<br />
The Text tab of the Branch properties dialog allows you to define all the properties related to the<br />
branch label.<br />
This tab is identical to the Text tab of the root. See "Root properties: Text tab" for more information.<br />
Branch properties: Picture tab<br />
The Properties dialog of a particular branch only contains a Picture tab if a branch picture has been<br />
inserted on the branch. The Picture tab allows you to define the properties related to the branch<br />
picture.<br />
This tab is identical to the Picture tab of the root. See "Root properties: Picture tab" for more<br />
information.<br />
204
Branch Data<br />
Branch data properties: General tab<br />
205<br />
Reference<br />
When you select the timeline information displayed below a particular branch label on your map,<br />
the following properties are shown in the Properties dialog.<br />
These properties behave in the same way as the properties of the branch itself. For more<br />
information, see "Branch properties: General tab" and "Branch properties: Text tab".<br />
Text note<br />
Text note properties: General tab<br />
When you select a text note in the Object list of a branch, the following properties are shown in the<br />
Properties dialog.<br />
Name: This shows the default name of the text note. You can edit it or enter a different name to<br />
help you identify the text note.<br />
Include in Export: This box is checked by default. Uncheck it if you intend to export your map to<br />
another format (HTML, Mediator, Word and so on) but do not want the text note to be exported.<br />
Floating comment<br />
Floating comment properties: General tab<br />
When you select a floating comment on the workspace, the following Properties dialog is shown.
<strong>MindView</strong> Documentation<br />
Text: This shows the contents of the comment. You can edit it by typing in this field.<br />
Fill Type: Choose the fill type required for the space enclosed by the comment outline.<br />
Fill Color 1: Click the small rectangle to choose a new fill color.<br />
Fill Color 2: This property only appears if you have chosen a gradient fill type. It lets you choose<br />
the end color for the gradient.<br />
Fill Mode: This property only appears if you have chosen a gradient fill type. It lets you choose the<br />
direction of the gradient.<br />
Outline Color: Click the small rectangle to choose a new color for the frame surrounding the<br />
comment.<br />
Outline Width: Edit this field to increase or decrease the width of the frame surrounding the<br />
comment.<br />
The next three properties only appear if the floating comment is connected to a branch.<br />
Line Color: Click the small rectangle to choose a new color for the line connecting the comment to<br />
the branch.<br />
Line Width: Edit this field to increase or decrease the width of the line connecting the comment to<br />
the branch.<br />
Include in Export: This box is checked by default. Uncheck it if you intend to export your map to<br />
another format (HTML, Mediator, Word and so on) but do not want the floating comment to be<br />
exported.<br />
Floating comment properties: Text tab<br />
The Text tab of the Floating comment properties dialog allows you to define all the properties<br />
related to the comment text.<br />
206
Font Name: Click this field to choose a new font for the comment.<br />
Font Size: Use this field to specify the font size.<br />
207<br />
Reference<br />
Bold/Italic/Underline/Strikethrough: Check the relevant box to enable the corresponding effect.<br />
Text Highlight Color: Click the small rectangle to choose a new color for the comment<br />
background.<br />
Text Color: Click the small rectangle to choose a new color for the comment text.<br />
Text Wrap Width: This defines the length of text that can be typed before wrapping onto the next<br />
line.<br />
Alignment: This property lets you right-align, left-align or center the text of the floating comment<br />
within its frame.<br />
Floating picture<br />
Floating picture properties: General tab<br />
When you select a floating picture on the workspace, the following properties are shown in the<br />
Properties dialog, provided that the floating picture is connected to a branch. If the floating picture<br />
is not connected to any branch, the Properties dialog only shows the Picture tab.<br />
Line Color: Click the small rectangle to choose a new color for the line connecting the floating<br />
picture to the branch.<br />
Line Width: Edit this field to increase or decrease the width of the line connecting the floating<br />
picture to the branch.<br />
Include in Export: This box is checked by default. Uncheck it if you intend to export your map to<br />
another format (HTML, Mediator, Word and so on) but do not want the floating picture to be<br />
exported.<br />
Floating picture properties: Picture tab<br />
Clicking the Picture tab of the Floating picture properties dialog shows the following dialog.<br />
This tab is identical to the Picture tab of the root. See "Root properties: Picture tab" for more<br />
information.<br />
Attachment<br />
Attachment properties: General tab<br />
When you select an attachment in the Object list of a branch, the following properties are shown in<br />
the Properties dialog.
<strong>MindView</strong> Documentation<br />
Name: By default, this field shows the name of the attached file. You can however replace it with a<br />
name of your choice to help you identify the attachment.<br />
If the attachment is a picture file, the name is also used as descriptive label when exporting to<br />
HTML or Mediator:<br />
If you export your document to HTML, this picture name will also be inserted in the Alt meta-tag<br />
for the picture in the .html file. When viewing the HTML page in the browser and moving the<br />
mouse pointer over the picture, you will therefore see the name of the picture appear in a small<br />
frame under the picture.<br />
If you export your document to Mediator, the picture name will be inserted in the Notes tab of<br />
the Properties dialog of the picture in Mediator.<br />
Path: This shows the path of the attached file. Enter a new folder and/or file name or click the<br />
Browse button to choose a different file.<br />
Export As: By default, the attachment is exported in the format you define during the export<br />
procedure for all attachments of this type. This property however gives you the option to export the<br />
selected attachment in a different format. If for instance you choose during the HTML export<br />
procedure to export all text attachments as buttons, you can override this choice for the selected<br />
attachment, and choose instead to export it as a hyperlink.<br />
Include in Export: This box is checked by default. Uncheck it if you intend to export your map to<br />
another format (HTML, Mediator, Word and so on) but do not want the attached file to be exported.<br />
Hyperlink<br />
Hyperlink properties: General tab<br />
When you select a hyperlink in the Object list of a branch, the following properties are shown in the<br />
Properties dialog.<br />
Text: By default, this field shows the name of the hyperlink. If you export your map, it is the text<br />
that will make up the hyperlink. You can replace it with any other text as required.<br />
URL: This shows the URL of the hyperlink. You can edit this field as required or enter a new URL.<br />
Export As: By default, hyperlinks are usually exported as hyperlinks. This property gives you the<br />
option to override this default export format for the selected hyperlink, and export it instead as a<br />
button.<br />
Include in Export: This box is checked by default. Uncheck it if you intend to export your map to<br />
another format (HTML, Mediator, Word and so on) but do not want the hyperlink to be exported.<br />
Branch connection<br />
Branch connection properties: General tab<br />
When you select a branch connection in the Object list of a branch, the following properties are<br />
shown in the Properties dialog.<br />
208
209<br />
Reference<br />
Name: This shows the name given to the branch connection, which by default is the name of the<br />
end branch.<br />
Line Color: This defines the color of the branch connection. Click the small rectangle to choose a<br />
new color.<br />
Line Width: Edit this field to increase or decrease the width of the branch connection.<br />
Active Color: This defines the color of the branch connection when hovered.<br />
Dash Style: This field lets you choose between various line styles.<br />
Include in Export: This box is checked by default. Uncheck it if you intend to export your map to<br />
another format (HTML, Mediator, Word and so on) but do not want the branch connection to be<br />
exported.
Keyboard shortcuts<br />
The table below lists all the keyboard shortcuts provided by <strong>MindView</strong>.<br />
Description<br />
Keyboard shortcut<br />
Enter Add a new branch at the same level as the selected branch<br />
Insert Add a new sub-branch to the selected branch<br />
Shift + Enter Add a new branch just before the selected branch<br />
Delete Delete the selected branch or element<br />
Ctrl + Shift + Delete Delete the selected branch without deleting its sub-branches. The<br />
sub-branches become attached to the parent of the deleted branch.<br />
Up Select the branch placed above the currently selected branch<br />
Down Select the branch placed below the currently selected branch<br />
Left Select the branch to the left of the currently selected branch in the<br />
map<br />
Right Select the branch to the right of the currently selected branch in the<br />
map<br />
F1 Help<br />
F2 Edit the name of the selected branch or the selected floating<br />
comment<br />
F3 Toggle Focus Mode on and off<br />
F4 Resize the map so that it fits entirely in the workspace<br />
F5 Read out aloud the selected branch, comment or text note<br />
F6 Apply branch focus to restrict the display to the selected branch<br />
Ctrl + Shift + F6 Remove branch focus to display the entire map again<br />
F7 Spellcheck the document<br />
Ctrl + F7 Spellcheck the selected element<br />
F8 Toggle between selected branch and Text Note editor<br />
Ctrl + F8 Create a new text note<br />
F9 Toggle Full Screen Mode on and off<br />
F11 Insert or edit a pop-up comment on the selected branch<br />
F12 Specify a start time for the selected branch<br />
Ctrl + F12 Specify an end time for the selected branch<br />
Ctrl + A Select all branches<br />
Ctrl + F Find and replace text in document<br />
Ctrl + N Create a new document<br />
Ctrl + O Open and browse for an existing document<br />
Ctrl + P Print the active document<br />
Ctrl + S Save the active document<br />
Ctrl + Z Undo the last action<br />
Ctrl + Y Reverse the last Undo<br />
211
<strong>MindView</strong> Documentation<br />
Ctrl + C Copy the selected data to the clipboard<br />
Ctrl + X Cut the selected data to the clipboard<br />
Ctrl + V Paste the data contained in the clipboard to the selected destination<br />
Ctrl + Shift + C Copy the formatting from one element to another with the Format<br />
Painter<br />
Ctrl + F6<br />
Ctrl + Tab<br />
Go from one open document to the next<br />
Ctrl + F8 Open the Text Note editor to create a new text note<br />
Ctrl + Up Move the selected branch up (Mind Map, Left/Right and Outline<br />
views only)<br />
Ctrl + Down Move the selected branch down (Mind Map, Left/Right and Outline<br />
views only)<br />
Ctrl + Left Move the selected branch left (Top Down view only)<br />
Collapses the selected branch (Outline view only)<br />
Ctrl + Right Move the selected branch right (Top Down view only)<br />
Expands the selected branch (Outline view only)<br />
Ctrl + Home Go to the first cell of the Outline (Outline view, Timeline view)<br />
Ctrl + End Go to the last cell of the Outline (Outline view, Timeline view)<br />
Ctrl + "+"<br />
Alt + mouse wheel<br />
Shift + mouse wheel<br />
Zoom in<br />
Ctrl + "-"<br />
Alt + mouse wheel<br />
Shift + mouse wheel<br />
Zoom out<br />
Ctrl + mouse wheel Scroll the workspace horizontally<br />
Shift + drag Navigate the mind map by panning the view within the workspace<br />
Ctrl + 1 Show only the main branches<br />
Ctrl + 2, 3, 4 Show only two, three or four levels of branches<br />
Ctrl + 5 Show all levels of branches<br />
Ctrl + Shift + "+" Expands the selected branch<br />
Ctrl + Shift + "-" Collapses the selected branch<br />
Ctrl + Shift + 1 Display the document in Mind Map view<br />
Ctrl + Shift + 2 Display the document in Top Down view<br />
Ctrl + Shift + 3 Display the document in Left/Right view<br />
Ctrl + Shift + 4 Display the document in Timeline view<br />
Ctrl + Shift + 5 Display the document in Outline view<br />
Alt + Shift + Right Indent the selected branch (Outline view)<br />
Alt + Shift + Left Outdent the selected branch (Outline view)<br />
212
Index<br />
.mvdx ............................................................. 33<br />
.mvtx .............................................................. 33<br />
Accelerators ................................................ 211<br />
Access keys .................................................. 23<br />
Activating ....................................................... 72<br />
a branch connection .................................. 77<br />
a hyperlink ................................................. 75<br />
an object .................................................... 72<br />
Additional folders .......................... 93, 130, 144<br />
Alt picture tag ..................... 140, 202, 204, 207<br />
Animation (effect) .......................................... 28<br />
Antialiasing .................................................... 28<br />
APA Word template ..................................... 131<br />
Arranging ..................................................... 102<br />
branches .................................................... 68<br />
objects in the Object list ........................... 102<br />
Aspect ratio of a picture ............. 202, 204, 207<br />
Attaching objects ........................................... 72<br />
Attachment - see Object ................................ 72<br />
AutoCorrect list .................................... 124, 126<br />
Auto-layout of branches ........................ 68, 200<br />
Auto-recovery feature .............................. 28, 33<br />
Backup files ................................................... 33<br />
Bibliography .................................................. 79<br />
citations...................................................... 84<br />
creating ...................................................... 79<br />
exporting .................................................. 131<br />
sources ...................................................... 79<br />
Branch ........................................................... 36<br />
attaching objects ........................................ 72<br />
auto-layout ......................................... 68, 200<br />
branch picture ............................................ 54<br />
citation ....................................................... 84<br />
collapsing ................................................... 36<br />
copying ................................................ 36, 68<br />
creating ...................................................... 36<br />
cutting .................................................. 36, 68<br />
data .................................................... 65, 205<br />
deleting ...................................................... 36<br />
detaching ................................................... 88<br />
editing .................................................. 36, 65<br />
213<br />
expanding .................................................. 36<br />
finding text ................................................. 86<br />
focusing ............................................... 35, 70<br />
formatting ............................................ 39, 65<br />
inserting ..................................................... 36<br />
locking ..................................................... 106<br />
moving ....................................................... 68<br />
navigating .................................................. 36<br />
pasting ................................................. 36, 68<br />
properties ........ 100, 199, 200, 203, 204, 205<br />
replacing text ............................................. 86<br />
selecting several ........................................ 65<br />
shape ................................................... 39, 65<br />
showing/hiding ............................... 36, 70, 71<br />
spellchecking ........................................... 124<br />
word wrapping ......................................... 199<br />
Branch connection ........................................ 77<br />
activating ................................................... 77<br />
creating ...................................................... 77<br />
curve .......................................................... 77<br />
deleting ...................................................... 77<br />
properties ........................................ 100, 208<br />
showing/hiding ......................................... 200<br />
start and end branch ................................. 77<br />
Branch label .................................................. 36<br />
narrating .................................................... 36<br />
Branch picture ............................................... 54<br />
deleting ...................................................... 54<br />
detaching ................................................... 54<br />
dragging .................................................... 54<br />
inserting ..................................................... 54<br />
properties ................................ 100, 202, 204<br />
replacing .................................................... 54<br />
Bulleted lists .................................................. 45<br />
Buttons navigation .............................. 144, 168<br />
in HTML export ........................................ 144<br />
in Mediator export.................................... 168<br />
Changes ........................................................ 89<br />
Checking a mind map ................................... 92<br />
Citation .......................................................... 84<br />
adding ........................................................ 84
<strong>MindView</strong> Documentation<br />
deleting ...................................................... 84<br />
editing ........................................................ 84<br />
exporting .................................................. 131<br />
inserting ..................................................... 84<br />
sources ...................................................... 79<br />
Clipart ...................................................... 54, 94<br />
Collapsing...................................................... 36<br />
a branch ..................................................... 36<br />
a mind map .......................................... 36, 42<br />
Color dialog ................................................. 100<br />
Comment (floating) - see Floating comment . 50<br />
Comment (pop-up) - see Pop-up comment .. 50<br />
Compacting a mind map ............................... 39<br />
Compressing a mind map ............................. 93<br />
Conversion from older versions .................... 35<br />
Copying a branch .................................... 36, 68<br />
from an external application ...................... 36<br />
from <strong>MindView</strong> ..................................... 36, 68<br />
Creating ......................................................... 31<br />
a branch ..................................................... 36<br />
a branch connection .................................. 77<br />
a branch picture ......................................... 54<br />
a citation .................................................... 84<br />
a filter ......................................................... 71<br />
a floating comment .................................... 50<br />
a floating picture ........................................ 54<br />
a hyperlink ................................................. 75<br />
a legend ..................................................... 90<br />
a Mediator document ............................... 164<br />
a mind map .......................................... 31, 88<br />
a new root .................................................. 88<br />
a <strong>PDF</strong> document ...................................... 163<br />
a pop-up comment ..................................... 50<br />
a PowerPoint presentation ...................... 135<br />
a RTF document ...................................... 180<br />
a source ..................................................... 79<br />
a text note .................................................. 45<br />
a timeline ........................................... 59, 113<br />
a web site ................................................ 140<br />
a Word document .................................... 131<br />
an attachment ............................................ 72<br />
an outline ................................................. 119<br />
Custom dictionaries ............................. 124, 126<br />
Custom icons - see Icons .............................. 53<br />
Custom Style Designer ................................. 39<br />
214<br />
Customizing .................................................. 23<br />
map styles ................................................. 39<br />
your preferences ....................................... 28<br />
your workspace ......................................... 23<br />
Cutting a branch ............................................ 68<br />
Daily timescale .............................................. 59<br />
Data files ....................................................... 92<br />
Dates ..................................................... 59, 113<br />
in a timeline ....................................... 59, 113<br />
Deleting ......................................................... 36<br />
a branch .................................................... 36<br />
a branch connection .................................. 77<br />
a branch picture ......................................... 54<br />
a branch section ........................................ 36<br />
a citation .................................................... 84<br />
a filter ......................................................... 71<br />
a floating comment .................................... 50<br />
a floating picture ........................................ 54<br />
a hyperlink ................................................. 75<br />
a pop-up comment .................................... 50<br />
a source ..................................................... 79<br />
a template .................................................. 33<br />
a text note .................................................. 45<br />
an attachment ............................................ 72<br />
an icon ....................................................... 53<br />
Designing a mind map .................................. 39<br />
Desktop search ............................................. 86<br />
Detaching .......................................... 50, 54, 88<br />
a branch .................................................... 88<br />
a branch picture ......................................... 54<br />
a floating comment .................................... 50<br />
a floating picture ........................................ 54<br />
Dictionaries ................................................. 124<br />
AutoCorrect list ................................ 124, 126<br />
custom ............................................. 124, 126<br />
language .................................................. 124<br />
standard .................................................. 124<br />
Distributing a mind map ................................ 93<br />
Docking panels ....................................... 23, 28<br />
Document - see Mind map ............................ 31<br />
Document properties..................... 28, 199, 200<br />
Dragging a picture ......................................... 54<br />
Duration ................................................ 59, 113<br />
of an event ......................................... 59, 113<br />
Duration bars .............................................. 113
in the Timeline view ................................. 113<br />
Editing ........................................................... 36<br />
a branch ............................................... 36, 65<br />
a citation .................................................... 84<br />
a floating comment .................................... 50<br />
a hyperlink ................................................. 75<br />
a pop-up comment ..................................... 50<br />
a root .................................................... 36, 65<br />
a source ..................................................... 79<br />
a text note .................................................. 45<br />
End times definitions ............................. 59, 113<br />
Expanding ..................................................... 36<br />
a branch ..................................................... 36<br />
a mind map .......................................... 36, 42<br />
Exporting ..................................................... 130<br />
as picture ................................................. 183<br />
Export Wizard ......................... 130, 144, 168<br />
FTP Upload Manager .............................. 160<br />
overview .................................................. 130<br />
packing ...................................................... 93<br />
Quick Export ........................... 130, 142, 165<br />
to HTML .................................. 140, 142, 144<br />
to <strong>MatchWare</strong> Mediator .......... 164, 165, 168<br />
to Microsoft PowerPoint ........................... 135<br />
to Microsoft Word .................................... 131<br />
to <strong>PDF</strong>...................................................... 163<br />
to RTF ...................................................... 180<br />
FAQ Knowledge Base ................................... 13<br />
Filter .............................................................. 71<br />
applying ..................................................... 71<br />
clearing ...................................................... 71<br />
defining ...................................................... 71<br />
deleting ...................................................... 71<br />
Filtering a mind map ................................ 35, 71<br />
Finding and replacing text ............................. 86<br />
in branch names ........................................ 86<br />
in floating comments .................................. 86<br />
in object names ......................................... 86<br />
in pop-up comments .................................. 86<br />
in text notes ............................................... 86<br />
Floating comment .......................................... 50<br />
creating ...................................................... 50<br />
deleting ...................................................... 50<br />
detaching ................................................... 50<br />
editing ........................................................ 50<br />
215<br />
Shortcuts<br />
finding text ................................................. 86<br />
formatting .................................................. 50<br />
inserting ..................................................... 50<br />
narrating .............................................. 42, 50<br />
properties ................................ 100, 205, 206<br />
replacing text ............................................. 86<br />
spellchecking ........................................... 124<br />
Floating picture ............................................. 54<br />
deleting ...................................................... 54<br />
detaching ................................................... 54<br />
dragging .................................................... 54<br />
inserting ..................................................... 54<br />
properties ........................................ 100, 207<br />
replacing .................................................... 54<br />
Focus mode .................................................. 42<br />
Focusing on a branch ............................. 35, 70<br />
Folder structure ............................. 93, 130, 144<br />
Format Painter .............................................. 65<br />
Formatting ..................................................... 65<br />
a branch .................................................... 65<br />
a comment ................................................. 50<br />
a root or branch label ................................ 65<br />
a text note .................................................. 45<br />
FreeMind ..................................................... 193<br />
FTP Upload Manager ................................. 160<br />
Full Screen mode .......................................... 44<br />
Geological timescale ..................................... 59<br />
Gestures ..................................................... 194<br />
Help ............................................................... 13<br />
Hiding/Showing - see Showing/Hiding .......... 36<br />
Historic timescale .......................................... 59<br />
HTML .......................................................... 140<br />
exporting .................................. 140, 142, 144<br />
Hyperlink ................................................. 45, 75<br />
activating ................................................... 75<br />
copying ...................................................... 75<br />
creating ...................................................... 75<br />
deleting ...................................................... 75<br />
editing ........................................................ 75<br />
in text notes ............................................... 45<br />
moving ....................................................... 75<br />
properties ........................................ 100, 208<br />
Icons ............................................................. 53<br />
deleting ...................................................... 53<br />
inserting ..................................................... 53
<strong>MindView</strong> Documentation<br />
replacing .................................................... 53<br />
img folder..................................................... 140<br />
Importing ..................................................... 185<br />
from FreeMind ................................... 35, 193<br />
from <strong>MatchWare</strong> Mediator ....................... 191<br />
from Microsoft PowerPoint ...................... 187<br />
from Microsoft Word ................................ 185<br />
from MindManager ............................ 35, 193<br />
overview .................................................. 185<br />
Include in export .......................................... 130<br />
Ink data ........................................................ 194<br />
Inserting ......................................................... 36<br />
attachments ............................................... 72<br />
branch connections ................................... 77<br />
branch pictures .......................................... 54<br />
branches .................................................... 36<br />
citations...................................................... 84<br />
floating comments ..................................... 50<br />
floating pictures ......................................... 54<br />
hyperlinks .................................................. 75<br />
icons .......................................................... 53<br />
main branches ........................................... 36<br />
pop-up comments ...................................... 50<br />
pre-branches ............................................. 36<br />
sounds ....................................................... 74<br />
sub-branches ............................................. 36<br />
text notes ................................................... 45<br />
timeline information ........................... 59, 113<br />
Installation ..................................................... 11<br />
Interactive whiteboard ................................. 194<br />
Keyboard shortcuts ..................................... 211<br />
Language .................................................... 124<br />
changing the dictionary ............................ 124<br />
Layouts .......................................................... 39<br />
Learning Management System - see LMS .. 144<br />
Left/Right view ............................................. 111<br />
Legend .......................................................... 90<br />
Level List navigation ............................ 144, 168<br />
in HTML export ........................................ 144<br />
in Mediator export .................................... 168<br />
LMS system ................................................ 144<br />
Locking ........................................................ 106<br />
a branch ................................................... 106<br />
a document .............................................. 106<br />
Main branch - see Branch ............................. 36<br />
216<br />
Map - see Mind map ..................................... 31<br />
Map navigation .............................................. 42<br />
<strong>MatchWare</strong> Mediator ........................... 164, 191<br />
exporting .................................. 164, 165, 168<br />
importing .................................................. 191<br />
<strong>MatchWare</strong> Shared Workspace .................. 103<br />
access rights ................................... 104, 106<br />
accessing ................................................ 103<br />
account .................................................... 104<br />
branch locking ......................................... 106<br />
closing documents................................... 104<br />
collaborating ............................................ 106<br />
connecting ............................................... 104<br />
document locking .................................... 106<br />
managing ................................................. 103<br />
opening documents ................................. 104<br />
owner ....................................................... 104<br />
saving documents ................................... 104<br />
shared documents ................................... 104<br />
shared folders .......................................... 104<br />
Mediator - see <strong>MatchWare</strong> Mediator .. 164, 191<br />
Merging mind maps ...................................... 93<br />
Microsoft PowerPoint .......................... 135, 187<br />
exporting .................................................. 135<br />
importing .................................................. 187<br />
Microsoft SharePoint................................... 103<br />
Microsoft Word .................................... 131, 185<br />
APA template .......................................... 131<br />
bibliography ............................................... 79<br />
citations ............................................... 79, 84<br />
exporting .................................................. 131<br />
importing .................................................. 185<br />
MLA template .......................................... 131<br />
sources ...................................................... 79<br />
Mind map ...................................................... 31<br />
bibliography ............................................... 79<br />
citations ..................................................... 84<br />
collapsing ............................................ 36, 42<br />
compacting ................................................ 39<br />
compressing .............................................. 93<br />
converting .................................................. 35<br />
creating ...................................................... 31<br />
data files .................................................... 92<br />
designing ................................................... 39<br />
distributing ........................................... 93, 94
expanding ............................................ 36, 42<br />
exporting .................................................. 130<br />
filtering ........................................... 35, 42, 71<br />
focusing ............................................... 42, 70<br />
importing .................................................. 185<br />
layouts ....................................................... 39<br />
legend ........................................................ 90<br />
locking...................................................... 106<br />
merging ...................................................... 93<br />
navigating .................................................. 42<br />
numbering scheme .................................... 42<br />
online ....................................................... 103<br />
opening ...................................................... 35<br />
owner ....................................................... 104<br />
packing ...................................................... 93<br />
presenting ............................................ 42, 90<br />
printing ....................................................... 62<br />
properties .......................... 39, 100, 199, 200<br />
root ............................................................. 36<br />
saving ........................................................ 33<br />
scrolling...................................................... 42<br />
sending ...................................................... 94<br />
sharing ..................................................... 106<br />
showing timeline info ................................. 59<br />
sources ...................................................... 79<br />
spellchecking ........................................... 124<br />
statistics ..................................................... 42<br />
styles .......................................................... 39<br />
tracking changes ....................................... 89<br />
unpacking .................................................. 93<br />
viewing ....................................................... 42<br />
zooming ..................................................... 44<br />
Mind Map view ............................................ 110<br />
MindManager ................................................ 35<br />
importing a .mmap file ............................. 193<br />
opening a .mmap file ................................. 35<br />
MLA Word template .................................... 131<br />
mmap MindManager file ........................ 35, 193<br />
Moving a branch ............................................ 68<br />
auto-layout ......................................... 68, 200<br />
Multimedia Catalog ................................. 54, 94<br />
adding elements ........................................ 94<br />
browsing .................................................... 94<br />
connecting a category ............................... 94<br />
keywords ................................................... 94<br />
217<br />
Shortcuts<br />
overview .................................................... 94<br />
resetting ............................................... 28, 94<br />
searching ................................................... 94<br />
mvfiles folder ............................................... 140<br />
MVHtmlExport folder ................................... 140<br />
MVPPImport folder ...................................... 187<br />
Narrating ................................................. 36, 42<br />
Navigating a mind map ................................. 42<br />
expanding/collapsing ................................. 42<br />
filtering ................................................. 42, 71<br />
focusing ............................................... 42, 70<br />
panning ...................................................... 42<br />
scrolling ..................................................... 42<br />
zooming ............................................... 42, 44<br />
Navigation pins ............................................. 42<br />
Note - see Text note ..................................... 45<br />
Notes tab (Mediator Properties dialog) .............<br />
164, 191, 202, 204, 207<br />
Numbered lists .............................................. 45<br />
Numbering scheme ....................... 42, 119, 131<br />
Object ............................................................ 72<br />
activating ................................................... 72<br />
attaching .................................................... 72<br />
copying ...................................................... 72<br />
deleting ...................................................... 72<br />
moving ....................................................... 72<br />
properties ........................................ 100, 207<br />
Object list .................................................... 102<br />
using ........................................................ 102<br />
Object name ................................................ 207<br />
finding text ................................................. 86<br />
replacing text ............................................. 86<br />
spellchecking ........................................... 124<br />
Online workspace ....................................... 103<br />
accessing ................................................ 103<br />
closing documents................................... 104<br />
managing ................................................. 103<br />
opening documents ................................. 104<br />
saving documents ................................... 104<br />
Opacity of a picture ..................... 202, 204, 207<br />
Opening ........................................................ 35<br />
a Mediator file .......................................... 191<br />
a Microsoft PowerPoint file ...................... 187<br />
a Microsoft Word file ............................... 185<br />
a mind map ................................................ 35
<strong>MindView</strong> Documentation<br />
a MindManager file .................................... 35<br />
Other icons - see Icons ................................. 53<br />
Outline view ................................................. 119<br />
Overview panel ........................................... 101<br />
Packing a mind map ...................................... 93<br />
Page properties ............................ 39, 199, 200<br />
Panels ........................................................... 23<br />
Changes .................................................... 89<br />
docking/undocking ............................... 23, 28<br />
Legend ....................................................... 90<br />
Multimedia ................................................. 94<br />
Object List ................................................ 102<br />
Overview .................................................. 101<br />
Properties ................................................ 100<br />
resetting ............................................... 23, 28<br />
resizing ................................................ 23, 28<br />
showing/hiding ..................................... 23, 28<br />
Text Note editor ......................................... 45<br />
Time(line) Info panel .......................... 59, 113<br />
Timeline Outline ....................................... 113<br />
Panning a mind map ..................................... 42<br />
Pasting a branch ..................................... 36, 68<br />
into an external application ........................ 36<br />
into <strong>MindView</strong> ...................................... 36, 68<br />
<strong>PDF</strong> ............................................................. 163<br />
Pen input ..................................................... 194<br />
Pen Mode .................................................... 194<br />
Picture ........................................................... 54<br />
aspect ratio ............................. 202, 204, 207<br />
branch pictures ......................... 54, 202, 204<br />
dragging ..................................................... 54<br />
exporting .................................................. 183<br />
floating pictures ................................. 54, 207<br />
inserting ..................................................... 54<br />
moving ....................................................... 54<br />
Multimedia Catalog .................................... 94<br />
name ....................................... 202, 204, 207<br />
opacity .................................... 202, 204, 207<br />
picture objects ................................... 72, 207<br />
Pins ............................................................... 42<br />
Pop-up comment ........................................... 50<br />
creating ...................................................... 50<br />
deleting ...................................................... 50<br />
editing ........................................................ 50<br />
finding text ................................................. 86<br />
218<br />
inserting ..................................................... 50<br />
narrating .............................................. 42, 50<br />
replacing text ............................................. 86<br />
resizing ...................................................... 50<br />
spellchecking ........................................... 124<br />
PowerPoint - see Microsoft PowerPoint ...........<br />
135, 187<br />
Pre-branch - see Branch ............................... 36<br />
Preferences ................................................... 28<br />
Presenting a mind map ........................... 42, 90<br />
Preview ......................................................... 28<br />
Printing a mind map ...................................... 62<br />
Problems (reporting) ..................................... 13<br />
Properties ............................................ 100, 199<br />
attachment ............................................... 207<br />
branch ............................. 199, 200, 203, 204<br />
branch connection ................................... 208<br />
branch data ..................................... 200, 205<br />
branch picture .................................. 202, 204<br />
document ......................................... 199, 200<br />
floating comment ............................. 205, 206<br />
floating picture ......................................... 207<br />
hyperlink .................................................. 208<br />
mind map ......................................... 199, 200<br />
object ....................................................... 207<br />
page ........................................................ 199<br />
root .................................................. 201, 202<br />
text note ................................................... 205<br />
view ................................................. 199, 200<br />
workspace ....................................... 199, 200<br />
Properties dialog ......................................... 100<br />
Quick Access Toolbar ................................... 23<br />
customizing ......................................... 23, 28<br />
resetting ..................................................... 23<br />
Quick Start .................................................... 14<br />
Quotation - see Citation ................................ 84<br />
Recognizer .................................................. 194<br />
Replacing ................................................ 53, 54<br />
a branch picture ......................................... 54<br />
a floating picture ........................................ 54<br />
an icon ....................................................... 53<br />
Replacing text ............................................... 86<br />
in branch names ........................................ 86<br />
in floating comments ................................. 86<br />
in object names ......................................... 86
in pop-up comments .................................. 86<br />
in text notes ............................................... 86<br />
Reporting a problem ...................................... 13<br />
Resetting ................................................. 23, 28<br />
the Multimedia Catalog ........................ 28, 94<br />
the workspace ..................................... 23, 28<br />
Restoring - see Resetting ........................ 23, 28<br />
Root ......................................................... 31, 36<br />
creating ................................................ 31, 88<br />
editing .................................................. 36, 65<br />
formatting ............................................. 39, 65<br />
properties ......................................... 201, 202<br />
shape ................................................... 39, 65<br />
RTF ............................................................. 180<br />
Saving a mind map ....................................... 33<br />
SCORM package ........................................ 144<br />
Scrolling a mind map ..................................... 42<br />
Searching and replacing text ........................ 86<br />
in branch names ........................................ 86<br />
in floating comments .................................. 86<br />
in object names ......................................... 86<br />
in pop-up comments .................................. 86<br />
in text notes ............................................... 86<br />
Searching the desktop .................................. 86<br />
Selecting several branches ........................... 65<br />
Sending a mind map ..................................... 94<br />
Serial number ................................................ 28<br />
Service Packs ............................................... 13<br />
Setting up ...................................................... 23<br />
your preferences ........................................ 28<br />
your workspace ......................................... 23<br />
Shared workspace - see <strong>MatchWare</strong> Shared<br />
Workspace ............................................... 103<br />
SharePoint .................................................. 103<br />
Sharing documents - see Microsoft Shared<br />
Workspace ............................................... 103<br />
Shortcut keys ........................................ 23, 211<br />
Showing/Hiding ............................................. 36<br />
branch connections ................................. 200<br />
branches ........................................ 36, 70, 71<br />
panels ........................................................ 23<br />
text notes ................................................. 119<br />
timeline information ........................... 59, 113<br />
Simplified interface ........................................ 28<br />
SMART board ............................................. 194<br />
219<br />
Shortcuts<br />
Sound ............................................................ 74<br />
copying ...................................................... 74<br />
deleting ...................................................... 74<br />
inserting ..................................................... 74<br />
moving ....................................................... 74<br />
playing ....................................................... 74<br />
properties .................................. 74, 100, 207<br />
Sources ......................................................... 79<br />
adding ........................................................ 79<br />
deleting ...................................................... 79<br />
editing ........................................................ 79<br />
exporting .................................................. 131<br />
Spellchecker ....................................... 124, 126<br />
options ..................................................... 126<br />
usage ....................................................... 124<br />
Spellchecking .............................................. 124<br />
branch names .......................................... 124<br />
entire mind map ....................................... 124<br />
floating comments ................................... 124<br />
object names ........................................... 124<br />
pop-up comments.................................... 124<br />
text notes ................................................. 124<br />
Standard timescale ....................................... 59<br />
Statistics ........................................................ 42<br />
Styles ............................................................ 39<br />
Sub-branch - see Branch .............................. 36<br />
Subject of the mind map ............................... 36<br />
Support ......................................................... 13<br />
Tables ........................................................... 45<br />
Tablet PC .................................................... 194<br />
Templates ..................................................... 31<br />
academic use ............................................ 31<br />
business use ............................................. 31<br />
customized ................................................ 33<br />
export .............................. 131, 135, 144, 168<br />
personal use .............................................. 31<br />
saving ........................................................ 33<br />
using .......................................................... 31<br />
Terminology .................................................... 9<br />
Text ............................................................... 86<br />
finding ........................................................ 86<br />
replacing .................................................... 86<br />
Text note ....................................................... 45<br />
citations ..................................................... 84<br />
creating ...................................................... 45
<strong>MindView</strong> Documentation<br />
default font ................................................. 28<br />
deleting ...................................................... 45<br />
editing ........................................................ 45<br />
finding text ................................................. 86<br />
inserting ..................................................... 45<br />
narrating .............................................. 42, 45<br />
properties ................................................. 205<br />
quotations .................................................. 84<br />
replacing text ............................................. 86<br />
spellchecking ........................................... 124<br />
Text Note editor ............................................. 45<br />
using .......................................................... 45<br />
Time breaks ................................................ 113<br />
Time(line) panel .................................... 59, 113<br />
using .................................................. 59, 113<br />
Timeline ................................................. 59, 113<br />
compressing ............................................ 113<br />
creating .................................................... 113<br />
dates .................................................. 59, 199<br />
designing ................................................. 113<br />
duration bars .................................... 113, 199<br />
expanding ................................................ 113<br />
exporting to HTML ........................... 113, 144<br />
filtering ..................................................... 113<br />
focusing ................................................... 113<br />
inserting time breaks ....................... 113, 199<br />
numbering scheme .................................. 113<br />
printing ..................................................... 113<br />
timescale ................................................... 59<br />
title ................................................... 113, 199<br />
viewing ..................................................... 113<br />
zooming ................................................... 113<br />
Timeline data ......................................... 59, 113<br />
entering .............................................. 59, 113<br />
formatting ................................................... 59<br />
showing/hiding ........................................... 59<br />
Timeline Outline panel ................................ 113<br />
using ........................................................ 113<br />
220<br />
Timeline view ........................................ 59, 113<br />
Timescales - Timelines ................................. 59<br />
Daily .......................................................... 59<br />
Geological ................................................. 59<br />
Historic ...................................................... 59<br />
Standard .................................................... 59<br />
Weekly ....................................................... 59<br />
Top Down view ........................................... 110<br />
Touch screen .............................................. 194<br />
Tracking changes .......................................... 89<br />
Tree List navigation ..................................... 144<br />
in HTML export ........................................ 144<br />
Troubleshooting ...................................... 13, 28<br />
Undo feature ................................................. 28<br />
Undocking panels ......................................... 23<br />
Unpacking a mind map ................................. 93<br />
Updates (program) ........................................ 28<br />
View ...................................................... 39, 109<br />
designing ................................................... 39<br />
properties .................................. 39, 199, 200<br />
Viewing area ......................................... 42, 101<br />
Views .......................................................... 109<br />
Left/Right view ......................................... 111<br />
Mind Map view ........................................ 110<br />
Outline view ............................................. 119<br />
Timeline view ........................................... 113<br />
Top Down view ........................................ 110<br />
Web site ...................................................... 140<br />
Weekly timescale .......................................... 59<br />
Welcome dialog ...................................... 28, 31<br />
Whiteboard .................................................. 194<br />
Word - see Microsoft Word ................. 131, 185<br />
Word wrapping ............................................ 199<br />
Workspace .................................................... 23<br />
properties .................................. 39, 199, 200<br />
setting up ................................................... 23<br />
WorldCat ....................................................... 79<br />
Zooming in and out ....................................... 44