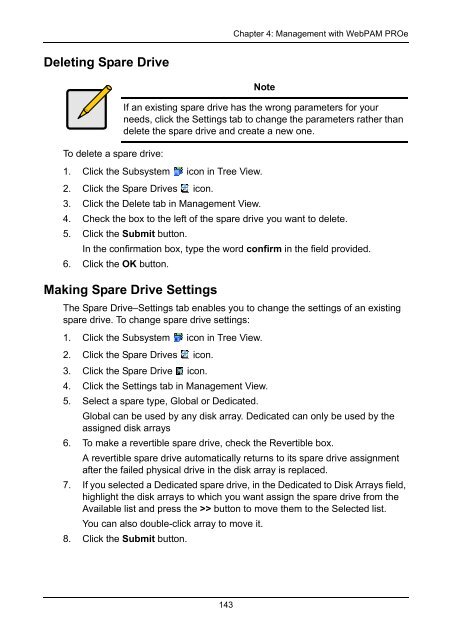
- Page 1 and 2:
VTRAK E-Class E610f, E610s, E310f,
- Page 3 and 4:
Contents Chapter 1: Introduction to
- Page 5 and 6:
v Contents Chapter 4: Management wi
- Page 7 and 8:
vii Contents Chapter 4: Management
- Page 9 and 10:
ix Contents Chapter 5: Management w
- Page 11 and 12:
xi Contents Chapter 5: Management w
- Page 13 and 14:
xiii Contents Chapter 7: Technology
- Page 15 and 16:
Chapter 1: Introduction to VTrak Th
- Page 17 and 18:
Figure 3. VTrak E610f rear view RAI
- Page 19 and 20:
5 Chapter 1: Introduction to VTrak
- Page 21 and 22:
LUN Masking and Mapping: Supports m
- Page 23 and 24:
9 Chapter 1: Introduction to VTrak
- Page 25 and 26:
Chapter 2: VTrak Installation This
- Page 27 and 28:
13 Chapter 2: VTrak Installation 4.
- Page 29 and 30:
15 Chapter 2: VTrak Installation Th
- Page 31 and 32:
Installing Disk Drives 17 Chapter 2
- Page 33 and 34:
Figure 8. Disk drive mounting holes
- Page 35 and 36:
21 Chapter 2: VTrak Installation Ma
- Page 37 and 38:
23 Chapter 2: VTrak Installation Fi
- Page 39 and 40:
Figure 15.JBOD expansion with no si
- Page 41 and 42:
Configuring Direct Attached Storage
- Page 43 and 44:
29 Chapter 2: VTrak Installation Fi
- Page 45 and 46:
Figure 21. JBOD expansion with no s
- Page 47 and 48:
Connecting the Power 33 Chapter 2:
- Page 49 and 50:
Chapter 3: VTrak Setup This chapter
- Page 51 and 52:
Setting up VTrak with the CLI 37 Ch
- Page 53 and 54:
Setting up VTrak with the CLU 1. At
- Page 55 and 56:
41 Chapter 3: Setup Making Manual S
- Page 57 and 58:
3. When the log-in screen (Figure 2
- Page 59 and 60:
Automatic 45 Chapter 3: Setup When
- Page 61 and 62:
Advanced 47 Note Chapter 3: Setup F
- Page 63 and 64:
Using WebPAM PROe over the Internet
- Page 65 and 66:
Chapter 4: Management with WebPAM P
- Page 67 and 68:
Figure 1. The WebPAM PROe log-in sc
- Page 69 and 70:
Perusing the Interface 55 Chapter 4
- Page 71 and 72:
Using Tree View 57 Chapter 4: Manag
- Page 73 and 74:
Logging out of WebPAM PROe There ar
- Page 75 and 76:
Working with Subsystems 61 Chapter
- Page 77 and 78:
63 Chapter 4: Management with WebPA
- Page 79 and 80:
Viewing NVRAM Events 65 Chapter 4:
- Page 81 and 82:
67 Chapter 4: Management with WebPA
- Page 83 and 84:
Scheduling an Activity 69 Chapter 4
- Page 85 and 86:
71 Chapter 4: Management with WebPA
- Page 87 and 88:
73 Chapter 4: Management with WebPA
- Page 89 and 90:
9. Click the Submit button. Creatin
- Page 91 and 92:
Managing the Network Connection 77
- Page 93 and 94:
Managing Fibre Channel Connections
- Page 95 and 96:
Port Setting Information 81 Chapter
- Page 97 and 98:
83 Chapter 4: Management with WebPA
- Page 99 and 100:
85 Chapter 4: Management with WebPA
- Page 101 and 102:
Managing Storage Services 87 Chapte
- Page 103 and 104:
89 Chapter 4: Management with WebPA
- Page 105 and 106: 91 Chapter 4: Management with WebPA
- Page 107 and 108: Making Telnet Settings 93 Chapter 4
- Page 109 and 110: Changing the Startup Setting 95 Cha
- Page 111 and 112: Deleting Netsend Recipients 97 Chap
- Page 113 and 114: Importing a User Database 99 Chapte
- Page 115 and 116: Restoring Factory Defaults 101 Chap
- Page 117 and 118: Shutting Down the Subsystem 103 Cha
- Page 119 and 120: Managing Controllers 105 Chapter 4:
- Page 121 and 122: Upgradable items You can upgrade th
- Page 123 and 124: 109 Chapter 4: Management with WebP
- Page 125 and 126: Figure 11. VTrak E610f and E610s fr
- Page 127 and 128: • Enclosure Warning Temperature T
- Page 129 and 130: 115 Chapter 4: Management with WebP
- Page 131 and 132: 117 Chapter 4: Management with WebP
- Page 133 and 134: Clearing Stale and PFA Conditions 1
- Page 135 and 136: Managing Disk Arrays Disk Array Man
- Page 137 and 138: 123 Chapter 4: Management with WebP
- Page 139 and 140: 125 Chapter 4: Management with WebP
- Page 141 and 142: • Media Patrol - Enabled or disab
- Page 143 and 144: Deleting a Logical Drive To delete
- Page 145 and 146: 131 Chapter 4: Management with WebP
- Page 147 and 148: To prepare a disk array for transpo
- Page 149 and 150: 135 Chapter 4: Management with WebP
- Page 151 and 152: 11. Click the Submit button. Initia
- Page 153 and 154: 139 Chapter 4: Management with WebP
- Page 155: Managing Spare Drives 141 Chapter 4
- Page 159 and 160: 145 Chapter 4: Management with WebP
- Page 161 and 162: Chapter 5: Management with the CLU
- Page 163 and 164: Figure 4. The CLU main menu 149 Cha
- Page 165 and 166: Running Quick Setup 151 Chapter 5:
- Page 167 and 168: 153 Chapter 5: Management with the
- Page 169 and 170: Managing the Controllers Controller
- Page 171 and 172: Locating the Controller 157 Chapter
- Page 173 and 174: Locating a Power Supply 159 Chapter
- Page 175 and 176: 161 Chapter 5: Management with the
- Page 177 and 178: Setting an Alias 163 Chapter 5: Man
- Page 179 and 180: Managing Disk Arrays Disk Array Man
- Page 181 and 182: Creating a Disk Array - Express 167
- Page 183 and 184: 169 Chapter 5: Management with the
- Page 185 and 186: 171 Chapter 5: Management with the
- Page 187 and 188: 173 Chapter 5: Management with the
- Page 189 and 190: 175 Chapter 5: Management with the
- Page 191 and 192: 177 Chapter 5: Management with the
- Page 193 and 194: Managing the Network Connection 179
- Page 195 and 196: Managing Fibre Channel Connections
- Page 197 and 198: 183 Chapter 5: Management with the
- Page 199 and 200: Viewing SAS Port Statistics 185 Cha
- Page 201 and 202: 187 Chapter 5: Management with the
- Page 203 and 204: 189 Chapter 5: Management with the
- Page 205 and 206: 191 Chapter 5: Management with the
- Page 207 and 208:
Working with LUN Mapping LUN Mappin
- Page 209 and 210:
4. The mark is an asterisk (*) to t
- Page 211 and 212:
List of User Privileges 197 Chapter
- Page 213 and 214:
Working with Software Management So
- Page 215 and 216:
Making Telnet Settings 201 Chapter
- Page 217 and 218:
Making CIM Settings 203 Chapter 5:
- Page 219 and 220:
205 Chapter 5: Management with the
- Page 221 and 222:
Clearing Statistics 207 Chapter 5:
- Page 223 and 224:
Shutting Down the Subsystem 209 Cha
- Page 225 and 226:
Restarting the Subsystem 211 Chapte
- Page 227 and 228:
Chapter 6: Maintenance This chapter
- Page 229 and 230:
215 Chapter 6: Maintenance 8. When
- Page 231 and 232:
217 Chapter 6: Maintenance 1. From
- Page 233 and 234:
Figure 2. Replacing an E310f/s powe
- Page 235 and 236:
221 Chapter 6: Maintenance Figure 7
- Page 237 and 238:
223 Chapter 6: Maintenance Figure 1
- Page 239 and 240:
225 Chapter 6: Maintenance Figure 1
- Page 241 and 242:
Figure 19. Removing the battery ass
- Page 243 and 244:
Single Controller Subsystem Removin
- Page 245 and 246:
Chapter 7: Technology Background Th
- Page 247 and 248:
RAID 1 - Mirror 233 Chapter 7: Tech
- Page 249 and 250:
RAID 5 - Block and Parity Stripe 23
- Page 251 and 252:
RAID 10 - Mirror + Stripe 237 Chapt
- Page 253 and 254:
239 Chapter 7: Technology Backgroun
- Page 255 and 256:
RAID 60 Array No. of Drives No. of
- Page 257 and 258:
RAID 1E Recommended Applications fo
- Page 259 and 260:
Choosing Stripe Size 245 Chapter 7:
- Page 261 and 262:
Read Cache Policy 247 Chapter 7: Te
- Page 263 and 264:
249 Chapter 7: Technology Backgroun
- Page 265 and 266:
251 Chapter 7: Technology Backgroun
- Page 267 and 268:
253 Chapter 7: Technology Backgroun
- Page 269 and 270:
255 Chapter 7: Technology Backgroun
- Page 271 and 272:
Transition 257 Chapter 7: Technolog
- Page 273 and 274:
Automatic Transition 259 Chapter 7:
- Page 275 and 276:
Chapter 8: Troubleshooting This cha
- Page 277 and 278:
LEDs Display Amber or Red Front Pan
- Page 279 and 280:
LEDs Power/ Activity Status Dark No
- Page 281 and 282:
Figure 6. Battery and Fan LEDs (lef
- Page 283 and 284:
CLU Reports a Problem 269 Chapter 8
- Page 285 and 286:
WebPAM PROe Reports a Problem 271 C
- Page 287 and 288:
Also see these troubleshooting topi
- Page 289 and 290:
275 Chapter 8: Troubleshooting Repo
- Page 291 and 292:
Reported Event Corrective Action Di
- Page 293 and 294:
Reported Event Corrective Action Ho
- Page 295 and 296:
Reported Event Corrective Action On
- Page 297 and 298:
Reported Event Corrective Action PS
- Page 299 and 300:
Reported Event Corrective Action Re
- Page 301 and 302:
Reported Event Corrective Action St
- Page 303 and 304:
Critical & Offline Disk Arrays 289
- Page 305 and 306:
Figure 13.Drive carrier LEDs 291 Ch
- Page 307 and 308:
Physical Drive Problems Physical Dr
- Page 309 and 310:
Enclosure Problems 295 Chapter 8: T
- Page 311 and 312:
Power Supplies Battery 297 Chapter
- Page 313 and 314:
Connection Problems 299 Chapter 8:
- Page 315 and 316:
301 Chapter 8: Troubleshooting Brow
- Page 317 and 318:
Chapter 9: Support This chapter cov
- Page 319 and 320:
How can I be sure everything is wor
- Page 321 and 322:
Taiwan E-mail Support e-Support On-
- Page 323 and 324:
309 Chapter 9: Support No other doc
- Page 325 and 326:
Appendix A: Useful Information The
- Page 327 and 328:
Installing a Second Cache Battery 3
- Page 329 and 330:
Index Numerics 10GB Truncate 108, 1
- Page 331 and 332:
delete disk array 125, 169 initiato
- Page 333 and 334:
information, cont. physical drive 1
- Page 335 and 336:
offline, cont. physical drive 119,
- Page 337 and 338:
eported events, cont. logical drive
- Page 339 and 340:
system reported event 287 T Table R


