

Final Fairing & Finishing - WEST SYSTEM Epoxy
Final Fairing & Finishing - WEST SYSTEM Epoxy
Final Fairing & Finishing - WEST SYSTEM Epoxy

Create successful ePaper yourself
Turn your PDF publications into a flip-book with our unique Google optimized e-Paper software.
<strong>Finishing</strong> 14<br />
<strong>SYSTEM</strong> epoxy compromises its strength and moisture resistance, and is not recommended.<br />
Additives or pigments should not be added to the first coat.<br />
Disposable, thin urethane foam rollers, such as <strong>WEST</strong> <strong>SYSTEM</strong> 800 Roller Covers, are<br />
essential for applying epoxy. They allow you greater control over film thickness, leave<br />
less stipple than thicker nap-type roller covers, and the epoxy does not build up and<br />
cure as quickly on the cover. When used with an 801 Roller Frame, the covers may be<br />
cut into narrower widths to reach difficult areas or for coating long narrow surfaces<br />
like stringers.<br />
Complete all fairing and cloth application before beginning the final coating. Allow<br />
the temperature of porous surfaces to stabilize before coating. Otherwise, as the material<br />
warms up, air within the porous material may expand and pass from the material<br />
through the coating (out-gassing) and leave bubbles in the cured coating. For most situations<br />
that will be coated with an opaque finish, 105 Resin with 205 or 206 Hardener<br />
are recommended. When extra working time is needed in warmer temperatures, use<br />
105 Resin with 209 Extra Slow Hardener. For clear finishes over wood, use 207<br />
Special Coating Hardener<br />
While coating, remember that the thinner the film thickness, the easier it is to control<br />
the evenness of the film and avoid runs or sags in each coat. Thin coats also reduce the<br />
risk of trapped air bubbles in the coating. Fewer thick coats may take less time to apply,<br />
but will require more sanding and possibly more time overall.<br />
Apply an epoxy barrier coat as follows:<br />
1. Prepare the surface as necessary. After local fairing, the surface should be immediately<br />
ready for bonding. To avoid the possibility of surface contamination, begin the coating<br />
operation within 24 hours of final sanding.<br />
2. Mix only as much resin/hardener as you can apply during the open time of the mixture.<br />
Pour the mixture into a roller pan as soon as it is mixed thoroughly.<br />
3. Load the roller with a moderate amount of the epoxy mixture. Roll the excess out on<br />
the ramp part of the roller pan to get a uniform coating on the roller.<br />
4. Transfer the epoxy evenly to a small area. Roll lightly and randomly over an area approximately<br />
2' × 2' (Figure 18).<br />
5. Work the epoxy from thicker areas into thinner areas to spread it into a thin even film.<br />
Increase pressure slightly as the roller dries out. Expand the coverage area if necessary<br />
to thin out the film. Avoid working air into the coating by rolling too vigorously.<br />
6. Finish the area with long, light, even strokes to reduce roller marks. Overlap the previously<br />
coated area to blend both areas together.<br />
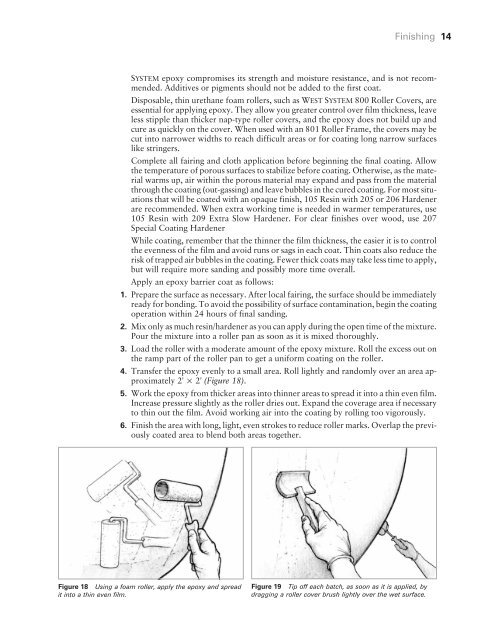
Figure 18 Using a foam roller, apply the epoxy and spread<br />
it into a thin even film.<br />
Figure 19 Tip off each batch, as soon as it is applied, by<br />
dragging a roller cover brush lightly over the wet surface.


