

Final Fairing & Finishing - WEST SYSTEM Epoxy
Final Fairing & Finishing - WEST SYSTEM Epoxy
Final Fairing & Finishing - WEST SYSTEM Epoxy

You also want an ePaper? Increase the reach of your titles
YUMPU automatically turns print PDFs into web optimized ePapers that Google loves.
A long flexible sanding block, or fairing board, is the primary tool for overall fairing on<br />
wood and fairing compound. See Appendix A, page 23 for information on making fairing<br />
boards. The key word is long, especially at early stages. Working on the same principle as<br />
the batten, the sanding board should bend to the overall shape of the surface, but be long<br />
enough and stiff enough to bridge the low areas and knock down the high spots over a<br />
large area. A short sanding block and most power tools at this stage will simply follow<br />
the contours and remove material from the low areas as well as the high areas.<br />
We prefer aluminum oxide sandpaper as it seems to cut a wide range of materials, including<br />
cured epoxy/fairing material, better than other types of sandpaper. Zirconia<br />
alumina also cuts well and it wears longer. Stick sandpaper to boards and blocks with a<br />
feathering disc adhesive, or use adhesive backed sandpaper. Either will permit removal<br />
of the paper when replacement is needed. See Appendix A, page 22 for more information<br />
about abrasives.<br />
Begin your final fairing with 50 or 60-grit paper, concentrating on taking down the<br />
high spots over a broad area. Change sanding direction frequently and check your<br />
progress from time to time by eye or feel, or with a batten.<br />
When you are getting close to final fairness, switch to 80-grit paper. If you will be clear<br />
coating wood, begin to sand only in the direction of the grain to remove and avoid<br />
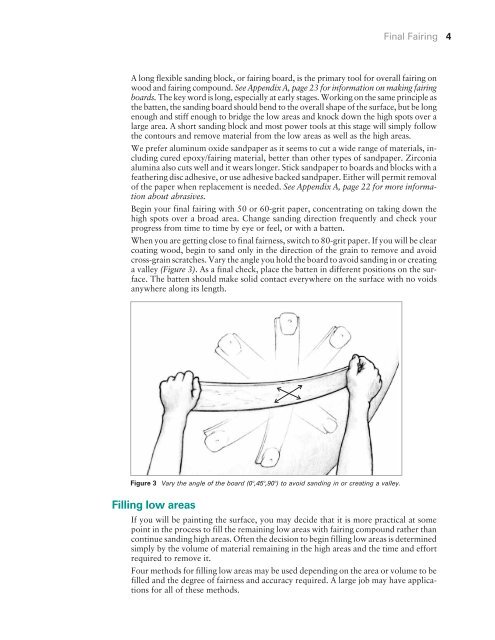
cross-grain scratches. Vary the angle you hold the board to avoid sanding in or creating<br />
a valley (Figure 3). As a final check, place the batten in different positions on the surface.<br />
The batten should make solid contact everywhere on the surface with no voids<br />
anywhere along its length.<br />
Figure 3 Vary the angle of the board (0°,45°,90°) to avoid sanding in or creating a valley.<br />
Filling low areas<br />
<strong>Final</strong> <strong>Fairing</strong> 4<br />
If you will be painting the surface, you may decide that it is more practical at some<br />
point in the process to fill the remaining low areas with fairing compound rather than<br />
continue sanding high areas. Often the decision to begin filling low areas is determined<br />
simply by the volume of material remaining in the high areas and the time and effort<br />
required to remove it.<br />
Four methods for filling low areas may be used depending on the area or volume to be<br />
filled and the degree of fairness and accuracy required. A large job may have applications<br />
for all of these methods.


