


You also want an ePaper? Increase the reach of your titles
YUMPU automatically turns print PDFs into web optimized ePapers that Google loves.
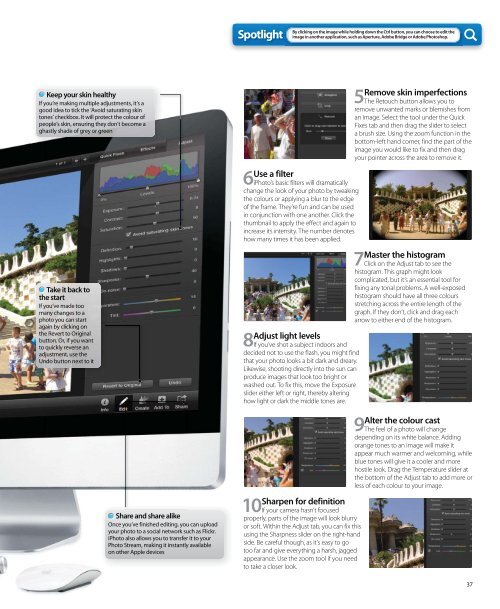
Keep your skin healthy<br />
If you’re making multiple adjustments, it’s a<br />
good idea to tick the ‘Avoid saturating skin<br />
tones’ checkbox. It will protect the colour of<br />
people’s skin, ensuring they don’t become a<br />
ghastly shade of grey or green<br />
Take it back to<br />
the start<br />
If you’ve made too<br />
many changes to a<br />
photo you can start<br />
again by clicking on<br />
the Revert to Original<br />
button. Or, if you want<br />
to quickly reverse an<br />
adjustment, use the<br />
Undo button next to it<br />
Share and share alike<br />
Once you’ve finished editing, you can upload<br />
your photo to a social network such as Flickr.<br />
iPhoto also allows you to transfer it to your<br />
Photo Stream, making it instantly available<br />
on other Apple devices<br />
Spotlight<br />
By clicking on the image while holding down the Ctrl button, you can choose to edit the<br />
image in another application, such as Aperture, Adobe Bridge or Adobe Photoshop.<br />
Use a filter 6 iPhoto’s basic filters will dramatically<br />
change the look of your photo by tweaking<br />
the colours or applying a blur to the edge<br />
of the frame. They’re fun and can be used<br />
in conjunction with one another. Click the<br />
thumbnail to apply the effect and again to<br />
increase its intensity. The number denotes<br />
how many times it has been applied.<br />
Adjust light levels 8 If you’ve shot a subject indoors and<br />
decided not to use the flash, you might find<br />
that your photo looks a bit dark and dreary.<br />
Likewise, shooting directly into the sun can<br />
produce images that look too bright or<br />
washed out. To fix this, move the Exposure<br />
slider either left or right, thereby altering<br />
how light or dark the middle tones are.<br />
Remove skin imperfections<br />
5 The Retouch button allows you to<br />
remove unwanted marks or blemishes from<br />
an image. Select the tool under the Quick<br />
Fixes tab and then drag the slider to select<br />
a brush size. Using the zoom function in the<br />
bottom-left hand corner, find the part of the<br />
image you would like to fix and then drag<br />
your pointer across the area to remove it.<br />
Master the histogram<br />
7 Click on the Adjust tab to see the<br />
histogram. This graph might look<br />
complicated, but it’s an essential tool for<br />
fixing any tonal problems. A well-exposed<br />
histogram should have all three colours<br />
stretching across the entire length of the<br />
graph. If they don’t, click and drag each<br />
arrow to either end of the histogram.<br />
Alter the colour cast 9 The feel of a photo will change<br />
depending on its white balance. Adding<br />
orange tones to an image will make it<br />
appear much warmer and welcoming, while<br />
blue tones will give it a cooler and more<br />
hostile look. Drag the Temperature slider at<br />
the bottom of the Adjust tab to add more or<br />
less of each colour to your image.<br />
Sharpen for definition<br />
10 If your camera hasn’t focused<br />
properly, parts of the image will look blurry<br />
or soft. Within the Adjust tab, you can fix this<br />
using the Sharpness slider on the right-hand<br />
side. Be careful though, as it’s easy to go<br />
too far and give everything a harsh, jagged<br />
appearance. Use the zoom tool if you need<br />
to take a closer look.<br />
37