

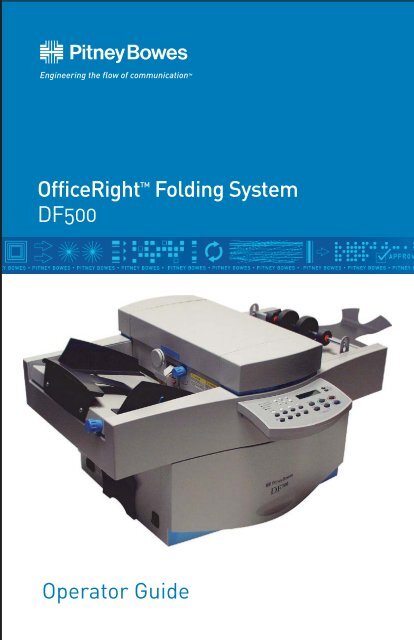
DF500 Folder Operator Guide - Pitney Bowes Canada
DF500 Folder Operator Guide - Pitney Bowes Canada
DF500 Folder Operator Guide - Pitney Bowes Canada

Create successful ePaper yourself
Turn your PDF publications into a flip-book with our unique Google optimized e-Paper software.
PB Form SV40124 First Edition, July 2003 © 2003 <strong>Pitney</strong> <strong>Bowes</strong><br />
Inc. All rights reserved. This book may not be reproduced in<br />
whole or in part in any fashion or stored in a retrieval system of<br />
any type or transmitted by any means, electronically or mechanically,<br />
without the express written permission of <strong>Pitney</strong> <strong>Bowes</strong> Inc.<br />
We have made every reasonable effort to assure the accuracy and<br />
usefulness of this manual, however, we cannot assume responsibility<br />
for errors or omissions or liability for the misuse or misapplication<br />
of our products.<br />
OfficeRight is a registered trademark and PB Supply Line is a<br />
service mark of <strong>Pitney</strong> <strong>Bowes</strong> Inc.<br />
FCC Compliance<br />
This equipment had been tested and found to comply with the<br />
limits for a Class A digital device, pursuant to Part 15 of the FCC<br />
rules. These limits are designed to provide reasonable protection<br />
against interference when the equipment is operated in a commercial<br />
environment. This equipment generates, uses, and can<br />
radiate radio frequency energy, and if not installed and used in<br />
accordance with the users manuals, may cause harmful interference<br />
to radio communications. Operation of this equipment in a<br />
residential area is likely to cause harmful interference in which<br />
case the user will be required to correct the interference at his<br />
own expense.<br />
Shielded cables must be used with this unit to insure compliance<br />
with Class A limits.<br />
Canadian DOC Compliance<br />
This digital apparatus does not exceed in the Class A limits for<br />
radio noise emissions from digital apparatus set out in the Interference-causing<br />
Equipment Regulations (Standard ICES-003) of<br />
the Canadian Department of Communications.<br />
NOTE: This equipment has been tested and found to comply<br />
with the U.S. Standard for Safety UL60950, Third Edition, Safety<br />
of Information Technology Equipment including Electrical Business<br />
Equipment and Canadian Standards C22.2 No 950-95,<br />
Safety of Information Technology Equipment including Electrical<br />
Business Equipment.
<strong>DF500</strong> <strong>Folder</strong> <strong>Operator</strong> <strong>Guide</strong><br />
Table of Contents<br />
Section Page<br />
Safety.................................................................................................2<br />
Description .....................................................................................2<br />
Moving the <strong>DF500</strong> .......................................................................8<br />
Machine and Job Setup ..............................................................9<br />
Automatic Fold Setup................................................................12<br />
Operating The <strong>Folder</strong>................................................................ 13<br />
<strong>Folder</strong> Mechanics For Understanding Fold Problems .... 15<br />
Total and Batch Count..............................................................20<br />
Running a Job ..............................................................................23<br />
Saving, Retrieving, or Deleting Jobs.....................................24<br />
Manual Fold Setup......................................................................28<br />
Manual Feed ................................................................................30<br />
Operating Hints ..........................................................................32<br />
Troubleshooting..........................................................................36<br />
Maintenance................................................................................ 40<br />
Supplies......................................................................................... 40<br />
Form Handling.............................................................................41<br />
Equipment/Form Specifications............................................43<br />
SV40214 Rev. A<br />
1
<strong>DF500</strong> <strong>Folder</strong> <strong>Operator</strong> <strong>Guide</strong><br />
SAFETY<br />
A series of messages may be used throughout this manual to<br />
alert you to potentially hazardous con di tions. These messages<br />
are ex plained below:<br />
WARNING - indicates the presence of a hazard that<br />
can cause severe personal injury or loss of life,<br />
or substantial property damage if the warning is<br />
ignored.<br />
CAUTION - indicates the presence of a hazard that<br />
will or can cause minor personal injury or property<br />
damage if the warning is ignored.<br />
NOTE - calls attention to practices that could adversely<br />
affect equipment operation if instructions<br />
are not followed exactly.<br />
Always use safe operating procedures when running your folder.<br />
Ob serve the following practices:<br />
• Keep loose clothing, jewelry and long hair away from all moving<br />
parts.<br />
• Avoid touching moving parts or materials while the machine<br />
is in use. Before clearing a jam, unplug the machine. Be sure<br />
machine mechanisms have come to a stop.<br />
• To protect against electric shock, the machine should only<br />
be plugged into a properly grounded wall outlet.<br />
• The power cord wall plug is the primary means of disconnecting<br />
the folder from the AC supply.<br />
• The wall outlet should be near the machine and easily accessible.<br />
• DO NOT use an adapter plug on the line cord or wall outlet.<br />
• DO NOT remove the ground pin from the line cord.<br />
• Avoid using wall outlets that are controlled by wall switches.<br />
• DO NOT route the power cord over sharp edges or trapped<br />
be tween furniture.<br />
2 SV40214 Rev. A
<strong>DF500</strong> <strong>Folder</strong> <strong>Operator</strong> <strong>Guide</strong><br />
• Ensure there is no strain on the power cord where it becomes<br />
jammed between the equipment, walls or furniture.<br />
• Be certain the area in front of the wall receptacle into which<br />
the machine is plugged is free from obstruction.<br />
• DO NOT remove covers. This machine cabinet serves to enclose<br />
hazardous parts. If the machine has been dropped or<br />
has oth er wise been stressed in any way, report it to your <strong>Pitney</strong><br />
<strong>Bowes</strong> Cus tom er Service Representative.<br />
• To reduce the risk of fire and/or electrical shock, do not attempt<br />
to disassemble this machine. If service is required,<br />
contact your <strong>Pitney</strong> <strong>Bowes</strong> Customer Service Representative.<br />
• To prevent overheating, do not cover the vent openings.<br />
• All areas of the machine requiring disassembly or removal of<br />
covers should be accessed only by your <strong>Pitney</strong> <strong>Bowes</strong> Customer<br />
Service Representative.<br />
• Read all instructions before attempting to operate the equipment.<br />
• Use this equipment only for its intended purpose.<br />
In addition, follow any specific occupational safety and health<br />
stan dards for your workplace or area.<br />
SV40214 Rev. A<br />
3
<strong>DF500</strong> <strong>Folder</strong> <strong>Operator</strong> <strong>Guide</strong><br />
DESCRIPTION<br />
The Model <strong>DF500</strong> <strong>Folder</strong> is a stand-alone tabletop folder capable<br />
of processing up to 40,000 doc u ments per month. The machine<br />
folds single and multi-part cut-sheet forms and then feeds<br />
them folded onto the stacker. It is equipped with two fold plates<br />
which allow it to produce single or double folds.<br />
Two covers (one on top, one on the right side) can be opened to<br />
allow access to the fold rollers and fold plates for maintenance<br />
and clear ing of jams. When a cover is opened, the machine stops<br />
automatically and cannot be started accidentally.<br />
A control panel with an LCD display informs you of the status<br />
of the machine and of the jobs your are running. Up to ten jobs<br />
may be setup and saved for easy retrieval. In addition, system<br />
di ag nos tics are available con ve nient ly from the control panel.<br />
One feature of the <strong>DF500</strong> is the Auto-Set mode for producing<br />
com mon folds (see below). This mode allows the au to mat ic setting<br />
of dif fer ent pro grammed folds and the adjustment of the<br />
paper thick ness. The following standard folds can be called up<br />
via the Auto-Set mode:<br />
Single Fold Double Parallel Fold Letter Fold<br />
Gate Fold Z-Fold Z-Fold with Margin<br />
In addition, other types of folds can be produced by entering the<br />
mea sure ments manually as described later in this guide.<br />
NOTE: The <strong>DF500</strong> is built for folding paper and is unsuitable for<br />
han dling other materials such as foils, plastics and textiles.<br />
4 SV40214 Rev. A
4<br />
5<br />
6<br />
SV40214 Rev. A<br />
3<br />
<strong>DF500</strong> <strong>Folder</strong> <strong>Operator</strong> <strong>Guide</strong><br />
<strong>DF500</strong> Controls and Features<br />
2 1<br />
7 8<br />
1. Stacker Deck – holds the folded documents.<br />
2. Top Cover – allows access inside of folder for removing<br />
jams.<br />
3. Material Feed Deck – where paper is fed into the folder.<br />
4. Skew Adjustment Control – used to offset skewing when<br />
feeding ma te ri al.<br />
5. Fuses – disconnects power to the folder when there is an<br />
over load of power con sumed by the machine.<br />
6. AC Input for Power Cord – connects to AC line cord.<br />
7. Power Switch – turns on and off machine.<br />
8. <strong>Operator</strong> Side of Machine<br />
9. Right Hand Cover (on side) – allows access to fold plate.<br />
9<br />
5
<strong>DF500</strong> <strong>Folder</strong> <strong>Operator</strong> <strong>Guide</strong><br />
4<br />
5<br />
6<br />
More <strong>DF500</strong> Controls and Features<br />
8<br />
3 2<br />
1. Stacker Extension – allows more space for collected doc u -<br />
ments after folding.<br />
2. Stacker Rollers – helps guide material on to stacker belts.<br />
3. Stacker Belts – moves folded documents away from exit<br />
area.<br />
4. Input Feed Deck Extension <strong>Guide</strong>s – allows long sheets of<br />
material to be supported. Flip up to activate.<br />
5. Pre-feed Adjustment Knob – allows you to change the<br />
amount of feed pressure for feeding various types of material.<br />
6. Operating <strong>Guide</strong> Holder – holds this <strong>DF500</strong> Operating<br />
<strong>Guide</strong>.<br />
7. Control Panel – allows user to setup and operate the folder.<br />
8. Hand Wheel Knob (under cover) – allows for manual turning<br />
of fold rollers to aid in clearing jams.<br />
6 SV40214 Rev. A<br />
7<br />
1
1<br />
SV40214 Rev. A<br />
<strong>DF500</strong> <strong>Folder</strong> <strong>Operator</strong> <strong>Guide</strong><br />
<strong>DF500</strong> Control Panel Features<br />
2 3 4<br />
5 6<br />
1. Paper Size Indicators – shows the paper size in use.<br />
2. Standard Fold Type Indicators – shows the type of fold<br />
se lect ed.<br />
3. LCD Display – displays machine and job status to operator.<br />
4. Dual Function Buttons – used for setting paper thickness<br />
or manual feeding. Also used for scroll ing in certain setup<br />
menus.<br />
5. Setup Buttons – sets up the folder functions.<br />
6. Main Control Buttons – used to control main folder oper<br />
a tion.<br />
7
<strong>DF500</strong> <strong>Folder</strong> <strong>Operator</strong> <strong>Guide</strong><br />
MOVING THE <strong>DF500</strong><br />
1. If moving the <strong>DF500</strong>, make sure that it is unplugged and that<br />
it is placed on an ap pro pri ate work surface. There has to be<br />
a min i mum clear ance of 36" (914mm) on three sides of the<br />
machine for op er a tor access. Rec om mend ed table height is<br />
30" (762mm).<br />
2. Lift the <strong>DF500</strong> from under each end. Do not lift the unit using<br />
the paper support guides, control panel, or fold plate door.<br />
AC Input for<br />
Power Cord<br />
WARNING: To avoid personal injury or damage<br />
to the machine, two people should be used to<br />
lift the <strong>DF500</strong>.<br />
WARNING: To avoid personal injury or damage to<br />
the machine, make sure you lift the folder by the<br />
bottom of the chassis. Do not use the fold plate<br />
compartment door on the side as a handle, as it<br />
will open up and cause you to drop the machine.<br />
3. Install the line cord into the AC input on the side of the<br />
<strong>DF500</strong> (see below) and then plug it in to a grounded 115<br />
VAC outlet.<br />
Power Switch<br />
4. Turn the machine on and verify that the control panel displays<br />
the power-up screen (see below).<br />
JOB: 1 READY<br />
ØØØØØØ<br />
8 SV40214 Rev. A
MACHINE AND JOB SETUP<br />
SV40214 Rev. A<br />
<strong>DF500</strong> <strong>Folder</strong> <strong>Operator</strong> <strong>Guide</strong><br />
Feeder Setup<br />
Setting the Paper Thickness<br />
1. Turn the power switch to ON. The display will read:<br />
JOB: 1 READY<br />
ØØØØØØ<br />
2. Press the Paper Thickness key on the control panel. The<br />
display changes to:<br />
SET THICKNESS?<br />
YES: Enter NO: <br />
3. Press Enter. The sheet separator in the feeder will open and<br />
the display will prompt:<br />
INSERT ONE SHEET<br />
DONE - Enter<br />
4. Insert a sample sheet of the paper<br />
you want to fold into the feeder.<br />
Push in the pressure roll er and<br />
insert the pa per into the feeder<br />
(see be low) about 2" (50mm).<br />
5. Press the Enter key. The <strong>DF500</strong> will now automatically adjust<br />
itself to the thickness of the paper.<br />
6. If your fold is already setup, you may now press the Trial<br />
Piece key to fold this sample sheet. If you have not yet setup<br />
your fold, withdraw the sheet. You will feel a slight resistance.<br />
7. The display will again show:<br />
JOB: 1 READY<br />
ØØØØØ1<br />
9
<strong>DF500</strong> <strong>Folder</strong> <strong>Operator</strong> <strong>Guide</strong><br />
Setting the Paper <strong>Guide</strong>s<br />
1. Squeeze the blue lever against the right hand paper guide,<br />
and, using two hands,<br />
move the guides to the<br />
width of the paper.<br />
2. Allow about 1/32"<br />
(1mm) clear ance so that<br />
the paper is not held<br />
too tightly (see below).<br />
Do not allow too much<br />
clear ance as this will affect<br />
fold accuracy.<br />
Loading Paper<br />
When paper is loaded into the <strong>DF500</strong>, the top sheet of the paper<br />
stack is fed first. This means that the paper stack must be<br />
“fanned out” so that the top sheet is closest to the feed roller.<br />
1. Place a stack of paper onto the feed table. Firmly grasp the<br />
upper end of the stack with your left hand and bend the entire<br />
stack up and forward as shown.<br />
2. While still holding the stack with your left hand, press down<br />
on the lower end of the stack<br />
with your right hand. Now<br />
release the upper end of the<br />
stack and let it fall onto the<br />
feed table. The stack should<br />
appear slightly fanned out.<br />
3. Repeat this process several<br />
times and the stack will be<br />
fanned out properly. Allow<br />
the fanned stack to slide<br />
down into the mouth of the<br />
feeder as far as it will go<br />
without forcing it.<br />
10 SV40214 Rev. A
SV40214 Rev. A<br />
<strong>DF500</strong> <strong>Folder</strong> <strong>Operator</strong> <strong>Guide</strong><br />
Using the Table Extension<br />
1. Lift the table extension up to sup port longer paper like legal<br />
size.<br />
Setting the Pressure Roller<br />
The pressure roller knob allows you to set the pressure applied to<br />
the first set of feed rollers.<br />
• For 20 lb. bond paper,<br />
set the knob halfway<br />
between "+" and "–".<br />
• For heavier paper, or if<br />
you see the feed rollers<br />
slipping, move the knob<br />
towards "+".<br />
• For lighter paper, or<br />
if the paper tends to<br />
bunch up under the<br />
feed rollers, set the knob<br />
towards "–".<br />
11
<strong>DF500</strong> <strong>Folder</strong> <strong>Operator</strong> <strong>Guide</strong><br />
AUTOMATIC FOLD SETUP<br />
Selecting Paper Size<br />
1. Press the Paper key to select the desired paper size length.<br />
Each press of the key will step through the three standard<br />
paper sizes and “other” and will light the appropriate paper<br />
size indicator on the control panel.<br />
2. At the same time, the display will show the selected paper<br />
length in millimeters. For example:<br />
T1 PAPER = 297.Ø<br />
CHG: DONE: Enter<br />
3. If your paper isn’t a standard size, press the or key, to<br />
change the size. Each key press will change the paper size by<br />
about 1/64" (0.5mm). Holding the key down for more than<br />
one second will increase the step size, allowing large changes<br />
to be made rapidly.<br />
4. When the correct paper size is shown, proceed with “Selecting<br />
Fold Type” below. NOTE: The <strong>DF500</strong>’s electronic control<br />
system will not allow you to deviate too far from the standard<br />
settings. This will prevent jams caused by “impossible” folds.<br />
Selecting Fold Type<br />
Before selecting a fold, make sure you have already set the<br />
<strong>DF500</strong> to the correct paper size length. This will prevent the machine<br />
from setting up a fold for the wrong paper length, which<br />
could result in a paper jam.<br />
1. Press the Fold Type key to select one of the six pre-programmed<br />
fold types. Each key press will turn on the indicator<br />
associated with each fold type.<br />
2. When you have made your selection, press the Enter key. The<br />
display will show:<br />
TEMP JOB: 1 READY<br />
ØØØØØØ<br />
3. While the machine is setting up the fold, all keys on the control<br />
panel are disabled and will not respond if pressed.<br />
(continued on next page)<br />
12 SV40214 Rev. A
SV40214 Rev. A<br />
<strong>DF500</strong> <strong>Folder</strong> <strong>Operator</strong> <strong>Guide</strong><br />
Selecting Fold Type (continued)<br />
4. When the setup is complete, the display will change back to<br />
the “Ready” state.<br />
TEMP JOB: 1 READY<br />
ØØØØØØ<br />
NOTE: “TEMP JOB” or “T” in the display means that the job<br />
just setup is considered a temporary job because it has not<br />
yet been saved in memory.<br />
OPERATING THE FOLDER<br />
Setting the Speed<br />
Set the proper speed before attempting to run the folder. The<br />
speed setting depends on the weight and size of the paper used.<br />
Light weight and large size papers (lighter than 20 lb. bond and<br />
larger than 8-1/2" by 11") must be run slower than heavy paper<br />
and smaller sheets. A good value to start with is 35.<br />
1. Press the Speed key. The display will typically show:<br />
T1 SPEED = 40<br />
CHG: DONE: Enter<br />
2. To change the speed, press the or key, then press Enter.<br />
3. If you forgot to press Enter and try to start the folder, the<br />
display will show:<br />
USE NEW SETTING?<br />
YES: Enter No: <br />
This message will also appear if you have entered any other<br />
new parameter such as paper size, fold type, batch or fold<br />
plate setting.<br />
4. Press Enter now to activate your setting or the key to stay<br />
with your previous setting.<br />
(continued on next page)<br />
13
<strong>DF500</strong> <strong>Folder</strong> <strong>Operator</strong> <strong>Guide</strong><br />
Setting the Speed (continued)<br />
The speed can also be changed while the machine is running.<br />
1. Press the Speed key. The display will change to:<br />
SPEED 35<br />
ØØØØØØ<br />
2. Use the or keys to run slower or faster.<br />
3. The speed will change instantly. You need not press the Enter<br />
key to activate the new setting.<br />
Running a Trial Piece<br />
Always run a trial piece before starting a run. It is also a good<br />
idea to run a trial piece each time a new stack of paper has been<br />
loaded onto the feed table. This will prevent a jam if the stack<br />
has been loaded incorrectly.<br />
1. Press the Trial Piece key. A single sheet will be folded and<br />
de liv ered to the stacker for you to check.<br />
Startup<br />
1. If you are happy with the trial piece, press the Start key to<br />
begin the au to mat ic feeding and folding. The folded sheets<br />
will be delivered neatly shingled on the stacker table.<br />
2. Remove the folded sheets as soon as they start piling up in<br />
front of the stacker extension.<br />
3. When the entire paper stack has been fed the machine will<br />
stop and the display will show:<br />
– FAIL TO FEED –<br />
DONE - Enter<br />
4. Reload the feed table with a new stack of paper and press the<br />
Enter key to clear the message on the display.<br />
TEMP JOB: 1 READY<br />
ØØØØØØ<br />
5. When the display shows ‘Ready’, press the Start key to resume<br />
folding.<br />
14 SV40214 Rev. A
<strong>DF500</strong> <strong>Folder</strong> <strong>Operator</strong> <strong>Guide</strong><br />
Stop ping the <strong>DF500</strong><br />
1. To in ter rupt the folding process at any time, press the Stop<br />
key. This will stop the machine in a controlled manner.<br />
2. The sheets already in process will be folded and delivered before<br />
the machine stops. The stacker belts will move all folded<br />
sheets to the end of the stacker table for easy removal.<br />
SV40214 Rev. A<br />
CAUTION: Unless there is an emergency<br />
situation, do not stop the ma chine by turning<br />
power off by the main switch or wall socket.<br />
Doing this while the <strong>DF500</strong> is folding will<br />
result in a paper jam inside the machine.<br />
FOLDER MECHANICS FOR UNDERSTANDING FOLD<br />
PROBLEMS<br />
There can be many reasons for a fold to be slightly off–the paper<br />
composition, paper weight, size and direction of grain. Also, folding<br />
speed and ambient conditions like temperature and humidity<br />
can have an effect. Consequently, an understanding of what is<br />
hap pen ing in the folder can be helpful when correcting a fold<br />
problem.<br />
A. The top sheet of paper is fed into the folder and is driven by<br />
rollers (1) and (2) into fold plate 1.<br />
2 3<br />
1<br />
Stop<br />
Fold plate 1<br />
6<br />
4 5<br />
(continued on next page)<br />
Stop<br />
Fold plate 2<br />
15
<strong>DF500</strong> <strong>Folder</strong> <strong>Operator</strong> <strong>Guide</strong><br />
<strong>Folder</strong> Mechanics (continued)<br />
B. The paper con tin ues into the fold plate until it hits the stop.<br />
Since the two rollers are still driving the paper, a buckle will<br />
form at the en trance to the fold plate and will, eventually, be<br />
caught be tween fold rollers (2) and (3). This is how the first<br />
fold is made.<br />
4<br />
2 3<br />
1<br />
C. The folded edge will be guided by the deflector into the grip<br />
of rollers (3) and (4). Here the same thing happens as in the<br />
first fold plate and a second fold is made.<br />
NOTE: If a single fold is selected, the second fold plate is auto<br />
mat i cal ly closed off and the folded sheet is routed past it.<br />
2 3<br />
1<br />
6<br />
4 5<br />
D. The folded sheet is now guided by the second deflector into the<br />
grip of rollers (5) and (6) where it is fed out onto the stacker.<br />
It is obvious that the position of each fold plate stop determines<br />
the length of the fold resulting from it. Keeping this in mind, it<br />
is easy to make corrections to each fold by simply moving the<br />
relevant stop in or out. You only need to know which end of the<br />
sheet entered the machine first to recognize which was the first<br />
fold and which was the second.<br />
16 SV40214 Rev. A
SV40214 Rev. A<br />
<strong>DF500</strong> <strong>Folder</strong> <strong>Operator</strong> <strong>Guide</strong><br />
Fine Tuning the <strong>Folder</strong><br />
Fold corrections can be made with the machine stopped or running.<br />
Correcting a fold with the machine stopped…<br />
1. Select which fold you want to correct by pressing the Fold 1<br />
or Fold 2 key. (If a single fold is set, the Fold 2 key will not<br />
respond). The display shows, for example:<br />
T1 FOLD1 = 148.Ø<br />
CHG: DONE: Enter<br />
2. Change the value by pressing the or key, then press<br />
Enter to confirm the new setting. The fold is now set and the<br />
display shows:<br />
3. If you try to start the machine without pressing Enter, the<br />
display will prompt:<br />
The machine will not start until you press either Enter or key.<br />
Correcting a fold with the machine running…<br />
1. Select which fold you want to correct by pressing the Fold 1<br />
or Fold 2 key. (If a single fold is set, the Fold 2 key will not<br />
respond). The display shows, for example:<br />
FOLD 1 = 148.Ø<br />
ØØØØØ1<br />
TEMP JOB: 1 READY<br />
ØØØØØØ<br />
USE NEW SETTING?<br />
YES: Enter No: <br />
2. Change the value by pressing the or key. You can judge<br />
the result instantly by taking a folded sample from the stacker.<br />
NOTE: This procedure should only be used to correct small<br />
errors; oth er wise you will produce many reject sheets before<br />
you get the fold right.<br />
3. The correction display will remain until you either press<br />
Enter, Speed, or you stop the machine.<br />
or<br />
FOLD 2 = 74.Ø<br />
ØØØØØ1<br />
17
<strong>DF500</strong> <strong>Folder</strong> <strong>Operator</strong> <strong>Guide</strong><br />
Correcting a Skewed Fold<br />
A skewed fold will result if the paper has not been fed exactly at<br />
right angles with respect to the fold rollers. To correct a skew, the<br />
entire feed table can be moved left or right by turning the skew<br />
ad just ment knob. A pointer in the slot above the knob will show<br />
which way the deck is moving<br />
when turn ing the knob. As a general<br />
rule, the pointer should be<br />
in the center of the slot.<br />
NOTE: Before attempting to<br />
correct the skew, make sure the<br />
feeder side guides are adjusted<br />
as close to the paper as possible<br />
without binding.<br />
The steps below de scribe in detail how to correct a skewed fold.<br />
1. Remove the paper from the feed table.<br />
2. Turn the skew adjustment knob to center the pointer in its<br />
slot.<br />
3. Reload the paper making sure there isn’t too much clear ance<br />
between the stack and the side guides.<br />
4. Set the machine for a half (single) fold. This makes it easier<br />
to determine which way to turn the skew ad just ing knob.<br />
5. Run a trial piece.<br />
6. If the fold is skewed, compare your sample with the drawings<br />
below.<br />
If the sample looks like "A", turn the skew<br />
ad just ment knob counter-clockwise slightly.<br />
If the sample looks like "B", turn the skew<br />
ad just ment knob clock wise slightly.<br />
7. Remove and reload the paper stack. This is<br />
im por tant – if you do not reload the stack<br />
the adjustment you just made may not take ef fect immediately.<br />
8. Run another trial piece and readjust if necessary.<br />
18 SV40214 Rev. A
SV40214 Rev. A<br />
<strong>DF500</strong> <strong>Folder</strong> <strong>Operator</strong> <strong>Guide</strong><br />
Fine Tuning the Feeder for "Problem" Paper<br />
The fine tuning feature allows you to adjust the feeder gap (the<br />
opening through which the paper must pass) in small steps while<br />
the machine is running. This is helpful with some “problem”<br />
papers, such as lightweight recycling papers and heavy stock because<br />
the stan dard feeder settings tend to mark the coated surface<br />
of the paper.<br />
Observe the paper feed while folding. If the feeding is erratic<br />
(paper seems to hesitate before entering the folder) or if you get<br />
“FAIL TO FEED” messages, check first whether the pressure roller<br />
is exerting enough pressure on the paper (see page 11 for details).<br />
If more pressure does not help, you must open the feeder<br />
gap a little. If you tend to get double sheets being fed, you must<br />
close the gap slightly.<br />
The steps below de scribe in detail how to fine tune paper feeding.<br />
1. With the machine running, press the or key. The display<br />
will change to:<br />
TUNE THICKNESS<br />
ØØØØØ1<br />
2. Press the key to open the gap, or the key to close the<br />
gap. Typically, the display will show:<br />
:+ ENTER<br />
ØØØØØ1<br />
NOTE: A "+" symbol on the display shows you are opening<br />
the gap a little. A "–" symbol on the display shows you are<br />
closing the gap a little.<br />
3. By using the or keys, you can open or close the gap in<br />
steps shown on the display by up to five "+" or five "–" symbols.<br />
Consequently, a typical display might be something like:<br />
:+++++ ENTER<br />
:----- ENTER<br />
or<br />
ØØØØØ1<br />
ØØØØØ1<br />
If no symbols show on the display, you are back to the standard<br />
feeder setting.<br />
(continued on next page)<br />
19
<strong>DF500</strong> <strong>Folder</strong> <strong>Operator</strong> <strong>Guide</strong><br />
Fine Tuning the Feeder (continued)<br />
4. To leave the fine tuning mode, press Enter. The display will<br />
switch back to normal running mode.<br />
If you don’t press Enter, the machine will stay in fine tuning<br />
mode until power is turned off. When the machine is turned<br />
back on again, the display will be back in normal running mode.<br />
NOTE: The paper thickness setting will not automatically<br />
change when switching jobs. You must set paper thickness<br />
first when starting a new job (see page 9). It is good practice<br />
to set paper thickness even when the same weight of paper is<br />
used with the new job.<br />
TOTAL AND BATCH COUNT<br />
Clearing Total Count<br />
The total count feature is always active and cannot be turned off.<br />
The counter must therefore be reset for each individual job that<br />
requires counting.<br />
1. To reset the count, press the Reset Counter key. The display<br />
shows:<br />
RESET ØØØØ29<br />
YES: Enter No: <br />
2. Press the Enter key to reset the counter, or the key, if you<br />
have changed your mind. The counter digits at the bottom<br />
right of the display will revert to zero:<br />
TEMP JOB: 1 READY<br />
ØØØØØØ<br />
20 SV40214 Rev. A
SV40214 Rev. A<br />
<strong>DF500</strong> <strong>Folder</strong> <strong>Operator</strong> <strong>Guide</strong><br />
Setting a Batch Count<br />
The batch count feature will make the machine fold a pre-selected<br />
number of sheets (a batch) and then stop. The remaining<br />
folded sheets on the stacker will be carried to the end of the<br />
stacker table to aid removal. Follow the steps below to set a batch<br />
count function.<br />
1. Press the Batch key. The indicator next to the key will light<br />
and the display will show:<br />
T1 BATCH = ØØ5<br />
CHG: DONE: Enter<br />
2. Change the batch count number (which must be from 5 to<br />
999) by using the or keys, then press Enter to confirm.<br />
3. The indicator will remain lit and the display will change to:<br />
TEMP JOB: 1 READY<br />
BATCH: Ø5Ø ØØØØØØ<br />
4. Folding of the next batch is resumed by pressing the Start key.<br />
Turning off the batch count<br />
The batch count function will operate as long as the batch indicator<br />
is on, even if the paper size and/or fold type is changed.<br />
1. Press the Batch key.<br />
2. The indicator will go off and the display will briefly show:<br />
BATCH MODE OFF<br />
then go back to the normal running mode display:<br />
TEMP JOB: 1 READY<br />
ØØØØØØ<br />
21
<strong>DF500</strong> <strong>Folder</strong> <strong>Operator</strong> <strong>Guide</strong><br />
Restoring a Batch Count<br />
If you have set a batch of 50, for instance, and have taken a trial<br />
piece or have run several pieces you cannot use, you may want to<br />
restore the batch count to 50 before starting a folding run. Follow<br />
the steps below to restore a batch count.<br />
1. Press the Batch key (to turn batch off).<br />
2. Press the Batch key a second time (batch setting mode on).<br />
3. Press Enter. The batch count will be restored and the machine<br />
is ready to run a full batch.<br />
22 SV40214 Rev. A
RUNNING A JOB<br />
SV40214 Rev. A<br />
<strong>DF500</strong> <strong>Folder</strong> <strong>Operator</strong> <strong>Guide</strong><br />
Normal Job<br />
The Normal Job is a commonly used setup which can be recalled<br />
very quickly when required. From the factory, this job is set to<br />
give a letter (C) fold on 8-1/2" by 11" paper. However, it can be<br />
set to a dif fer ent fold and paper com bi na tion, if required, by a<br />
<strong>Pitney</strong> <strong>Bowes</strong> service engineer. Follow the steps below to select a<br />
normal job.<br />
1. Simply press the Normal Job key. The display will prompt:<br />
SET NORMAL JOB?<br />
YES: Enter No: <br />
2. Press Enter to activate the Normal Job settings or press if<br />
you have changed your mind.<br />
3. During activation of the Normal Job, the display will show:<br />
SETTING<br />
4. When the Normal Job is set, the display will only show:<br />
READY<br />
ØØØØØØ<br />
Temporary Job<br />
A Temporary Job is any folding job setup without it having been<br />
stored in the machine’s memory. The settings are not retained by<br />
the machine and cannot be recalled at a future date. A Temporary<br />
Job will be shown in the display by the word “TEMP” or the<br />
letter “T”:<br />
TEMP JOB: 1 READY<br />
ØØØØØØ<br />
T1 PAPER = 297.Ø<br />
CHG: DONE: Enter<br />
If you recall a programmed job and change any of its settings,<br />
it will be regarded as a Temporary Job by the <strong>DF500</strong> until it is<br />
saved again to memory. See page 24 for details of saving a job in<br />
memory or updating a job already in memory.<br />
23
<strong>DF500</strong> <strong>Folder</strong> <strong>Operator</strong> <strong>Guide</strong><br />
SAVING, RETRIEVING, OR DELETING JOBS<br />
After setting up and running a job, you might want to save it for<br />
later use. This is especially useful for jobs which occur frequently<br />
or for difficult jobs that run well only at a certain speed and fold<br />
plate setting. The following parameters are saved with a job:<br />
• The paper size (standard or not)<br />
• The type of fold (including any manual fold plate corrections)<br />
• The speed<br />
• The batch count (if any)<br />
You can save up to nine different jobs on the <strong>DF500</strong>.<br />
Saving A New Or Replacement Job<br />
1. Press the Store Job key. The display will prompt:<br />
MAKE NEW JOB: 2?<br />
YES: Enter No: <br />
2. If you don’t want to save the job, press the key. The display<br />
will go back to running mode and the job will not be saved.<br />
3. To save the job, press the Enter key. If the memory space is<br />
available, the display will show for a few seconds…<br />
STORED AS: JOB2<br />
… then return to running mode with the job saved.<br />
JOB: 2 READY<br />
ØØØØØØ<br />
If the memory space is already occupied by another job, the<br />
display will show:<br />
REPLACE JOB2?<br />
YES: Enter No: <br />
(continued on next page)<br />
24 SV40214 Rev. A
<strong>DF500</strong> <strong>Folder</strong> <strong>Operator</strong> <strong>Guide</strong><br />
Saving a New or Replacement Job (continued)<br />
4. If you press Enter, the job previously saved under “JOB 2”<br />
(for this example) will be replaced by the new job under the<br />
same job number:<br />
SV40214 Rev. A<br />
STORED AS: JOB2<br />
5. If you don’t want to erase the job already in memory, press<br />
the key. The display will increment the job number up by<br />
one and will prompt:<br />
MAKE NEW JOB3?<br />
YES: Enter No:<br />
6. The new job number offered (in this example 3), is always<br />
the lowest available job number. In this case jobs 1 and 2<br />
are already occupied, while job numbers 3 to 9 are available.<br />
Available job numbers are always offered in ascending order.<br />
It is not pos si ble to “jump” one number.<br />
7. Press Enter to save your new job under the new job number.<br />
STORED AS: JOB3<br />
8. If all 9 memory spaces are full and you choose not to replace<br />
an existing job, the display will show:<br />
–PROGRAMS FULL–<br />
CLEAR JOB FIRST<br />
9. To store any more jobs you must first delete existing job(s) as<br />
described in "Deleting a Job from Memory" on page 27.<br />
25
<strong>DF500</strong> <strong>Folder</strong> <strong>Operator</strong> <strong>Guide</strong><br />
Retrieving A Job From Memory<br />
1. To retrieve a job from memory and set it up, press the Select<br />
Job key repeatedly until the job you want is displayed:<br />
2. If you press Enter, the job shown will be set up and the display<br />
will show in succession:<br />
JOB: 2<br />
SETTING<br />
SELECT JOB: 2?<br />
YES: Enter No: <br />
3. If you press key, the display will return to the normal running<br />
mode without a job being selected.<br />
Identifying A Job In Memory<br />
1. Use the Select Job key to step through the available jobs<br />
stored in memory. The appropriate indicators for paper size<br />
and fold type will light up for each job. This way you can tell<br />
what kind of job is stored under each job number.<br />
SELECT JOB: 2?<br />
YES: Enter No: <br />
2. If you want to know exactly what dimensions are stored for<br />
each fold plate, press the Fold 1 or Fold 2 keys. The display<br />
will briefly show the fold plate dimension set for the job:<br />
SELECT JOB: 2?<br />
FOLD 1 = Ø9Ø.Ø<br />
JOB: 2 READY<br />
ØØØØØØ<br />
3. If the job has a single fold, pressing Fold 2 will not display<br />
a di men sion as fold plate 2 is closed for single fold applications.<br />
26 SV40214 Rev. A
<strong>DF500</strong> <strong>Folder</strong> <strong>Operator</strong> <strong>Guide</strong><br />
Deleting A Job From Memory<br />
1. Select the job number you want to delete by pressing Select<br />
Job until the correct job number is displayed.<br />
2. Press the Reset Counter key. The display will prompt:<br />
SV40214 Rev. A<br />
DELETE JOB: 3?<br />
YES: Enter No: <br />
3. Press Enter to delete the job:<br />
JOB DELETED<br />
4. The memory location is now clear and another job may be<br />
stored under that number. This job number will be automatically<br />
offered when you want to store a new job without erasing<br />
any others.<br />
27
<strong>DF500</strong> <strong>Folder</strong> <strong>Operator</strong> <strong>Guide</strong><br />
MANUAL FOLD SETUP<br />
Setting A Standard Fold With Non-standard Size Paper<br />
1. Press the Fold Type key to select the desired type of standard<br />
fold.<br />
2. Press the Paper key until the “Other” indicator lights. The<br />
display will show:<br />
TØ PAPER = 297.Ø<br />
CHG: DONE: Enter<br />
3. Use the or keys to change the dimension shown to the<br />
length of your paper in millimeters.<br />
4. Press Enter and the fold will be setup automatically. The display<br />
will first show…<br />
TEMP JOB: Ø<br />
SETTING<br />
… then return to the normal running mode display.<br />
TEMP JOB: Ø READY<br />
ØØØØØØ<br />
5. Run a trial piece to check the fold. If necessary, make cor rec -<br />
tions as described on page 14.<br />
NOTE: The <strong>DF500</strong>’s electronic control system will not allow<br />
you to deviate too far from the standard settings. This will<br />
prevent jams caused by “impossible” folds.<br />
28 SV40214 Rev. A
<strong>DF500</strong> <strong>Folder</strong> <strong>Operator</strong> <strong>Guide</strong><br />
Setting A Non-standard Fold With Any Size Paper<br />
1. Press the Paper key to select any of the 3 standard paper<br />
sizes, or select “Other” and set the paper size as described<br />
above.<br />
2. Press the Fold Type key to select a fold which comes closest<br />
to the type of fold you want.<br />
3. Press the Fold 1 key to set fold plate 1. Measure the length of<br />
the first fold on your sample and transfer the measurement<br />
using the or keys.<br />
4. Press Fold 2 and transfer the measurement of the second<br />
fold. If your special fold is a single fold, you do not need to<br />
set fold plate 2.<br />
5. Press Enter, the machine will set itself automatically.<br />
SV40214 Rev. A<br />
TEMP JOB: Ø<br />
SETTING<br />
TEMP JOB: Ø READY<br />
ØØØØØØ<br />
6. Run a trial piece to check the fold. If necessary make corrections<br />
as described on page 14.<br />
29
<strong>DF500</strong> <strong>Folder</strong> <strong>Operator</strong> <strong>Guide</strong><br />
MANUAL FEED<br />
The manual feed mode allows you to hand-feed sets of two or<br />
more sheets, loose, glued or stapled. The limit is five sheets of 20<br />
lb. (80g/m 2) bond, folded into a single, letter (C) or Z fold.<br />
CAUTION: Do not attempt to fold sets into<br />
any other type of fold. This could result in<br />
serious damage to the machine.<br />
In manual feed mode the fold rollers will be turning, but the<br />
feeder is disabled. Automatic feeding is not possible because the<br />
paper is fed by hand, one set at a time.<br />
Setting The Feeder For Manual Feed<br />
1. Press the Manual Feed key. The display will show:<br />
MANUAL FEED MODE<br />
YES: Enter No: <br />
2. Press Enter. You will hear a small motor opening the feeder<br />
gap, which will enable you to feed more than one sheet at a<br />
time. After the motor stops, the display will show:<br />
MAN. FEED READY<br />
ØØØØØØ<br />
3. Press Start and start feeding your collated sets one by one.<br />
In order to get cleanly folded sets, make sure to insert the<br />
sets straight down the paper guides on the feed table.<br />
MAN. FEED RUN<br />
ØØØØØ1<br />
NOTE: If the pressure rollers interfere with hand feeding,<br />
turn the pressure roller setting knob fully to "-".<br />
4. Press Stop to halt feed motors when finished.<br />
30 SV40214 Rev. A
<strong>DF500</strong> <strong>Folder</strong> <strong>Operator</strong> <strong>Guide</strong><br />
Returning To Automatic Feed<br />
1. To get out of the manual feed mode, press the Manual Feed<br />
key again. The display will prompt:<br />
SV40214 Rev. A<br />
MANUAL FEED EXIT?<br />
YES: Enter No: <br />
2. Press the Enter key. The display will show:<br />
INSERT ONE SHEET<br />
DONE - Enter<br />
3. Insert a sheet of paper to be fed automatically and press Enter.<br />
The machine will set the feed gap to the thickness of the<br />
sample sheet and the display will return to normal running<br />
mode.<br />
4. Remove the sample sheet or press Trial Piece to feed the<br />
sheet through the machine.<br />
31
<strong>DF500</strong> <strong>Folder</strong> <strong>Operator</strong> <strong>Guide</strong><br />
OPERATING HINTS<br />
Clearing A Jam<br />
Jams can occur for a number of reasons, including:<br />
• Double sheets being fed<br />
• Running a certain type of fold with the wrong size paper<br />
• Running very light paper too fast<br />
• Running heavy stock too slow<br />
Whenever there is a jam in the machine, errors such as these may<br />
display:<br />
–JAM IN FOLDER–<br />
OPEN TOP COVER<br />
Follow the steps below to clear a jam.<br />
1. Open the top cover and look for any paper stuck inside. With<br />
the cover open, either turn the fold rollers by hand or use<br />
the handwheel knob to remove any stalled paper.<br />
2. To use the handwheel<br />
knob (see figure on<br />
right), press in on the<br />
end of the knob and<br />
then release. This will<br />
cause it to pop out to its<br />
operating position. For<br />
safety rea sons, the knob<br />
is still disengaged in<br />
this po si tion.<br />
3. Pull the knob out as far as it will go to engage the gears inside.<br />
Turn the knob while keeping it pulled out. Turning it<br />
clockwise will feed the paper towards the stacker.<br />
(continued on next page)<br />
–JAM IN STACKER–<br />
DONE - Enter<br />
32 SV40214 Rev. A
<strong>DF500</strong> <strong>Folder</strong> <strong>Operator</strong> <strong>Guide</strong><br />
Clearing a Jam (continued)<br />
4. If the paper is bunched up inside, making it hard to turn the<br />
knob or the fold roller directly,<br />
remove the two de flec tor bars.<br />
Using the screw as a handle,<br />
push the bar towards the control<br />
panel, then lift it out. Any<br />
paper inside should now be visible<br />
and is easily removed.<br />
5. Refit the deflector bars by inserting the round end with the<br />
spring into its hole in the operator side frame. <strong>Guide</strong> the<br />
other end of the bar into the square hole on the opposite<br />
side frame.<br />
6. When you have finished using the manual turnover knob,<br />
press it back in so that it latches into position.<br />
7. While the top cover is open, the display will show:<br />
SV40214 Rev. A<br />
TOP–COVER OPEN<br />
Close the cover and the display will return to normal running<br />
mode, showing whatever fold job, etc.. had been there before<br />
the jam.<br />
8. If the display still shows “JAM IN FOLDER”, press Enter and<br />
the display should return to running mode.<br />
9. If the error message does not go away, this means that there<br />
is paper stuck in the fold plate. Turn off the main power<br />
switch and refer to the following section “Removing the fold<br />
plates”.<br />
33
<strong>DF500</strong> <strong>Folder</strong> <strong>Operator</strong> <strong>Guide</strong><br />
Removing The Fold Plates<br />
You will need to remove the fold plate assembly if paper is stalled<br />
in this area and you have been unable to clear a jam as described<br />
in the previous “Clearing a Jam” section.<br />
Follow the steps below to remove the fold plates.<br />
1. Turn power OFF.<br />
2. Open the fold<br />
plate door by<br />
pulling it away<br />
from the machine.<br />
NOTE:<br />
Some force may<br />
be needed to<br />
open the door.<br />
The door will<br />
stay in its up per -<br />
most po si tion.<br />
CAUTION: Before opening the fold plate<br />
door, always turn off the power first. This<br />
will prevent any possibility of dam age to<br />
the machine’s electronic control system.<br />
Silver Handle<br />
Fold Plate Assembly<br />
Blue Lock Levers<br />
Fold Plate Door<br />
3. Press and release the two blue lock levers on either side of<br />
fold plate assembly. This will cause the fold plate assembly to<br />
drop slightly.<br />
4. Grab the silver handle and lift the fold plate assembly up and<br />
out.<br />
(continued on next page)<br />
34 SV40214 Rev. A
Removing Fold Plates (continued)<br />
SV40214 Rev. A<br />
<strong>DF500</strong> <strong>Folder</strong> <strong>Operator</strong> <strong>Guide</strong><br />
5. Check for any paper in the fold plates or between the fold<br />
rollers in the machine. Turn the rollers by hand or use the<br />
hand wheel knob to make sure that all paper has been removed.<br />
6. Reinstall fold plates by sliding fold plate assembly back into<br />
folder until it is supported by the latch mechanism.<br />
7. Push up from bottom of fold plate assembly until you feel<br />
and hear the latches fully engage.<br />
8. Close fold plate compartment door.<br />
CAUTION: If door does not close, the fold plate<br />
assembly has not been installed correctly.<br />
Redo Steps 6 and 7 above until you can close<br />
the door properly.<br />
9. Turn power on. The display will return to running mode and<br />
folding may be resumed.<br />
35
<strong>DF500</strong> <strong>Folder</strong> <strong>Operator</strong> <strong>Guide</strong><br />
TROUBLESHOOTING<br />
Feeding and folding problems are usually due to im prop er adjust<br />
ment of the machine or to improperly setting up a job. Refer<br />
to the Symptom/Probable Cause section below and the Error<br />
Mes sag es Dis played on the Control Panel table (starting on the<br />
next page) to help you resolve prob lems when operating the<br />
<strong>DF500</strong>.<br />
Symptom Probable Cause–Solution<br />
<strong>Folder</strong> will not run Line plug loose or pulled<br />
out–attach.<br />
Power switch is off–Turn ON.<br />
Safety cover not completely<br />
closed–close.<br />
Circuit breaker needs to be<br />
reset–reset.<br />
Forms folded improperly Need to redo setup procedures–page<br />
17.<br />
Forms skew to one side Infeed guides not set properly–adjust.<br />
Improper stacking Form stop bracket not positioned<br />
properly–check job<br />
setup.<br />
Form guides not positioned<br />
properly –adjust.<br />
Rollers do not rotate while Internal problems –contact<br />
motor is running<br />
Service personnel.<br />
No display Internal problems–contact<br />
Service personnel.<br />
36 SV40214 Rev. A
<strong>DF500</strong> <strong>Folder</strong> <strong>Operator</strong> <strong>Guide</strong><br />
Error Messages Displayed on the Control Panel<br />
Error Message What It Means <strong>Operator</strong> Action<br />
Fail To Feed<br />
Done Enter<br />
Fold Is<br />
Not Available<br />
SV40214 Rev. A<br />
The paper was fed<br />
either too late or<br />
not at all.<br />
You have tried to set<br />
up an “impossible”<br />
fold.<br />
Fold Plate Error The fold plate stop<br />
is prevented from<br />
travelling along its<br />
guide screw by an<br />
obstruction like an<br />
accumulation of<br />
dirt and paper dust.<br />
• Remove the paper stack from the feed<br />
table, fan it out and place it back on<br />
the feeder. Slide the stack down into<br />
the grip of the pressure roller.<br />
• Adjust side guides (see page 10) to<br />
loosen the side guides.<br />
• Adjust the roller pressure setting (see<br />
page 11).<br />
• Adjust the feeder gap (see page 19).<br />
Although this is set automatically<br />
using the Paper Thickness control,<br />
certain papers may need manual<br />
adjustment.<br />
Do not go beyond the setup parameters<br />
of the machine. For example, you may<br />
have tried to set a “Z” fold for a paper<br />
length of 4” (100mm). Such a folded<br />
piece would become too small to<br />
transport through the machine and so<br />
the internal electronic control system<br />
rejects the request.<br />
• Press Enter. The fault may be cleared<br />
automatically and the display will<br />
revert to the normal running mode.<br />
• If this does not help, turn power off<br />
and remove the fold plate assembly as<br />
described on page 33. Place the fold<br />
plate assembly on its side. Working<br />
through the openings in each fold<br />
plate, try to turn the long guide screw<br />
on which the fold plate stop travels.<br />
Turn the screw several turns each way<br />
to clean out any paper dust which may<br />
have accumulated in the brass nut<br />
of the paper stop. If you fi nd that the<br />
paper stop has travelled to the very<br />
end of its travel at either end, turn<br />
the screw so that the stop is at least<br />
3/4” (20mm) away from the extreme<br />
position. Refi t the fold plate assembly<br />
as described on page 33 and turn<br />
power back on. The fold plate stops<br />
will move to their proper positions and<br />
the display will return to the running<br />
mode. If the “FOLD PLATE ERROR”<br />
message appears again, try the above<br />
procedure once or twice more. If the<br />
fault persists, call <strong>Pitney</strong> <strong>Bowes</strong> for<br />
assistance.<br />
37
<strong>DF500</strong> <strong>Folder</strong> <strong>Operator</strong> <strong>Guide</strong><br />
Error Messages Displayed on the Control Panel (continued)<br />
Error Message What It Means <strong>Operator</strong> Action<br />
Jam In <strong>Folder</strong><br />
Open Top Cover<br />
Jam In Stacker<br />
Done Enter<br />
Limit Switch F.P.1<br />
Or<br />
Limit Switch F.P.2<br />
Motor Stopped<br />
Open Top Cover<br />
Programs Full<br />
Clear Job First<br />
A paper jam has occurred<br />
within the machine.<br />
A folded sheet has not<br />
been ejected properly<br />
onto the stacker table. It<br />
is usually caused by paper<br />
piling up when the stacker<br />
table is full or by a double<br />
sheet. In rare cases, with<br />
certain types of paper,<br />
it can also happen when<br />
a folded sheet catches<br />
the topmost panel of the<br />
preceding sheet. The<br />
sheet causing the jam will<br />
probably look like this: Z<br />
or like this: Z<br />
The stop in either fold<br />
plate 1 (F.P.1) or fold plate<br />
2 (F.P.2) has moved to<br />
the very end of its travel<br />
and has operated the<br />
emergency limit switches<br />
at those positions.<br />
A large paper jam caused<br />
the motor to stall. The<br />
internal electronic control<br />
in the <strong>DF500</strong> will shut<br />
down the motor and<br />
display this message.<br />
You have attempted to<br />
save a new job but all nine<br />
memory locations are<br />
already full.<br />
Refer to “Clearing a jam”<br />
on page 32 and “Removing<br />
the fold plates” on page<br />
33.<br />
• Remove all paper from<br />
the stacker table,<br />
then press Enter. The<br />
stacker wheels will<br />
return to their operating<br />
position and the display<br />
will show operating<br />
mode again.<br />
• Open the top cover<br />
and remove any paper<br />
inside. Close the top<br />
cover and press Enter<br />
to clear the display<br />
message.<br />
• If possible, adjust the<br />
fold to look more even<br />
like this: Z<br />
Follow the procedure for<br />
“FOLD PLATE ERROR”<br />
above to clear this<br />
condition.<br />
Refer to “Clearing a jam”<br />
on page 32 and “Removing<br />
the fold plates” on page<br />
33.<br />
Delete some jobs to make<br />
room (see page 27).<br />
38 SV40214 Rev. A
<strong>DF500</strong> <strong>Folder</strong> <strong>Operator</strong> <strong>Guide</strong><br />
Error Messages Displayed on the Control Panel (continued)<br />
Error Message What It Means <strong>Operator</strong> Action<br />
Stacker Error There is a problem<br />
with the stacker<br />
rollers.<br />
Use New Setting ?<br />
Yes: Enter No:<br />
SV40214 Rev. A<br />
This message<br />
appears when you<br />
have changed a<br />
setting but have<br />
not confi rmed it by<br />
pressing Enter.<br />
• Press Enter and the problem may<br />
clear itself automatically.<br />
• If this does not help, turn power off<br />
and remove the fold plate assembly<br />
as described on page 33. This<br />
gives access to the stacker drive<br />
mechanisms on the underside of<br />
the stacker table. Locate the stacker<br />
motor and turn the small drive gear<br />
on the motor shaft. This will move the<br />
stacker rollers. Turn the gear in the<br />
direction that will move the stacker<br />
rollers away from the extreme end<br />
of their travel. Keep turning until the<br />
stacker rollers have moved about 3/4”<br />
(20mm) away from the end of their<br />
guide slots in the stacker table. Refi t<br />
the fold plate assembly as described<br />
on page 33 and turn power back<br />
on. The stacker rollers will move to<br />
their proper position and the display<br />
will return to the running mode. If<br />
the rollers return to their extreme<br />
position and the “STACKER ERROR”<br />
message appears again, try the above<br />
procedure once or twice more. If the<br />
fault persists, call <strong>Pitney</strong> <strong>Bowes</strong> for<br />
assistance.<br />
Press Enter to activate your setting or<br />
to stay with your previous setting.<br />
39
<strong>DF500</strong> <strong>Folder</strong> <strong>Operator</strong> <strong>Guide</strong><br />
MAINTENANCE<br />
Regular and proper cleaning contributes to a long life of the machine<br />
and a consistent quality. It is important, therefore, to clean<br />
the machine at regular intervals. The interval between machine<br />
main te nance depends on the workload, but once a week is a<br />
good starting point. Maintenance of the <strong>DF500</strong> includes:<br />
• Removing accumulated paper dust<br />
• Removing any built-up debris on the fold rollers. This should<br />
be done with a stiff brush only-not with liquids. Liquids such<br />
as soap and water, alcohol, roller cleaner, ink re mov er, etc.<br />
would dam age the rollers' anti-static surface and cause folding<br />
prob lems.<br />
• Cleaning the outside surface of the <strong>DF500</strong> as needed with<br />
a damp ened cloth and a water-based mild liquid or spray<br />
clean er.<br />
SUPPLIES<br />
WARNING: Before cleaning or doing any<br />
maintenance on the ma chine, always<br />
unplug the AC cord from the wall.<br />
Do not attempt to service the Model <strong>DF500</strong> your self, as re mov ing<br />
covers may expose you to dangerous voltage and moving parts.<br />
Refer all servicing to a trained <strong>Pitney</strong> <strong>Bowes</strong> Cus tom er Service<br />
Rep re sen ta tive.<br />
To order the following item, just call the PB Supply Line at 1-800-243-<br />
7824.<br />
Multipurpose Cleaning Kit, Item code F902-0<br />
40 SV40214 Rev. A
FORM HANDLING<br />
SV40214 Rev. A<br />
<strong>DF500</strong> <strong>Folder</strong> <strong>Operator</strong> <strong>Guide</strong><br />
Material Handling Notes<br />
Material handling problems with paper handling equipment are<br />
often due to distortion (warping, curl, sticking, etc.). This can be<br />
a result of poor packaging, improper handling or environmental<br />
ex tremes during manufacture, transit, or storage. This is particularly<br />
true of material which contains glue that is extremely sensitive<br />
to tem per a ture and humidity.<br />
Fortunately, there are a number of easy and effective measures<br />
you can take to minimize problems, improve production and get<br />
the most out of your <strong>Pitney</strong> <strong>Bowes</strong> equipment.<br />
Be Sure Material Meets Our Forms Specifications<br />
The <strong>DF500</strong> is designed to handle a certain range of material.<br />
Ma te ri al which falls outside this range may run poorly or not at<br />
all. Many operating problems are actually due to out-of-spec i -<br />
fi ca tion material.<br />
Store and Handle Material with Care<br />
• Do not "crash" skids, loaded with the material, onto loading<br />
docks, in trans port vans, or in the final storage area.<br />
• Block loaded skids in transport vans.<br />
• Do not expose cartons to the elements; prolonged exposure to<br />
intense sunlight, high humidity and so on can damage material.<br />
• Store materials in a controlled environment. We recommend<br />
a nominal temperature of 75°F at 50% relative humidity. Glue<br />
formulas do vary, however, so temperature and humidity limits<br />
above and below these may be better for certain materials.<br />
• Store cartons on skids or shelves to prevent absorption of<br />
moisture, never directly on floors or against cement walls.<br />
Very dry material may accumulate static and be difficult to handle,<br />
whereas damp material will almost certainly stick together.<br />
• Do not stack cartons too high; this can deform the cartons<br />
on the bottom and damage the material. Try to stack cartons<br />
so that material lies flat.<br />
41
<strong>DF500</strong> <strong>Folder</strong> <strong>Operator</strong> <strong>Guide</strong><br />
FORM HANDLING (continued)<br />
Rotate Stock; Give Material Time to Stabilize<br />
• Rotate stock; use oldest stock first (first in, first out).<br />
• Transfer cartons from the storage area to the work area no<br />
more than several hours before use.<br />
• Do not remove boxes from their cartons until they are needed.<br />
• Allow about one hour of stabilization time for each degree of<br />
temperature change from the storage to the processing area.<br />
42 SV40214 Rev. A
Equipment<br />
SV40214 Rev. A<br />
<strong>DF500</strong> <strong>Folder</strong> <strong>Operator</strong> <strong>Guide</strong><br />
EQUIPMENT/FORM SPECIFICATIONS<br />
Dimensions Width: 25" (640mm)<br />
Length: 34" (860mm)<br />
Height: 17" (430mm)<br />
Weight 95 lbs. (43 kg) shipping weight<br />
Electrical 120 VAC, 60 Hz, 3A (also 230 VAC, 50 Hz, 2A)<br />
Operating Speed Up to 20,000 sheets per hour, depending<br />
on fold (actual speed will depend on the<br />
paper size, paper quality, system setup,<br />
operator experience, and environmental<br />
conditions)<br />
Nominal Usage 2,000 pieces/day; 40,000 pieces/month<br />
Maximum peak operation is 40,000 pieces<br />
per day, no more than once a month.<br />
Sound Level: 75 dBA, based on folding 20 lb. bond<br />
(80 g/m2 ) paper into a letter (C) fold at<br />
a speed of 10,000 sheets per hour (Aweighted<br />
sound level at op er a tor position).<br />
Environment Amb. 55 - 95°F (13 - 35 °C)<br />
Temperature<br />
Operation Max. Wet Bulb: 80 °F (27 °C)<br />
Relative humidity: 20 - 80% (noncondense)<br />
Fold Types • Single (half fold)<br />
• Z-fold (accordion)<br />
• Letter (C) fold<br />
• Double Parallel fold<br />
• Z+ fold with margin<br />
Fold Plate Range Fold plate 1: min. 1-9/16" (40 mm),<br />
max. 12-3/4" (324 mm)<br />
Fold plate 2: min. 1-9/16" (40 mm),<br />
max. 8-1/2" (216 mm)<br />
43
<strong>DF500</strong> <strong>Folder</strong> <strong>Operator</strong> <strong>Guide</strong><br />
Skew Allowance -based on 20 lb. 8.5" x 11" (80 g/m2 A4 bond paper)<br />
• 68% of samples will deviate from the ideal fold center line<br />
within ±.02" (±0.5mm)<br />
• 28% of samples will deviate from the ideal fold center line<br />
within ±.02-.04" (±0.5-1.0mm)<br />
• 4% of samples will deviate from the ideal fold center line<br />
within ±.04-.06" (±1.0-1.5mm)<br />
Multi-Skew Allowance:<br />
Collated sets of up to five sheets may deviate from the ideal fold<br />
life by a maximum of ±1/12" (±2mm) either side.<br />
Ideal Fold Line<br />
+.02"<br />
-.02"<br />
Ideal Fold Line<br />
Fold Deviation: Based on 20 lb. 8.5" x 11" (80 g/m2 A4 bond paper)<br />
• 68% of samples will deviate from the ideal fold center line<br />
within ±.02" (±0.5mm)<br />
• 28% of samples will deviate from the ideal fold center line<br />
within ±.02-.04" (±0.5-1.0mm)<br />
• 4% of samples will deviate from the ideal fold center line<br />
within ±.04-.06" (±1.0-1.5mm)<br />
44 SV40214 Rev. A
Ideal Fold Line<br />
SV40214 Rev. A<br />
+.02"<br />
-.02"<br />
<strong>DF500</strong> <strong>Folder</strong> <strong>Operator</strong> <strong>Guide</strong><br />
Multi-Sheet Fold Allowance: Collated sets of up to five sheets<br />
may deviate from the ideal fold life by a max. of ±1/12" (±2mm)<br />
either side.<br />
Forms<br />
Size Width: min. 3-1/2" (90 mm), max. 12" (305 mm)<br />
Length: min. 4" (100 mm), max. 17" (432 mm)<br />
Form Weight Minimum: 14 lb. bond (53 g/m2 )<br />
Maximum: 65 lb. bond (180 g/m2 )<br />
Thickness The <strong>DF500</strong> can process, hand fed, stapled, or<br />
non-stapled collations of up to five sheets of<br />
8-1/2" by 11" 20 lb. (80 g/m2 ) material. Maximum<br />
thickness is 0.020"(0.5mm).<br />
Feeding The feed and stacking areas will ac com -<br />
Capacity mo date 250 sheets of 20 lb. (80 g/m2 ) material<br />
Paper Ratio The length of the paper must be at least two<br />
times the width of the paper.<br />
Length<br />
Width<br />
45
<strong>DF500</strong> <strong>Folder</strong> <strong>Operator</strong> <strong>Guide</strong><br />
Index<br />
A<br />
Adjustments<br />
Feeder Gap 19<br />
Fold Type 17<br />
Paper <strong>Guide</strong>s 10<br />
Pressure Roller 11<br />
Skewed Fold 18<br />
Automatic Fold Setup 12<br />
Automatic Feed 31<br />
B<br />
Batch Count, Setting 21, 22<br />
C<br />
Clearing a Jam 32<br />
Controls/Features 5, 6, 7<br />
Control Panel, Description 7<br />
D<br />
Deleting a Job 27<br />
Description, Machine 4<br />
Double Parallel Fold<br />
Description 4<br />
Setup 12<br />
E<br />
Equipment Specifications 43<br />
Error Messages 37, 38, 39<br />
F<br />
Feed, Manual 30<br />
Feed, Automatic 31<br />
Feeder Gap, Adjusting 19<br />
Feeder, Setup 9, 10, 11<br />
<strong>Folder</strong> Mechanics 15<br />
Fold Plates, Removing 34<br />
Fold Types<br />
Description 4, 43<br />
Fine Tuning 17<br />
Setup, Automatic 12<br />
Setup, Manual 28, 29<br />
Form Handling 41<br />
Forms Specifications 45<br />
G<br />
Gap, Feeder, Adjusting 19<br />
Gate Fold<br />
Description 4<br />
Setup 12<br />
I<br />
Identifying a Job 26<br />
J<br />
Jam, Clearing 32<br />
Jobs<br />
Deleting Job 27<br />
Identifying Job 26<br />
Normal Job, Setup 23<br />
Retrieving Job 26<br />
Running Job 23<br />
Saving Job 24<br />
Temporary Job, Setup 23<br />
L<br />
Letter Fold<br />
Description 4<br />
Setup 12<br />
M<br />
Machine Setup 9<br />
Maintenance 40<br />
Manual Feed 30<br />
Manual Fold Setup 28, 29<br />
Moving the <strong>DF500</strong> 8<br />
46 SV40214 Rev. A
N<br />
Non-Standard Fold, Man.Setup 28<br />
Normal Job, Setup 23<br />
O<br />
Operating, <strong>Folder</strong> 13<br />
Operating Hints 32<br />
P<br />
Paper <strong>Guide</strong>s, Adjusting 10<br />
Paper, Loading 10<br />
Paper Size<br />
Setup for Automatic Fold 12<br />
Setup for Manual Fold 28<br />
Pressure Roller, Adjusting 11<br />
R<br />
Retrieving Job 26<br />
Running Job 23<br />
S<br />
Safety 2<br />
Saving Job 24<br />
Single Fold<br />
Description 4<br />
Setup 12<br />
Skewed Fold, Adjusting 18<br />
Specifications,<br />
Equipment 43, 44<br />
Forms 45<br />
Speed, Setting 13<br />
Standard Fold, Manual Setup 28<br />
Start/Stopping Machine 14, 15<br />
Supplies 40<br />
Symptoms , Troubleshooting 36<br />
SV40214 Rev. A<br />
<strong>DF500</strong> <strong>Folder</strong> <strong>Operator</strong> <strong>Guide</strong><br />
T<br />
Table Extension 11<br />
Temporary Job, Setup 23<br />
Theory, <strong>Folder</strong> Mechanics 15<br />
Total Count, Clearing 20<br />
Trial Piece, Running 14<br />
Troubleshooting 36, 37, 38, 39<br />
Z<br />
Z-Fold<br />
Description 4<br />
Setup 12<br />
Z-Fold with Margin<br />
Description 4<br />
Setup 12<br />
47
<strong>DF500</strong> <strong>Folder</strong> <strong>Operator</strong> <strong>Guide</strong><br />
48 SV40214 Rev. A


