Service Manual, Micropaq Monitor - Welch Allyn
Service Manual, Micropaq Monitor - Welch Allyn
Service Manual, Micropaq Monitor - Welch Allyn
You also want an ePaper? Increase the reach of your titles
YUMPU automatically turns print PDFs into web optimized ePapers that Google loves.
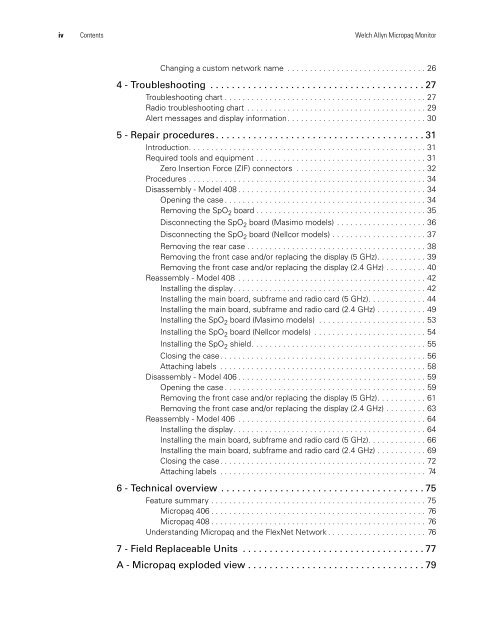
iv Contents <strong>Welch</strong> <strong>Allyn</strong> <strong>Micropaq</strong> <strong>Monitor</strong><br />
Changing a custom network name . . . . . . . . . . . . . . . . . . . . . . . . . . . . . . . 26<br />
4 - Troubleshooting . . . . . . . . . . . . . . . . . . . . . . . . . . . . . . . . . . . . . . . . 27<br />
Troubleshooting chart . . . . . . . . . . . . . . . . . . . . . . . . . . . . . . . . . . . . . . . . . . . . . 27<br />
Radio troubleshooting chart . . . . . . . . . . . . . . . . . . . . . . . . . . . . . . . . . . . . . . . . 29<br />
Alert messages and display information. . . . . . . . . . . . . . . . . . . . . . . . . . . . . . . 30<br />
5 - Repair procedures . . . . . . . . . . . . . . . . . . . . . . . . . . . . . . . . . . . . . . . 31<br />
Introduction. . . . . . . . . . . . . . . . . . . . . . . . . . . . . . . . . . . . . . . . . . . . . . . . . . . . . 31<br />
Required tools and equipment . . . . . . . . . . . . . . . . . . . . . . . . . . . . . . . . . . . . . . 31<br />
Zero Insertion Force (ZIF) connectors . . . . . . . . . . . . . . . . . . . . . . . . . . . . . 32<br />
Procedures . . . . . . . . . . . . . . . . . . . . . . . . . . . . . . . . . . . . . . . . . . . . . . . . . . . . . 34<br />
Disassembly - Model 408 . . . . . . . . . . . . . . . . . . . . . . . . . . . . . . . . . . . . . . . . . . 34<br />
Opening the case . . . . . . . . . . . . . . . . . . . . . . . . . . . . . . . . . . . . . . . . . . . . . 34<br />
Removing the SpO 2 board . . . . . . . . . . . . . . . . . . . . . . . . . . . . . . . . . . . . . . 35<br />
Disconnecting the SpO2 board (Masimo models) . . . . . . . . . . . . . . . . . . . . 36<br />
Disconnecting the SpO2 board (Nellcor models) . . . . . . . . . . . . . . . . . . . . . 37<br />
Removing the rear case . . . . . . . . . . . . . . . . . . . . . . . . . . . . . . . . . . . . . . . . 38<br />
Removing the front case and/or replacing the display (5 GHz). . . . . . . . . . . 39<br />
Removing the front case and/or replacing the display (2.4 GHz) . . . . . . . . . 40<br />
Reassembly - Model 408 . . . . . . . . . . . . . . . . . . . . . . . . . . . . . . . . . . . . . . . . . . 42<br />
Installing the display. . . . . . . . . . . . . . . . . . . . . . . . . . . . . . . . . . . . . . . . . . . 42<br />
Installing the main board, subframe and radio card (5 GHz). . . . . . . . . . . . . 44<br />
Installing the main board, subframe and radio card (2.4 GHz) . . . . . . . . . . . 49<br />
Installing the SpO2 board (Masimo models) . . . . . . . . . . . . . . . . . . . . . . . . 53<br />
Installing the SpO2 board (Nellcor models) . . . . . . . . . . . . . . . . . . . . . . . . . 54<br />
Installing the SpO2 shield. . . . . . . . . . . . . . . . . . . . . . . . . . . . . . . . . . . . . . . 55<br />
Closing the case. . . . . . . . . . . . . . . . . . . . . . . . . . . . . . . . . . . . . . . . . . . . . . 56<br />
Attaching labels . . . . . . . . . . . . . . . . . . . . . . . . . . . . . . . . . . . . . . . . . . . . . . 58<br />
Disassembly - Model 406 . . . . . . . . . . . . . . . . . . . . . . . . . . . . . . . . . . . . . . . . . . 59<br />
Opening the case . . . . . . . . . . . . . . . . . . . . . . . . . . . . . . . . . . . . . . . . . . . . . 59<br />
Removing the front case and/or replacing the display (5 GHz). . . . . . . . . . . 61<br />
Removing the front case and/or replacing the display (2.4 GHz) . . . . . . . . . 63<br />
Reassembly - Model 406 . . . . . . . . . . . . . . . . . . . . . . . . . . . . . . . . . . . . . . . . . . 64<br />
Installing the display. . . . . . . . . . . . . . . . . . . . . . . . . . . . . . . . . . . . . . . . . . . 64<br />
Installing the main board, subframe and radio card (5 GHz). . . . . . . . . . . . . 66<br />
Installing the main board, subframe and radio card (2.4 GHz) . . . . . . . . . . . 69<br />
Closing the case. . . . . . . . . . . . . . . . . . . . . . . . . . . . . . . . . . . . . . . . . . . . . . 72<br />
Attaching labels . . . . . . . . . . . . . . . . . . . . . . . . . . . . . . . . . . . . . . . . . . . . . . 74<br />
6 - Technical overview . . . . . . . . . . . . . . . . . . . . . . . . . . . . . . . . . . . . . . 75<br />
Feature summary . . . . . . . . . . . . . . . . . . . . . . . . . . . . . . . . . . . . . . . . . . . . . . . . 75<br />
<strong>Micropaq</strong> 406 . . . . . . . . . . . . . . . . . . . . . . . . . . . . . . . . . . . . . . . . . . . . . . . . 76<br />
<strong>Micropaq</strong> 408 . . . . . . . . . . . . . . . . . . . . . . . . . . . . . . . . . . . . . . . . . . . . . . . . 76<br />
Understanding <strong>Micropaq</strong> and the FlexNet Network . . . . . . . . . . . . . . . . . . . . . . 76<br />
7 - Field Replaceable Units . . . . . . . . . . . . . . . . . . . . . . . . . . . . . . . . . . 77<br />
A - <strong>Micropaq</strong> exploded view . . . . . . . . . . . . . . . . . . . . . . . . . . . . . . . . . 79


