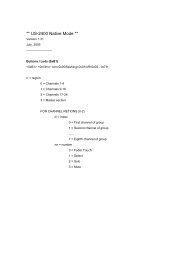
Modular Multitrack Recorder - Tascam
Modular Multitrack Recorder - Tascam
Modular Multitrack Recorder - Tascam

You also want an ePaper? Increase the reach of your titles
YUMPU automatically turns print PDFs into web optimized ePapers that Google loves.
The bottom level LED (-25) is a green presence indicator. Any time there is signal on the track there will<br />
be an indication. The next three LEDs indicate signal levels of -12, -6 and 0 VU. The next two LEDs are<br />
yellow and indicate +6 and +12 VU. The final two LEDs are red to indicate the audio peaks are at MAX<br />
(3 dB below clipping) and CLIP, which means the signal has most likely exceeded the input capability of<br />
the digital converter and may be distorted. The CLIP indicator acts as a peak-hold indicator during<br />
recording. It is only reset when the MMR-8 is stopped and put into PLAY again.<br />
A de-facto film/video industry standard for digital device monitoring is that 0 VU should be set to<br />
indicate a signal level of -20 dBFS (decibels below full scale, i.e. 20 dB below the digital clipping level).<br />
The MMR-8 default setup follows this recommendation with the MAX LED indicator set to turn on with<br />
a signal 17 dB above the nominal 0 VU indication (just before all bits would be set true in the ADC). The<br />
CLIP indication is typically adjusted for a 3 dB hotter signal (20 dB above 0 VU). These settings can be<br />
adjusted in 1dB increments using Setup mode menu 520 (Meter Reference Level) for any dB reference<br />
level from -15 dBFS to -24 dBFS.<br />
When the Meter Calibrate function (Menu 521) is on (for accurate field calibration of the inputs), the<br />
LED’s reference steps are changed to indicate levels above and below 0 as +/- 1/3 dB, +/-1.0 dB, and +/-<br />
3dB steps to allow fine tuning of input calibration levels. See the Chapter 6, System Maintenance for<br />
instructions on calibrating the inputs and outputs using the meters.<br />
Machine Status LEDs<br />
To the left of the LCD are 12 LEDs used to indicate the status of various MMR machine states (interlock,<br />
calibrate, busy, lock, etc.), as well as the master record states (safe, destructive, 24-bit, etc.). These are<br />
described here:<br />
• The SAFE LED will light when menu 201 (All Safe) is set to On, indicating that the MMR-8 will not<br />
go into record.<br />
• The DESTRUCTIVE LED will be lit when menu 200 (Record Mode) is set to Auto-Cleanup or Tape<br />
Mode. This indicates that all recordings will be destructive (i.e. any new recording will replace audio<br />
already existing on the recorded track between the punch in & out points).<br />
• The 24-BIT REC (24-bit recording on) LED is controlled by menu 700 (Disk Encoding). When the<br />
LED is lit, all audio is recorded in 24-bit file format. When the LED is off, 16-bit file format is used.<br />
• The DIG IN LED (Digital In) will be lit when menu 500 (Input Source) is set to Digital or Rate<br />
Converter.<br />
• The TONE LED is lit when menu 530 (Reference Tone) is set to On. Pressing play when this LED is<br />
lit will cause all channels to output a 1kHz reference tone at 0 VU.<br />
• The MIDI LED is used to indicate a valid MIDI input signal (MMC) is being received.<br />
• The ERROR LED indicates an error state has occurred and must be cleared before normal operation<br />
can resume.<br />
• The BUSY LED indicates the system is occupied with a task, and the transport keys are not available<br />
until the system finishes the current task and the Busy LED goes out.<br />
• The LOCK LED indicates the system is locked to the incoming machine synchronization source<br />
(usually time code, biphase, or the MMR Bus).<br />
• The CAL LED indicates the Calibration function (Menu 521) is on.<br />
• The OFFSET LED indicates there is an offset (value other than 0) in the offset register (local MMR<br />
offset) or when there is an MMR bus offset and the unit is a slave on the MMR bus.<br />
• The INTERLOCK LED lights when the system is in Biphase Chase Control Mode.<br />
38<br />
<strong>Tascam</strong> MMR-8 Owner’s Manual • Chapter 3 • MMR-8 Operation MMR-8