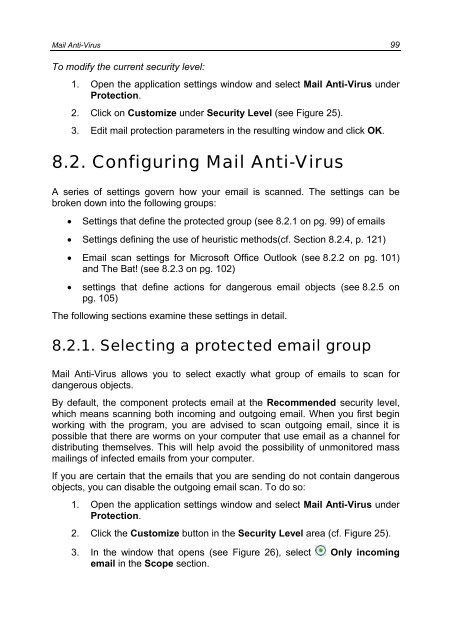
- Page 1 and 2:
KASPERSKY LAB Kaspersky ® Internet
- Page 3 and 4:
Table of Contents CHAPTER 1. THREAT
- Page 5 and 6:
Table of Contents 5 6.8. Types of M
- Page 7 and 8:
Table of Contents 7 13.3.1. Configu
- Page 9 and 10:
Table of Contents 9 19.3.14. Popups
- Page 11 and 12:
CHAPTER 1. THREATS TO COMPUTER SECU
- Page 13 and 14:
Threats to Computer Security 13 Int
- Page 15 and 16:
Threats to Computer Security 15 Spy
- Page 17 and 18:
Threats to Computer Security 17 Kas
- Page 19 and 20:
Threats to Computer Security 19 Int
- Page 21 and 22:
CHAPTER 2. KASPERSKY INTERNET SECUR
- Page 23 and 24:
Kaspersky Internet Security 7.0 23
- Page 25 and 26:
Kaspersky Internet Security 7.0 25
- Page 27 and 28:
Kaspersky Internet Security 7.0 27
- Page 29 and 30:
Kaspersky Internet Security 7.0 29
- Page 31 and 32:
CHAPTER 3. INSTALLING KASPERSKY INT
- Page 33 and 34:
Installing Kaspersky Internet Secur
- Page 35 and 36:
Installing Kaspersky Internet Secur
- Page 37 and 38:
Installing Kaspersky Internet Secur
- Page 39 and 40:
Installing Kaspersky Internet Secur
- Page 41 and 42:
Installing Kaspersky Internet Secur
- Page 43 and 44:
Installing Kaspersky Internet Secur
- Page 45 and 46:
CHAPTER 4. PROGRAM INTERFACE Kasper
- Page 47 and 48: Program interface 47 Block network
- Page 49 and 50: Program interface 49 • Navigation
- Page 51 and 52: Program interface 51 The Activation
- Page 53 and 54: CHAPTER 5. GETTING STARTED One of K
- Page 55 and 56: Getting started 55 • Postpone thr
- Page 57 and 58: Getting started 57 5.4. How to scan
- Page 59 and 60: Getting started 59 To train Anti-Sp
- Page 61 and 62: CHAPTER 6. PROTECTION MANAGEMENT SY
- Page 63 and 64: Protection management system 63 Fig
- Page 65 and 66: Protection management system 65 Ind
- Page 67 and 68: Protection management system 67 To
- Page 69 and 70: Protection management system 69 Fig
- Page 71 and 72: Protection management system 71 cou
- Page 73 and 74: Protection management system 73 Pot
- Page 75 and 76: Protection management system 75 pg.
- Page 77 and 78: Protection management system 77 Fig
- Page 79 and 80: Protection management system 79 Whe
- Page 81 and 82: CHAPTER 7. FILE ANTI-VIRUS The Kasp
- Page 83 and 84: File Anti-Virus 83 Example: The wor
- Page 85 and 86: File Anti-Virus 85 Figure 18. Selec
- Page 87 and 88: File Anti-Virus 87 Figure 19. Creat
- Page 89 and 90: File Anti-Virus 89 For example, whe
- Page 91 and 92: File Anti-Virus 91 To use the heuri
- Page 93 and 94: File Anti-Virus 93 7.2.6. Selecting
- Page 95 and 96: File Anti-Virus 95 Successfully dis
- Page 97: Mail Anti-Virus 97 A special plug-i
- Page 101 and 102: Mail Anti-Virus 101 You can find mo
- Page 103 and 104: Mail Anti-Virus 103 Warning! The Ma
- Page 105 and 106: Mail Anti-Virus 105 Figure 29. Usin
- Page 107 and 108: Mail Anti-Virus 107 Block access Di
- Page 109 and 110: Web Anti-Virus 109 malicious code.
- Page 111 and 112: Web Anti-Virus 111 To modify a prei
- Page 113 and 114: Web Anti-Virus 113 Figure 32. Confi
- Page 115 and 116: Web Anti-Virus 115 Figure 33. Using
- Page 117 and 118: CHAPTER 10. PROACTIVE DEFENSE Warni
- Page 119 and 120: Proactive Defense 119 • Integrity
- Page 121 and 122: Proactive Defense 121 Kaspersky Int
- Page 123 and 124: Proactive Defense 123 To edit a dan
- Page 125 and 126: Proactive Defense 125 of applicatio
- Page 127 and 128: Proactive Defense 127 To turn off t
- Page 129 and 130: Proactive Defense 129 logical group
- Page 131 and 132: Proactive Defense 131 Figure 41. Ad
- Page 133 and 134: CHAPTER 11. PROTECTION AGAINST INTE
- Page 135 and 136: Protection against Internet fraud 1
- Page 137 and 138: Protection against Internet fraud 1
- Page 139 and 140: Protection against network attacks
- Page 141 and 142: Protection against network attacks
- Page 143 and 144: Protection against network attacks
- Page 145 and 146: Protection against network attacks
- Page 147 and 148: Protection against network attacks
- Page 149 and 150:
Protection against network attacks
- Page 151 and 152:
Protection against network attacks
- Page 153 and 154:
Protection against network attacks
- Page 155 and 156:
Protection against network attacks
- Page 157 and 158:
Protection against network attacks
- Page 159 and 160:
Protection against network attacks
- Page 161 and 162:
Protection against network attacks
- Page 163 and 164:
Protection against network attacks
- Page 165 and 166:
Protection against network attacks
- Page 167 and 168:
Protection against network attacks
- Page 169 and 170:
SPAM Protection 169 installed. This
- Page 171 and 172:
SPAM Protection 171 Allow all - low
- Page 173 and 174:
SPAM Protection 173 To train Anti-S
- Page 175 and 176:
SPAM Protection 175 • Add to whit
- Page 177 and 178:
SPAM Protection 177 Figure 62. Conf
- Page 179 and 180:
SPAM Protection 179 The chief appli
- Page 181 and 182:
SPAM Protection 181 always accepted
- Page 183 and 184:
SPAM Protection 183 13.3.5. Additio
- Page 185 and 186:
SPAM Protection 185 Sometimes it ca
- Page 187 and 188:
SPAM Protection 187 It opens automa
- Page 189 and 190:
SPAM Protection 189 13.3.9. Configu
- Page 191 and 192:
SPAM Protection 191 Figure 68. conf
- Page 193 and 194:
193 A verification is performed for
- Page 195 and 196:
195 To use preconfigured Teenager a
- Page 197 and 198:
To modify security level: Figure 71
- Page 199 and 200:
Figure 72. Configuring Filter Setti
- Page 201 and 202:
Under Maximum Time, you may specify
- Page 203 and 204:
interface, or with the standard too
- Page 205 and 206:
Figure 75. Scanning objects from th
- Page 207 and 208:
207 In addition, you can configure
- Page 209 and 210:
Figure 77. Configuring scan setting
- Page 211 and 212:
the application databases, the date
- Page 213 and 214:
Figure 79. Configuring rootkit scan
- Page 215 and 216:
If the action selected was When it
- Page 217 and 218:
CHAPTER 16. TESTING KASPERSKY INTER
- Page 219 and 220:
Testing Kaspersky Internet Security
- Page 221 and 222:
Testing Kaspersky Internet Security
- Page 223 and 224:
Program updates 223 If you do not h
- Page 225 and 226:
Program updates 225 • The run mod
- Page 227 and 228:
Program updates 227 Kaspersky Inter
- Page 229 and 230:
Program updates 229 By schedule. Up
- Page 231 and 232:
Program updates 231 To disable scan
- Page 233 and 234:
Managing keys 233 Figure 87. Key Ma
- Page 235 and 236:
ADVANCED OPTIONS 235 The program al
- Page 237 and 238:
ADVANCED OPTIONS 237 Figure 88. Lis
- Page 239 and 240:
ADVANCED OPTIONS 239 Here you can d
- Page 241 and 242:
ADVANCED OPTIONS 241 Figure 91. Rep
- Page 243 and 244:
ADVANCED OPTIONS 243 Discard All -
- Page 245 and 246:
ADVANCED OPTIONS 245 If you check A
- Page 247 and 248:
ADVANCED OPTIONS 247 19.3.5. The Se
- Page 249 and 250:
ADVANCED OPTIONS 249 Figure 98. The
- Page 251 and 252:
ADVANCED OPTIONS 251 Figure 100. Di
- Page 253 and 254:
ADVANCED OPTIONS 253 Figure 102. Bl
- Page 255 and 256:
ADVANCED OPTIONS 255 Figure 104. Mo
- Page 257 and 258:
ADVANCED OPTIONS 257 Figure 106. Li
- Page 259 and 260:
ADVANCED OPTIONS 259 19.3.18. The T
- Page 261 and 262:
ADVANCED OPTIONS 261 After entering
- Page 263 and 264:
ADVANCED OPTIONS 263 monitoring for
- Page 265 and 266:
ADVANCED OPTIONS 265 To apply the a
- Page 267 and 268:
ADVANCED OPTIONS 267 Automatically
- Page 269 and 270:
ADVANCED OPTIONS 269 All colors, fo
- Page 271 and 272:
ADVANCED OPTIONS 271 19.9.1. Kasper
- Page 273 and 274:
ADVANCED OPTIONS 273 Figure 116. Pr
- Page 275 and 276:
ADVANCED OPTIONS 275 event log (App
- Page 277 and 278:
ADVANCED OPTIONS 277 To export the
- Page 279 and 280:
ADVANCED OPTIONS 279 A new service
- Page 281 and 282:
CHAPTER 20. WORKING WITH THE PROGRA
- Page 283 and 284:
Working with the program from the c
- Page 285 and 286:
Working with the program from the c
- Page 287 and 288:
Working with the program from the c
- Page 289 and 290:
Working with the program from the c
- Page 291 and 292:
Working with the program from the c
- Page 293 and 294:
Working with the program from the c
- Page 295 and 296:
Working with the program from the c
- Page 297 and 298:
Modifying, repairing, and removing
- Page 299 and 300:
CHAPTER 22. FREQUENTLY ASKED QUESTI
- Page 301 and 302:
APPENDIX A. REFERENCE INFORMATION T
- Page 303 and 304:
Appendix A 303 pp* - Microsoft Offi
- Page 305 and 306:
APPENDIX B. KASPERSKY LAB Founded i
- Page 307 and 308:
Appendix B 307 • Select standard/
- Page 309 and 310:
Appendix B 309 • Remote administr
- Page 311 and 312:
Appendix B 311 • Proactive Defens
- Page 313 and 314:
Appendix B 313 • Dynamic resource
- Page 315 and 316:
Appendix B 315 revolutionary techno
- Page 317 and 318:
Appendix C 317 All references to
- Page 319 and 320:
Appendix C 319 (c) Updates of anti-
- Page 321:
Appendix C 321 (iii) Subject to par


