
Create successful ePaper yourself
Turn your PDF publications into a flip-book with our unique Google optimized e-Paper software.
Using the TV’s Menu System<br />
Menus, On-screen Help, and Control Panels<br />
This section highlights your TV’s on-screen menu system. The menu system has several types of screens. An<br />
overview follows.<br />
Note: The Parental Controls menu items is discussed in the Features chapter, while Assisted Setup is<br />
discussed in the Connections and Setup chapter.<br />
Tips<br />
0<br />
Go Back<br />
1 Picture Menu<br />
2 Audio Menu<br />
3 Channel Setup<br />
4 Setup Options<br />
Main Menu<br />
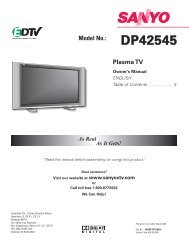
The Audio menu has screens for setting the audio features<br />
and for tweaking the sound:<br />
•Sound Preset Mode<br />
•Sound Logic<br />
•Balance<br />
•Advanced Audio<br />
Press OK or4to access the Audio menu.<br />
A shortcut method to access a menu item is to press<br />
the number button on the remote that matches the<br />
number next to the on-screen menu. For example, in<br />
the Main Menu, press 2 to go straight to the Audio<br />
menu.<br />
Feel free to explore the menu system. If you’re ever<br />
unsure where you are in the menu system, look at<br />
the menu path at the top (for example, Main Menu,<br />
Picture Menu) or if you’re just tired of exploring,<br />
press CLEAR to remove the menus from the screen<br />
and start over again.<br />
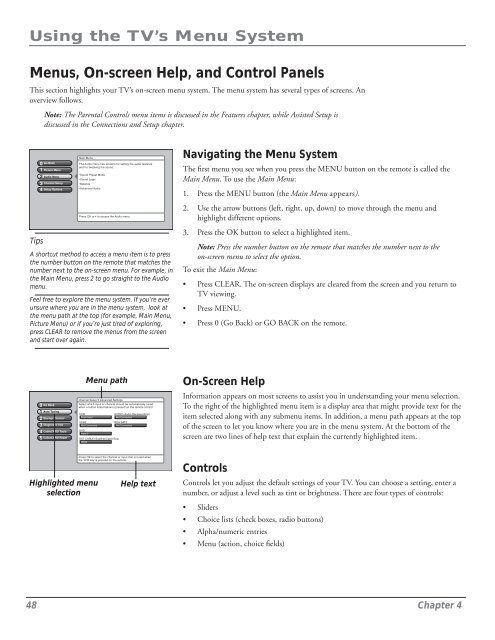
Navigating the Menu System<br />
The first menu you see when you press the MENU button on the remote is called the<br />
Main Menu. To use the Main Menu:<br />
1. Press the MENU button (the Main Menu appears).<br />
2. Use the arrow buttons (left, right, up, down) to move through the menu and<br />
highlight different options.<br />
3. Press the OK button to select a highlighted item.<br />
Note: Press the number button on the remote that matches the number next to the<br />
on-screen menu to select the option.<br />
To exit the Main Menu:<br />
• Press CLEAR. The on-screen displays are cleared from the screen and you return to<br />
TV viewing.<br />
• Press MENU.<br />
• Press 0 (Go Back) or GO BACK on the remote.<br />
0<br />
1<br />
2<br />
3<br />
4<br />
5<br />
Go Back<br />
Auto Tuning<br />
Startup Channel<br />
Diagnostic Info<br />
CableCARD Tools<br />
CableCARD Reset<br />
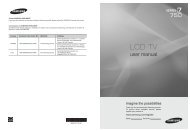
Menu path<br />
Channel Setup4Advanced Settings<br />
Select which input or channel should be automatically tuned<br />
when a button listed below is pressed on the remote control.<br />
VCR<br />
AUDIO (Audio Receiver/Amp)<br />
Front Input<br />
Not Connected<br />
VCR2<br />
RCA SAT2<br />
Not Connected<br />
Not Connected<br />
DVD<br />
Input 2<br />
SAT-CABLE (Satellite/Cable Box)<br />
HDMI<br />
On-Screen Help<br />
Information appears on most screens to assist you in understanding your menu selection.<br />
To the right of the highlighted menu item is a display area that might provide text for the<br />
item selected along with any submenu items. In addition, a menu path appears at the top<br />
of the screen to let you know where you are in the menu system. At the bottom of the<br />
screen are two lines of help text that explain the currently highlighted item.<br />
Highlighted menu<br />
selection<br />
Press OK to select the channel or input that is tuned when<br />
the VCR key is pressed on the remote.<br />
Help text<br />
Controls<br />
Controls let you adjust the default settings of your TV. You can choose a setting, enter a<br />
number, or adjust a level such as tint or brightness. There are four types of controls:<br />
• Sliders<br />
• Choice lists (check boxes, radio buttons)<br />
• Alpha/numeric entries<br />
• Menu (action, choice fields)<br />
48 Chapter 4