Download - TRENDnet
Download - TRENDnet
Download - TRENDnet

Create successful ePaper yourself
Turn your PDF publications into a flip-book with our unique Google optimized e-Paper software.
<strong>TRENDnet</strong> User’s Guide<br />
Cover Page
<strong>TRENDnet</strong> User’s Guide<br />
Contents<br />
Product Overview ........................................................................... 1<br />
Package Contents .......................................................................................................... 1<br />
Features ......................................................................................................................... 1<br />
Product Hardware Features........................................................................................... 2<br />
Application Diagram ...................................................................................................... 4<br />
Basic Router Setup .......................................................................... 5<br />
Creating a Home Network ............................................................................................. 5<br />
Router Installation ......................................................................................................... 6<br />
Connect additional wired devices to your network ..................................................... 11<br />
Wireless Networking and Security ................................................. 12<br />
How to choose the type of security for your wireless network .................................. 12<br />
Secure your wireless network ..................................................................................... 13<br />
Connect wireless devices to your router ..................................................................... 15<br />
Connect wireless devices using WPS ........................................................................... 16<br />
Basic wireless settings ................................................................................................. 18<br />
Basic wireless settings ................................................................................................. 18<br />
Steps to improve wireless connectivity ....................................................................... 20<br />
Advanced wireless settings .......................................................................................... 21<br />
Access Control Filters .................................................................... 22<br />
Access control basics ................................................................................................... 22<br />
MAC address filters ................................................................................................. 22<br />
Domain/URL Filters ................................................................................................. 23<br />
Protocol/IP filters .................................................................................................... 24<br />
Firewall rules ........................................................................................................... 25<br />
Table of Contents<br />
Advanced Router Setup ................................................................ 27<br />
Access your router management page ........................................................................ 27<br />
Change your router login password ............................................................................ 27<br />
Set your router date and time ..................................................................................... 28<br />
Manually configure your Internet connection ............................................................ 28<br />
Clone a MAC address ................................................................................................... 29<br />
Change your router IP address .................................................................................... 30<br />
Set up the DHCP server on your router ....................................................................... 30<br />
Set up DHCP reservation ............................................................................................. 31<br />
Enable/disable UPnP on your router ........................................................................... 32<br />
Allow/deny VPN connections through your router ..................................................... 32<br />
Allow/deny multicast streaming.................................................................................. 33<br />
Identify your network on the Internet ........................................................................ 33<br />
Allow remote access to your router management page ............................................. 34<br />
Open a device on your network to the Internet .......................................................... 34<br />
DMZ ......................................................................................................................... 34<br />
Virtual Server .......................................................................................................... 35<br />
Special Applications ................................................................................................ 37<br />
Add static routes to your router .................................................................................. 38<br />
Enable dynamic routing on your router ...................................................................... 39<br />
Router Maintenance & Monitoring ............................................... 41<br />
Reset your router to factory defaults .......................................................................... 41<br />
Router Default Settings ............................................................................................... 41<br />
Backup and restore your router configuration settings .............................................. 42<br />
Upgrade your router firmware .................................................................................... 43<br />
Restart your router ...................................................................................................... 44<br />
Check connectivity using the router management page ............................................. 44<br />
© Copyright 2012 <strong>TRENDnet</strong>. All Rights Reserved.<br />
i
<strong>TRENDnet</strong> User’s Guide<br />
Table of Contents<br />
Check the router system information .......................................................................... 45<br />
View your router log .................................................................................................... 46<br />
Configure your router log ............................................................................................ 47<br />
View your router packet statistics ............................................................................... 48<br />
View wireless devices connected to your router ......................................................... 48<br />
Capture packets using the router management page ................................................. 49<br />
Enable SNMP on your router ....................................................................................... 49<br />
Router Management Page Structure ............................................. 50<br />
Technical Specifications................................................................. 51<br />
Troubleshooting ............................................................................ 52<br />
Appendix ...................................................................................... 53<br />
© Copyright 2012 <strong>TRENDnet</strong>. All Rights Reserved.<br />
ii
<strong>TRENDnet</strong> User’s Guide<br />
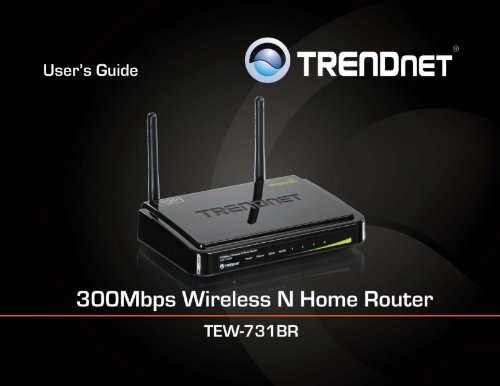
TEW-731BR<br />
Product Overview<br />
Package Contents<br />
TEW-731BR<br />
In addition to your router, the package includes:<br />
• Multi-Language Quick Installation Guide<br />
• CD-ROM (User’s Guide)<br />
• Network cable (1.5m / 5ft.)<br />
• Power adapter (5V DC, 1A)<br />
If any package contents are missing or damaged, please contact the retail store, online<br />
retailer, or reseller/distributor from which the product was purchased.<br />
Features<br />
<strong>TRENDnet</strong>’s 300Mbps Wireless N Home Router, model TEW-731BR, provides enhanced<br />
300Mbps wireless n speed and coverage to share files, play games, and stream video<br />
wirelessly. Advanced encryption protects your wireless network, Access Control tools<br />
help block unwanted Websites and unknown users, and embedded GREENnet<br />
technology reduces power consumption by up to 50%.<br />
Advanced Multiple Input Multiple Output (MIMO) antenna technology reduces wireless<br />
dead spots. Wi-Fi Protected Setup (WPS) connects other WPS supported wireless<br />
adapters at the touch of a button. WMM® Quality of Service (QoS) technology prioritizes<br />
gaming, Internet calls, and video streams. LEDs on the front of the router convey device<br />
status. Network wired devices to the four Fast Ethernet ports on the back of the router.<br />
• 4 x 10/100Mbps Auto-MDIX LAN ports<br />
• 1 x 10/100Mbps Auto-MDIX WAN port (Internet)<br />
• One touch wireless connection to wireless clients using the WPS button<br />
• Wi-Fi compliant with IEEE 802.11n and IEEE 802.11b/g standards<br />
• High-speed data rates of up to 300Mbps with IEEE 802.11n*<br />
• GREENnet technology reduces power consumption by up to 50%<br />
• Compatible with most popular cable/DSL Internet service providers using<br />
Dynamic/Static IP, PPPoE, PPTP and L2TP protocols<br />
• 2 fixed external antennas support high speed performance and great coverage<br />
with MIMO technology<br />
• Firewall features Network Address Translation (NAT)<br />
• Virtual server and Application Level Gateway (ALG) services for special Internet<br />
applications<br />
• Universal Plug and Play (UPnP) for auto discovery and support for device<br />
configuration of Internet applications<br />
• Dynamic DNS Client for dynamic Internet IP resolution<br />
• Provides additional security with Internet Access Control (MAC Address,<br />
Domain, and IP Filtering)<br />
• Static and Dynamic RIP V1/2 routing support<br />
• Easy setup via Web browser using Internet Explorer 6.0 or above, Firefox 2.0 or<br />
above, Chrome, Opera, Safari<br />
• Advanced wireless security of up to WPA2-RADIUS<br />
• Wi-Fi Multimedia (WMM) Quality of Service (QoS) data prioritization<br />
• Indoor coverage up to 100 meters (330ft.)* depending on the environment<br />
• Outdoor coverage up to 300 meters (980ft.)* depending on the environment<br />
© Copyright 2012 <strong>TRENDnet</strong>. All Rights Reserved.<br />
1
<strong>TRENDnet</strong> User’s Guide<br />
TEW-731BR<br />
*Maximum wireless signal rates are referenced from IEEE 802.11 theoretical specifications. Actual<br />
data throughput and coverage will vary depending on interference, network traffic, building<br />
materials and other conditions.<br />
Product Hardware Features<br />
Rear View<br />
• Reset Button –Use an item such as a paperclip to push and hold this button for<br />
15 seconds and release to reset your router to its factory defaults.<br />
• LAN Ports – Connect Network cables (also called network cables) from your<br />
router LAN ports to your wired network devices.<br />
• WAN Port–Connect a Network cable from your router WAN port to your<br />
modem.<br />
• Power Port – Connect the included power adapter from your router power<br />
port and to an available power outlet.<br />
Note: Use only the adapter that came with your router.<br />
• On/Off Power Switch – Push the router On/Off push button to turn your router<br />
“On” (Inner position) or “Off” (Outer position).<br />
• Antennas – The antennas broadcast wireless network signals.<br />
© Copyright 2012 <strong>TRENDnet</strong>. All Rights Reserved.<br />
2
<strong>TRENDnet</strong> User’s Guide<br />
TEW-731BR<br />
Front View<br />
• Power LED -This LED indicator is solid green when your router is powered on.<br />
Otherwise if this LED indicator is off, there is no power to your router.<br />
• Status LED - This LED indicator is blinking green when your router is ready and<br />
working successfully. If this LED indicator is solid green on or off, your router is<br />
not receiving power or not working properly.<br />
• WAN (Link/Activity) LED – This LED indicator is solid green when your router<br />
WAN port is physically connected to the modem Network port (also called<br />
network port) successfully with a Network cable. The LED indicator will be<br />
blinking green while data is transmitted or received through the WAN port of<br />
your router.<br />
• WLAN (Link/Activity) LED – This LED indicator is blinking green when the<br />
wireless is “On” and functioning properly on your router. This LED indicator will<br />
be blinking green rapidly while data is transmitted or received by your wireless<br />
clients or wireless network devices connected to your router.<br />
• LAN 1-4 (Link/Activity) LEDs – These LED indicators are solid green when the<br />
LAN ports are successfully connected to your wired network devices (which are<br />
turned on). These LED indicators will blink green while data is transmitted or<br />
received through your router’s LAN ports.<br />
© Copyright 2012 <strong>TRENDnet</strong>. All Rights Reserved.<br />
3
<strong>TRENDnet</strong> User’s Guide<br />
TEW-731BR<br />
Side View<br />
Application Diagram<br />
• WPS (Wi-Fi Protected Setup) –Push and hold this button for 3 seconds to<br />
activate WPS. The button LED is blinking blue when WPS is activated.<br />
The router is installed near the modem (supplied by your ISP “Internet Service<br />
Provider”) and physically connected to the router’s WAN port to the modem’s network<br />
port which connects to the Internet. Wireless signals from the router are broadcasted to<br />
wireless clients such as laptops (with wireless capability) thereby providing Internet<br />
access.<br />
© Copyright 2012 <strong>TRENDnet</strong>. All Rights Reserved.<br />
4
<strong>TRENDnet</strong> User’s Guide<br />
TEW-731BR<br />
Basic Router Setup<br />
Creating a Home Network<br />
3. Set up your router. See “How to setup your router” below.<br />
4. To connect additional wired computers or wired network devices to your network,<br />
see “Connect additional wired devices to your network” on page 11.<br />
What is a network?<br />
A network is a group of computers or devices that can communicate with each other. A<br />
home network of more than one computer or device also typically includes Internet<br />
access, which requires a router.<br />
A typical home network may include multiple computers, a media player/server, a<br />
printer, a modem, and a router. A large home network may also have a switch,<br />
additional routers, access points, and many Internet-capable media devices such as TVs,<br />
game consoles, and Internet cameras.<br />
• Modem – Connects a computer or router to the Internet or ISP (Internet<br />
Service Provider).<br />
5. To set up wireless networking on your router, see “Wireless Networking and Security”<br />
on page 12.<br />
How to setup your router<br />
Refer to the Quick Installation Guide or continue to the next section “Router<br />
Installation” on page 6 for more detailed installation instructions.<br />
Where to find more help<br />
In addition to this User’s Guide, you can find help below:<br />
• http://www.trendnet.com/support<br />
(documents, downloads, and FAQs are available from this Web page))<br />
• Router – Connects multiple devices to the Internet.<br />
• Switch –Connect several wired network devices to your home network. Your<br />
router has a built-in network switch (the LAN port 1-4). If you have more wired<br />
network devices than available Network ports on your router, you will need an<br />
additional switch to add more wired connections.<br />
How to set up a home network<br />
1. For a network that includes Internet access, you’ll need:<br />
• Computers/devices with a Network port or wireless networking capabilities.<br />
• A modem and Internet service to your home, provided by your ISP (modem<br />
typically supplied by your ISP).<br />
• A router to connect multiple devices to the Internet.<br />
2. Make sure that your modem is working properly. Your modem is provided by your<br />
Internet Service Provider (ISP) when you sign up for Internet service. If your modem is<br />
not working contact your ISP to verify functionality.<br />
© Copyright 2012 <strong>TRENDnet</strong>. All Rights Reserved.<br />
5
<strong>TRENDnet</strong> User’s Guide<br />
TEW-731BR<br />
Router Installation<br />
Before you Install<br />
Many Internet Service Providers (ISPs) allow your router to connect to the Internet<br />
without verifying the information fields listed below. Skip this section for now and if<br />
your router cannot connect to the Internet using the standard installation process, come<br />
back to this page and contact your ISP to verify required ISP specification fields listed<br />
below.<br />
1. Obtain IP Address Automatically (DHCP)<br />
Host Name (Optional)<br />
Clone Mac Address (Optional)<br />
2. Fixed IP address<br />
WAN IP Address: _____. _____._____._____<br />
(e.g. 215.24.24.129)<br />
WAN Subnet Mask: _____. _____._____._____<br />
WAN Gateway IP Address: _____. _____._____._____<br />
DNS Server Address 1: _____. _____._____._____<br />
DNS Server Address 2: _____. _____._____._____<br />
3. PPPoE to obtain IP automatically<br />
User Name: _________<br />
Password: ________________<br />
Verify Password: ________________<br />
4. PPPoE with a fixed IP address<br />
User Name: _________<br />
Password: ________________<br />
Verify Password: ________________<br />
IP Address: ____. _____._____._____ (e.g. 215.24.24.129)<br />
5. PPTP or Russian PPTP<br />
Type (Dynamic IP or Static IP)<br />
My IP Address: _____. _____._____._____<br />
(e.g. 215.24.24.129)<br />
Subnet Mask:_____. _____._____._____<br />
Gateway:_____. _____._____._____<br />
Server IP: _____. _____._____._____<br />
PPTP Account: ________________<br />
PPTP Password: ________________<br />
Retype Password: ________________<br />
6. L2TP or Russia L2TP<br />
Type (Dynamic IP or Static IP)<br />
My IP Address: _____. _____._____._____<br />
(e.g. 215.24.24.129)<br />
Subnet Mask:_____. _____._____._____<br />
Gateway:_____. _____._____._____<br />
Server IP: _____. _____._____._____<br />
L2TP Account: ________________<br />
L2TP Password: ________________<br />
Retype Password: ________________<br />
7. Russia PPPoE<br />
Type (Dynamic IP or Static IP)<br />
User Name: _________<br />
Password: ________________<br />
Verify Password: ________________<br />
IP Address: ____. _____._____._____ (e.g. 215.24.24.129)<br />
© Copyright 2012 <strong>TRENDnet</strong>. All Rights Reserved.<br />
6
<strong>TRENDnet</strong> User’s Guide<br />
TEW-731BR<br />
Hardware Installation<br />
1. Verify that you have an Internet connection when connecting your computer directly<br />
to your modem.<br />
2. Turn off your modem.<br />
3. Disconnect the Network cable from your computer to your modem.<br />
4. Using a Network cable, connect the WAN port on the router to your modem.<br />
5. Using another Network cable, connect your computer to one of the four LAN ports on<br />
the router.<br />
6. Plug in the power adapter, connect it to the router’s power port, and then push the<br />
On/Off Power Switch to the “On” position (pushed in).<br />
7. Turn on your modem.<br />
8. Verify that the following front panel LED indicators on your router: Power (Solid<br />
Green), Status (Blinking Green), LAN 1, 2, 3, or 4 (Solid/Blinking Green for ports for<br />
which devices are connected), WAN (Solid/Blinking Green), and WLAN (Blinking Green).<br />
© Copyright 2012 <strong>TRENDnet</strong>. All Rights Reserved.<br />
7
<strong>TRENDnet</strong> User’s Guide<br />
TEW-731BR<br />
Setup Wizard<br />
1. Open your web browser (e.g. Internet Explorer, Firefox, Safari, Chrome, or Opera) and<br />
go to http://192.168.10.1. Your router will prompt you for a user name and password.<br />
3. The Setup Wizard will automatically appear. Click Next.<br />
Note: If the Setup Wizard does not automatically appear, click Wizard (the bottom<br />
button on the left tab).<br />
2. Next to Language, click the drop-down list to select your preferred language. Enter<br />
the default user name and password and then click Login.<br />
Default User Name: admin<br />
Default Password: admin<br />
4. Enter a new login password for your router and enter it again next to “Verify<br />
Password” to confirm. This will change the password required to log into your router.<br />
Click Next.<br />
Note: This is the password to enter your router’s management interface and NOT to<br />
connect to the router wirelessly. Once you change the login password, it will be required<br />
every time you log into your router. Store your router password in a location that you<br />
can reference at a future time.<br />
© Copyright 2012 <strong>TRENDnet</strong>. All Rights Reserved.<br />
8
<strong>TRENDnet</strong> User’s Guide<br />
TEW-731BR<br />
5. Select the Time Zone for your router and click Next.<br />
7. This section determines what method the router will use to interface with your ISP<br />
service. Most ISP services allow your router to obtain an IP address automatically. Do<br />
not change the default setting of Obtain IP Automatically and click next to proceed.<br />
Note: If you know that your ISP requires a configuration other than Obtain IP<br />
Automatically or if are having difficulty completing the router installation, please contact<br />
your ISP to verify all required settings for one of the options listed on page 6. The options<br />
listed on page 6 match the settings options available to choose from.<br />
6. Click Next at the Set LAN connection and DHCP Server window.<br />
Note: If you are an advanced user, you can make LAN IP address interface and DHCP IP<br />
address range changes here.<br />
8. Wireless LAN: Select Enable for Wireless LAN.<br />
Note: Selecting Disable will disable the wireless functionality of the router and will not<br />
allow wireless clients to connect.<br />
© Copyright 2012 <strong>TRENDnet</strong>. All Rights Reserved.<br />
9
<strong>TRENDnet</strong> User’s Guide<br />
TEW-731BR<br />
9. SSID: Enter a unique SSID (Wireless Network Name). Choose something that you<br />
would easily identify when searching for available wireless networks (using laptops,<br />
smart phones, etc.) Click Next.<br />
11. Wait for your router to reboot.<br />
12. Verify you have an Internet connection by opening a Web browser on your<br />
computer.<br />
Note:<br />
1. To protect your network from unauthorized access, it is recommended to enable<br />
wireless encryption. See “Secure your wireless network” on page 13 for information on<br />
configuring wireless security.<br />
2. Once wireless security is enabled on your router, each wireless device connecting to<br />
your router must be configured with the same wireless security type and key.<br />
Note: If you cannot access the Internet, power down your modem and router again.<br />
Occasionally certain modems need to be power cycled to adopt new router settings.<br />
10. Click Restart and wait for your router to reboot.<br />
© Copyright 2012 <strong>TRENDnet</strong>. All Rights Reserved.<br />
10
<strong>TRENDnet</strong> User’s Guide<br />
TEW-731BR<br />
Connect additional wired devices to your network<br />
You can connect additional computers or other network enabled devices to your<br />
network by using Network cables. Connect them to one of the available LAN ports<br />
labeled 1,2,3,4 on your router. Check the status of the LED indicators (1, 2, 3, or 4) on<br />
the front panel of your router to ensure the physical cable connection from your<br />
computer or device.<br />
Note: If you encounter issues connecting to your network, there may be a problem with<br />
your computer or device network settings. Please ensure that your computer or device<br />
network settings (also called TCP/IP settings) are configured to obtain IP address settings<br />
automatically (also called dynamic IP address or DHCP) and to Obtain DNS Server<br />
address settings automatically.<br />
© Copyright 2012 <strong>TRENDnet</strong>. All Rights Reserved.<br />
11
<strong>TRENDnet</strong> User’s Guide<br />
Wireless Networking and Security<br />
How to choose the type of security for your wireless network<br />
Setting up wireless security is very important. Leaving your wireless network open and<br />
unsecure could expose your entire network and personal files to outsiders. <strong>TRENDnet</strong><br />
recommends reading through this entire section and setting up wireless security on your<br />
new router.<br />
There are a few different wireless security types supported in wireless networking each<br />
having its own characteristics which may be more suitable for your wireless network<br />
taking into consideration compatibility, performance, as well as the security strength<br />
along with using older wireless networking hardware (also called legacy hardware).<br />
It is strongly recommended to enable wireless security to prevent unwanted users from<br />
accessing your network and network resources (personal documents, media, etc.).<br />
In general, it is recommended that you choose the security type with the highest<br />
strength and performance supported by the wireless computers and devices in your<br />
network. Please review the security types to determine which one you should use for<br />
your network.<br />
Wireless Encryption Types<br />
• WEP: Legacy encryption method supported by older 802.11b/g hardware. This<br />
is the oldest and least secure type of wireless encryption. It is generally not<br />
recommended to use this encryption standard, however if you have old 802.11<br />
b or 802.11g wireless adapters or computers with old embedded wireless<br />
TEW-731BR<br />
cards(wireless clients), you may have to set your router to WEP to allow the old<br />
adapters to connect to the router. Note: This encryption standard will limit<br />
connection speeds to 54Mbps.<br />
• WPA: This encryption is significantly more robust than the WEP technology.<br />
Much of the older 802.11g hardware was been upgraded (with firmware/driver<br />
upgrades) to support this encryption standard. Total wireless speeds under<br />
this encryption type however are limited to 54Mbps.<br />
• WPA-Auto: This setting provides the router with the ability to detect wireless<br />
devices using either WPA or WPA2 encryption. Your wireless network will<br />
automatically change the encryption setting based on the first wireless device<br />
connected. For example, if the first wireless client that connects to your<br />
wireless network uses WPA encryption your wireless network will use WPA<br />
encryption. Only when all wireless clients disconnect to the network and a<br />
wireless client with WPA2 encryption connects your wireless network will then<br />
change to WPA2 encryption. NOTE: WPA2 encryption supports 802.11n speeds<br />
and WPA encryption will limit your connection speeds to 54Mbps<br />
• WPA2: This is the most secure wireless encryption available today, similar to<br />
WPA encryption but more robust. This encryption standard also supports the<br />
highest connection speeds. <strong>TRENDnet</strong> recommends setting your router to this<br />
encryption standard. If you find that one of your wireless network devices does<br />
not support WPA2 encryption, then set your router to either WPA or WPA-Auto<br />
encryption.<br />
Note: Check the specifications of your wireless network adapters and wireless appliances<br />
to verify the highest level of encryption supported.<br />
© Copyright 2012 <strong>TRENDnet</strong>. All Rights Reserved.<br />
12
<strong>TRENDnet</strong> User’s Guide<br />
TEW-731BR<br />
Below is brief comparison chart of the wireless security types and the recommended<br />
configuration depending on which type you choose for your wireless network.<br />
Secure your wireless network<br />
Wireless > Security<br />
Security Standard WEP WPA WPA2<br />
Compatible<br />
Wireless<br />
Standards<br />
IEEE 802.11a/b/g/n<br />
(802.11n devices<br />
will operate at<br />
802.11g speeds)<br />
IEEE 802.11a/b/g/n<br />
(802.11n devices<br />
will operate at<br />
802.11g speeds) IEEE 802.11a/b/g/n<br />
Highest<br />
Performance<br />
Under This<br />
Setting Up to 54Mbps Up to 54Mbps Up to 450Mbps*<br />
Encryption<br />
Strength Low Medium High<br />
Additional<br />
Options<br />
Recommended<br />
Configuration<br />
Open System or<br />
Shared Key,<br />
HEX or ASCII,<br />
Different key sizes<br />
Open System ASCII<br />
13 characters<br />
TKIP or AES,<br />
Preshared Key or<br />
RADIUS<br />
TKIP<br />
Preshared Key<br />
8-63 characters<br />
TKIP or AES,<br />
Preshared Key or<br />
RADIUS<br />
AES<br />
Preshared Key<br />
8-63 characters<br />
After you have determined which security type to use for your wireless network (see<br />
“How to choose the security type for your wireless network” on page 12), you can set up<br />
wireless security.<br />
1. Log into your router management page (see “Access your router management page”<br />
on page 27).<br />
2. Click on Wireless, and click on Security.<br />
3. Click on the Authentication Type drop-down list to select your wireless security type.<br />
*Dependent on the maximum 802.11n data rate supported by the device (150Mbps,<br />
300Mbps, or 450Mbps)<br />
© Copyright 2012 <strong>TRENDnet</strong>. All Rights Reserved.<br />
13
<strong>TRENDnet</strong> User’s Guide<br />
TEW-731BR<br />
Selecting WEP:<br />
If selecting WEP (Wired Equivalent Privacy), please review the WEP settings to configure<br />
and click Apply to save the changes.<br />
password of 12345, then the client must select: Key 2 (entering Key 1,<br />
3, or 4 will block the ability to connect) and enter password 12345)<br />
Selecting WPA, WPA-Auto, or WPA2 (WPA2 recommended):<br />
First, from the Authentication Type row, select WPA, WPA-Auto, or WPA2.<br />
• WEP– Choose Open System or Shared Key.<br />
Note: It is recommended to use Open System because it is known to be more secure<br />
than Shared Key.<br />
• Mode – Choose HEX or ASCII.<br />
Note: It is recommended to use ASCII because of the much larger character set that<br />
can be used to create the key.<br />
• WEP Key – Choose the key length 64-bit or 128-bit.<br />
Note: It is recommended to use 128-bit because it is more secure to use a key that<br />
consists of more characters.<br />
Then from the PSK/EAP row, select either PSK or EAP<br />
• PSK stands for Preshared Key<br />
• EAP stands for Extensive Authentication Protocol, also called Remote<br />
Authentication Dial-In User Service or RADIUS).<br />
Note: EAP requires an external RADIUS server, PSK only requires you to create a<br />
passphrase.<br />
The following section outlines options when selecting PSK (Preshared Key Protocol),<br />
• Key 1-4<br />
o<br />
o<br />
o<br />
o<br />
This is where you enter the password or key needed for a computer to<br />
connect to the router wirelessly<br />
You can define up to 4 passwords or 4 keys. Only one key can be active<br />
at a given time. Most users simply define one key.<br />
Choose a key index 1, 2, 3, or 4 and enter the key.<br />
When connecting to the router, the client must match both the<br />
password and the Key number. (e.g. if you have activated Key 2 with a<br />
WEP Key Format HEX ASCII<br />
Character set 0-9 & A-F, a-f only Alphanumeric (a,b,C,?,*, /,1,2, etc.)<br />
64-bit key length 10 characters 5 characters<br />
128-bit key length 26 characters 13 characters<br />
o Select a Cipher Type. When selecting WPA security, it is recommended<br />
to use TKIP.<br />
o When selecting WPA-Auto security, it is recommended to use AES.<br />
o When selecting WPA2 security, it is recommended to use AES.<br />
© Copyright 2012 <strong>TRENDnet</strong>. All Rights Reserved.<br />
14
<strong>TRENDnet</strong> User’s Guide<br />
TEW-731BR<br />
Create your Wireless security Passphrase (password or key):<br />
• Passphrase – Enter the passphrase.<br />
o This is the password or key that is used to connect your computer to<br />
this router wirelessly<br />
• Confirmed Passphrase – Re-enter the passphrase.<br />
Note: 8-63 alphanumeric characters (a,b,C,?,*, /,1,2, etc.)<br />
The following section outlines options when selecting EAP (Extensive Authentication<br />
Protocol),<br />
EAP (Extensible Authentication Protocol) is also called Remote Authentication Dial-In<br />
User Service or RADIUS.<br />
Select a Cipher Type<br />
o When selecting WPA security, it is recommended to use TKIP.<br />
o When selecting WPA-Auto security, it is recommended to use AES.<br />
o When selecting WPA2 security, it is recommended to use AES.<br />
• RADIUS Server 1/2 - Configure the RADIUS server settings.<br />
Note: RADIUS Server 2 is optional and can be configured as a backup if there are any<br />
issues with RADIUS Server 1.<br />
o IP – Enter the IP address of the RADIUS server. (e.g. 192.168.10.250)<br />
o<br />
o<br />
Port – Enter the port your RADIUS server is configured to use for<br />
RADIUS authentication.<br />
Note: It is recommended to use port 1812.<br />
Shared Secret – Enter the shared secret used to authorize your router<br />
with your RADIUS server.<br />
Connect wireless devices to your router<br />
A variety of wireless network devices can connect to your wireless network such as:<br />
• Gaming Consoles<br />
• Internet enabled TVs<br />
• Network media players<br />
• Smart Phones<br />
• Wireless Laptop computers<br />
• Wireless IP cameras<br />
Each device may have its own software utility for searching and connecting to available<br />
wireless networks, therefore, you must refer to the User’s Manual/Guide of your<br />
wireless client device to determine how to search and connect to this router’s wireless<br />
network.<br />
See the “Appendix” on page 53 for general information on connecting to a wireless<br />
network.<br />
© Copyright 2012 <strong>TRENDnet</strong>. All Rights Reserved.<br />
15
<strong>TRENDnet</strong> User’s Guide<br />
TEW-731BR<br />
Connect wireless devices using WPS<br />
WPS (Wi-Fi Protected Setup) is a feature that makes it easy to connect devices to your<br />
wireless network. If your wireless devices support WPS, you can use this feature to<br />
easily add wireless devices to your network.<br />
Note: You will not be able to use WPS if you set the SSID Broadcast setting to Disabled.<br />
There are two methods the WPS feature can easily connect your wireless devices to<br />
your network.<br />
• Push Button Configuration (PBC) method<br />
o RECOMMENDED Hardware Push Button method–with an external<br />
button located physically on your router and on your client device<br />
o WPS Software/Virtual Push Button - located in router management<br />
page<br />
• PIN (Personal Identification Number) Method - located in router management<br />
page<br />
PBC (Software/Virtual Push Button)<br />
Wireless >WiFi Protected Setup<br />
In addition to the hardware push button located physically on your router, the router<br />
management page also has push button which is a software or virtual push button you<br />
can click to activate WPS on your router.<br />
1. Log into your router management page (see “Access your router management page”<br />
on page 27).<br />
2. Click on Wireless, and click on WPS.<br />
3. To add a wireless device to your network, simply the push the WPS button on the<br />
wireless device (consult wireless device’s User’s Guide for length of time), you are<br />
connecting, then in your router management page next to Push Button Configuration,<br />
click Start PBC.<br />
Note: Refer to your wireless device documentation for details on the operation of WPS.<br />
Recommended Hardware Push Button (PBC) Method<br />
• Note it is recommended that a wireless key (passphrase or password) is created<br />
before connecting clients using the PBC method. If no wireless key is defined<br />
when connecting via PBC, the router will automatically create an encryption<br />
key that is 64 characters long. This 64 character key will then have to be used if<br />
one has to connect computers to the router using the traditional connection<br />
method.<br />
To add a wireless device to your network, simply push the WPS button on the wireless<br />
device you are connecting(consult client device User’s Guide for length of time), then<br />
push and hold the WPS button located on your router for 3 seconds and release it. A<br />
blue LED on your router WPS button will flash indicating that the WPS setup process has<br />
been activated on your router. (See “Product Hardware Features” on page 2)<br />
For connecting additional WPS supported devices, repeat this process for each<br />
additional device.<br />
4. You will receive a message counting down indicating the WPS process is activated on<br />
your router.<br />
5. You will receive a success message indicate that the wireless device successfully<br />
connected using WPS.<br />
© Copyright 2012 <strong>TRENDnet</strong>. All Rights Reserved.<br />
16
<strong>TRENDnet</strong> User’s Guide<br />
TEW-731BR<br />
PIN (Personal Identification Number)<br />
Wireless >WiFi Protected Setup<br />
If your wireless device has WPS PIN (typically an 8-digit code printed on the wireless<br />
device product label or located in the wireless device wireless software utility), you can<br />
use this method.<br />
1. Log into your router management page (see “Access your router management page”<br />
on page 27).<br />
2. Click on Wireless, and click on WPS.<br />
3. Next to Client PIN Number, enter the WPS PIN of the wireless device you are<br />
connecting and click Start PIN.<br />
Note: You may need to initiate the WPS PIN on your wireless device first when using this<br />
method. Refer to your wireless device documentation for details on the operation of<br />
WPS.<br />
© Copyright 2012 <strong>TRENDnet</strong>. All Rights Reserved.<br />
17
<strong>TRENDnet</strong> User’s Guide<br />
TEW-731BR<br />
Basic wireless settings<br />
Wireless > Basic<br />
This section outlines available management options under the Basic Wireless sub tab.<br />
1. Log into your router management page (see “Access your router management page”<br />
on page 27).<br />
2. Click on Wireless, and click on Basic.<br />
3. To save changes to this section, click Apply when finished.<br />
• Wireless<br />
o<br />
o<br />
Enabled turns on the wireless networking on your router (by default it<br />
is enabled).<br />
Disabled turns off wireless networking on your router.<br />
• Auto Channel – In North America, this router can broadcast on 1 of 11<br />
Channels (13 in Europe and other countries). Selecting Auto Channel enables<br />
the router to automatically select the best Channel for wireless<br />
communication.<br />
• Channel – To manually set the channel on which the router will broadcast,<br />
uncheck Auto Channel, then click the drop-down list and select the desired<br />
Channel for wireless communication. The goal is to select the Channel that is<br />
least used by neighboring wireless networks.<br />
• 802.11 Mode - Select the appropriate mode for your network.<br />
o 2.4GHz 802.11b/g/n mixed mode – Select this mode for the best<br />
compatibility. This mode allows older 802.11b and 802.11g wireless<br />
devices to connect to the router in addition to newer 802.11n devices.<br />
Note: It is recommended to leave the wireless setting to Enabled unless you do not<br />
plan on connecting any wireless computers or devices to your network.<br />
o<br />
2.4GHz 802.11b/g mixed mode – This mode only allows devices to<br />
connect to the router using older and slow 802.11b or 802.11g<br />
technology and it thereby reduces the router’s maximum speed to<br />
54Mbps (typically not recommended).<br />
• SSID – This acronym stands for Service Set Identifier and is the name of your<br />
wireless network. It differentiates your wireless network from others around<br />
you. By default, the router broadcast <strong>TRENDnet</strong>731 as the wireless network<br />
name. If you choose to change the SSID, change it to a name that you can easily<br />
remember.<br />
o 2.4GHz 802.11n only mode – This mode only allows newer 802.11n<br />
devices to connect to your router. This mode does ensure the highest<br />
speed and security for your network, however if you have older<br />
802.11g wireless clients, they will no longer be able to connect to this<br />
router.<br />
© Copyright 2012 <strong>TRENDnet</strong>. All Rights Reserved.<br />
18
<strong>TRENDnet</strong> User’s Guide<br />
TEW-731BR<br />
o<br />
o<br />
2.4GHz 802.11g only mode – This mode only allows devices to<br />
connect to the router using older and slow 802.11g technology<br />
(typically not recommended).<br />
2.4GHz 802.11b only mode – This mode only allows devices to<br />
connect to the router using older and slow 802.11b technology<br />
(typically not recommended).<br />
Note: Please check the specifications on your wireless devices for the highest wireless<br />
capability supported first before applying these settings. If you are unsure, it is<br />
recommended that you keep the default setting (2.4GHz 802.11b/g/n mixed mode) for<br />
the best compatibility.<br />
When applying the 802.11 mode setting, please keep in mind the following:<br />
• Wireless devices that support 802.11n are backwards compatible and can<br />
connect wirelessly at 802.11g or 802.11b.<br />
• Connecting at 802.11b or 802.11g will limit the capability of your 802.11n<br />
supported wireless devices from obtaining higher performance and data rates.<br />
• Allowing 802.11b or 802.11g devices to connect to an 802.11n capable wireless<br />
network may degrade the wireless network performance below the higher<br />
performance and data rates of 802.11n.<br />
• Wireless devices that only support 802.11b or 802.11g will not be able to<br />
connect to a wireless network that is set to 802.11n only mode.<br />
• Wireless devices that only support 802.11b will not be able to connect to a<br />
wireless network that is set to 802.11g only mode.<br />
stability than Auto 20/40 MHz for connectivity in busy wireless<br />
environments where there are several wireless networks in the area.<br />
o Auto 20/40 MHz – This mode can automatically switch between using<br />
a single 20MHz channel or 40MHz (two 20MHz channels). When<br />
40MHz is active, this mode is capable of providing higher performance<br />
only if the wireless devices support the 40MHz channel width.<br />
Enabling 20/40MHz typically results in substantial performance<br />
increases when connecting to an 802.11n client.<br />
• SSID Broadcast<br />
o Enabled allows wireless devices to search and discover your wireless<br />
network name (also called SSID) broadcasted by your router.<br />
o Disabled turns off the ability for wireless devices to find your network.<br />
It is still possible for wireless devices to be configured to connect to<br />
your wireless network.<br />
Note: Setting this option to Disabled, will disable WPS functionality.<br />
• WMM – Wi-Fi Multimedia is a Quality of Service (QoS) feature which prioritizes<br />
audio and video data packets. This feature requires the wireless device to also<br />
support WMM. Click Enabled (recommended) or Disabled to turn this feature<br />
on or off on your router.<br />
• Channel Width – This setting only applies to wireless devices connecting at<br />
802.11n. Select the appropriate channel width for your wireless network.<br />
o<br />
20 MHz – This mode operates using a single 20MHz channel for<br />
wireless devices connecting at 802.11n. This setting may provide more<br />
© Copyright 2012 <strong>TRENDnet</strong>. All Rights Reserved.<br />
19
<strong>TRENDnet</strong> User’s Guide<br />
TEW-731BR<br />
Steps to improve wireless connectivity<br />
There are a number of factors that can impact the range of wireless devices. Follow<br />
these tips to help improve your wireless connectivity:<br />
1. Keep the number of obstructions to a minimum. Each obstruction can reduce<br />
the range of a wireless device. Position the wireless devices in a manner that<br />
will minimize the amount of obstructions between them.<br />
a. For the widest coverage area, install your router near the center of<br />
your home, and near the ceiling, if possible.<br />
b. Avoid placing the router on or near metal objects (such as file cabinets<br />
and metal furniture), reflective surfaces (such as glass or mirrors), and<br />
masonry walls.<br />
3. Antenna orientation can also have a large impact on your wireless signal. Use<br />
the wireless adapter’s site survey tool to determine the best antenna<br />
orientation for your wireless devices.<br />
4. Interference from devices that produce RF (radio frequency) noise can also<br />
impact your signal. Position your wireless devices away from anything that<br />
generates RF noise, such as microwaves, radios and baby monitors.<br />
If possible, upgrade wireless network interfaces (such as wireless cards in computers)<br />
from older wireless standards to 802.11n. If a wirelessly networked device uses an older<br />
standard, the performance of the entire wireless network may be slower. If you are still<br />
experiencing low or no signal consider repositioning the wireless devices or installing<br />
additional access points.<br />
c. Any obstruction can weaken the wireless signal (even non-metallic<br />
objects), so the fewer obstructions between the router and the<br />
wireless device, the better.<br />
d. Place the router in a location away from other electronics, motors,<br />
and fluorescent lighting.<br />
e. Many environmental variables can affect the router’s performance, so<br />
if your wireless signal is weak, place the router in several locations and<br />
test the signal strength to determine the ideal position.<br />
2. Building materials can have a large impact on your wireless signal. In an indoor<br />
environment, try to position the wireless devices so that the signal passes<br />
through less dense material such as dry wall. Dense materials like metal, solid<br />
wood, glass or even furniture may block or degrade the signal.<br />
© Copyright 2012 <strong>TRENDnet</strong>. All Rights Reserved.<br />
20
<strong>TRENDnet</strong> User’s Guide<br />
TEW-731BR<br />
Advanced wireless settings<br />
Wireless > Advanced<br />
These settings are advanced options that can be configured to change advanced<br />
wireless broadcast specifications. It is recommended that these settings remain set to<br />
their default values unless you are knowledgeable about the effects of changing these<br />
values. Changing these settings incorrectly can degrade performance.<br />
• Fragmentation Threshold – Fragmentation in wireless networks is the process<br />
of breaking down data communications into smaller data packets in order to<br />
improve data efficiency when transferring or receiving data between wireless<br />
devices. The fragmentation threshold defines the maximum size of the data<br />
packets that are broken down.<br />
Default Value: 2346 (range: 1500~2346, even numbers only)<br />
• DTIM Interval – A Delivery Traffic Indication Message (DTIM) is an<br />
informational message that is sent as part of a beacon by an access point (your<br />
wireless router) to a wireless client (wireless device or connecting station) in<br />
sleep mode to provide an alert that data is awaiting delivery. The DTIM Interval<br />
(also called Data Beacon Rate) is the amount of time between DTIM<br />
transmissions included in part of a beacon.<br />
Default Value: 1 (range: 1-255)<br />
• Beacon Interval – A beacon is a management frame used in wireless networks<br />
that transmitted periodically to announce the presence and provide<br />
information about the router’s wireless network. The interval is the amount<br />
time between each beacon transmission.<br />
Default Value:100 milliseconds (range: 25-1000)<br />
• RTS Threshold – The Request To Send (RTS) function is part of the networking<br />
protocol. A wireless device that needs to send data will send a RTS before<br />
sending the data in question. The destination wireless device will send a<br />
response called Clear to Send (CTS). The RTS Threshold defines the smallest<br />
data packet size allowed to initiate the RTS/CTS function.<br />
Default Value: 2346 (range: 256-2346)<br />
© Copyright 2012 <strong>TRENDnet</strong>. All Rights Reserved.<br />
21
<strong>TRENDnet</strong> User’s Guide<br />
TEW-731BR<br />
Access Control Filters<br />
Access control basics<br />
Access > Filter<br />
Note: You can check the Dynamic DHCP List for the MAC addresses of the devices on<br />
your network, see “Setup the DHCP server on your router” on page 30 or refer to your<br />
computer or device documentation to find the MAC address.<br />
MAC address filters<br />
Access > Filter > MAC Filters<br />
Every network device has a unique, 12-digit MAC (Media Access Control) address. Using<br />
MAC filters, you can allow or deny specific computers and other devices from using this<br />
router’s wired or wireless network.<br />
1. Log into your router management page (see “Access your router management page”<br />
on page 27).<br />
Click Add to save the new MAC address entry to the MAC Table. After clicking Add, the<br />
MAC address entry will appear in the list below. Repeat for each device.<br />
2. Click on Access, click on Filter, and click on MAC Filters.<br />
• Add – Saves a new MAC address entry.<br />
3. Add the MAC addresses to the MAC Table first before applying the MAC filter<br />
function.<br />
Note: MAC filter can be configured to allow access to the listed MAC address and deny<br />
all others unlisted or vice versa. The recommended function is to choose to only allow<br />
access to the MAC addresses listed and deny all others unlisted because it is easier to<br />
determine the MAC addresses of devices in your network then to determine which MAC<br />
addresses you do not want to allow access.<br />
• Name – Enter a name for the MAC address entry.<br />
• MAC Address – Enter the 12-digit MAC address.(e.g. 00-11-22-AA-BB-CC)<br />
To modify an existing MAC address entry, click on the entry in the MAC Table. When<br />
selected, the entry will be highlighted.<br />
• Delete – Removes an existing MAC address entry.<br />
• Update – Modifies an existing MAC address entry.<br />
• Cancel – Discard changes to an existing MAC address entry.<br />
© Copyright 2012 <strong>TRENDnet</strong>. All Rights Reserved.<br />
22
<strong>TRENDnet</strong> User’s Guide<br />
TEW-731BR<br />
4. Review the MAC Filter options.<br />
• Disabled – disables MAC address filter.<br />
• Only Allow computers/devices with MAC addresses listed below to access the<br />
local network (LAN/WLAN), web management, and the Internet.<br />
• Only Deny computers/devices with MAC addresses listed below to access the<br />
local network (LAN/WLAN), web management, and the Internet<br />
Note: Do not configure this setting until you have added the MAC addresses to the MAC<br />
Table first. The recommended option is to only Allow access to the MAC addresses listed<br />
and deny all others unlisted.<br />
Domain/URL Filters<br />
Access > Filter > Domain/URL Blocking<br />
You may want to allow or block computers or devices on your network access to specific<br />
websites (e.g. www.trendnet.com, etc.), also called domains or URLs (Uniform Resource<br />
Locators). You may also enter a keyword (e.g. instead of complete URL to generally<br />
allow or block computers or devices access to websites that may contain the keyword in<br />
the URL or on the web page.<br />
1. Log into your router management page (see “Access your router management page”<br />
on page 27).<br />
2. Click on Access, click on Filter, and click on Domain/URL Blocking.<br />
Click Apply to save the changes.<br />
3. Review the Domain/URL blocking options.<br />
• Disabled – disables domain/URL blocking<br />
• Allow users to access all domains listed.<br />
(Deny access to all other unlisted websites)<br />
• Deny users to access all domains listed.<br />
(Allow access to all other unlisted websites)<br />
© Copyright 2012 <strong>TRENDnet</strong>. All Rights Reserved.<br />
23
<strong>TRENDnet</strong> User’s Guide<br />
TEW-731BR<br />
Click Apply to save the changes.<br />
Protocol/IP filters<br />
Access > Filter > Protocol/IP Filters<br />
You may want to block computers or devices on your network access to specific ports<br />
(used or required by a specific application) to the Internet.<br />
4. Under Domain Blocking click on Allow or Deny. The Domains List will then appear.<br />
Enter the Website/URL/domain (e.g.www.trendnet.com) or keyword (e.g. trendnet) to<br />
allow or block access and click Add to add this to the domains list. The entry will be<br />
listed below. Repeat for each additional website or keyword added.<br />
1. Log into your router management page (see “Access your router management page”<br />
on page 27).<br />
2. Click on Access, click on Filter, and click on Protocol/IP Filters.<br />
• Cancel - Discard changes to the domains list.<br />
• Delete -Delete an existing website/URL/domain or keyword entry, click on the<br />
entry in the Domains List. When selected, the entry will be highlighted. Click<br />
Delete to remove it from the list.<br />
To simplify configuration, there is a list of commonly used pre-defined Protocol/IP Filters<br />
to modify otherwise, you can choose to manually add a new Protocol/IP Filter.<br />
4. Go back to the Domain Blocking section and confirm you want to Allow or Deny<br />
access to the Domains List. It is generally easier to manage a list of Domains for which<br />
access is denied.<br />
5. In Domain Blocking click on Apply to save the selected settings.<br />
3. Review the protocol/IP filter settings.<br />
• Enabled – Selecting Enabled turns on the Protocol/IP Filter and selecting<br />
Disabled turns it off.<br />
• Name – Enter a name for the Protocol/IP Filter.<br />
© Copyright 2012 <strong>TRENDnet</strong>. All Rights Reserved.<br />
24
<strong>TRENDnet</strong> User’s Guide<br />
TEW-731BR<br />
• Protocol – Select the protocol type to filter. TCP, UDP, or you can select * to<br />
choose all protocol types.<br />
• Port – Enter the port number or port range numbers to block. (e.g. 80-80 or 20-<br />
21).<br />
• IP Range – Enter the IP address or IP address range to apply the protocol/IP<br />
filter. (e.g. 192.168.10.20-192.168.10.20 or 192.168.10.20-192.168.10.30).<br />
Note: The filter will not be applied to IP addresses outside of the range<br />
specified.<br />
Firewall rules<br />
Access > Firewall Rule<br />
You may want specify inbound or outbound access control to allow/deny sources (or<br />
Internet IP addresses) to your network from the Internet or from computers or devices<br />
on your network to the Internet. Firewall rules may allow for more granular control of<br />
specific inbound and outbound access between your network and the Internet. It is<br />
recommended that these settings remain set to default unless you are knowledgeable<br />
about the effects of changing the firewall rule configuration. It is possible to have<br />
undesirable functionality from your router if these settings are improperly modified.<br />
1. Log into your router management page (see “Access your router management page”<br />
on page 27).<br />
2. Click on Access, click on Filter, and click on Firewall Rule.<br />
• Add – Saves new protocol/IP filter.<br />
3. In the list, there are two default rules specific which cannot be modified. One rule to<br />
deny all access from the Internet to your network for security and the other to allow all<br />
access from your network to the Internet. Any additional rules will take precedence over<br />
the default rules.<br />
To modify an existing protocol/IP filter, click on the entry in the Protocol/IP Filters list.<br />
When selected, the entry will be highlighted.<br />
• Delete – Removes an existing protocol/IP filter.<br />
• Update – Modifies an existing protocol/IP filter.<br />
• Cancel – Discard changes to an existing protocol/IP filter.<br />
© Copyright 2012 <strong>TRENDnet</strong>. All Rights Reserved.<br />
25
<strong>TRENDnet</strong> User’s Guide<br />
TEW-731BR<br />
4. Review the firewall rule settings.<br />
• Enabled – Selecting Enabled turns on the firewall ruler and selecting Disabled<br />
turns it off.<br />
• Name – Enter a name for the firewall rule.<br />
• Action – Select Allow will allow access and selecting Deny will block or deny<br />
access.<br />
• Source – Configure the source information for the firewall rule.<br />
o Interface - Click the drop-down list and select LAN (from your<br />
network) or WAN (from the Internet) depending on where the traffic<br />
will be coming from.<br />
o IP Range Start – Changes the starting address for the firewall rule to<br />
apply (e.g. 192.168.1.20)<br />
o IP Range End – Changes the last address for the firewall rule to apply<br />
(e.g. 192.168.1.30)<br />
Note: The IP Range Start and End specify the range of IP addresses<br />
that the firewall rule will apply. Both fields need to be completed so<br />
use the same value to specify a single IP address.<br />
• Add – Saves new firewall rule.<br />
• Update – Modifies an existing firewall rule.<br />
• Delete – Removes an existing firewall rule.<br />
• New -Saves new firewall rule.<br />
• Cancel – Discard changes to an existing firewall rule.<br />
•<br />
• Destination – Configure the destination information for the firewall rule.<br />
o Interface - Click the drop-down list and select LAN (your network) or<br />
WAN (Internet) depending on where the traffic will be coming from.<br />
o IP Range Start – Changes the starting address for the firewall rule to<br />
apply (e.g. 192.168.10.20)<br />
o IP Range End – Changes the last address for the firewall rule to apply<br />
(e.g. 192.168.10.30)<br />
Note: The IP Range Start and End specify the range of IP addresses that the<br />
firewall rule will apply. Both fields need to be completed so use the same<br />
value to specify a single IP address.<br />
• Priority Up – Moves an existing firewall rule one step higher in priority.<br />
• Priority Down – Moves an existing firewall rule one step below in priority.<br />
• Update Priority – Save updated changes to priority.<br />
Note: Top position in the list is the highest priority, bottom position in the list is<br />
the lowest priority.<br />
o<br />
Protocol – Select the protocol type to filter. TCP, UDP, ICMP, or you<br />
can select * to choose all protocol types. Below, enter the port<br />
number or range of port numbers to apply the firewall rule. (e.g. 80-80<br />
or 20-21). For all ports, use the port range 1 - 65534.<br />
To modify an existing firewall rule, click on the rule in the firewall rules list. When<br />
selected, the entry will be highlighted.<br />
© Copyright 2012 <strong>TRENDnet</strong>. All Rights Reserved.<br />
26
<strong>TRENDnet</strong> User’s Guide<br />
TEW-731BR<br />
Advanced Router Setup<br />
Access your router management page<br />
Note: Your router management page http://192.168.10.1 is accessed through the use of<br />
your Internet web browser (e.g. Internet Explorer, Firefox, Chrome, Safari, Opera) and<br />
will be referenced frequently in this User’s Guide.<br />
1. Open your web browser (e.g. Internet Explorer, Firefox, Safari, Chrome, or Opera) and<br />
go to http://192.168.10.1. Your router will prompt you for a user name and password.<br />
Change your router login password<br />
Main > Password<br />
1. Log into your router management page (see “Access your router management page”<br />
on page 27).<br />
2. Click on Main, and click on Password.<br />
3. Under the Administrator section, in the New Password field, enter the new<br />
password, and in the Confirm Password field, retype the new password again to<br />
confirm.<br />
4. To save changes, click Apply.<br />
2. Next to Language, click the drop-down list to select your preferred language. Enter<br />
the default user name and password and then click Login.<br />
Default User Name: admin<br />
Default Password: admin<br />
Note: If you change the router login password, you will need to access the router<br />
management page using the User Name “admin” and the new password instead of the<br />
default password “admin”.<br />
© Copyright 2012 <strong>TRENDnet</strong>. All Rights Reserved.<br />
27
<strong>TRENDnet</strong> User’s Guide<br />
TEW-731BR<br />
User (Optional): The User account is an additional account used for viewing the settings<br />
on the router management page only. Accessing the router management page using the<br />
User account will restrict access to viewing only and will not allow any settings to be<br />
changed.<br />
Default User Name: user<br />
Default Password: user<br />
5. You can verify the time/date settings next to Local Time at the top of the page. Local<br />
Time displays the current date and time set on your router.<br />
Set your router date and time<br />
Main > Time<br />
1. Log into your router management page (see “Access your router management page”<br />
on page 27).<br />
2. Click on Main, and click on Time.<br />
3. Next to Time Zone, click the drop-down list to select your Time Zone.<br />
4. Next to Synchronize the clock with, you can choose one of the following options:<br />
• Manual – Set your router date and time manually in the Set Time section. To<br />
save changes, click Apply.<br />
Note: Time is specified in 24-hour format.<br />
OR<br />
• Automatic – Set your router date and time to synchronize with an NTP<br />
(Network Time Protocol) server address (e.g. pool.ntp.org). Enter the NTP<br />
server address next to Default NTP server, (e.g. pool.ntp.org). Next to Daylight<br />
Saving, set the annual range when daylight saving is activated. To save<br />
changes, click Apply.<br />
Note: NTP servers are used for computers and other network devices to synchronize<br />
time across an entire network.<br />
Manually configure your Internet connection<br />
Main > WAN<br />
1. Log into your router management page (see “Access your router management page”<br />
on page 27).<br />
2. Click on Main, and click on WAN.<br />
3. In the Connection Type drop-down list, click the type of Internet connection provided<br />
by your Internet Service Provider (ISP).<br />
4. Complete the fields required by your ISP.<br />
© Copyright 2012 <strong>TRENDnet</strong>. All Rights Reserved.<br />
28
<strong>TRENDnet</strong> User’s Guide<br />
TEW-731BR<br />
5. Complete the optional settings only if required by your ISP.<br />
6. To save changes, click Apply.<br />
Note: For many ISPs that provide dynamic IP addresses automatically, typically, the<br />
stored MAC address in the modem is reset each time you restart the modem. If you are<br />
installing this router for the first time, turn your modem before connecting the router to<br />
your modem. To clear your modem stored MAC address, typically the procedure is to<br />
disconnect power from the modem for approximately one minute, then reconnect the<br />
power. For more details on this procedure, refer to your modem’s User Guide/Manual or<br />
contact your ISP.<br />
1. Log into your router management page (see “Access your router management page”<br />
on page 27).<br />
2. Click on Main, and click on WAN.<br />
3. Under your Internet connection settings, find the MAC Address section shown below.<br />
Note: If you are unsure which Internet connection type you are using, please contact<br />
your ISP. Note: If your ISP requires a host name to be specified, you can specify it under<br />
Main > LAN & DHCP Server, in the Host Name field. To save changes, click Apply at<br />
bottom of the page.<br />
4. Click either Clone MAC Address to clone the MAC address of the computer you are<br />
currently using or manually enter the 12-digit MAC address of your old router.<br />
Clone a MAC address<br />
Main > WAN<br />
On any home network, each network device has a unique MAC (Media Access Control)<br />
address. Some ISPs register the MAC address of the device (usually a router or a<br />
computer) connected directly to the modem. If your computer MAC address is already<br />
registered with your ISP and to prevent the re-provisioning and registration process of a<br />
new MAC address with your ISP, then you can clone the address (assign the registered<br />
MAC address of your previous device to your new router). If you want to use the MAC<br />
address from the previous device (computer or old router that directly connected to the<br />
modem, you should first determine the MAC address of the device or computer and<br />
manually enter it into your router using the clone MAC address feature.<br />
5. To save changes, click Apply.<br />
© Copyright 2012 <strong>TRENDnet</strong>. All Rights Reserved.<br />
29
<strong>TRENDnet</strong> User’s Guide<br />
TEW-731BR<br />
Change your router IP address<br />
Main > LAN & DHCP Server<br />
In most cases, you do not need to change your router IP address settings. Typically, the<br />
router IP address settings only needs to be changed, if you plan to use another router in<br />
your network with the same IP address settings, if you are connecting your router to an<br />
existing network that is already using the IP address settings your router is using, or if<br />
you are experiencing problems establishing VPN connections to your office network<br />
through your router.<br />
Note: If you are not encountering any issues or are not faced with one of the cases<br />
described above or similar, it is recommended to keep your router IP address settings as<br />
default.<br />
Default Router IP Address: 192.168.10.1<br />
Default Router Network: 192.168.10.0 / 255.255.255.0<br />
1. Log into your router management page (see “Access your router management page”<br />
on page 27).<br />
2. Click on Main, and click on LAN & DHCP Server.<br />
3. Enter the router IP address settings.<br />
4. To save changes, click Apply.<br />
Note: You will need to access your router management page using your new router IP<br />
address to access the router management page. (e.g. Instead of using the default<br />
http://192.168.10.1 using your new router IP address will use the following format using<br />
your new router IP address http://(new.router.ipaddress.here) to access your router<br />
management page.<br />
Set up the DHCP server on your router<br />
Main > LAN & DHCP Server<br />
Your router can be used as a DHCP (Dynamic Host Configuration Protocol) server to<br />
automatically assign an IP address to each computer or device on your network. The<br />
DHCP server is enabled by default on your router. If you already have a DHCP server on<br />
your network, or if you do not want to use your router as a DHCP server, you can disable<br />
this setting. It is recommended to leave this setting enabled.<br />
1. Log into your router management page (see “Access your router management page”<br />
on page 27).<br />
2. Click on Main, and click on LAN & DHCP Server.<br />
3. Review the DHCP Server settings.<br />
• IP Address – Enter the new router IP address.<br />
(e.g. 192.168.200.1)<br />
• Subnet Mask – Enter the new router subnet mask.<br />
(e.g. 255.255.255.0)<br />
Note: The DHCP address range will change automatically to your new router IP<br />
address settings so you do not have to change the DHCP address range manually to<br />
match your new router IP address settings.<br />
• DHCP Server – Enable or Disable the DHCP server.<br />
• Start IP – Changes the starting address for the DHCP server range. (e.g.<br />
192.168.10.20)<br />
• End IP – Changes the last address for the DHCP server range. (e.g.<br />
192.168.10.30)<br />
Note: The Start IP and End IP specify the range of IP addresses to automatically<br />
assign to computers or devices on your network.<br />
© Copyright 2012 <strong>TRENDnet</strong>. All Rights Reserved.<br />
30
<strong>TRENDnet</strong> User’s Guide<br />
TEW-731BR<br />
• Domain Name (Optional) – Specifies a domain name to assign to computers or<br />
devices. (e.g. trendnet.com)<br />
• Lease Time – Click the drop-down list to select the lease time.<br />
Note: The DHCP lease time is the amount of time a computer or device can keep an<br />
IP address assigned by the DHCP server. When the lease time expires, the computer<br />
or device will renew the IP address lease with the DHCP server, otherwise, if there is<br />
no attempt to renew the lease, the DHCP server will reallocate the IP address to be<br />
assigned to another computer or device.<br />
4. To save changes, click Apply.<br />
Set up DHCP reservation<br />
Main > LAN & DHCP Server<br />
DHCP (Dynamic Host Configuration Protocol) reservation (also called Static DHCP) allows<br />
your router to assign a fixed IP address from the DHCP server IP address range to a<br />
specific device on your network. Assigning a fixed IP address can allow you to easily<br />
keep track of the IP addresses used on your network by your computers or devices for<br />
future reference or configuration such as virtual server (also called port forwarding, see<br />
“Virtual Server” on page 35) or special applications (also called port triggering, see<br />
“Special Applications” on page 36).<br />
1. Log into your router management page (see “Access your router management page”<br />
on page 27).<br />
2. Click on Main, and click on LAN & DHCP Server.<br />
3. Review the DHCP reservation settings.<br />
Dynamic DHCP List – You can view the list of active lease entries for computers or<br />
devices that have been assigned IP addresses automatically from the DHCP server on<br />
your router.<br />
• Static DHCP– Enable or Disable the DHCP reservation feature.<br />
• Name – Enter a name for the reservation.<br />
• IP Address – Enter the IP address to assign to the reservation. (e.g.<br />
192.168.10.101)<br />
Note: You cannot assign IP addresses outside of the DHCP range. The IP address is<br />
required to be within the DHCP IP address range (Start IP & End IP).<br />
• MAC Address – Enter the MAC (Media Access Control) address of the computer<br />
or network device to assign to the reservation. (e.g. 00:11:22:AA:BB:CC)<br />
• Add - Saves the reservation.<br />
© Copyright 2012 <strong>TRENDnet</strong>. All Rights Reserved.<br />
31
<strong>TRENDnet</strong> User’s Guide<br />
TEW-731BR<br />
Static DHCP List – You can view the list of reservations for computers or devices that<br />
have been created in this list.<br />
Note: It is recommended to leave this setting enabled, otherwise, you may encounter<br />
issues with applications that utilize UPnP in order allow the required communication<br />
between your computers or devices and the Internet.<br />
4. To save changes, click Apply.<br />
To modify an existing reservation, click on the entry in the Static DHCP list. When<br />
selected, the entry will be highlighted.<br />
• Update – Saves changes to an existing reservation.<br />
• Delete – Removes an existing reservation.<br />
• Cancel – Discards changes to existing reservation.<br />
Enable/disable UPnP on your router<br />
Management > Remote Management<br />
UPnP (Universal Plug and Play) allows devices connected to a network to discover each<br />
other and automatically open the connections or services for specific applications (e.g.<br />
instant messenger, online gaming applications, etc.) UPnP is enabled on your router by<br />
default to allow specific applications required by your computers or devices to allow<br />
connections through your router as they are needed.<br />
1. Log into your router management page (see “Access your router management page”<br />
on page 27).<br />
2. Click on Management, and click on Remote Management.<br />
Allow/deny VPN connections through your router<br />
Management > Remote Management<br />
A Virtual Private Network (VPN) is a network that uses a public network, such as the<br />
Internet, to provide secure communications between a remote computer or network<br />
and another network. Some offices often provide VPN access to their networks to<br />
enable employees to work from their remote office/home office, or while traveling.<br />
If your office or place of work has allowed and authorized access for you to access their<br />
network through VPN, the default VPN settings in your router have been configured to<br />
pass through the most common types of VPN protocols, which typically do not require<br />
any additional configuration changes.<br />
1. Log into your router management page (see “Access your router management page”<br />
on page 27).<br />
2. Click on Management, and click on Remote Management.<br />
3. Next to PPTP, L2TP, or IPsec (depending the VPN protocol your corporation requires)<br />
click Enabled or Disabled to turn the VPN pass through feature on or off on your router.<br />
Note: It is recommended to leave these settings enabled.<br />
4. To save changes, click Apply.<br />
3. Next to UPnP, click Enabled or Disabled to turn the feature on or off on your router.<br />
© Copyright 2012 <strong>TRENDnet</strong>. All Rights Reserved.<br />
32
<strong>TRENDnet</strong> User’s Guide<br />
TEW-731BR<br />
Allow/deny multicast streaming<br />
Management > Remote Management<br />
In some cases, applications require multicast communication (also called IP multicast<br />
which is the delivery of information to a specific group of computers or devices in a<br />
single transmission) typically used in media streaming applications. Multicast streaming<br />
is enabled by default on your router to allow applications that require multicast<br />
communication through your router which typically does not require additional<br />
configuration changes.<br />
1. Log into your router management page (see “Access your router management page”<br />
on page 27).<br />
2. Click on Management, and click on Remote Management.<br />
3. Next to Multicast Stream, click Enabled or Disabled to turn the feature on or off on<br />
your router.<br />
Note: It is recommended to leave this setting enabled.<br />
4. To save changes, click Apply.<br />
Note: First, you will need to sign up for one of the DDNS service providers listed in the<br />
Server Address drop-down list.<br />
1. Sign up for one of the DDNS available service providers list under Server Address.<br />
(e.g. dyndns.com, no-ip.com, etc.)<br />
2. Log into your router management page (see “Access your router management page”<br />
on page 27).<br />
3. Click on Main and click on Dynamic DNS.<br />
4. Next to DDNS, click Enabled.<br />
5. In the Server Address drop-down list, select the provider you selected, and enter your<br />
information in the fields.<br />
• Host Name: Personal URL provided to you by your Dynamic DNS service<br />
provider (e.g. www.trendnet.dyndns.biz)<br />
• User Name: The user name needed to log in to your Dynamic DNS service<br />
account<br />
• Password: This is the password to gain access to Dynamic DNS service (NOT<br />
your router or wireless network password) for which you have signed up to.<br />
Identify your network on the Internet<br />
Main > Dynamic DNS<br />
Since most ISPs constantly change your home IP address, providing access to devices on<br />
your home or small office Local Area Network (such as IP Cameras) from the Internet<br />
requires setting up a Dynamic DNS service and entering the parameters into this<br />
management area. Dynamic DNS services allow your router to confirm its location to the<br />
given Dynamic DNS service, thereby providing the Dynamic DNS service with the ability<br />
to provide a virtual fixed IP address for your network. This means that even though your<br />
ISP is always changing your IP address, the Dynamic DNS service will be able to identify<br />
your network using a fixed address—one that can be used to view home IP Camera and<br />
other devices on your local area network.<br />
6. To save changes, click Apply.<br />
© Copyright 2012 <strong>TRENDnet</strong>. All Rights Reserved.<br />
33
<strong>TRENDnet</strong> User’s Guide<br />
TEW-731BR<br />
Allow remote access to your router management page<br />
Management > Remote Management<br />
You may want to make changes to your router from a remote location such at your<br />
office or another location while away from your home.<br />
1. Log into your router management page (see “Access your router management page”<br />
on page 27).<br />
2. Click on Management, and click on Remote Management.<br />
3. Under the HTTP section, click Enabled.<br />
• Port– It is recommended to leave this setting as 8080.<br />
Note: If you have configured port 8080 for another configuration section such<br />
as virtual server or special application, please change the port to use.<br />
(Recommended port range 1024-65534)<br />
• Remote IP Range – It is recommended to leave this setting as *, to allow<br />
remote access from anywhere on the Internet.<br />
Note: You can enter a specific range of Internet IP addresses that are allowed to<br />
access your router management page, all others will be denied.<br />
DMZ<br />
Access > DMZ<br />
You may want to expose a specific computer or device on your network to the Internet<br />
to allow anyone to access it. Your router includes the DMZ (Demilitarized Zone) feature<br />
that makes all the ports and services available on the WAN/Internet side of the router<br />
and forwards them to a single IP address (computer or network device) on your<br />
network. The DMZ feature is an easy way of allowing access from the Internet however,<br />
it is a very insecure technology and will open local area network to greater threats from<br />
Internet attacks.<br />
It is strongly recommended to use Virtual Server (also called port forwarding, see<br />
“Virtual Server” on page 35) to allow access to your computers or network devices from<br />
the Internet.<br />
1. Make the computer or network device (for which you are establishing a DMZ link) has<br />
a static IP address (or you can use the DHCP reservation feature to ensure the device<br />
has a fixed IP address) (see “Set up DHCP reservation” on page 31).<br />
A. Signing up for a Dynamic DNS service (outlined in the DDNS section) will<br />
provide identification of the router’s network from the Internet.<br />
2. Log into your router management page (see “Access your router management page”<br />
on page 27).<br />
3. Click on Access, and click on DMZ.<br />
4. Next to DMZ Enable, click Enabled.<br />
5. Next to DMZ Host IP, enter the IP address you assigned to the computer or network<br />
device to expose to the Internet.<br />
4. To save changes, click Apply.<br />
6. To save changes, click Apply.<br />
Open a device on your network to the Internet<br />
This router can provide access to devices on your local area network to the Internet<br />
using the Virtual Server, Special Application, method (DMZ NOT recommended).<br />
© Copyright 2012 <strong>TRENDnet</strong>. All Rights Reserved.<br />
34
<strong>TRENDnet</strong> User’s Guide<br />
TEW-731BR<br />
Virtual Server<br />
Access > Virtual Server<br />
Virtual Server (also called port forwarding) allows you to define specific ports (used or<br />
required by a specific application) and forward them to a single IP address (a computer<br />
or device) on your network. Using this feature is more secure compared to using DMZ<br />
(see DMZ on page 34) in which DMZ forwards all ports instead of only specific ports<br />
used by an application. An example would be forwarding a port to an IP camera<br />
(<strong>TRENDnet</strong> IP cameras default to HTTP TCP port 80 for remote access web requests) on<br />
your network to be able to view it over the Internet.<br />
Since most ISPs constantly change your home IP address, to be able to access the Virtual<br />
Server port(s) from the Internet it is recommended to setup Dynamic DNS service (See<br />
DynDNS section).<br />
1. Log into your router management page (see “Access your router management page”<br />
on page 27).<br />
2. Click on Access, and click on Virtual Server.<br />
3. Review the virtual server settings.<br />
• Enabled – Selecting Enabled turns on the virtual server and selecting Disabled<br />
turns off the virtual server.<br />
• Name – Enter a name for the virtual server.<br />
• Protocol – Select the protocol required for your device. TCP, UDP, or you can<br />
select Both to choose both TCP & UDP (recommended).<br />
Note: Please refer to the device documentation to determine which ports and<br />
protocols are required.<br />
• Private Port – Enter the port number required by your device. Refer to the<br />
connecting device’s documentation for reference to the network port(s)<br />
required.<br />
• Public Port – Enter the port number used to access the device from the<br />
Internet.<br />
Note: The Public Port can be assigned a different port number than the Private Port<br />
(also known as port redirection), however it is recommended to use the same port<br />
number for both settings. Please refer to the device documentation to determine<br />
which ports and protocols are required.<br />
To simplify configuration, there is a list of commonly used pre-defined virtual server<br />
entries to modify, otherwise, you can choose to manually add a new virtual server.<br />
• LAN Server – Enter the IP address of the device to forward the port (e.g.<br />
192.168.10.101).<br />
Note: You should assign a static IP address to the device or use DHCP reservation to<br />
ensure the IP address of the device does not change.<br />
© Copyright 2012 <strong>TRENDnet</strong>. All Rights Reserved.<br />
35
<strong>TRENDnet</strong> User’s Guide<br />
TEW-731BR<br />
• Add – Saves a new virtual server entry.<br />
• Delete – Removes an existing virtual server.<br />
• Update – Modifies an existing virtual server.<br />
• Cancel – Discard changes to an existing virtual server.<br />
Example: To forward TCP port 80 to your IP camera<br />
1. Setup DynDNS service (See DynDNS section).<br />
2. Access <strong>TRENDnet</strong> IP Camera management page and forward Port 80 (see<br />
product documentation)<br />
3. Make sure to configure your network/IP camera to use a static IP address or you can<br />
use the DHCP reservation feature (see “Set up DHCP reservation” on page 31).<br />
Note: You may need to reference your camera documentation on configuring a static IP<br />
address.<br />
4. Log into your router management page (see “Access your router management page”<br />
on page 27).<br />
5. Click on Access, and click on Virtual Server.<br />
6. In the list below, click the pre-defined virtual server entry named Virtual Server HTTP.<br />
8. Click Enabled to turn on this virtual server.<br />
9. Next to Name, you can enter another name for the virtual server, otherwise, leave<br />
the default name.<br />
10. Next to Protocol, make sure TCP is selected in the drop-down list.<br />
11. The Private Port and Public Port, make sure port number 80 is configured for both<br />
settings.<br />
12. Next to LAN Server, enter the IP address assigned to the camera. (e.g.<br />
192.168.10.101)<br />
13. To save the changes, click Update.<br />
Note: The selected item will be highlighted in yellow when selected.<br />
7. The fields will be populated with the selected pre-defined virtual server entry.<br />
© Copyright 2012 <strong>TRENDnet</strong>. All Rights Reserved.<br />
36
<strong>TRENDnet</strong> User’s Guide<br />
TEW-731BR<br />
Special Applications<br />
Access > Special AP<br />
Special applications (also called port triggering) is typically used for online gaming<br />
applications or communication applications that require a range of ports or several<br />
ports to be dynamically opened on request to a device on your network. The router will<br />
wait for a request on a specific port or range of ports (or trigger port/port range) from a<br />
device on your network and once a request is detected by your router, the router will<br />
forward a single port or multiple ports (or incoming port/port range) to the device on<br />
your network. This feature is not typically used as most devices and routers currently<br />
use UPnP (Universal Plug and Play) to automatically configure your router to allow<br />
access for applications. See “Enable/disable UPnP on your router” on page 32.<br />
Note: Please refer to the device documentation to determine if your device supports<br />
UPnP first, before configuring this feature.<br />
1. Log into your router management page (see “Access your router management page”<br />
on page 27).<br />
2. Click on Access, and click on Special AP.<br />
3. Review the special application settings.<br />
• Enabled – Selecting Enabled turns on the special application and selecting<br />
Disabled turns it off.<br />
• Name – Enter a name for the special application.<br />
• Trigger – Port or port range requested by the device.<br />
o Protocol – Select the protocol requested by the device. TCP, UDP, or you<br />
can select Both to choose both TCP and UDP.<br />
o Port Range – Enter the ports or port range requested by the device.<br />
(e.g. 554-554 or 6112-6112).<br />
Note: Please refer to the device documentation to determine which ports and protocols<br />
are required.<br />
• Incoming – Port(s) forwarded to the device.<br />
To simplify configuration, there is a list of commonly used pre-defined special<br />
application entries to modify, otherwise, you can choose to manually add a new special<br />
application.<br />
o<br />
o<br />
Protocol – Select the protocol to be forwarded to the device. TCP,<br />
UDP, or you can select Both to choose both TCP and UDP.<br />
Port Range – Enter the ports or port range to be forwarded to the<br />
device.<br />
(e.g. 2000-2038,2069,2081,2200-2210).<br />
Note: Please refer to the device documentation to determine which ports and<br />
protocols are required.<br />
© Copyright 2012 <strong>TRENDnet</strong>. All Rights Reserved.<br />
37
<strong>TRENDnet</strong> User’s Guide<br />
TEW-731BR<br />
• Add – Saves a new special application.<br />
To modify an existing application, click on the entry in the special applications list. When<br />
selected, the entry will be highlighted.<br />
• Delete – Removes an existing special application.<br />
• Update – Modifies an existing special application.<br />
• Cancel – Discard changes to an existing special application.<br />
Add static routes to your router<br />
Routing > Static<br />
You may want set up your router to route computers or devices on your network to<br />
other local networks through other routers. Generally, different networks can be<br />
determined by the IP addressing assigned to those networks. Generally speaking and for<br />
the case of an example, your network may have 192.168.10.x IP addressing and another<br />
network may have 192.168.20.x IP addressing and because the IP addressing of these<br />
two networks are different, they are separate networks. In order to communicate<br />
between the two separate networks, static routing needs to be configured. Below is an<br />
example diagram where routing is needed for devices and computers on your network<br />
to access the other network.<br />
Note: Configuring this feature assumes that you have some general networking<br />
knowledge.<br />
© Copyright 2012 <strong>TRENDnet</strong>. All Rights Reserved.<br />
38
<strong>TRENDnet</strong> User’s Guide<br />
TEW-731BR<br />
1. Log into your router management page (see “Access your router management page”<br />
on page 27).<br />
To modify an existing reservation, click on the entry in the static route list. When<br />
selected, the entry will be highlighted.<br />
2. Click on Routing, and click on Static.<br />
3. Review the static route settings.<br />
• Network Address – Enter the IP network address of the destination network<br />
for the route.<br />
(e.g. 192.168.20.0)<br />
• Network Mask – Enter the subnet mask of the destination network for the<br />
route.<br />
(e.g. 255.255.255.0)<br />
• Gateway Address – Enter the gateway to the destination network for the<br />
route.<br />
(e.g. 192.168.10.2)<br />
• Interface – Click the drop-down list and select the Interface on your router<br />
where the route is active.<br />
(e.g. LAN)<br />
• Metric – Enter the metric or priority of the route. The metric range is 1-15, the<br />
lowest number 1 being the highest priority. (e.g. 1 )<br />
• Update – Saves changes to an existing static route.<br />
• Delete – Removes an existing static route.<br />
• Cancel – Discards changes to existing static route.<br />
Enable dynamic routing on your router<br />
Routing > Dynamic<br />
You may want to setup your router to route computers or devices on your network to<br />
other local networks through other routers. If other routers support dynamic routing<br />
such as RIP (Routing Information Protocol), you can enable this feature on your router<br />
to automatically learn the required routes to reach those networks. It is required that<br />
the same dynamic routing protocol and version is also enabled on the other routers in<br />
order your router and the other routers to exchange information about the network.<br />
Note: Configuring this feature assumes that you have some general networking<br />
knowledge.<br />
1. Log into your router management page (see “Access your router management page”<br />
on page 27).<br />
2. Click on Routing, and click on Dynamic.<br />
3. Select the appropriate dynamic routing protocol and version communicate with other<br />
routers.<br />
• Add – Saves the static route.<br />
© Copyright 2012 <strong>TRENDnet</strong>. All Rights Reserved.<br />
39
<strong>TRENDnet</strong> User’s Guide<br />
TEW-731BR<br />
• Transmit – Allows your router to send out network information to other<br />
routers so other routers can dynamically build routes to your network.<br />
o<br />
o<br />
o<br />
Disabled – Disable sending routing information from your router to<br />
other routers.<br />
RIP 1 - Sends out routing information to other routers using the RIP<br />
version 1 protocol.<br />
RIP 2 – Sends out routing information to other routers using the RIP<br />
version 2 protocol (recommended if supported by both devices).<br />
• Receive - Allows your router to receive network information from other router<br />
so your router can build routes to other networks.<br />
o<br />
o<br />
o<br />
Disabled – Disable receiving routing information from other routers to<br />
your router.<br />
RIP 1 - Receive routing information from other routers using the RIP<br />
version 1 protocol.<br />
RIP 2 – Receive routing information from other routers using the RIP<br />
version 2 protocol.<br />
4. Click Apply to save the changes or click Cancel to discard the changes.<br />
© Copyright 2012 <strong>TRENDnet</strong>. All Rights Reserved.<br />
40
<strong>TRENDnet</strong> User’s Guide<br />
TEW-731BR<br />
Router Maintenance & Monitoring<br />
Router Default Settings<br />
Reset your router to factory defaults<br />
Tools > Settings<br />
You may want to reset your router to factory defaults if you are encountering difficulties<br />
with your router and have attempted all other troubleshooting. Before you reset your<br />
router to defaults, if possible, you should backup your router configuration first, see<br />
“Backup and restore your router configuration settings” on page 42.<br />
Administrator User Name admin<br />
Administrator Password<br />
admin<br />
Router IP Address 192.168.10.1<br />
Router Subnet Mask 255.255.255.0<br />
DHCP Server IP Range 192.168.10.101-192.168.199<br />
There are two methods that can be used to reset your router to factory defaults.<br />
Wireless<br />
SSID (wireless network name)<br />
Enabled<br />
<strong>TRENDnet</strong>731<br />
• Reset Button – Located on the rear panel of your router, see “Product<br />
Hardware Features” on page 2 . Use this method if you are encountering<br />
difficulties with accessing your router management page.<br />
Wireless Security<br />
Disabled<br />
802.11 Mode 2.4GHz 802.11b/g/n mixed mode<br />
Channel<br />
Auto Channel<br />
OR<br />
• Router Management Page<br />
1. Log into your router management page (see “Access your router management page”<br />
on page 27).<br />
2. Click on Tools and click on Settings.<br />
3. Under Restore factory default settings, click Restore. When prompted to confirm this<br />
action, click OK.<br />
© Copyright 2012 <strong>TRENDnet</strong>. All Rights Reserved.<br />
41
<strong>TRENDnet</strong> User’s Guide<br />
TEW-731BR<br />
Backup and restore your router configuration settings<br />
Tools > Settings<br />
You may have added many customized settings to your router and in the case that you<br />
need to reset your router to default, all your customized settings would be lost and<br />
would require you to manually reconfigure all of your router settings instead of simply<br />
restoring from a backed up router configuration file.<br />
3. Under Restore Configuration Settings, next to Load Settings, depending on your web<br />
browser, click on Browse or Choose File.<br />
To backup your router configuration:<br />
1. Log into your router management page (see “Access your router management page”<br />
on page 27).<br />
2. Click on Tools and click on Settings.<br />
A separate file navigation window should open.<br />
3. Under Save Configuration Settings and next to Save Settings, click Save.<br />
4. Select the router configuration file to restore and click Load.<br />
(Default Filename: cfg.bin). If prompted, click Yes or OK.<br />
5. Wait for the router to restore settings.<br />
4. Depending on your web browser settings, you may be prompted to save a file (specify<br />
the location) or the file may be downloaded automatically to the web browser settings<br />
default download folder. (Default Filename: cfg.bin)<br />
To restore your router configuration:<br />
1. Log into your router management page (see “Access your router management page”<br />
on page 27).<br />
2. Click on Tools and click on Settings.<br />
© Copyright 2012 <strong>TRENDnet</strong>. All Rights Reserved.<br />
42
<strong>TRENDnet</strong> User’s Guide<br />
TEW-731BR<br />
Upgrade your router firmware<br />
Tools > Firmware<br />
<strong>TRENDnet</strong> may periodically release firmware upgrades that may add features or fix<br />
problems associated with your <strong>TRENDnet</strong> router model and version. To check if there is<br />
a firmware upgrade available for your device, please check your <strong>TRENDnet</strong> model and<br />
version using the link. http://www.trendnet.com/downloads/<br />
1. Log into your router management page (see “Access your router management page”<br />
on page 27).<br />
2. Click on Status and click on Device Information to check your router’s current<br />
firmware version at the top of the page.<br />
In addition, it is also important to verify if the latest firmware version is newer than the<br />
one your router is currently running. To identify the firmware that is currently loaded on<br />
your router, log in to the router, click on the Status tab and then on the Device<br />
Information sub-tab. The firmware used by the router is listed at the top of this page. If<br />
there is a newer version available, also review the release notes to check if there were<br />
any new features you may want or if any problems were fixed that you may have been<br />
experiencing.<br />
3. Click on Tools and click on Firmware.<br />
4. Depending on your web browser, next to Upgrade Firmware, click Browse or Choose<br />
File.<br />
1. If a firmware upgrade is available, download the firmware to your computer.<br />
2. Unzip the file to a folder on your computer.<br />
Please note the following:<br />
• Do not interrupt the firmware upgrade process. Do not turn off the device or<br />
press the Reset button during the upgrade.<br />
• If you are upgrade the firmware using a laptop computer, ensure that the<br />
laptop is connected to a power source or ensure that the battery is fully<br />
charged.<br />
• Disable sleep mode on your computer as this may interrupt the firmware<br />
upgrade process.<br />
• Do not upgrade the firmware using a wireless connection, only using a wired<br />
network connection.<br />
• Any interruptions during the firmware upgrade process may permanently<br />
damage your router.<br />
5. Navigate to the folder on your computer where the unzipped firmware file (.bin) is<br />
located and select it.<br />
6. Click Upgrade. If prompted, click yes or OK.<br />
© Copyright 2012 <strong>TRENDnet</strong>. All Rights Reserved.<br />
43
<strong>TRENDnet</strong> User’s Guide<br />
TEW-731BR<br />
Restart your router<br />
Tools > Restart<br />
You may want to restart your router if you are encountering difficulties with your router<br />
and have attempted all other troubleshooting.<br />
There are two methods that can be used to restart your router.<br />
• Turn the router off for 10 seconds using the router On/Off switch located on<br />
the rear panel of your router, see “Product Hardware Features” on page 2 .<br />
Use this method if you are encountering difficulties with accessing your router<br />
management page. This is also known as a hard reboot or power cycle.<br />
OR<br />
• Router Management Page – This is also known as a soft reboot or restart.<br />
1. Log into your router management page (see “Access your router management page”<br />
on page 27).<br />
Check connectivity using the router management page<br />
Tools > Ping Test<br />
For troubleshooting purposes, you may want to check your router connectivity using the<br />
ping (also known as a network connectivity test) test tool on your router management<br />
page.<br />
1. Log into your router management page (see “Access your router management page”<br />
on page 27).<br />
2. Click on Tools and click on Ping Test.<br />
3. Enter in the IP address (e.g. 192.168.10.101) or host name (e.g. www.trendnet.com)<br />
to test.<br />
4. Click Ping.<br />
2. Click on Tools and click on Restart. If prompted, click yes or OK.<br />
5. You will receive a success or fail result message of the address you entered providing<br />
a basic indicating of the router’s connectivity to the Internet or devices that are<br />
connected to your network. Click Back to bring you back to the Ping Test page.<br />
© Copyright 2012 <strong>TRENDnet</strong>. All Rights Reserved.<br />
44
<strong>TRENDnet</strong> User’s Guide<br />
TEW-731BR<br />
Check the router system information<br />
Status > Device Information<br />
You may want to check the system information of your router such as WAN (Internet)<br />
connectivity, wireless and wired network settings, router MAC address, and firmware<br />
version.<br />
1. Log into your router management page (see “Access your router management page”<br />
on page 27).<br />
• IP Address – The current IP address assigned to your router WAN port or<br />
interface configuration.<br />
• Subnet Mask - The current subnet mask assigned to your router WAN port or<br />
interface configuration.<br />
• Default Gateway – The current gateway assigned to your router WAN port or<br />
interface configuration.<br />
• DNS (Domain Name System) – The current DNS address(es) assigned to your<br />
router port or interface configuration.<br />
2. Click on Status and click on Device Information.<br />
3. Review the device information.<br />
• Firmware Version – The current firmware version your router is running.<br />
• Router Up Time – The duration your router has been running continuously<br />
without a restart/power cycle (hard or soft reboot) or reset.<br />
Wireless Information<br />
WAN (Internet) Information<br />
• MAC Address – The current MAC address used by your router’s WAN port or<br />
interface configuration.<br />
• Connection – Displays the current WAN (Internet) connection status. When<br />
using DHCP Client (or Dynamic IP address) Internet connection type, you will<br />
provide the option to Release and Renew your IP address settings.<br />
• MAC Address – The current MAC address of your router’s wireless or interface<br />
configuration.<br />
• Connection – Displays the status if your wireless functionality on your router is<br />
enabled or disabled.<br />
• SSID – Displays the current wireless network name assigned to your router.<br />
• Channel – Displays the current wireless channel your router is operating.<br />
• Authentication – Displays the current wireless security configured on your<br />
router.<br />
Other Internet connection types such as PPPoE will provide the option to<br />
Connect and Disconnect.<br />
© Copyright 2012 <strong>TRENDnet</strong>. All Rights Reserved.<br />
45
<strong>TRENDnet</strong> User’s Guide<br />
TEW-731BR<br />
1. Log into your router management page (see “Access your router management page”<br />
on page 27).<br />
2. Click on Status and click on Log.<br />
3. Review the device log information.<br />
Wired LAN Information<br />
• MAC Address – The current MAC address of your router’s wired LAN or<br />
interface configuration.<br />
• Time – Displays the time of the log entry. If the time is inaccurate, make sure to<br />
set the router date and time correctly. (See “Set your router date and time” on<br />
page 28)<br />
• Type – Displays a notification regarding the type of log.<br />
• Message – Displays the log message.<br />
• IP Address - Displays your router’s current IP address.<br />
• Subnet Mask – Displays your router’s current subnet mask.<br />
• DHCP Server - Display your router’s DHCP server status, enabled or disabled,<br />
and provides a link to the DHCP client listing.<br />
Router Log Navigation<br />
View your router log<br />
Status > Log<br />
Your router log can be used to obtain activity information on the functionality of your<br />
router or for troubleshooting purposes.<br />
• First Page – Displays the first page of the log.<br />
• Last Page – Displays the last page of the log.<br />
• Previous Page – Display the log page previous to the current. The Page: 1/1 will<br />
display the current page.<br />
• Next Page – Displays the log page next to the current.<br />
• Clear Log - Clears all logging<br />
• Refresh - The Page: 1/1 will display the current page.<br />
© Copyright 2012 <strong>TRENDnet</strong>. All Rights Reserved.<br />
46
<strong>TRENDnet</strong> User’s Guide<br />
TEW-731BR<br />
Configure your router log<br />
Status > Log Setting<br />
You may want send your router log to your e-mail address or to an external log server<br />
(also known as Sysco server) so you can check it periodically while away from home. You<br />
may also want to only see specific categories of logging.<br />
Send router logs to your e-mail address<br />
• Email Log Now – Click this option to send an e-mail with the current router log<br />
using your email settings.<br />
• Email Logs – Select when you want the router log to be e-mailed.<br />
o When log is full – The router log will be e-mailed to your e-mail<br />
address when router internal log is full.<br />
o Click the drop-down list and configure to e-mail logs according to a set<br />
schedule. Once on a specific day of the week or once every day.<br />
1. Log into your router management page (see “Access your router management page”<br />
on page 27).<br />
2. Click on Status and click on Log Setting.<br />
3. Review the e-mail log settings.<br />
• SMTP Authentication – Set this option to Enabled if your e-mail service<br />
requires authentication. If not, leave this setting to Disabled.<br />
Note: If you are unsure of this setting check with your e-mail service provider if<br />
authentication is required.<br />
• SMTP Account – Enter your account user name for your e-mail service.<br />
• SMTP Password – Enter your password for your e-mail service.<br />
• SMTP Server – Enter the IP address (e.g. 10.10.10.10) or domain name (e.g.<br />
mail.trendnet.com) of your e-mail server.<br />
• SMTP Server Port – Enter the port used by your e-mail service. (e.g. Default<br />
SMTP Server Port: 25)<br />
• From Email Address – Enter a sender e-mail address. (e.g.<br />
router@trendnet.com)<br />
Note: This does not need to be real e-mail address, only used for identification<br />
purposes when checking your e-mail.<br />
• To Email Address – Enter your e-mail address.<br />
4. To save changes, click Apply.<br />
Send router logs to an external log server<br />
1. Log into your router management page (see “Access your router management page”<br />
on page 27).<br />
© Copyright 2012 <strong>TRENDnet</strong>. All Rights Reserved.<br />
47
<strong>TRENDnet</strong> User’s Guide<br />
TEW-731BR<br />
2. Click on Status and click on Log Setting.<br />
3. Next to Syslog Server, enter the IP address of the external log server to send router<br />
logging.<br />
View your router packet statistics<br />
Status > Statistics<br />
You may want to check your router packet statistics for informational purposes only.<br />
1. Log into your router management page (see “Access your router management page”<br />
on page 27).<br />
4. To save changes, click Apply.<br />
2. Click on Status and click on Statistic.<br />
3. The table displays the amount of packets sent and received on your router’s wired<br />
LAN, wireless, and WAN (Internet).<br />
Set the types or categories to include in logging<br />
1. Log into your router management page (see “Access your router management page”<br />
on page 27).<br />
2. Click on Status and click on Log Setting.<br />
3. Next to Log Type, check the types or categories to include in logging.<br />
View wireless devices connected to your router<br />
Status > Wireless<br />
You may want to check the wireless devices connected to your router.<br />
1. Log into your router management page (see “Access your router management page”<br />
on page 27).<br />
2. Click on Status and click on Wireless.<br />
3. The table displays the amount time each wireless device has been connected and the<br />
MAC address of each wireless device.<br />
4. To save changes, click Apply.<br />
© Copyright 2012 <strong>TRENDnet</strong>. All Rights Reserved.<br />
48
<strong>TRENDnet</strong> User’s Guide<br />
TEW-731BR<br />
Capture packets using the router management page<br />
Management > Capture Packets<br />
You may want to use the router management page to capture data packets for further<br />
troubleshooting and analysis. Packet captures allow you to see what type of data and<br />
information is inside each packet. You will need a packet capture software application to<br />
be able to open and view the packet capture files downloaded from the router.<br />
1. Log into your router management page (see “Access your router management page”<br />
on page 27).<br />
2. Click on Management and click on Capture Packets.<br />
3. Click on the Network Interface drop-down list and select which interface you would<br />
like to capture data packets, LAN or WAN.<br />
4. Review the options for capturing packets.<br />
Enable SNMP on your router<br />
Management > SNMP<br />
SNMP (Simple Network Management Protocol) is a network management protocol used<br />
to monitor (read) and/or manage (write) multiple network devices on a network. This<br />
preconfigured external SNMP server.<br />
1. Log into your router management page (see “Access your router management page”<br />
on page 27).<br />
2. Click on Management and click on SNMP.<br />
3. Review the options for SNMP.<br />
• SNMP – Select Enabled to enable SNMP.<br />
• System Location – Enter the location. (optional)<br />
• System Contact – Enter the contact. (optional)<br />
• Community – Enter the community to match the settings with the external<br />
SNMP server.<br />
• Trap Receiver 1-3 – Enter the IP address of the external SNMP trap receiver.<br />
You can enter up to three receivers. (e.g. 192.168.10.250)<br />
• Start – Starts the packet capture.<br />
• Stop - Stops the packet capture<br />
• <strong>Download</strong> – <strong>Download</strong> the packet capture file.<br />
(.pcap file)<br />
4. To save changes, click Apply.<br />
© Copyright 2012 <strong>TRENDnet</strong>. All Rights Reserved.<br />
49
<strong>TRENDnet</strong> User’s Guide<br />
TEW-731BR<br />
Router Management Page Structure<br />
Main<br />
• LAN & DHCP Server<br />
o Static DHCP Reservation<br />
• WAN<br />
o Clone MAC Address<br />
• Password<br />
• Time<br />
• Dynamic DNS<br />
Wireless<br />
• Basic<br />
• Security<br />
• Advanced<br />
• Wi-Fi Protected Setup<br />
Status<br />
• Device Information<br />
• Log<br />
• Log Setting<br />
o Email Log<br />
o Syslog<br />
o Log Type<br />
• Statistic<br />
• Wireless<br />
Routing<br />
• Static<br />
• Dynamic<br />
• Routing Table<br />
Access<br />
• Filter<br />
o MAC Filters<br />
o Domain/URL Blocking<br />
o Protocol/IP Filters<br />
• Virtual Server<br />
• Special AP<br />
• DMZ<br />
• Firewall Rule<br />
Management<br />
• SNMP<br />
• Remote Management<br />
• Capture Packets<br />
Routing<br />
• Static<br />
• Dynamic<br />
• Routing Table<br />
Tools<br />
• Restart<br />
• Settings<br />
o Save Configuration Settings<br />
o Restore Configuration Settings<br />
o Reset to Factory Default<br />
• Firmware<br />
• Upgrade Firmware<br />
• Ping Test<br />
Wizard<br />
• Setup Wizard<br />
© Copyright 2012 <strong>TRENDnet</strong>. All Rights Reserved.<br />
50
<strong>TRENDnet</strong> User’s Guide<br />
TEW-731BR<br />
Technical Specifications<br />
Humidity<br />
(14°F~158 °F)<br />
Max. 90% (non-condensing)<br />
Hardware<br />
Certifications<br />
CE, FCC<br />
Standards<br />
IEEE 802.3 (10BASE-T), IEEE 802.3u (100BASE-TX), IEEE<br />
802.11b, IEEE 802.11g, IEEE 802.11n, IEEE 802.3az<br />
Wireless<br />
Frequency<br />
2.412~2.484GHz band<br />
WAN<br />
1 x 10/100Mbps Auto-MDIX port (Internet)<br />
Antenna<br />
2 x 2dBi fixed dipole antennas<br />
LAN<br />
WPS Button<br />
Power Switch<br />
Connection Type<br />
Supported Web Browsers<br />
Internet Access Control<br />
4 x 10/100Mbps Auto-MDIX ports<br />
Enables Wi-Fi Protected Setup (WPS) function (Hold for 3<br />
seconds)<br />
On/Off power switch<br />
Dynamic IP, Static (fixed) IP, PPPoE, PPTP, L2TP<br />
Internet Explorer 6.0 or above, Firefox 2.0 or above,<br />
Chrome, Opera, Safari<br />
MAC Address Filter, Domain/URL Filter, Protocol/IP Filter,<br />
Virtual Server, DMZ host, UPnP, PPTP/L2TP/IPsec VPN pass<br />
through<br />
Modulation<br />
Media Access Protocol<br />
Data Rate<br />
Security<br />
802.11b: CCK (11 and 5.5Mbps), DQPSK (2Mbps), DBPSK<br />
(1Mbps)<br />
802.11g: OFDM with BPSK, QPSK and 16/64-QAM<br />
802.11n: BPSK, QPSK, 16QAM, 64QAM with OFDM<br />
CSMA/CA with ACK<br />
802.11b: Up to 11Mbps<br />
802.11g: Up to 54Mbps<br />
802.11n: Up to 300Mbps<br />
64/128-bit WEP (HEX/ASCII), WPA/WPA2-RADIUS,<br />
WPA/WPA2-PSK<br />
Management/<br />
Monitoring<br />
Routing<br />
LED Indicators<br />
Power<br />
Local/remote configuration, upgrade firmware,<br />
Backup/Restore configuration via Web browser, Internal<br />
System Log, Syslog, E-Mail Logging, SNMPv1/v2c, Ping Test<br />
Tool, Dynamic DNS<br />
Static and Dynamic RIPv1/2<br />
Power, Status, LAN1~LAN4, WAN, WLAN<br />
Input: 100~240V AC, 50~60Hz<br />
Output: 5V DC, 1A<br />
Output Power<br />
Receiving Sensitivity<br />
Channels<br />
802.11b: 15dBm (typical) @ 11Mbps<br />
802.11g: 15dBm (typical) @ 54Mbps<br />
802.11n: 13dBm (typical) @ 300Mbps<br />
802.11b: -85dBm (typical) @ 11Mbps<br />
802.11g: -68dBm (typical) @ 54Mbps<br />
802.11n: -62dBm (typical) @ 300Mbps<br />
1~ 11 (FCC), 1~13 (ETSI)<br />
Power Consumption<br />
Dimension (L x W x H)<br />
Weight<br />
3.0 Watts (max)<br />
158 x 109 x 34 mm (6.2 x 4.3 x 1.3 in)<br />
210 g (7.4oz)<br />
*Maximum wireless signal rates are referenced from IEEE 802.11 theoretical specifications. Actual<br />
data throughput and coverage will vary depending on interference, network traffic, building<br />
materials and other conditions.<br />
Temperature Operation: 0°~ 40°C (32°F~ 104°F); Storage: -10°~ 70°C<br />
© Copyright 2012 <strong>TRENDnet</strong>. All Rights Reserved.<br />
51
<strong>TRENDnet</strong> User’s Guide<br />
TEW-731BR<br />
Troubleshooting<br />
Q: I typed http://192.168.10.1 in my Internet Browser Address Bar, but an error<br />
message says “The page cannot be displayed.” How can I access the router<br />
management page?<br />
Answer:<br />
1. Check your hardware settings again. See “Router Installation” on page 2.<br />
2. Make sure the LAN and WLAN lights are lit.<br />
3. Make sure your network adapter TCP/IP settings are set to Obtain an IP address<br />
automatically or DHCP (see the steps below).<br />
4. Make sure your computer is connected to one of the router’s LAN ports<br />
5. Press on the factory reset button for 15 seconds, the release.<br />
Windows 7<br />
a. Go into the Control Panel, click Network and Sharing Center.<br />
b. Click Change Adapter Settings, right-click the Local Area Connection icon.<br />
c. Then click Properties and click Internet Protocol Version 4 (TCP/IPv4).<br />
d. Then click Obtain an IP address automatically and click OK.<br />
Windows Vista<br />
a. Go into the Control Panel, click Network and Internet.<br />
b. Click Manage Network Connections, right-click the Local Area Connection<br />
icon and click Properties.<br />
c. Click Internet Protocol Version (TCP/IPv4) and then click Properties.<br />
d. Then click Obtain an IP address automatically and click OK.<br />
Windows XP/2000<br />
a. Go into the Control Panel, double-click the Network Connections icon<br />
b. Right-click the Local Area Connection icon and the click Properties.<br />
c. Click Internet Protocol (TCP/IP) and click Properties.<br />
d. Then click Obtain an IP address automatically and click OK.<br />
Note: If you are experiencing difficulties, please contact your computer or operating<br />
system manufacturer for assistance.<br />
Q: I am not sure what type of Internet Account Type I have for my Cable/DSL<br />
connection. How do I find out?<br />
Answer:<br />
Contact your Internet Service Provider (ISP) for the correct information.<br />
Q: The Wizard does not appear when I access the router. What should I do?<br />
Answer:<br />
1. Click on Wizard on the left hand side.<br />
2. Near the top of the browser, “Pop-up blocked” message may appear. Right click on<br />
the message and select Always Allow Pop-ups from This Site.<br />
3. Disable your browser's pop up blocker.<br />
Q: I went through the Wizard, but I cannot get onto the Internet. What should I do?<br />
Answer:<br />
1. Verify that you can get onto the Internet with a direct connection into your modem<br />
(meaning, plug your computer directly to the modem and verify that your single<br />
computer (without the help of the router) can access the Internet).<br />
2. Power cycle your modem and router. Unplug the power to the modem and router.<br />
Wait 30 seconds, and then reconnect the power to the modem. Wait for the modem to<br />
fully boot up, and then reconnect the power to the router.<br />
3. Contact your ISP and verify all the information that you have in regards to your<br />
Internet connection settings is correct.<br />
Q: I cannot connect wirelessly to the router. What should I do?<br />
Answer:<br />
1. Double check that the WLAN light on the router is lit.<br />
2. Power cycle the router. Unplug the power to the router. Wait 15 seconds, then plug<br />
the power back in to the router.<br />
3. Contact the manufacturer of your wireless network adapter and make sure the<br />
wireless network adapter is configured with the proper SSID. The preset SSID is<br />
<strong>TRENDnet</strong>(model_number).<br />
4. To verify whether or not wireless is enabled, login to the router management page,<br />
click on Wireless.<br />
5. Please see “Steps to improve wireless connectivity” on page 19 if you continue to<br />
have wireless connectivity problems.<br />
© Copyright 2012 <strong>TRENDnet</strong>. All Rights Reserved.<br />
52
<strong>TRENDnet</strong> User’s Guide<br />
TEW-731BR<br />
Appendix<br />
How to find your IP address?<br />
Note: Please note that although the following procedures provided to follow for your<br />
operating system on configuring your network settings can be used as general<br />
guidelines, however, it is strongly recommended that you consult your computer or<br />
operating system manufacturer directly for assistance on the proper procedure for<br />
configuring network settings.<br />
Command Prompt Method<br />
Windows 2000/XP/Vista/7<br />
1. On your keyboard, press Windows Logo+R keys simultaneously to bring up the Run<br />
dialog box.<br />
2. In the dialog box, type cmd to bring up the command prompt.<br />
3. In the command prompt, type ipconfig /alto display your IP address settings.<br />
MAC OS X<br />
1. Navigate to your Applications folder and open Utilities.<br />
2. Double-click on Terminal to launch the command prompt.<br />
3. In the command prompt, type ipconfiggetifaddrto display the wired or<br />
wireless IP address settings.<br />
Note: en0 is typically the wired Network and en1 is typically the wireless Airport<br />
interface.<br />
Graphical Method<br />
MAC OS 10.6/10.5<br />
1. From the Apple menu, select System Preferences.<br />
2. In System Preferences, from the View menu, select Network.<br />
3. In the Network preference window, click a network port (e.g., Network, AirPort,<br />
modem). If you are connected, you'll see your IP address settings under "Status:"<br />
MAC OS 10.4<br />
1. From the Apple menu, select Location, and then Network Preferences.<br />
2. In the Network Preference window, next to "Show:", select Network Status. You'll see<br />
your network status and your IP address settings displayed.<br />
Note: If you are experiencing difficulties, please contact your computer or operating<br />
system manufacturer for assistance.<br />
How to configure your network settings to obtain an IP address automatically or use<br />
DHCP?<br />
Note: Please note that although the following procedures provided to follow for your<br />
operating system on configuring your network settings can be used as general<br />
guidelines, however, it is strongly recommended that you consult your computer or<br />
operating system manufacturer directly for assistance on the proper procedure for<br />
configuring network settings.<br />
Windows 7<br />
a. Go into the Control Panel, click Network and Sharing Center.<br />
b. Click Change Adapter Settings, right-click the Local Area Connection icon.<br />
c. Then click Properties and click Internet Protocol Version 4 (TCP/IPv4).<br />
d. Then click Obtain an IP address automatically and click OK.<br />
Windows Vista<br />
a. Go into the Control Panel, click Network and Internet.<br />
b. Click Manage Network Connections, right-click the Local Area Connection<br />
icon and click Properties.<br />
c. Click Internet Protocol Version (TCP/IPv4) and then click Properties.<br />
d. Then click Obtain an IP address automatically and click OK.<br />
Windows XP/2000<br />
a. Go into the Control Panel, double-click the Network Connections icon<br />
b. Right-click the Local Area Connection icon and the click Properties.<br />
c. Click Internet Protocol (TCP/IP) and click Properties.<br />
d. Then click Obtain an IP address automatically and click OK.<br />
MAC OS 10.4/10.5/10.6<br />
a. From the Apple, drop-down list, select System Preferences.<br />
b. Click the Network icon.<br />
c. From the Location drop-down list, select Automatic.<br />
d. Select and view your Network connection.<br />
In MAC OS 10.4, from the Show drop-down list, select Built-in<br />
Network and select the TCP/IP tab.<br />
In MAC OS 10.5/10.6, in the left column, select Network.<br />
e. Configure TCP/IP to use DHCP.<br />
© Copyright 2012 <strong>TRENDnet</strong>. All Rights Reserved.<br />
53
<strong>TRENDnet</strong> User’s Guide<br />
TEW-731BR<br />
In MAC 10.4, from the Configure IPv4, drop-down list, select Using<br />
DHCP and click the Apply Now button.<br />
In MAC 10.5, from the Configure drop-down list, select Using DHCP<br />
and click the Apply button.<br />
In MAC 10.6, from the Configure drop-down list, select Using DHCP<br />
and click the Apply button.<br />
f. Restart your computer.<br />
Note: If you are experiencing difficulties, please contact your computer or operating<br />
system manufacturer for assistance.<br />
How to find your MAC address?<br />
In Windows 2000/XP/Vista/7,<br />
Your computer MAC addresses are also displayed in this window, however, you can type<br />
getmac –v to display the MAC addresses only.<br />
In MAC OS 10.4,<br />
1. Apple Menu > System Preferences > Network<br />
2. From the Show menu, select Built-in Network.<br />
3. On the Network tab, the Network ID is your MAC Address.<br />
In MAC OS 10.5/10.6,<br />
1. Apple Menu > System Preferences > Network<br />
2. Select Network from the list on the left.<br />
3. Click the Advanced button.<br />
3. On the Network tab, the Network ID is your MAC Address.<br />
How to connect to a wireless network using the built-in Windows utility?<br />
Note: Please note that although the following procedures provided to follow for your<br />
operating system on configuring your network settings can be used as general<br />
guidelines, however, it is strongly recommended that you consult your computer or<br />
operating system manufacturer directly for assistance on the proper procedure for<br />
connecting to a wireless network using the built-in utility.<br />
Windows 7<br />
1. Open Connect to a Network by clicking the network icon ( or ) in the notification<br />
area.<br />
2. In the list of available wireless networks, click the wireless network you would like to<br />
connect to, then click Connect.<br />
4. You may be prompted to enter a security key in order to connect to the network.<br />
5. Enter in the security key corresponding to the wireless network, and click OK.<br />
Windows Vista<br />
1. Open Connect to a Network by clicking the Start Button. and then click Connect To.<br />
2. In the Show list, click Wireless.<br />
3. In the list of available wireless networks, click the wireless network you would like to<br />
connect to, then click Connect.<br />
4. You may be prompted to enter a security key in order to connect to the network.<br />
5. Enter in the security key corresponding to the wireless network, and click OK.<br />
Windows XP<br />
1. Right-click the network icon in the notification area, then click View Available<br />
Wireless Networks.<br />
2. In Connect to a Network, under Available Networks, click the wireless network you<br />
would like to connect to.<br />
3. You may be prompted to enter a security key in order to connect to the network.<br />
4. Enter in the security key corresponding to the wireless network, and click Connect.<br />
© Copyright 2012 <strong>TRENDnet</strong>. All Rights Reserved.<br />
54
<strong>TRENDnet</strong> User’s Guide<br />
TEW-731BR<br />
Federal Communication Commission Interference Statement<br />
This equipment has been tested and found to comply with the limits for a Class B digital<br />
device, pursuant to Part 15 of the FCC Rules. These limits are designed to provide<br />
reasonable protection against harmful interference in a residential installation. This<br />
equipment generates, uses and can radiate radio frequency energy and, if not installed<br />
and used in accordance with the instructions, may cause harmful interference to radio<br />
communications. However, there is no guarantee that interference will not occur in a<br />
particular installation. If this equipment does cause harmful interference to radio or<br />
television reception, which can be determined by turning the equipment off and on, the<br />
user is encouraged to try to correct the interference by one of the following measures:<br />
• Reorient or relocate the receiving antenna.<br />
• Increase the separation between the equipment and receiver.<br />
• Connect the equipment into an outlet on a circuit different from that to which<br />
the receiver is connected.<br />
• Consult the dealer or an experienced radio/TV technician for help.<br />
FCC Caution: Any changes or modifications not expressly approved by the party<br />
responsible for compliance could void the user's authority to operate this equipment.<br />
This device complies with Part 15 of the FCC Rules. Operation is subject to the following<br />
two conditions: (1) This device may not cause harmful interference, and (2) this device<br />
must accept any interference received, including interference that may cause undesired<br />
operation.<br />
IMPORTANT NOTE:<br />
FCC Radiation Exposure Statement:<br />
This equipment complies with FCC radiation exposure limits set forth for an<br />
uncontrolled environment. This equipment should be installed and operated with<br />
minimum distance 20cm between the radiator & your body.<br />
This transmitter must not be co-located or operating in conjunction with any other<br />
antenna or transmitter.<br />
The availability of some specific channels and/or operational frequency bands are<br />
country dependent and are firmware programmed at the factory to match the intended<br />
destination. The firmware setting is not accessible by the end user.<br />
RoHS<br />
This product is RoHS compliant.<br />
Europe – EU Declaration of Conformity<br />
This device complies with the essential requirements of the R&TTE Directive 1999/5/EC.<br />
The following test methods have been applied in order to prove presumption of<br />
conformity with the essential requirements of the R&TTE Directive 1999/5/EC:<br />
EN60950-1: 2006 + A11 : 2009 + A1 : 2010<br />
Safety of Information Technology Equipment<br />
EN 50385: 2002<br />
Product standard to demonstrate the compliance of radio base stations and fixed<br />
terminal stations for wireless telecommunication systems with the basic restrictions or<br />
the reference levels related to human exposure to radio frequency electromagnetic<br />
fields (110MHz - 40 GHz) - General public<br />
EN 300 328 V1.7.1 (2006-10)<br />
Electromagnetic compatibility and Radio spectrum Matters (ERM); Wideband<br />
transmission systems; Data transmission equipment operating in the 2,4 GHz ISM band<br />
and using wide band modulation techniques; Harmonized EN covering essential<br />
requirements under article 3.2 of the R&TTE Directive<br />
EN 301 489-1 V1.8.1 (2008-04)<br />
Electromagnetic compatibility and Radio Spectrum Matters (ERM); ElectroMagnetic<br />
Compatibility (EMC) standard for radio equipment and services; Part 1: Common<br />
technical requirements<br />
EN 301 489-17 V2.1.1 (2009-05)<br />
Electromagnetic compatibility and Radio spectrum Matters (ERM); ElectroMagnetic<br />
Compatibility (EMC) standard for radio equipment and services; Part 17: Specific<br />
conditions for 2,4 GHz wideband transmission systems and 5 GHz high performance<br />
RLAN equipment<br />
This device is a 2.4 GHz wideband transmission system (transceiver), intended for use in<br />
all EU member states and EFTA countries, except in France and Italy where restrictive<br />
use applies.<br />
In Italy the end-user should apply for a license at the national spectrum authorities in<br />
order to obtain authorization to use the device for setting up outdoor radio links and/or<br />
for supplying public access to telecommunications and/or network services.<br />
This device may not be used for setting up outdoor radio links in France and in some<br />
areas the RF output power may be limited to 10 mW EIRP in the frequency range of<br />
2454 – 2483.5 MHz. For detailed information the end-user should contact the national<br />
spectrum authority in France.<br />
© Copyright 2012 <strong>TRENDnet</strong>. All Rights Reserved.<br />
55
<strong>TRENDnet</strong> User’s Guide<br />
TEW-731BR<br />
Česky [Czech]<br />
Dansk [Danish]<br />
Deutsch<br />
[German]<br />
Eesti<br />
[Estonian]<br />
English<br />
Español<br />
[Spanish]<br />
Ελληνική<br />
[Greek]<br />
Français<br />
[French]<br />
Italiano[Italian]<br />
Latviski<br />
[Latvian]<br />
<strong>TRENDnet</strong> tímto prohlašuje, že tento TEW-731BR je ve shodě<br />
se základními požadavky a dalšími příslušnými ustanoveními<br />
směrnice 1999/5/ES.<br />
Undertegnede <strong>TRENDnet</strong> erklærer herved, at følgende udstyr<br />
TEW-731BR overholder de væsentlige krav og øvrige relevante<br />
krav i direktiv 1999/5/EF.<br />
Hiermit erklärt <strong>TRENDnet</strong>, dass sich das Gerät TEW-731BR in<br />
Übereinstimmung mit den grundlegenden Anforderungen und<br />
den übrigen einschlägigen Bestimmungen der Richtlinie<br />
1999/5/EG befindet.<br />
Käesolevaga kinnitab <strong>TRENDnet</strong> seadme TEW-731BR vastavust<br />
direktiivi 1999/5/EÜ põhinõuetele ja nimetatud direktiivist<br />
tulenevatele teistele asjakohastele sätetele.<br />
Hereby, <strong>TRENDnet</strong>, declares that this TEW-731BR is in<br />
compliance with the essential requirements and other<br />
relevant provisions of Directive 1999/5/EC.<br />
Por medio de la presente <strong>TRENDnet</strong> declara que el TEW-<br />
731BR cumple con los requisitos esenciales y cualesquiera<br />
otras disposiciones aplicables o exigibles de la Directiva<br />
1999/5/CE.<br />
ΜΕ ΤΗΝ ΠΑΡΟΥΣΑ<strong>TRENDnet</strong> ΔΗΛΩΝΕΙ ΟΤΙTEW-<br />
731BRΣΥΜΜΟΡΦΩΝΕΤΑΙ ΠΡΟΣ ΤΙΣ ΟΥΣΙΩΔΕΙΣ ΑΠΑΙΤΗΣΕΙΣ ΚΑΙ<br />
ΤΙΣ ΛΟΙΠΕΣ ΣΧΕΤΙΚΕΣ ΔΙΑΤΑΞΕΙΣ ΤΗΣ ΟΔΗΓΙΑΣ 1999/5/ΕΚ.<br />
Par la présente <strong>TRENDnet</strong> déclare que l'appareil TEW-731BR<br />
est conforme aux exigences essentielles et aux autres<br />
dispositions pertinentes de la directive 1999/5/CE.<br />
Con la presente <strong>TRENDnet</strong> dichiara che questo TEW-731BR è<br />
conforme ai requisiti essenziali ed alle altre disposizioni<br />
pertinenti stabilite dalla direttiva 1999/5/CE.<br />
Aršo<strong>TRENDnet</strong>deklarē, ka TEW-731BR atbilstDirektīvas<br />
1999/5/EK būtiskajāmprasībām un citiemar to<br />
saistītajiemnoteikumiem.<br />
Lietuvių<br />
[Lithuanian]<br />
Nederlands<br />
[Dutch]<br />
Malti<br />
[Maltese]<br />
Magyar<br />
[Hungarian]<br />
Polski [Polish]<br />
Português<br />
[Portuguese]<br />
Slovensko<br />
[Slovenian]<br />
Slovensky<br />
[Slovak]<br />
Suomi<br />
[Finnish]<br />
Svenska<br />
[Swedish]<br />
Šiuo <strong>TRENDnet</strong> deklaruoja, kad šis TEW-731BR atitinka<br />
esminius reikalavimus ir kitas 1999/5/EB Direktyvos nuostatas.<br />
Hierbij verklaart <strong>TRENDnet</strong> dat het toestel TEW-731BR in<br />
overeenstemming is met de essentiële eisen en de andere<br />
relevante bepalingen van richtlijn 1999/5/EG.<br />
Hawnhekk, <strong>TRENDnet</strong>, jiddikjara li dan TEW-731BR<br />
jikkonforma mal-ħtiġijiet essenzjali u ma provvedimenti oħrajn<br />
relevanti li hemm fid-Dirrettiva 1999/5/EC.<br />
Alulírott, <strong>TRENDnet</strong> nyilatkozom, hogy a TEW-731BRmegfelel<br />
a vonatkozó alapvetõ követelményeknek és az 1999/5/EC<br />
irányelv egyéb elõírásainak.<br />
Niniejszym <strong>TRENDnet</strong> oświadcza, że TEW-731BR jest zgodny z<br />
zasadniczymi wymogami oraz pozostałymi stosownymi<br />
postanowieniami Dyrektywy 1999/5/EC.<br />
<strong>TRENDnet</strong> declara que este TEW-731BR está conforme com os<br />
requisitos essenciais e outras disposições da Directiva<br />
1999/5/CE.<br />
<strong>TRENDnet</strong> izjavlja, da je ta TEW-731BR v skladu z bistvenimi<br />
zahtevami in ostalimi relevantnimi določili direktive<br />
1999/5/ES.<br />
<strong>TRENDnet</strong>týmtovyhlasuje, že TEW-<br />
731BRspĺňazákladnépožiadavky a<br />
všetkypríslušnéustanoveniaSmernice 1999/5/ES.<br />
<strong>TRENDnet</strong> vakuuttaa täten että TEW-731BR tyyppinen laite on<br />
direktiivin 1999/5/EY oleellisten vaatimusten ja sitä koskevien<br />
direktiivin muiden ehtojen mukainen.<br />
Härmed intygar <strong>TRENDnet</strong> att denna TEW-731BR står I<br />
överensstämmelse med de väsentliga egenskapskrav och<br />
övriga relevanta bestämmelser som framgår av direktiv<br />
1999/5/EG.<br />
© Copyright 2012 <strong>TRENDnet</strong>. All Rights Reserved.<br />
56
<strong>TRENDnet</strong> User’s Guide<br />
Limited Warranty<br />
Limited Warranty<br />
<strong>TRENDnet</strong> warrants its products against defects in material and workmanship, under<br />
normal use and service, for the following lengths of time from the date of purchase.<br />
TEW-731BR – 3 Years Warranty<br />
AC/DC Power Adapter, Cooling Fan, and Power Supply carry 1 year warranty.<br />
If a product does not operate as warranted during the applicable warranty period,<br />
<strong>TRENDnet</strong> shall reserve the right, at its expense, to repair or replace the defective<br />
product or part and deliver an equivalent product or part to the customer. The<br />
repair/replacement unit’s warranty continues from the original date of purchase. All<br />
products that are replaced become the property of <strong>TRENDnet</strong>. Replacement products<br />
may be new or reconditioned. <strong>TRENDnet</strong> does not issue refunds or credit. Please<br />
contact the point-of-purchase for their return policies.<br />
<strong>TRENDnet</strong> shall not be responsible for any software, firmware, information, or memory<br />
data of customer contained in, stored on, or integrated with any products returned to<br />
<strong>TRENDnet</strong> pursuant to any warranty.<br />
There are no user serviceable parts inside the product. Do not remove or attempt to<br />
service the product by any unauthorized service center. This warranty is voided if (i) the<br />
product has been modified or repaired by any unauthorized service center, (ii) the<br />
product was subject to accident, abuse, or improper use (iii) the product was subject to<br />
conditions more severe than those specified in the manual.<br />
Warranty service may be obtained by contacting <strong>TRENDnet</strong> within the applicable<br />
warranty period and providing a copy of the dated proof of the purchase. Upon proper<br />
submission of required documentation a Return Material Authorization (RMA) number<br />
will be issued. An RMA number is required in order to initiate warranty service support<br />
for all <strong>TRENDnet</strong> products. Products that are sent to <strong>TRENDnet</strong> for RMA service must<br />
have the RMA number marked on the outside of return packages and sent to <strong>TRENDnet</strong><br />
prepaid, insured and packaged appropriately for safe shipment. Customers shipping<br />
from outside of the USA and Canada are responsible for return shipping fees. Customers<br />
shipping from outside of the USA are responsible for custom charges, including but not<br />
limited to, duty, tax, and other fees.<br />
WARRANTIES EXCLUSIVE: IF THE TRENDNET PRODUCT DOES NOT OPERATE AS<br />
WARRANTED ABOVE, THE CUSTOMER’S SOLE REMEDY SHALL BE, AT TRENDNET’S<br />
OPTION, REPAIR OR REPLACE. THE FOREGOING WARRANTIES AND REMEDIES ARE<br />
EXCLUSIVE AND ARE IN LIEU OF ALL OTHER WARRANTIES, EXPRESSED OR IMPLIED,<br />
EITHER IN FACT OR BY OPERATION OF LAW, STATUTORY OR OTHERWISE, INCLUDING<br />
WARRANTIES OF MERCHANTABILITY AND FITNESS FOR A PARTICULAR PURPOSE.<br />
TRENDNET NEITHER ASSUMES NOR AUTHORIZES ANY OTHER PERSON TO ASSUME FOR<br />
IT ANY OTHER LIABILITY IN CONNECTION WITH THE SALE, INSTALLATION MAINTENANCE<br />
OR USE OF TRENDNET’S PRODUCTS.<br />
TRENDNET SHALL NOT BE LIABLE UNDER THIS WARRANTY IF ITS TESTING AND<br />
EXAMINATION DISCLOSE THAT THE ALLEGED DEFECT IN THE PRODUCT DOES NOT EXIST<br />
OR WAS CAUSED BY CUSTOMER’S OR ANY THIRD PERSON’S MISUSE, NEGLECT,<br />
IMPROPER INSTALLATION OR TESTING, UNAUTHORIZED ATTEMPTS TO REPAIR OR<br />
MODIFY, OR ANY OTHER CAUSE BEYOND THE RANGE OF THE INTENDED USE, OR BY<br />
ACCIDENT, FIRE, LIGHTNING, OR OTHER HAZARD.<br />
LIMITATION OF LIABILITY: TO THE FULL EXTENT ALLOWED BY LAW TRENDNET ALSO<br />
EXCLUDES FOR ITSELF AND ITS SUPPLIERS ANY LIABILITY, WHETHER BASED IN<br />
CONTRACT OR TORT (INCLUDING NEGLIGENCE), FOR INCIDENTAL, CONSEQUENTIAL,<br />
INDIRECT, SPECIAL, OR PUNITIVE DAMAGES OF ANY KIND, OR FOR LOSS OF REVENUE OR<br />
PROFITS, LOSS OF BUSINESS, LOSS OF INFORMATION OR DATE, OR OTHER FINANCIAL<br />
LOSS ARISING OUT OF OR IN CONNECTION WITH THE SALE, INSTALLATION,<br />
MAINTENANCE, USE, PERFORMANCE, FAILURE, OR INTERRUPTION OF THE POSSIBILITY<br />
OF SUCH DAMAGES, AND LIMITS ITS LIABILITY TO REPAIR, REPLACEMENT, OR REFUND<br />
OF THE PURCHASE PRICE PAID, AT TRENDNET’S OPTION. THIS DISCLAIMER OF LIABILITY<br />
FOR DAMAGES WILL NOT BE AFFECTED IF ANY REMEDY PROVIDED HEREIN SHALL FAIL<br />
OF ITS ESSENTIAL PURPOSE.<br />
Governing Law: This Limited Warranty shall be governed by the laws of the state of<br />
California.<br />
Some <strong>TRENDnet</strong> products include software code written by third party developers.<br />
These codes are subject to the GNU General Public License ("GPL") or GNU Lesser<br />
General Public License ("LGPL").<br />
Go to http://www.trendnet.com/gpl or http://www.trendnet.com <strong>Download</strong> section<br />
and look for the desired <strong>TRENDnet</strong> product to access to the GPL Code or LGPL Code.<br />
These codes are distributed WITHOUT WARRANTY and are subject to the copyrights of<br />
the developers. <strong>TRENDnet</strong> does not provide technical support for these codes. Please go<br />
to http://www.gnu.org/licenses/gpl.txt or http://www.gnu.org/licenses/lgpl.txt for<br />
specific terms of each license.<br />
PWP05202009v2 2011/12/20<br />
© Copyright 2012 <strong>TRENDnet</strong>. All Rights Reserved.<br />
57