NV52/NV54/NV56/NV58 Service Guide - tim.id.au
NV52/NV54/NV56/NV58 Service Guide - tim.id.au
NV52/NV54/NV56/NV58 Service Guide - tim.id.au
Create successful ePaper yourself
Turn your PDF publications into a flip-book with our unique Google optimized e-Paper software.
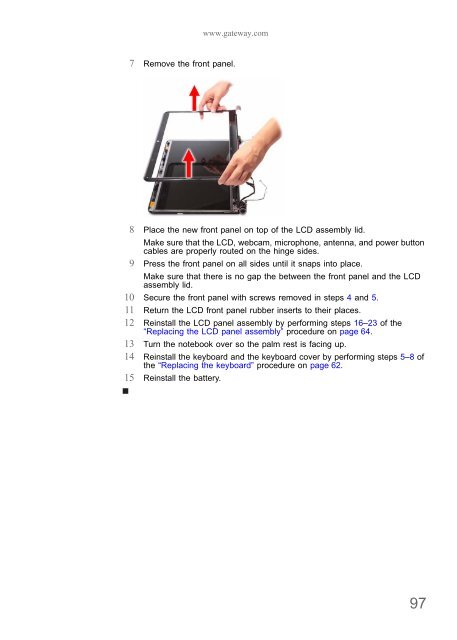
7 Remove the front panel.<br />
www.gateway.com<br />
8 Place the new front panel on top of the LCD assembly l<strong>id</strong>.<br />
Make sure that the LCD, webcam, microphone, antenna, and power button<br />
cables are properly routed on the hinge s<strong>id</strong>es.<br />
9 Press the front panel on all s<strong>id</strong>es until it snaps into place.<br />
Make sure that there is no gap the between the front panel and the LCD<br />
assembly l<strong>id</strong>.<br />
10 Secure the front panel with screws removed in steps 4 and 5.<br />
11 Return the LCD front panel rubber inserts to their places.<br />
12 Reinstall the LCD panel assembly by performing steps 16–23 of the<br />
“Replacing the LCD panel assembly” procedure on page 64.<br />
13 Turn the notebook over so the palm rest is facing up.<br />
14 Reinstall the keyboard and the keyboard cover by performing steps 5–8 of<br />
the “Replacing the keyboard” procedure on page 62.<br />
15 Reinstall the battery.<br />
97


