TSUBAKI EMERSON CAM CLUTCH
TSUBAKI EMERSON CAM CLUTCH
TSUBAKI EMERSON CAM CLUTCH

You also want an ePaper? Increase the reach of your titles
YUMPU automatically turns print PDFs into web optimized ePapers that Google loves.
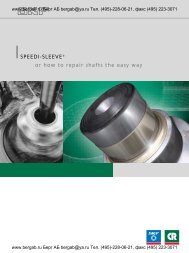
www.bergab.ru Берг АБ bergab@ya.ru Тел. (495)-228-06-21, факс (495) 223-3071<br />
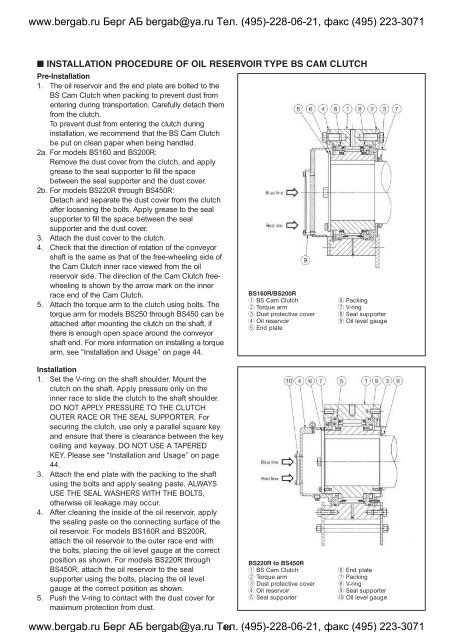
■ INSTALLATION PROCEDURE OF OIL RESERVOIR TYPE BS <strong>CAM</strong> <strong>CLUTCH</strong><br />
Pre-Installation<br />
1. The oil reservoir and the end plate are bolted to the<br />
BS Cam Clutch when packing to prevent dust from<br />
entering during transportation. Carefully detach them<br />
from the clutch.<br />
To prevent dust from entering the clutch during<br />
installation, we recommend that the BS Cam Clutch<br />
be put on clean paper when being handled.<br />
2a. For models BS160 and BS200R:<br />
Remove the dust cover from the clutch, and apply<br />
grease to the seal supporter to fill the space<br />
between the seal supporter and the dust cover.<br />
2b. For models BS220R through BS450R:<br />
Detach and separate the dust cover from the clutch<br />
after loosening the bolts. Apply grease to the seal<br />
supporter to fill the space between the seal<br />
supporter and the dust cover.<br />
3. Attach the dust cover to the clutch.<br />
4. Check that the direction of rotation of the conveyor<br />
shaft is the same as that of the free-wheeling side of<br />
the Cam Clutch inner race viewed from the oil<br />
reservoir side. The direction of the Cam Clutch freewheeling<br />
is shown by the arrow mark on the inner<br />
race end of the Cam Clutch.<br />
5. Attach the torque arm to the clutch using bolts. The<br />
torque arm for models BS250 through BS450 can be<br />
attached after mounting the clutch on the shaft, if<br />
there is enough open space around the conveyor<br />
shaft end. For more information on installing a torque<br />
arm, see “Installation and Usage” on page 44.<br />
BS160R/BS200R<br />
q BS Cam Clutch<br />
w Torque arm<br />
e Dust protective cover<br />
r Oil reservoir<br />
t End plate<br />
y Packing<br />
u V-ring<br />
i Seal supporter<br />
o Oil level gauge<br />
Installation<br />
1. Set the V-ring on the shaft shoulder. Mount the<br />
clutch on the shaft. Apply pressure only on the<br />
inner race to slide the clutch to the shaft shoulder.<br />
DO NOT APPLY PRESSURE TO THE <strong>CLUTCH</strong><br />
OUTER RACE OR THE SEAL SUPPORTER. For<br />
securing the clutch, use only a parallel square key<br />
and ensure that there is clearance between the key<br />
ceiling and keyway. DO NOT USE A TAPERED<br />
KEY. Please see “Installation and Usage” on page<br />
44.<br />
3. Attach the end plate with the packing to the shaft<br />
using the bolts and apply sealing paste. ALWAYS<br />
USE THE SEAL WASHERS WITH THE BOLTS,<br />
otherwise oil leakage may occur.<br />
4. After cleaning the inside of the oil reservoir, apply<br />
the sealing paste on the connecting surface of the<br />
oil reservoir. For models BS160R and BS200R,<br />
attach the oil reservoir to the outer race end with<br />
the bolts, placing the oil level gauge at the correct<br />
position as shown. For models BS220R through<br />
BS450R, attach the oil reservoir to the seal<br />
supporter using the bolts, placing the oil level<br />
gauge at the correct position as shown.<br />
5. Push the V-ring to contact with the dust cover for<br />
maximum protection from dust.<br />
BS220R to BS450R<br />
q BS Cam Clutch<br />
w Torque arm<br />
e Dust protective cover<br />
r Oil reservoir<br />
t Seal supporter<br />
y End plate<br />
u Packing<br />
i V-ring<br />
o Seal supporter<br />
!0 Oil level gauge<br />
www.bergab.ru Берг АБ bergab@ya.ru Тел. 48 (495)-228-06-21, факс (495) 223-3071