

Curlin 2000 User Manual - Med-E-Quip Locators
Curlin 2000 User Manual - Med-E-Quip Locators
Curlin 2000 User Manual - Med-E-Quip Locators

You also want an ePaper? Increase the reach of your titles
YUMPU automatically turns print PDFs into web optimized ePapers that Google loves.
Chapter<br />
3<br />
Basics of Programming<br />
The <strong>Curlin</strong> <strong>Med</strong>ical pump allows the operator to customize this device to meet the specific infusion needs of each<br />
individual patient. This chapter will explain the customizing features along with the programming steps.<br />
P<br />
rogramming the <strong>Curlin</strong> <strong>Med</strong>ical pump requires initial orientation and training, but the<br />
programming steps have been designed to be user friendly and self-prompting to<br />
minimize training time.<br />
Several different types of screens and fields may appear on the displays. Each of the<br />
different types of screens is explained below. Whenever you are required to interact with<br />
the pump, a highlight bar or cursor will be present on the screen.<br />
Types of Display Screens<br />
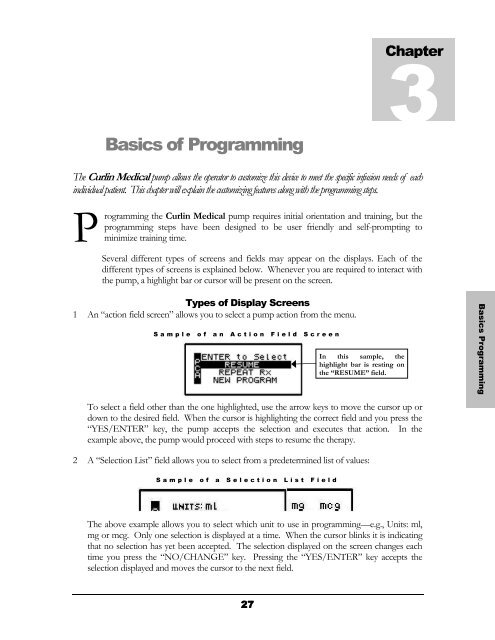
1 An “action field screen” allows you to select a pump action from the menu.<br />
Sample of an Action Field Screen<br />
In this sample, the<br />
highlight bar is resting on<br />
the “RESUME” field.<br />
Basics Programming<br />
To select a field other than the one highlighted, use the arrow keys to move the cursor up or<br />
down to the desired field. When the cursor is highlighting the correct field and you press the<br />
“YES/ENTER” key, the pump accepts the selection and executes that action. In the<br />
example above, the pump would proceed with steps to resume the therapy.<br />
2 A “Selection List” field allows you to select from a predetermined list of values:<br />
Sample of a Selection List Field<br />
The above example allows you to select which unit to use in programming—e.g., Units: ml,<br />
mg or mcg. Only one selection is displayed at a time. When the cursor blinks it is indicating<br />
that no selection has yet been accepted. The selection displayed on the screen changes each<br />
time you press the “NO/CHANGE” key. Pressing the “YES/ENTER” key accepts the<br />
selection displayed and moves the cursor to the next field.<br />
27


