

Stylistic 1200 Tech Reference Manual (PDF) - The Labs
Stylistic 1200 Tech Reference Manual (PDF) - The Labs
Stylistic 1200 Tech Reference Manual (PDF) - The Labs

Create successful ePaper yourself
Turn your PDF publications into a flip-book with our unique Google optimized e-Paper software.
Installing a DIMM Card 4<br />
One of the following DIMM cards can be installed in the <strong>Stylistic</strong> <strong>1200</strong> pen tablet:<br />
• 8MB DIMM (FMW25EM8)<br />
• 16MB DIMM (FMW25EM16)<br />
• 32MB DIMM (FMW25EM32)<br />
Only one DIMM socket is available on the <strong>Stylistic</strong> <strong>1200</strong> pen tablet. You will need to remove any DIMM<br />
card currently installed in the system before you can install a new DIMM card. See “Removing a DIMM<br />
Card” for details.<br />
To install a DIMM card in the <strong>Stylistic</strong> <strong>1200</strong> pen tablet,<br />
1. Shut down and turn off the pen tablet. (Slide the Power switch to the Off position.)<br />
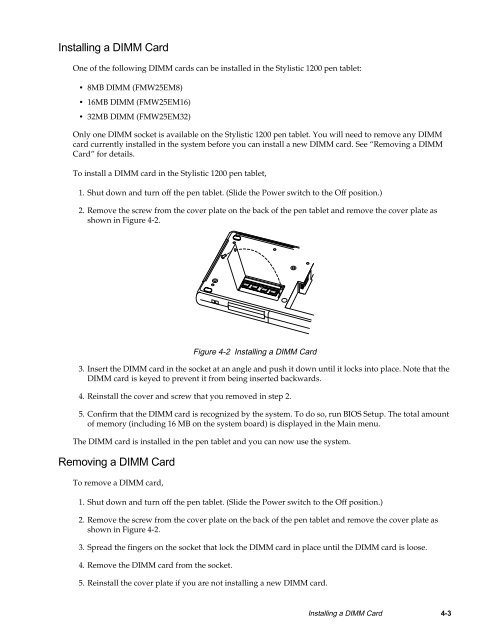
2. Remove the screw from the cover plate on the back of the pen tablet and remove the cover plate as<br />
shown in Figure 4-2.<br />
Figure 4-2 Installing a DIMM Card<br />
3. Insert the DIMM card in the socket at an angle and push it down until it locks into place. Note that the<br />
DIMM card is keyed to prevent it from being inserted backwards.<br />
4. Reinstall the cover and screw that you removed in step 2.<br />
5. Confirm that the DIMM card is recognized by the system. To do so, run BIOS Setup. <strong>The</strong> total amount<br />
of memory (including 16 MB on the system board) is displayed in the Main menu.<br />
<strong>The</strong> DIMM card is installed in the pen tablet and you can now use the system.<br />
Removing a DIMM Card 4<br />
To remove a DIMM card,<br />
1. Shut down and turn off the pen tablet. (Slide the Power switch to the Off position.)<br />
2. Remove the screw from the cover plate on the back of the pen tablet and remove the cover plate as<br />
shown in Figure 4-2.<br />
3. Spread the fingers on the socket that lock the DIMM card in place until the DIMM card is loose.<br />
4. Remove the DIMM card from the socket.<br />
5. Reinstall the cover plate if you are not installing a new DIMM card.<br />
Installing a DIMM Card 4-3