condair FF2
condair FF2
condair FF2

Create successful ePaper yourself
Turn your PDF publications into a flip-book with our unique Google optimized e-Paper software.
31<br />
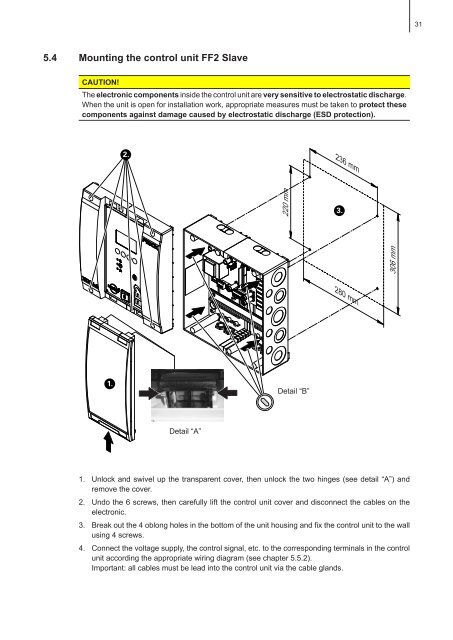
5.4 Mounting the control unit <strong>FF2</strong> Slave<br />
CAUTION!<br />
The electronic components inside the control unit are very sensitive to electrostatic discharge.<br />
When the unit is open for installation work, appropriate measures must be taken to protect these<br />
components against damage caused by electrostatic discharge (ESD protection).<br />
2.<br />
236 mm<br />
220 mm<br />
3.<br />
306 mm<br />
280 mm<br />
1.<br />
Detail “B”<br />
Detail “A”<br />
1. Unlock and swivel up the transparent cover, then unlock the two hinges (see detail “A”) and<br />
remove the cover.<br />
2. Undo the 6 screws, then carefully lift the control unit cover and disconnect the cables on the<br />
electronic.<br />
3. Break out the 4 oblong holes in the bottom of the unit housing and fix the control unit to the wall<br />
using 4 screws.<br />
4. Connect the voltage supply, the control signal, etc. to the corresponding terminals in the control<br />
unit according the appropriate wiring diagram (see chapter 5.5.2).<br />
Important: all cables must be lead into the control unit via the cable glands.