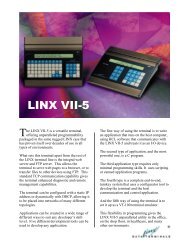
- Page 1 and 2:
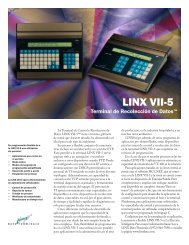
LINX 7-5 Turn-Key Application User'
- Page 3 and 4:
Contents Overview: 1 What is the Tu
- Page 5 and 6:
Overview: What is the Turn-Key Appl
- Page 7 and 8:
• Each Submenu defined can also h
- Page 9 and 10:
• Validation response can be sele
- Page 11 and 12:
Note This should never be changed u
- Page 13 and 14:
Main Status Monitor Window: Once co
- Page 15 and 16:
Saving Unsolicited Data Each time y
- Page 17 and 18:
File Transfer Utility The LINX File
- Page 19 and 20:
Turn-Key Configurator Entry Screens
- Page 21 and 22:
Terminal: Program Constraint Option
- Page 23 and 24:
Entry Fields: Afternoon Break Start
- Page 25 and 26:
The alignment of the display prompt
- Page 27 and 28:
The Application Input Configuration
- Page 29 and 30:
Terminal: MSR Input Qualification S
- Page 31 and 32:
Note: Whatever name has been define
- Page 33 and 34:
Prompt for Finger Scan: This option
- Page 35 and 36:
Fixed Length Field Mode: Start Posi
- Page 37 and 38:
Terminal: Record Validation Control
- Page 39 and 40:
Note: Any day that does not have va
- Page 41 and 42:
Terminal: End of Configuration Scre
- Page 43 and 44:
However, if not, then a periodic Ho
- Page 45 and 46:
The Host Validation Record Extract
- Page 47 and 48:
Sample Applications Sample #1: A sm
- Page 49 and 50:
Door Access enabled. Local Storage
- Page 51 and 52:
Default used for Bar Code input qua
- Page 53 and 54:
Note: Extracted Field #2 is employe
- Page 55 and 56:
Summary of the current configuratio
- Page 57 and 58:
COMInDataLen=1 UseBells=0 UseDoor=1
- Page 59 and 60:
+MinFKey=1 +MaxFKey=10 +FKeyInRecor
- Page 61 and 62:
+FKeyControls[11].Line2=Prompt Line
- Page 63 and 64: SyncTime=03:00 HostValidationMode=0
- Page 65 and 66: For each task, an employee must fir
- Page 67 and 68: Main prompts - Line #1 will display
- Page 69 and 70: Note: “Format as part of record
- Page 71 and 72: F4 (STOP TASK) prompts.. IN (Clock
- Page 73 and 74: No Filtering - defaults used.. Use
- Page 75 and 76: Above: Summary of Current configura
- Page 77 and 78: Press F4 to actually start the JOB.
- Page 79 and 80: Define Desired BELLs.. Set Door (In
- Page 81 and 82: First submenu (START JOB submenu1)
- Page 83 and 84: Bar Code defaults used.. Define thi
- Page 85 and 86: Submenu 1-1 (EMP-ID) Extract field
- Page 87 and 88: Submenu 1-2 (JOB#): Allow Bar Code,
- Page 89 and 90: Submenu 1-2(Job #) No badge filteri
- Page 91 and 92: Submenu 1-3(Proc#) Allow Bar Codes,
- Page 93 and 94: Submenu 1-3(Proc#): Qualifications
- Page 95 and 96: Submenu 1-4(Start JOB): Define prom
- Page 97 and 98: Submenu 1-4(Start-JOB): Inputs qual
- Page 99 and 100: Submenu 1-4(Start JOB): No Time/Day
- Page 101 and 102: Submenu 2-1(ID): Define prompts for
- Page 103 and 104: Submenu 2-1(ID): All inputs qualifi
- Page 105 and 106: Submenu 2-1(ID): No Time/day valida
- Page 107 and 108: Submenu 2-2(Job Number): Default Ba
- Page 109 and 110: Submenu 2-2 (Job Number): Define re
- Page 111 and 112: Submenu 2-3(End Job): Use bar code
- Page 113: Submenu 2-3(End Job): Define record
- Page 117 and 118: Host application control file: ”P
- Page 119: LINX 7-5 Turn-Key Application User'