Lighting - Trackspot Manual - SXS Events
Lighting - Trackspot Manual - SXS Events
Lighting - Trackspot Manual - SXS Events
- No tags were found...

You also want an ePaper? Increase the reach of your titles
YUMPU automatically turns print PDFs into web optimized ePapers that Google loves.
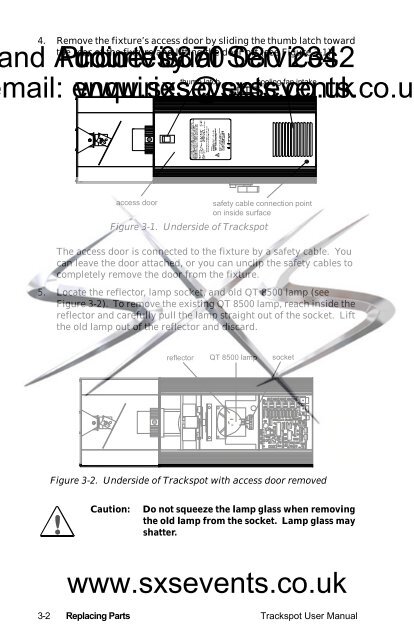
4. Remove the fixture’s access door by sliding the thumb latch towardthe rear of the fixture and lifting the door off (see Figure 3-1).nd Audio-Visual Phone: courtesy 0870 of Services 080 2342thumb latch cooling fan intakemail: enquiries@sxsevents.co.ukwww.sxsevents.co.ukaccess doorsafety cable connection pointon inside surfaceFigure 3-1. Underside of <strong>Trackspot</strong>The access door is connected to the fixture by a safety cable. Youcan leave the door attached, or you can unclip the safety cables tocompletely remove the door from the fixture.5. Locate the reflector, lamp socket, and old QT 8500 lamp (seeFigure 3-2). To remove the existing QT 8500 lamp, reach inside thereflector and carefully pull the lamp straight out of the socket. Liftthe old lamp out of the reflector and discard.reflectorQT 8500 lampsocketFigure 3-2. Underside of <strong>Trackspot</strong> with access door removedCaution:Do not squeeze the lamp glass when removingthe old lamp from the socket. Lamp glass mayshatter.www.sxsevents.co.uk3-2 Replacing Parts <strong>Trackspot</strong> User <strong>Manual</strong>