User Manual - TOSHIBA TEC store
User Manual - TOSHIBA TEC store
User Manual - TOSHIBA TEC store
- No tags were found...

You also want an ePaper? Increase the reach of your titles
YUMPU automatically turns print PDFs into web optimized ePapers that Google loves.
CE Compliance (for EU only)This product complies with the requirements of EMC and Low Voltage Directives including theiramendments.VORSICHT:• Schallemission: unter 70dB (A) nach DIN 45635 (oder ISO 7779)• Die für das Gerät Vorgesehene Steckdose muß in der Nähe des Gerätes und leicht zugänglich sein.Centronics is a registered trademark of Centronics Data Computer Corp.Microsoft is a registered trademark of Microsoft Corporation.Windows is a trademark of Microsoft Corporation.As an ENERGY STAR ® Partner, <strong>TOSHIBA</strong> <strong>TEC</strong> has determined that thisproduct meets the ENERGY STAR ® guidelines for energy efficiency.-- Outline of the International ENERGY STAR ® Office Equipment Program --The International ENERGY STAR ® Office Equipment Program is an international program thatpromotes energy saving through the penetration of energy efficient computers and other officeequipment. The program backs the development and dissemination of products with functions thateffectively reduce energy consumption. It is an open system in which business proprietors canparticipate voluntarily. The targeted products are office equipment such as computers, monitors,printers, facsimiles, copiers, scanners, and multifunction devices. Their standards and logos areuniform among participating nations.ENERGY STAR is a U.S. registered mark.This equipment has been tested and found to comply with the limits for a Class A digital device,pursuant to Part 15 of the FCC Rules. These limits are designed to provide reasonable rotectionagainst harmful interference when the equipment is operated in a commercial environment. Thisequipment generates, uses, and can radiate radio frequency energy and, if not installed and sed inaccordance with the instruction manual, may cause harmful interference to radio communications.Operations of this equipment in a residential area is likely to cause harmful interference in which casethe user will be required to correct the interference at his own expense.(for USA only)Changes or modifications not expressly approved by manufacturer for compliance could void theuser’s authority to operate the equipment.“This Class A digital apparatus meets all requirements of the Canadian Interference-CausingEquipment Regulations.”“Cet appareil numérique de la classe A respecte toutes les exigences du Règlement sur le matérielbrouilleur du Canada.”(for CANADA only)N258IP20< For EU Only ><strong>TOSHIBA</strong> <strong>TEC</strong> Europe Retail Information Systems S.A.Rue de la Célidée 33 BE-1080 BrusselsCopyright © 2006by <strong>TOSHIBA</strong> <strong>TEC</strong> CORPORATIONAll Rights Reserved570 Ohito, Izunokuni-shi, Shizuoka-ken, JAPAN
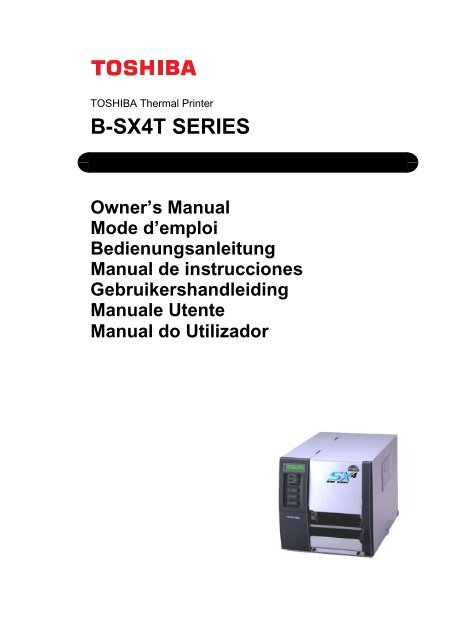
<strong>TOSHIBA</strong> Thermal PrinterB-SX4T SERIESOwner's <strong>Manual</strong>
This product is equipped with a wireless communication device,<strong>TEC</strong>-RFID-US1 (B-9704-RFID-U1-US-R)<strong>TEC</strong>-RFID-EU1 (B-9704-RFID-U1-EU-R)Please be sure to read the enclosed precaution for handling of wireless communication devices before using thisproduct.Precautions for Handling of Wireless Communication DevicesRFID kit: <strong>TEC</strong>-RFID-US1 (B-9704-RFID-U1-US-R)<strong>TEC</strong>-RFID-EU1 (B-9704-RFID-U1-EU-R)For all countries and areasThis product is a wireless communication device, and the use of this product is restricted to the following countries orareas. If the product is used in the countries or areas other than the following, you may be punished according to thelaws of those countries or areas.<strong>TEC</strong>-RFID-US1 (B-9704-RFID-U1-US-R): USA, Canada<strong>TEC</strong>-RFID-EU1 (B-9704-RFID-U1-EU-R): Austria, Belgium, Cyprus, Czech Republic, Denmark, Estonia, Finland,France, Hungary, Germany, Greece, Ireland, Italy, Latvia, Lithuania, Luxembourg, Malta, Netherlands, Poland,Portugal, Slovakia, Slovenia, Spain, Sweden, United Kingdom, Norway, Liechtenstein, Iceland, SwitzerlandFor safetyDo not use the product in locations where the use is forbidden, for example in a hospital.When you do not know the forbidden areas, please refer to and follow the medical institution.Otherwise medical equipment may be affected, causing a serious accident.This product may affect the operation of some implanted cardiac pacemakers and other medically implantedequipment. Pace maker patients should be aware that the use of this product very close to a pacemaker might causethe device to malfunction.If you have any reason to suspect that interference is taking place, immediately turn off the product and contact your<strong>TOSHIBA</strong> <strong>TEC</strong> sales agent.Do not disassemble, modify, or repair the product.Doing so may cause injury. Also, modification is against the Laws and Regulations for Radio Equipment. Please askyour <strong>TOSHIBA</strong> <strong>TEC</strong> sales agent for repair.For USAThis device complies with Part 15 of the FCC Rules.Operation is subject to the following two conditions:(1) this device may not cause harmful interference, and(2) this device must accept any interference received , including interference that may cause undesired operation.Changes or modification not expressly approved by manufacturer for compliance could void the user’s authority tooperate the equipment.For CanadaOperation is subject to the following two conditions:(1) this device may not cause interference, and(2) this device must accept any interference , including interference that may cause undesired operation of the device.For EuropeHereby, Toshiba <strong>TEC</strong> Corporation, declares that this <strong>TEC</strong>-RFID-EU1 (B-9704-RFID-U1-EU-R) is in compliance withthe essential requirements and other relevant provisions of Directive 1999/5/EC.This equipment uses the radio frequency band which has not been harmonized throughout all EU and EFTA countries,and can be used in the following countries.Austria, Belgium, Cyprus, Czech Republic, Denmark, Estonia, Finland, France, Hungary, Germany, Greece, Ireland,Italy, Latvia, Lithuania, Luxembourg, Malta, Netherlands, Poland, Portugal, Slovakia, Slovenia, Spain, Sweden, UnitedKingdom, Norway, Liechtenstein, Iceland, Switzerland
Safety SummaryENGLISH VERSION EO1-33058Safety SummaryPersonal safety in handling or maintaining the equipment is extremely important. Warnings and Cautionsnecessary for safe handling are included in this manual. All warnings and cautions contained in this manualshould be read and understood before handling or maintaining the equipment.Do not attempt to effect repairs or modifications to this equipment. If a fault occurs that cannot be rectifiedusing the procedures described in this manual, turn off the power, unplug the machine, then contact yourauthorised <strong>TOSHIBA</strong> <strong>TEC</strong> representative for assistance.Meanings of Each SymbolThis symbol indicates warning items (including cautions).Specific warning contents are drawn inside the symbol.(The symbol on the left indicates a general caution.)This symbol indicates prohibited actions (prohibited items).Specific prohibited contents are drawn inside or near the symbol.(The symbol on the left indicates “no disassembling”.)This symbol indicates actions which must be performed.Specific instructions are drawn inside or near the • symbol.(The symbol on the left indicates “disconnect the power cord plug from the outlet”.)WARNINGDo not use voltages other thanAny other than thespecified AC voltage the voltage (AC) specified on theis prohibited. rating plate, as this may causefire or electric shock.This indicates that there is the risk of death or serious injury if themachines are improperly handled contrary to this indication.ProhibitedDo not plug in or unplug the powercord plug with wet hands as thismay cause electric shock.ProhibitedProhibitedIf the machines share the sameoutlet with any other electricalappliances that consume largeamounts of power, the voltagewill fluctuate widely each timethese appliances operate. Be sureto provide an exclusive outlet forthe machine as this may causefire or electric shock.Do not insert or drop metal,flammable or other foreignobjects into the machines throughthe ventilation slits, as this maycause fire or electric shock.ProhibitedProhibitedDo not place metal objects orwater-filled containers such asflower vases, flower pots or mugs,etc. on top of the machines. Ifmetal objects or spilled liquid enterthe machines, this may cause fireor electric shock.Do not scratch, damage or modifythe power cords. Also, do notplace heavy objects on, pull on, orexcessively bend the cords, as thismay cause fire or electrical shock.Disconnectthe plug.If the machines are dropped ortheir cabinets damaged, first turnoff the power switches anddisconnect the power cord plugsfrom the outlet, and then contactyour authorised <strong>TOSHIBA</strong> <strong>TEC</strong>representative for assistance.Continued use of the machine inthat condition may cause fire orelectric shock.Disconnectthe plug.Continued use of the machines inan abnormal condition such aswhen the machines are producingsmoke or strange smells may causefire or electric shock. In thesecases, immediately turn off thepower switches and disconnect thepower cord plugs from the outlet.Then, contact your authorised<strong>TOSHIBA</strong> <strong>TEC</strong> representative forassistance.( i )
Safety SummaryENGLISH VERSION EO1-33058Disconnectthe plug.Connect agrounding wire.If foreign objects (metalfragments, water, liquids) enterthe machines, first turn off thepower switches and disconnectthe power cord plugs from theoutlet, and then contact yourauthorised <strong>TOSHIBA</strong> <strong>TEC</strong>representative for assistance.Continued use of the machine inthat condition may cause fire orelectric shock.Ensure that the equipment isproperly grounded. Extensioncables should also be grounded.Fire or electric shock couldoccur on improperly groundedequipment.Disconnectthe plug.Nodisassembling.When unplugging the power cords,be sure to hold and pull on the plugportion. Pulling on the cord portionmay cut or expose the internal wiresand cause fire or electric shock.Do not remove covers, repair ormodify the machine by yourself.You may be injured by highvoltage, very hot parts or sharpedges inside the machine.CAUTIONThis indicates that there is the risk of personal Injury or damage toobjects if the machines are improperly handled contrary to this indication.PrecautionsThe following precautions will help to ensure that this machine will continue to function correctly.• Try to avoid locations that have the following adverse conditions:* Temperatures out of the specification * Direct sunlight * High humidity* Shared power source * Excessive vibration * Dust/Gas• The cover should be cleaned by wiping with a dry cloth or a cloth slightly dampened with a milddetergent solution. NEVER USE THINNER OR ANY OTHER VOLATILE SOLVENT on the plasticcovers.• USE ONLY <strong>TOSHIBA</strong> <strong>TEC</strong> SPECIFIED paper and ribbons.• DO NOT STORE the paper or ribbons where they might be exposed to direct sunlight, hightemperatures, high humidity, dust, or gas.• Ensure the printer is operated on a level surface.• Any data <strong>store</strong>d in the memory of the printer could be lost during a printer fault.• Try to avoid using this equipment on the same power supply as high voltage equipment or equipmentlikely to cause mains interference.• Unplug the machine whenever you are working inside it or cleaning it.• Keep your work environment static free.• Do not place heavy objects on top of the machines, as these items may become unbalanced and fallcausing injury.• Do not block the ventilation slits of the machines, as this will cause heat to build up inside themachines and may cause fire.• Do not lean against the machine. It may fall on you and could cause injury.• Care must be taken not to injure yourself with the printer paper cutter.• Unplug the machine when it is not used for a long period of time.• Place the machine on a stable and level surface.Request Regarding Maintenance• Utilize our maintenance services.After purchasing the machine, contact your authorised <strong>TOSHIBA</strong> <strong>TEC</strong> representative for assistanceonce a year to have the inside of the machine cleaned. Otherwise, dust will build up inside themachines and may cause a fire or a malfunction. Cleaning is particularly effective before humid rainyseasons.• Our preventive maintenance service performs the periodic checks and other work required to maintainthe quality and performance of the machines, preventing accidents beforehand.For details, please consult your authorised <strong>TOSHIBA</strong> <strong>TEC</strong> representative for assistance.• Using insecticides and other chemicalsDo not expose the machines to insecticides or other volatile solvents. This will cause the cabinet orother parts to deteriorate or cause the paint to peel.( ii)
ENGLISH VERSION EO1-33058TABLE OF CONTENTSPage1. PRODUCT OVERVIEW......................................................................................................... E1- 11.1 Introduction................................................................................................................... E1- 11.2 Features ....................................................................................................................... E1- 11.3 Unpacking..................................................................................................................... E1- 11.4 Accessories ................................................................................................................. E1- 21.5 Appearance .................................................................................................................. E1- 31.5.1 Dimensions................................................................................................................E1- 31.5.2 Front View .................................................................................................................E1- 31.5.3 Rear View..................................................................................................................E1- 31.5.4 Operation Panel.........................................................................................................E1- 41.5.5 Interior .......................................................................................................................E1- 41.6 Options ................................................................................................................................E1- 52. PRINTER SETUP .................................................................................................................. E2- 12.1 Installation .................................................................................................................... E2- 22.2 Fitting the Fan Filter...................................................................................................... E2- 32.3 Connecting the Power Cord ......................................................................................... E2- 32.4 Loading the Media ........................................................................................................ E2- 42.5 Loading the Ribbon ...................................................................................................... E2- 92.6 Connecting the Cables to Your Printer ........................................................................ E2-112.7 Turning the Printer ON/OFF ........................................................................................ E2-122.7.1 Turning ON the Printer .............................................................................................E2-122.7.2 Turning OFF the Printer............................................................................................E2-122.8 Inserting the Optional PCMCIA Cards......................................................................... E2-132.9 Setting an Operating Environment .............................................................................. E2-142.9.1 Parameter Setting.....................................................................................................E2-152.9.2 Dump Mode Setting..................................................................................................E2-322.9.3 BASIC Expansion Mode ...........................................................................................E2-342.10 Installing the Printer Drivers ........................................................................................ E2-352.10.1 Introduction.............................................................................................................E2-352.10.2 General Description................................................................................................E2-352.10.3 Installing the Printer Driver .....................................................................................E2-362.10.4 Uninstalling the Printer Driver.................................................................................E2-492.10.5 Adding/Deleting a LAN Port....................................................................................E2-502.10.6 Cautions .................................................................................................................E2-522.10.7 Using the Printer Driver ..........................................................................................E2-532.11 Print Test ..................................................................................................................... E2-542.12 Position and Print Tone Fine Adjustment ................................................................... E2-562.13 Threshold Setting ........................................................................................................ E2-643. ON LINE MODE..................................................................................................................... E3- 13.1 Operation Panel............................................................................................................ E3- 13.2 Operation...................................................................................................................... E3- 23.3 Reset ............................................................................................................................ E3- 2
ENGLISH VERSION EO1-33058Page4. MAINTENANCE .................................................................................................................... E4- 14.1 Cleaning ....................................................................................................................... E4- 14.1.1 Print Head/Platen/Sensors ........................................................................................E4- 14.1.2 Covers and Panels ....................................................................................................E4- 24.1.3 Optional Cutter Module..............................................................................................E4- 35. TROUBLESHOOTING .......................................................................................................... E5- 15.1 Error Messages ............................................................................................................ E5- 15.2 Possible Problems........................................................................................................ E5- 35.3 Removing Jammed Media............................................................................................ E5- 56. PRINTER SPECIFICATIONS................................................................................................ E6- 17. SUPPLY SPECIFICATIONS ................................................................................................. E7- 17.1 Media............................................................................................................................ E7- 17.1.1 Media Type......................................................................................................... E7- 17.1.2 Detection Area of the Transmissive Sensor ....................................................... E7- 27.1.3 Detection Area of the Reflective Sensor............................................................. E7- 37.1.4 Effective Print Area............................................................................................. E7- 37.1.5 RFID Tags .......................................................................................................... E7- 47.2 Ribbon .......................................................................................................................... E7- 67.3 Recommended Media and Ribbon Types .................................................................... E7- 67.4 Care/Handling of Media and Ribbon ............................................................................ E7- 7APPENDIX 1 MESSAGES AND LEDS......................................................................................EA1-1APPENDIX 2 INTERFACE.........................................................................................................EA2-1APPENDIX 3 POWER CORD ....................................................................................................EA3-1APPENDIX 4 PRINT SAMPLES ................................................................................................EA4-1APPENDIX 5 GLOSSARIES ......................................................................................................EA5-1INDEXWARNING!This is a Class A product. In a domestic environment this product may cause radio interference inwhich case the user may be required to take adequate measures.CAUTION!1. This manual may not be copied in whole or in part without prior written permission of <strong>TOSHIBA</strong><strong>TEC</strong>.2. The contents of this manual may be changed without notification.3. Please refer to your local Authorised Service representative with regard to any queries you mayhave in this manual.
1. PRODUCT OVERVIEW ENGLISH VERSION EO1-330581.1 Introduction1. PRODUCT OVERVIEW1.1 IntroductionThank you for choosing the <strong>TEC</strong> B-SX4T series thermal printer. ThisOwner’s <strong>Manual</strong> contains from general set-up through how to confirmthe printer operation using a test print, and should be read carefully tohelp gain maximum performance and life from your printer. For mostqueries please refer to this manual and keep it safe for future reference.Please contact your <strong>TOSHIBA</strong> <strong>TEC</strong> representative for furtherinformation concerning this manual.1.2 Features1.3 UnpackingNOTES:1. Check for damage orscratches on the printer.However, please note that<strong>TOSHIBA</strong> <strong>TEC</strong> shall have noliability for any damage ofany kind sustained duringtransportation of the product.2. Keep the cartons and padsfor future transportation ofthe printer.This printer has the following features:• The print head block can be opened providing smooth loading ofmedia and ribbon.• Various kinds of media can be used as the media sensors can bemoved from the centre to the left edge of the media.• When the optional interface board is installed, Web functions such asremote maintenance and other advanced network features areavailable.• Superior hardware, including the specially developed 8 dots/mm (203dots/inch) thermal print head which will allow very clear print at aprinting speed of 76.2 mm/sec. (3 inches/sec.), 152.4 mm/sec. (6inches/sec.), or 254.0 mm/sec. (10 inches/sec.).• Besides the optional Cutter Module, there is also an optional StripModule, Ribbon Saving Module, PCMCIA Interface Board,Expansion I/O Interface Board, LAN Interface Board, Wireless LANBoard, the USB Interface Board, RFID module, and Fanfold PaperGuide Module.Unpack the printer as per the Unpacking Instructions supplied with theprinter.E1- 1
1. PRODUCT OVERVIEW ENGLISH VERSION EO1-330581.4 Accessories1.4 Accessories When unpacking the printer, please make sure all the followingaccessories are supplied with the printer.NOTE:As a power cord is not suppliedwith this printer, please purchaseone that meets each country’ssafety standard. For details, referto APPENDIX 3. CD-ROM (1 pc.)(P/No.: 7FM1647000) Warranty Disclaimer Sheet (1 sheet)• Bar code print application (Bartender ultra lite)• Windows Driver• Owner’s <strong>Manual</strong>• Specifications (Programming, Key operation, etc.)• Product information (Catalogue) Fan Filter (1 pc.)(P/No. FMBB0036801) Supply Loading Instructions(Doc. No.: EO2-33021) Safety Precautions(Doc. No.: EO2-33020) Quality Control Report(1 sheet)E1- 2
1. PRODUCT OVERVIEW ENGLISH VERSION EO1-330581.5 Appearance1.5 Appearance1.5.1 DimensionsThe names of the parts or units introduced in this section are used in thefollowing chapters.291 (11.5) 460 (18.1)308(12.1)Dimensions in mm (inches)1.5.2 Front ViewLCD Message DisplayTop CoverOperation PanelSupply WindowMedia Outlet1.5.3 Rear ViewParallel InterfaceConnector (Centronics)PCMCIA Card Slot (Option),USB Connector (Option), orLAN Connector (Option)Serial InterfaceConnector (RS-232C)AC Power InletExpansion I/OInterface Connector(Option)Power Switch◦: OFF|: ONUSB Connector(Option), WirelessLAN Board(Option), or LANConnector (Option)E1- 3
1. PRODUCT OVERVIEW ENGLISH VERSION EO1-330581.5 Appearance1.5.4 Operation PanelLCD Message DisplayPOWER LED(Green)[FEED] keyON LINE LED(Green)ERROR LED(Red)[RESTART] key[PAUSE] keyPlease see Section 3.1 for further information about the Operation Panel.1.5.5 InteriorRibbon StopperLocking RingSupply HolderPrint Head BlockPrint HeadPlatenHead LeverRibbon ShaftSupply ShaftE1- 4
1. PRODUCT OVERVIEW ENGLISH VERSION EO1-330581.6 Options1.6 OptionsOption Name Type DescriptionSwing cutter module B-4205-QM-R A stop and cut swing cutter.Rotary cutter module B-8204-QM-R Rotary cutterStrip module B-9904-H-QM-R This allows use of on-demand (peel-off) operation or to take-uplabels and backing paper together when using the rewind guideplate. To purchase the strip module, please inquire at your localdistributor.Ribbon saving module B-9904-R2-QM-R This module moves the print head up and down by using asolenoid to minimise ribbon usage as far as possible.Expansion I/Ointerface boardB-7704-IO-QM-R Installing this board in the printer allows connection to an externaldevice with the exclusive interface.PCMCIA interfaceboardB-9700-PCM-QM-R This board enables the use of the following PCMCIA cards.ATA card: Conforming to PC card ATA standardFlash memory card: 1MB and 4MB cards (See Section 2.8.)Built-in LAN interface B-9700-LAN-QM-R This board enables the printer to be used in a LAN network.boardUSB interface board B-9700-USB-QM-R Installing this board enables a connection to a PC which has a USBRFID moduleFanfold paper guidemoduleB-9704-RFID-U1-US-RB-9704-RFID-U1-EU-RB-9704-RFID-H1-QM-RB-4905-FF-QM-Rinterface.Installing this module enables read and write of RFID tags.Applicable frequency range differs depending on the module types:U1-US: UHF, 902MHz to 928MHzU1-EU: UHF, 869.5MHzH1-QM: HF, 13.56MHzThis is a paper guide exclusively used for fanfold paper.Wireless LAN board B-9700-WLAN-QM-R Installing this PC board allows a communication by wireless LAN.NOTE:To purchase the optional kits, please contact the nearest authorised <strong>TOSHIBA</strong> <strong>TEC</strong> representative or <strong>TOSHIBA</strong><strong>TEC</strong> Head Quarters.E1- 5
2. PRINTER SETUP ENGLISH VERSION EO1-330582. PRINTER SETUP2. PRINTER SETUPThis section outlines the procedures to setup your printer prior to its operation. The section includes precautions,loading media and ribbon, connecting cables, setting the operating environment of the printer, and performing anonline print test.Setup FlowInstallationFitting the fan filterProcedureAfter referring to the Safety Precautions in thismanual, install the printer on a safe and stablelocation.Fit the supplied fan filter to the ventilation ofthe printer.2.1 InstallationReference2.2 Fitting the Fan FilterConnecting the power cordLoading the mediaConnect a power cord to the power inlet of theprinter, then, to an AC outlet.Load a label stock or tag stock.2.3 Connecting the PowerCord2.4 Loading the MediaMedia sensor positionalignmentAdjust the position of feed gap sensor or blackmark sensor according to the media to be used.2.4 Loading the MediaLoading the ribbonIn case of thermal transfer printing, load theribbon.2.5 Loading the RibbonConnecting to a host computerConnect the printer to a host computer or anetwork.2.6 Connecting the Cables toYour PrinterTurning the power ONTurn on the printer power.2.7 Turning the PrinterON/OFFSetting the operatingenvironmentInstalling the printer driverPrint testSet the printer parameters in the system mode.If necessary, install the printer driver in your hostcomputer.Make a print test in your operating environmentand check the print result.2.9 Setting an OperatingEnvironment2.10 Installing the PrinterDrivers2.11 Print TestPosition and Print Tone FineadjustmentAutomatic threshold setting<strong>Manual</strong> threshold settingIf necessary, fine adjust the print start position,cut/strip position, print tone, etc.If the print start position cannot be detectedproperly when pre-printed label is used, set thethreshold automatically.If the print start position cannot be detectedproperly even an automatic threshold setting isperforming, manually set the threshold.2.12 Position and Print ToneFine Adjustment2.13 Threshold Setting2.13 Threshold SettingE2- 1
2. PRINTER SETUP ENGLISH VERSION EO1-330582.1 Installation2.1 Installation To insure the best operating environment, and to assure the safety of theoperator and the equipment, please observe the following precautions.• Operate the printer on a stable, level, operating surface in a locationfree from excessive humidity, high temperature, dust, vibration ordirect sunlight.• Keep your work environment static free. Static discharge can causedamage to delicate internal components.• Make sure that the printer is connected to a clean source of ACPower and that no other high voltage devices that may cause linenoise interference are connected to the same mains.• Assure that the printer is connected to the AC mains with a threeprongpower cable that has the proper ground (earth) connection.• Do not operate the printer with the cover open. Be careful not toallow fingers or articles of clothing to get caught into any of themoving parts of the printer especially the optional cutter mechanism.• Make sure to turn off the printer power and to remove the power cordfrom the printer whenever working on the inside of the printer suchas changing the ribbon or loading the media, or when cleaning theprinter.• For best results, and longer printer life, use only <strong>TOSHIBA</strong> <strong>TEC</strong>recommended media and ribbons.• Store the media and ribbons in accordance with their specifications.• This printer mechanism contains high voltage components; thereforeyou should never remove any of the covers of the machine as youmay receive an electrical shock. Additionally, the printer containsmany delicate components that may be damaged if accessed byunauthorised personnel.• Clean the outside of the printer with a clean dry cloth or a clean clothslightly dampened with a mild detergent solution.• Use caution when cleaning the thermal print head as it may becomevery hot while printing. Wait until it has had time to cool beforecleaning. Use only the <strong>TOSHIBA</strong> <strong>TEC</strong> recommended print headcleaner to clean the print head.• Do not turn off the printer power or remove the power plug while theprinter is printing or while the ON LINE lamp is blinking.E2- 2
2. PRINTER SETUP ENGLISH VERSION EO1-330582.2 Fitting the Fan Filter2.2 Fitting the Fan FilterWhen installing the printer, it is important to ensure that the Fan Filter isattached before using the printer.The Fan Filter consists of 2 parts:(1) Filter Pad(2) Filter RetainerTo fit the Fan Filter, put the Filter Pad inside the Filter Retainer andsimply press into place as shown in the diagram below, ensuringconnecting pins are aligned with the connecting holes.Filter PadSnap OnFilter RetainerSnap On2.3 Connecting thePower CordCAUTION!1. As a Power Cord is notsupplied with the printer,please purchase anapproved on that meetsthe safety standard ofeach country. (Refer toAPPENDIX 3.)2. Make sure that the printerPower Switch is turned tothe OFF position (◦)before connecting thePower Cord to preventpossible electric shock ordamage to the printer.3. Connect the Power Cordto a supply outlet with aproperly grounded(earthed) connection.1. Make sure that the printer Power Switch is in the OFF (◦) position.Connect the Power Cord to the printer as shown in the figure below2. Plug the other end of the Power Cord into a grounded outlet as shownin the figure below.Power CordPower SwitchPower CordPower Cord[Example of US Type][Example of EU Type]E2- 3
2. PRINTER SETUP ENGLISH VERSION EO1-330582.4 Loading the Media2.4 Loading the Media The following procedure shows the steps to properly load the media intoWARNING!1. Do not touch any movingparts. To reduce the riskof fingers, jewellery,clothing, etc., beingdrawn into the movingparts, be sure to load themedia once the printerhas stopped movingcompletely.2. The Print Head becomeshot immediately afterprinting. Allow it to coolbefore loading the media.3. To avoid injury, be carefulnot to trap your fingerswhile opening or closingthe cover.CAUTION!Be careful not to touch thePrint Head Element whenraising the Print Head Block.Failure to do this may causemissing dots by staticelectricity or other printquality problems.the printer so that it feeds straight and true through the printer.The printer prints both labels and tags.1. Turn off the power and open the Top Cover.2. Turn the Head Lever to Free position, then release the Ribbon ShaftHolder Plate.3. Open the Print Head Block.Top CoverPrint Head BlockHead LeverRibbon ShaftHolder PlateCAUTION!When loading or replacing the media or a ribbon, be careful not todamage the print head with a hard object like a watch or a ring.NOTES:1. When the Head Lever isturned to Free position, thePrint Head is raised.2. To allow printing the HeadLever must be set to Lockposition. (This ensures thatthe Print Head is closed.)There are two head pressurelevels in the Lock position.Set the Head Lever dependingon the media type:Position : LabelsPosition : TagsHowever, proper positionmay differ depending onmedia. For details, refer to<strong>TOSHIBA</strong> <strong>TEC</strong> authorisedservice representative.3. Do not turn the Locking Ringcounter-clockwise too far or itmay come off the SupplyHolder.Care must be taken not to allowthe metal or glass part of a watchto touch the print head edge.Care must be taken not to allowa metal object like a ring to touchthe print head edge.Since the print head element can be easily damaged by shock, pleasetreat it carefully by not hitting a hard object against it.4. Turn the Locking Ring counterclockwise and remove the SupplyHolder from the Supply Shaft.Locking RingSupply ShaftSupply HolderE2- 4
2. PRINTER SETUP ENGLISH VERSION EO1-330582.4 Loading the Media2.4 Loading the Media(Cont.)NOTE:Do not over-tighten the LockingRing of the Supply Holder.5. Put the media on the Supply Shaft.6. Pass the media around the Damper, then pull the media towards thefront of the printer.7. Align the projection of the Supply Holder with the groove of theSupply Shaft, and push the Supply Holder against the media until themedia is held firmly in place. This will centre the mediaautomatically.Then turn the Locking Ring clockwise to secure the Supply Holder.GrooveDamperSupply HolderProjectionMediaSupply ShaftLocking RingIn case of a label rolled withthe print side facing inside.In case of a label rolled withthe print side facing outside.MediaDamper8. Place the media between the Media Guides, adjust the Media Guidesto the media width, and tighten the Locking Screw.9. Check that the media path through the printer is straight. The mediashould be centred under the Print Head.Media GuidePrint HeadSupply HolderLocking ScrewMediaMedia GuideE2- 5
2. PRINTER SETUP ENGLISH VERSION EO1-330582.4 Loading the Media2.4 Loading the Media(Cont.)10. Lower the Print Head Block until it stops.11. After loading the media, it may be necessary to set the MediaSensors used to detect the print start position for label or tag printing.Setting the Feed Gap Sensor position(1) Remove the Locking Screw that secures the Media Sensor.(2) <strong>Manual</strong>ly move the Media Sensor so that the Feed Gap Sensor ispositioned at the centre of the labels. ( indicates the position ofthe Feed Gap Sensor).(3) Tighten the Locking Screw.GapLabelMedia SensorLocking ScrewFeed Gap SensorNOTE:Be sure to set the black marksensor to detect the centre of theblack mark, otherwise a paperjam or no paper error may occur.Setting the Black Mark Sensor position(1) Remove the Locking Screw that secures the Media Sensor.(2) Pull about 500 mm of media out of the front of the printer, turn themedia back on itself and feed it under the Print Head past the sensorso that the black mark can be seen from above.(3) <strong>Manual</strong>ly move the Media Sensor so that the Black Mark Sensor isin line with the centre of the black mark on the media. ( indicatesthe position of the Black Mark Sensor).(4) Tighten the Locking Screw.Black Mark SensorMedia SensorLocking ScrewBlack MarkE2- 6
2. PRINTER SETUP ENGLISH VERSION EO1-330582.4 Loading the Media2.4 Loading the Media(Cont.)12. There are four issue modes available on this printer. How to set themedia for each mode is provided below.Batch modeIn the batch mode, the media is continuously printed and fed until thenumber of labels/tags specified in the issue command have been printed.NOTES:1. Be sure to set the SelectionSwitch to STANDARD/PEEL OFF position.2. The backing paper is easierto feed back to the Take-UpSpool if the Front Plate isremoved.3. Fit the Take-Up Clip so thatthe longer side of the clip isfitted into the shallow groovein the Take-Up Spool.4. The backing paper can bewound directly onto the TakeupSpool or a paper core.When using the Take-upSpool, detach the HolderStopper by removing the B-3x4 screw. Otherwise, it maybe difficult to pull out thewound backing paper roll.Strip mode (Option)When the optional Strip Module is fitted, the backing paper isautomatically removed from the label at the Strip Plate as each label isprinted.(1) Remove enough labels from the leading edge of the media to leave500mm of backing paper free.(2) Insert the backing paper under the Strip Plate.(3) Wind the backing paper onto the Take-up Spool and fix it in positionwith the Take-up Clip. (Wind the paper counterclockwise aroundthe spool as this is the direction it rotates.)(4) Rotate the Take-up Spool anti-clockwise a few times to remove anyslack in the backing paper.(5) Set the Selection Switch mounted on the Rewinder Assembly toSTANDARD/PEEL OFF position.Take-up SpoolHolder StopperB-3x4 ScrewTake-up SpoolTake-up ClipWhen using a paper core, putthe core on the Take-up Spoolwith the Holder Stopper on it,and attach the top edge of thebacking paper to the corewith adhesive tape. TheTake-up Clip is notnecessary.This winding method isapplicable to the Built-inRewinder mode.Front PlateBlack ScrewStrip PlateBacking PaperTake-up ClipE2- 7
2. PRINTER SETUP ENGLISH VERSION EO1-330582.4 Loading the Media2.4 Loading the Media(Cont.)NOTE:Be sure to set the Selection Switch toREWINDER position.ADJUSTMENT:If the media skews when using theBuilt-in Rewinder, turn theAdjustment Knob of the RewinderGuide Plate to correct the mediafeed. Clockwise turn moves theRewinder Guide Plate forward andcounter-clockwise moves itbackward.When the media skews to the right:Loosen the SM-4x8 screw, turn theAdjustment Knob clockwise, andthen tighten the SM-4x8 screw whenthe Rewinder Guide Plate ispositioned correctly.When the media skews to the left:Loosen the SM-4x8 screw, turn theAdjustment Knob counter-clockwise,and tighten the SM-4x8 screw whenthe Rewinder Guide Plate ispositioned correctly.Built-in rewinder mode (Option)The Rewinder Assembly of the Strip Module can be used in batch modeto take up the printed media as a Built-in Rewinder.(1) Remove the two Black Screws to detach the Front Plate.(2) Attach the Rewinder Guide Plate enclosed with the optional StripModule to the Strip Plate with the SMW-4x8 sems screws.(3) Insert the media under the Rewinder Guide Plate.(4) Wind the media onto the Take-up Spool and fix it in position withthe Take-up Clip.(5) Rotate the Take-up Spool counterclockwise a few times to removeany slack in the media.(6) Set the Selection Switch mounted on the Rewinder Assembly toREWINDER position.RewinderGuide PlateSMW-4x8 ScrewAdjustment KnobSM-4x8 ScrewWARNING!The cutter is sharp, so care mustbe taken not to injure yourselfwhen handling the cutter.CAUTION!1. Be sure to cut the backingpaper of the label. Cuttinglabels will cause the glue tostick to the cutter which mayaffect the cutter quality andshorten the cutter life.2. Use of tag paper when thethickness exceeds thespecified value may affect thecutter life.NOTE:When using the Rotary Cutter, besure to install the Ribbon SavingModule (B-9904-R2-QM-R).Failure to do this may cause a paperjam or ribbon error.Cut mode (Option)When the optional Cutter Module is fitted, the media is automatically cut.A swing cutter and a rotary cutter are available as an option, but they areused in the same way.Insert the leading edge of the media into the Media Outlet of the CutterModule.Cutter ModuleMediaMedia Outlet13. If the loaded media is direct thermal media (a chemically treatedsurface), the media loading procedure is now completed. Close theRibbon Shaft Holder Plate, and turn the Head Lever to Lockposition to close. Then, close the Top Cover.If the media is thermal transfer media, it is also necessary to load aribbon. Refer to Section 2.5 Loading the Ribbon.E2- 8
2. PRINTER SETUP ENGLISH VERSION EO1-330582.5 Loading the Ribbon2.5 Loading the Ribbon There are two types of media available for printing on: these are thermalWARNING!1. Do not touch any movingparts. To reduce the riskof fingers, jewellery,clothing, etc., beingdrawn into the movingparts, be sure to load theribbon once the printerhas stopped movingcompletely.2. The print head becomeshot immediately afterprinting. Allow it to coolbefore loading the ribbon.3. To avoid injury, be carefulnot to trap your fingerswhile opening or closingthe cover.CAUTION!Be careful not touch thePrint Head Element whenraising the Print Head Block.Failure to do this may causemissing dots by staticelectricity or other printquality problems.transfer media and direct thermal media (a chemically treated surface).DO NOT LOAD a ribbon when using a direct thermal media.1. Grasp the tabs on the top and bottom of the Ribbon Stoppers andmove the Ribbon Stoppers back to the end of the Ribbon Shaft.2. Leaving plenty of slack between the ribbon spools, place the ribbononto the Ribbon Shafts as shown below.Print Head BlockRibbon Take-up RollRibbon StopperRibbon ShaftRibbon ShaftNOTES:1. When attaching the ribbonstoppers, make sure that thepinchers face into the printer2. Be sure to remove any slack inthe ribbon when printing.Printing with a wrinkledribbon will lower the printquality.3. The Ribbon Sensor is mountedon the rear of the Print HeadBlock to detect a ribbon end.When a ribbon end isdetected, “NO RIBBON”message will appear on thedisplay and the ERROR LEDwill illuminate.CAUTION!When loading or replacing the media or a ribbon, be careful not todamage the print head with a hard object like a watch or a ring.Care must be taken not to allowthe metal or glass part of a watchto touch the print head edge.Care must be taken not to allowa metal object like a ring to touchthe print head edge.Since the print head element can be easily damaged by shock, pleasetreat it carefully by not hitting a hard object against it.E2- 9
2. PRINTER SETUP ENGLISH VERSION EO1-330582.5 Loading the Ribbon2.5 Loading the Ribbon(Cont.)3. Slide the Ribbon Stoppers along the Ribbon Shafts to a position wherethe ribbon is centred when fitted.4. Lower the Print Head Block and set the Ribbon Shaft Holder Platealigning its holes with the Ribbon Shafts.5. Take up any slack in the ribbon. Wind the leading tape onto theribbon take-up roll until the ink ribbon can be seen from the front ofthe printer.Ribbon ShaftHolder Plate6. Turn the Head Lever to Lock position to close the Print Head.7. Close the Top Cover.NOTE:Ribbon loss per ribbon savingvaries according to the relationbetween the outer roll diameterof the used ribbon and the printspeed.Print speed Ribbon loss/Ribbon saving3”/sec. Approx. 6 mm6”/sec. Approx. 10 mm10”/sec. Approx. 20 mm• Auto Ribbon Saving ModeWhen the auto ribbon saving function is selected, it will be activated toreduce ribbon loss when a no print area extends more than 20 mm (3 or 6ips) or 30 mm (10 ips). For further information on this function, pleaseask a <strong>TOSHIBA</strong> <strong>TEC</strong> authorised service representative.E2-10
2. PRINTER SETUP ENGLISH VERSION EO1-330582.6 Connecting the Cables to Your Printer2.6 Connecting theCables to YourPrinterThe following paragraphs outline how to connect the cables from theprinter to your host computer, and will also show how to make cableconnections to other devices. Depending on the application softwareyou use to print labels, there are 4 possibilities for connecting theprinter to your host computer. These are:• A serial cable connection between the printer’s RS-232 serialconnector and one of your host computer’s COM ports.(Refer to APPENDIX 2.)• A parallel cable connection between the printer’s standard parallelconnector and your host computer’s parallel port (LPT).• An Ethernet connection using the optional LAN board.• A USB cable connection between the printer’s optional USBconnector and your host computer’s USB port. (Conforming toUSB 1.1)NOTES:1. The picture on the right showsthe layout of the interfaceconnectors when the optionsare fully installed. It may bedifferent depending on yoursystem configuration.2. The USB interface and LANinterface cannot be used at thesame time.The diagram below shows all the possible cable connections to thecurrent version of the printer., , or , , or 8 Parallel Interface Connector (Centronics) Serial Interface Connector (RS-232C) Expansion I/O Interface Connector (Option) Power Inlet USB Interface Connector (Option) PCMCIA Card Slot (Option) LAN Interface Connector (Option)8 Wireless LAN Board (Option)E2-11
2. PRINTER SETUP ENGLISH VERSION EO1-330582.7 Turning the Printer ON/OFF2.7 Turning the PrinterON/OFFWhen the printer is connected to your host computer it is good practice toturn the printer ON before turning on your host computer and turn OFFyour host computer before turning off the printer.2.7.1 Turning ON the PrinterCAUTION!Use the power switch to turnthe printer On/Off. Pluggingor unplugging the PowerCord to turn the printerOn/Off may cause fire, anelectric shock, or damage tothe printer.1. To turn ON the printer power, press the Power Switch as shown in thediagram below. Note that ( | ) is the power ON side of the switch.Power SwitchNOTE:If a message other than ONLINE appears on the display orthe ERROR LED lamp isilluminated, go to Section 5.1,Error Messages.2. Check that the ON LINE message appears in the LCD MessageDisplay and that the ON LINE and POWER LED lights areilluminated.2.7.2 Turning OFF the Printer1. Before turning off the printer Power Switch verify that the ON LINEmessage appears in the LCD Message Display and that the ON LINELED light is on and is not flashing.2. To turn OFF the printer power press the Power Switch as shown in thediagram below. Note that (◦) is the power OFF side of the switch.CAUTION!1. Do not turn off the printerpower while the media isbeing printed as this maycause a paper jam ordamage to the printer.2. Do not turn off the printerpower while the ON LINElamp is blinking as thismay cause damage toyour computer.Power SwitchE2-12
2. PRINTER SETUP ENGLISH VERSION EO1-330582.8 Inserting the Optional PCMCIA Cards2.8 Inserting the OptionalPCMCIA CardsCAUTION!1. To protect PC cards,discharge static electricityfrom your body bytouching the metal cabinetof the printer beforetouching the card.2. Before inserting orremoving a PCMCIA cardmake sure that theprinter’s power is turnedoff.3. Be sure to protectPCMCIA Cards when notin use by putting them intotheir protective covers.4. Do not subject the cardto any shocks orexcessive force norexpose the card toextremes in temperatureor humidity.5. The card may beinserted into the slothalfway even in the wrongorientation. However, theslot is safety designed sothat the card will not seatagainst the connectorpins.NOTE:Reading a read-only-type flashmemory is possible if it has beenused on the <strong>TOSHIBA</strong> printer,such as B-472 and B-572.When the optional PCMCIA Interface Board is installed into the printer,there will be a PCMCIA slot available as shown in the figure below.This allows the use of a Flash Memory type card. The followingparagraphs outline how to insert PCMCIA cards.1. Make sure that the printer’s Power Switch is in the OFF position.2. Hold the PCMCIA Card so that the side with the model name facesright.Eject ButtonModelName3. The following PCMCIA cards or equivalent can be used.Type Maker Description RemarksATA CardSan Disk, A card conforming to theHitachi PC card ATA standard----------Maxell EF-4M-TB CCMaxell EF-4M-TB DCRead/WriteCentennialTechnologies INC.FL04M-15-11119-03INTELIMC004FLSAFlash MemorySimple<strong>TEC</strong>NOLOGYSTI-FL/4ACard (4 MB) Mitsubishi MF84M1-G7DAT01PC Card KINGMAXFJN-004M6CCentennialTechnologies Inc.FL04M-20-11138-67Read (See NOTE.)PC CardFJP-004M6RMitsubishi MF84M1-GMCAV01Flash Memory Maxell EF-1M-TB AACard (1 MB) Mitsubishi MF81M1-GBDAT01E2-13
2. PRINTER SETUP ENGLISH VERSION EO1-330582.9 Setting an Operating Environment2.9 Setting an OperatingEnvironmentON LINEPAUSERESET[FEED][FEED][FEED][FEED][FEED][PAUSE][RESTART]PARAMETER SETADJUST SETDUMP MODE[RESTART][RESTART][RESTART]EXPAND MODELCD MessageDisplayFEED keyRESTART keyPAUSE keyHold down [RESTART] for 3 sec.[RESTART]Depending on the settings of your host computer or an interface to beused, it may be necessary to change the printer parameter settings.Follow the procedures described below to change the printer parametersettings in the System Mode to correspond to your environment.NOTE:Incorrect settings can cause the printer to function erroneously. If youhave any problems with the parameter settings, please contact your nearest<strong>TOSHIBA</strong> <strong>TEC</strong> service representative.For the settings this manual does not cover, please contact your nearest<strong>TOSHIBA</strong> <strong>TEC</strong> service representative, or refer to the B-SX4T/SX5T SeriesKey Operation Specification <strong>store</strong>d in the CD-ROM.How to enter the System Mode1. Turn on the printer and confirm that “ONLINE” appears on the LCDMessage Display.2. Press the [PAUSE] key to pause the printer.3. Hold down the [RESTART] key for three seconds until “RESET”is displayed.The System Mode consists of the following menus.RESETPARAMETER SETThis menu is used to clear print data sent from aPC and return the printer to an idle state.Refer to Section 3.3 Reset.This menu is used to set the printer parameters.Refer to Section 2.9.1 Parameter Setting.ADJUST SET This menu is used to make a fine adjustment of aprint start position, cut position, etc.Refer to Section 2.12 Position and Print ToneFine Adjustment.DUMP MODE This menu is used to print the data in the receivebuffer for debug.Refer to Section 2.9.2 Dump Mode Setting.EXPAND MODE This menu is used to start the program forBASIC mode.Refer to Section 2.9.3 BASIC ExpansionMode.NOTES:1. System Mode menus can be selected with the [RESTART] or [FEED] key.2. To enter each of the above System Mode menus, press the [PAUSE] keywhen the menu is displayed.3. If the [PAUSE] key is pressed with “RESET” being displayed, theprinter will turn to an idle state and the message will change to “ONLINE”.E2-14
2. PRINTER SETUP ENGLISH VERSION EO1-330582.9 Setting an Operating Environment2.9.1 Parameter Setting While “PARAMETER SET” is displayed on the LCD MessageDisplay, press the [PAUSE] key to enter the Parameter Setting Mode.The Parameter Setting Mode contains the following sub menus. Eachtime the [PAUSE] key is pressed, the sub menus are displayedsequentially.(1) Character code selection(2) Character zero selection(3) Baud rate selection(4) Data length selection(5) Stop bit selection(6) Parity selection(7) Flow control code selection(8) LCD language selection(9) Auto forward wait selection(10) Head up cut/Rewinder selection(11) Solenoid type selection(12) Ribbon saving function selection(13) Control code selection(14) Strip wait status selection(15) FEED key function selection(16) KANJI code selection(17) EURO code selection(18) Auto print head check selection(19) Centronics ACK/BUSY timing selection(20) Web printer function selection(21) Input prime selection(22) Ribbon near end selection(23) Expansion I/O interface selection(24) Centronics interface selection(25) Plug & Play selection(26) Label end/ribbon end selection(27) Pre-strip selection(28) Reverse feed speed selection(29) Maxi code specification selection(30) Print head type selectionE2-15
2. PRINTER SETUP ENGLISH VERSION EO1-330582.9 Setting an Operating Environment2.9.1 Parameter Setting(Cont.)NOTE:Be careful if the printer is turned offwithout pressing the [PAUSE] key,the selected value does not becomeeffective.(1) Character Code SelectionThis parameter is to choose a character code used for printing. Printedcharacters differ depending on a chosen character code and font. Fordetails of characters, refer to the B-SX4T/SX5T Series ExternalEquipment Interface Specification (Printer Command <strong>Manual</strong>).When “PARAMETER SET” appears, press the [PAUSE] key.PARAMETER SETFONT CODE PC-850Use the [FEED] or [RESTART] key to select a desired option.FONT CODE PC-850FONT CODE PC-852FONT CODE PC-857[RESTART]FONT CODE PC-8FONT CODE PC-851FONT CODE PC-855FONT CODE PC1250FONT CODE PC1251FONT CODE PC1252FONT CODE PC1253FONT CODE PC1254[FEED]FONT CODE PC1257FONT CODE LATIN9FONT CODE ArabicFONT CODE PC-866FONT CODE UTF-8After selecting a character code, press the [PAUSE] key.NOTE:The following fonts do not support azero with slash.Bit Map Font:OCR-A, OCR-B, GOTHIC 725 Black,Kanji, ChineseOutline Font:Price Font 1, Price Font 2, PriceFont 3, DUTCH 801 Bold, BRUSH738 Regular, GOTHIC 725 Black,True Type Font(2) Character Zero SelectionThis parameter is to choose the way to indicate zero between “0” and “Ø”.When “PARAMETER SET” appears, press the [PAUSE] key twice.PARAMETER SETZERO FONT 0Use the [FEED] or [RESTART] key to select a desired option.[RESTART][FEED]ZERO FONT 0ZERO FONTØ(Without slash)(With slash)After selecting a character zero, press the [PAUSE] key.E2-16
2. PRINTER SETUP ENGLISH VERSION EO1-330582.9 Setting an Operating Environment2.9.1 Parameter Setting(Cont.)(3) Baud Rate SelectionThis parameter is to choose a baud rate of the RS-232C interface. Whenthe printer communicates with a host computer by serial interface, be sureto match the setting with the host.When “PARAMETER SET” appears, press the [PAUSE] key untilthe following display appears.PARAMETER SETSPEED 9600bpsUse the [FEED] or [RESTART] key to select a desired option.SPEED 115200 bps[RESTART]SPEED 38400 bpsSPEED 19200 bpsSPEED 9600 bps[FEED] SPEED 4800 bpsSPEED 2400 bpsProperties screen of Serial (COM) portunder Windows98After selecting a baud rate, press the [PAUSE] key.(4) Data Length SelectionThis parameter is to choose a communication data length of the RS-232Cinterface.7 bits is used when transmitting alphanumeric data only. 8 bits is used towhen transmitting special characters. Be sure to match a setting with ahost computer.When “PARAMETER SET” appears, press the [PAUSE] key untilthe following display appears.PARAMETER SETDATA LENG. 8bitsUse the [FEED] or [RESTART] key to select a desired option.[RESTART][FEED]DATA LENG. 8bitsDATA LENG. 7bitsAfter selecting a data length, press the [PAUSE] key.E2-17
2. PRINTER SETUP ENGLISH VERSION EO1-330582.9 Setting an Operating Environment2.9.1 Parameter Setting(Cont.)NOTES:1. When using the hardware flowcontrol, the control signals anddata must be in pairs between theprinter and the PC.Printer HostTD → RDRD ← TDRTS → CTSCTS ← RTSDSR → DTRDTR ← DSRRefer to the RS-232C connector’spin layout in APPENDIX 2.Check if the printer and the PC isproperly connectable with yourcable2. Be careful that there are twotypes of RS-232C cable; straightcable and cross cable.Use a straight cable for thisprinter.NOTE:The following is the detaileddescriptions for each transmissioncontrol code.1) XON/XOFF AUTOAt the power on time, the printeroutputs XON. At the power offtime, the printer outputs XOFF.2) XON+READY AUTOAt the power on time, the printeroutputs XON. At the power offtime, the printer outputs XOFF.3) READY/BUSYAt the power on time, the DTRsignal output from the printerturns to High level (READY). Atthe power off time, the printer doesnot output XOFF.4) ON/XOFFAt the power on time, the printeroutputs XON. At the power offtime, the printer does not outputXOFF.5) READY/BUSY RTSAt the power on time, the RTS signaloutput from the printer turns to Highlevel (READY). At the power offtime, the printer does not outputXOFF.(5) Stop Bit SelectionThis parameter is to choose a stop bit of the RS-232C interface.Be sure to match a setting with a host computer.When “PARAMETER SET” appears, press the [PAUSE] key untilthe following display appears.PARAMETER SETSTOP BIT 1bitUse the [FEED] or [RESTART] key to select a desired option.[RESTART][FEED]STOP BIT 1bitSTOP BIT 2bitsAfter selecting a stop bit, press the [PAUSE] key.(6) Parity SelectionThis parameter is to choose the parity of the RS-232C interface.When “PARAMETER SET” appears, press the [PAUSE] key untilthe following display appears.PARAMETER SETPARITY NONEUse the [FEED] or [RESTART] key to select a desired option.[RESTART][FEED]After selecting the parity, press the [PAUSE] key.(7) Flow Control Code SelectionThis parameter is to choose a flow control code of the RS-232C interface.When “PARAMETER SET” appears, press the [PAUSE] key untilthe following display appears.PARAMETER SETXON+READY AUTOUse the [FEED] or [RESTART] key to select a desired option.[RESTART][FEED]PARITYPARITYPARITYXON/XOFF AUTOXON+READY AUTOREADY/BUSYXON/XOFFEVENODDNONEXON/XOFF modeREADY/BUSY RTS RTS modeAfter selecting a flow control code, press the [PAUSE] key.XON/XOFF+READY/BUSY (DTR) modeREADY/BUSY (DTR)modeXON/XOFF modeE2-18
2. PRINTER SETUP ENGLISH VERSION EO1-330582.9 Setting an Operating Environment2.9.1 Parameter Setting(Cont.)(8) LCD Language SelectionThis parameter is to choose a language in which the LCD message isdisplayed.When “PARAMETER SET” appears, press the [PAUSE] key untilthe following display appears.PARAMETER SETLCD ENGLISHUse the [FEED] or [RESTART] key to select a desired option.ENGLISH[RESTART]ITALIANJAPANESESPANISH[FEED]DUTCHFRENCHGERMANAfter selecting a language, press the [PAUSE] key.NOTES:1. If the printer is not used for a fewdays, the top edge of the mediamay become curly, which maycause a paper jam. The AutoForward Wait Function preventsthis problem since the media feedamount is increased so that themedia stops past the platen.2. When the Stop Position FineAdjustment Value is set in +direction, the media will stop pastthe media outlet.When the value is set in –direction, the media will stopinside the media outlet.3. This setting will be useful to fineadjust the cut position of labels.(9) Auto Forward Wait SelectionThis parameter is to choose whether to activate the Auto Forward Waitfunction or not.This function, used in the cut mode, automatically feeds the mediaforward for about 18 mm if there is more than 1-second idle time afterprinting, to prevent the top edge of the media from curling.When “PARAMETER SET” appears, press the [PAUSE] key untilthe following display appears.PARAMETER SETFORWARD WAIT OFFUse the [FEED] or [RESTART] key to select a desired option.[RESTART]FORWARD WAIT ONActivated[FEED] FORWARD WAIT OFF Not activatedAfter selecting an auto forward wait, press the [PAUSE] key.E2-19
2. PRINTER SETUP ENGLISH VERSION EO1-330582.9 Setting an Operating Environment2.9.1 Parameter Setting(Cont.)When ON is selected, pressing the [PAUSE] key will result that the LCDMessage Display shows the stop position fine adjustment value settingscreen.PARAMETER SETPOSITION +0.0mm[RESTART][FEED]POSITION +5.0mmPOSITION +0.0mmPOSITION -5.0mm[FEED] key: Pressing the [FEED] key one time causes a –0.5mm change,up to –5.0 mm.[RESTART] key: Pressing the [RESTART] key one time causes a +0.5mmchange, up to +5.0 mm.After selecting an auto forward wait, press the [PAUSE] key.NOTE:The print head may not be raiseddepending on the rise of thesolenoid’s temperature.(10) Head Up Cut/Rewinder SelectionThis parameter is to choose whether to activate the head up action in thecut issue or to use the Rewinder in the batch or strip issue.This function prevents ribbon smudges by raising the print head during areverse feed to the print start position.When “PARAMETER SET” appears, press the [PAUSE] key untilthe following display appears.PARAMETER SETHU CUT/RWD OFFUse the [FEED] or [RESTART] key to select a desired option.[RESTART][FEED]HU CUT/RWD ONHead up cut is activated or the Rewinderis used.HU CUT/RWD OFFHead up cut is not activated or the Rewinderis not used.After selecting the head up action in cut issue or use of the Rewinder,press the [PAUSE] key.E2-20
2. PRINTER SETUP ENGLISH VERSION EO1-330582.9 Setting an Operating Environment2.9.1 Parameter Setting(Cont.)NOTE:Improper setting of the solenoid typemay disable the ribbon savingfunction.(11) Solenoid Type SelectionThis parameter is to choose the solenoid type that is actually installed.When “PARAMETER SET” appears, press the [PAUSE] key untilthe following display appears.PARAMETER SETSOLENOID TYPE1Use the [FEED] or [RESTART] key to select a desired option.[RESTART][FEED]SOLENOID TYPE1TDS-12C (Insulation tape is blue.)SOLENOIDTYPE2TDS-16A (Stronger pull force type)(Insulation tape is black.)After selecting the solenoid type, press the [PAUSE] key.NOTES:1. The ribbon saving function isavailable only when an optionalribbon saving module (B-9904-R2-QM-R) is installed.2. Ribbon saving option should beselected according to the headlever position. Incorrect settingmay disable the proper ribbonsaving function.3. The ribbon saving function isactivated when there is a 20-mmor more non-print area in themedia feed direction.4. Ribbon saving is enabled up to 4areas per media.(12) Ribbon Saving Function SelectionThis parameter is to choose whether to activate the Ribbon savingfunction or not.This function enables reducing the ribbon loss caused by taking upunused ribbon during non-print areas.When “PARAMETER SET” appears, press the [PAUSE] key untilthe following display appears.PARAMETER SETRBN SAVE ON (TAG)Use the [FEED] or [RESTART] key to select a desired option.[RESTART][FEED]RBN SAVE ON (TAG)Activated (When the head lever is set to“(2)TAG”.)RBN SAVE ON (LBL)Activated (When the head lever is set to“(1)LABEL”.)RBN SAVE OFFNot activatedAfter selecting the ribbon saving function, press the [PAUSE] key.E2-21
2. PRINTER SETUP ENGLISH VERSION EO1-330582.9 Setting an Operating Environment2.9.1 Parameter Setting(Cont.)(13) Control Code SelectionThis parameter is to choose a Control Code.When “PARAMETER SET” appears, press the [PAUSE] key untilthe following display appears.PARAMETER SETCODE AUTOUse the [FEED] or [RESTART] key to select a desired option.[RESTART][FEED]CODE AUTOCODE ESC,LF,NULCODE{|}CODE MANUALAutomatic selection<strong>Manual</strong> selection<strong>Manual</strong> selectionControl codes shouldbe specified.When “CODE MANUAL” is selected and the [PAUSE] key is pressed,the LCD display will show the setting screen of CONTROL CODE1 toCONTROL CODE3 as follows.PARAMETER SETCONTROL CODE1 1BCONTROL CODE1 FF[RESTART]CONTROL CODE1 FECONTROL CODE1 FD[FEED]CONTROL CODE1 02CONTROL CODE1 01CONTROL CODE1 00After setting the control code for Control Code 1, press the [PAUSE]key to show the CONTROL CODE2 screen. In a same manner, press the[PAUSE] key after setting the control code for Control Code 2 to displaythe CONTROL CODE3 screen.CONTROL CODE1CONTROL CODE2[PAUSE][PAUSE]CONTROL CODE3Press the [PAUSE] key after setting the control code for Control Code 3,and the Strip Wait Status Selection screen will appear.E2-22
2. PRINTER SETUP ENGLISH VERSION EO1-330582.9 Setting an Operating Environment2.9.1 Parameter Setting(Cont.)(14) Strip Wait Status SelectionThis parameter is to choose when the printer sends a strip wait status(05H) to a host in response to a status request command.When “PARAMETER SET” appears, press the [PAUSE] key untilthe following display appears.PARAMETER SETPEEL OFF STS OFFUse the [FEED] or [RESTART] key to select a desired option.PEEL OFF STS OFF[RESTART][FEED]A strip wait status is sent when the printerreceives the next issue command and thepreviously printed label is waiting to be removed.PEEL OFF STS ONA strip wait status is sent when a printed labelis waiting to be removed.After selecting the Strip Wait Status, press the [PAUSE] key.(15) FEED Key Function SelectionThis parameter is to choose the function of the [FEED] key.When “PARAMETER SET” appears, press the [PAUSE] key untilthe following display appears.PARAMETER SETFEED KEY FEEDUse the [FEED] or [RESTART] key to select a desired option.[RESTART][FEED]FEED KEY FEEDThe [FEED] key will feed one media whenpressed.FEED KEY PRINTThe [FEED] key will print the data in theImage Buffer (The last printed data)After selecting the FEED key function, press the [PAUSE] key.E2-23
2. PRINTER SETUP ENGLISH VERSION EO1-330582.9 Setting an Operating Environment2.9.1 Parameter Setting(Cont.)NOTE:Kanji code selection is not supportedby the QM model as the Kanji ROMsare not installed.(16) KANJI Code SelectionThis parameter is to choose a KANJI code.When “PARAMETER SET” appears, press the [PAUSE] key untilthe following display appears.PARAMETER SETKANJI CODE TYPE1Use the [FEED] or [RESTART] key to select a desired option.[RESTART][FEED]KANJI CODE TYPE1KANJI CODE TYPE2Windows codeOriginal codeAfter selecting a Kanji code, press the [PAUSE] key.(17) EURO Code SelectionThis parameter is to choose a Euro code (€).When “PARAMETER SET” appears, press the [PAUSE] key untilthe following display appears.PARAMETER SETEURO CODE B0NOTE:Pressing the [FEED] or[RESTART] key causes 1 bytechange in the Euro Code value.Use the [FEED] or [RESTART] key to select a desired option.EURO CODE 20[RESTART]EURO CODE 21[FEED]EURO CODEEURO CODEFEFFAfter selecting a Euro code, press the [PAUSE] key.E2-24
2. PRINTER SETUP ENGLISH VERSION EO1-330582.9 Setting an Operating Environment2.9.1 Parameter Setting(Cont.)NOTES:1. It takes about 2 seconds toperform an Auto Print Headcheck.2. It is recommended that thisfunction should be activated whenhigh quality printing such as barcodes printing is required.Otherwise, choose OFF.3. When a broken element is found,the printer stops, displaying“HEAD ERROR”. The errorstate can be cleared by pressingthe [RESTART] key, but if thebroken element affects bar codereadability or actual operations,please replace the print head witha proper one.(18) Auto Print Head Check SelectionThis parameter is to choose whether to perform the Auto Print HeadCheck function at the power on time. When “PARAMETER SET”appears, press the [PAUSE] key until the following display appears.PARAMETER SETAUTO HD CHK OFFUse the [FEED] or [RESTART] key to select a desired option.[RESTART][FEED]AUTO HD CHK OFFAuto print head broken elementcheck is not performed.AUTO HD CHK ONAuto print head broken elementcheck is performed.After selecting auto print head check, press the [PAUSE] key.(19) Centronics Interface ACK/BUSY Timing SelectionThis parameter is to choose an ACK/BUSY timing of the Centronicsinterface.“TYPE1” has been chosen as default, but if a communication error occursor a communication is not properly made, change to “TYPE2”.When “PARAMETER SET” appears, press the [PAUSE] key untilthe following display appears”.PARAMETER SETACK/BUSY TYPE1Use the [FEED] or [RESTART] key to select a desired option.[RESTART][FEED]ACK/BUSY TYPE1A rise of ACK signal and a release ofBUSY occur at the same time.ACK/BUSY TYPE2A fall of ACK signal and a release ofBUSY occur at the same time.After selecting an ACK/BUSY timing, press the [PAUSE] key.E2-25
2. PRINTER SETUP ENGLISH VERSION EO1-330582.9 Setting an Operating Environment2.9.1 Parameter Setting(Cont.)NOTE:When “WEB PRINTER ON” isselected, the status of the printerconnected in a network can bechecked through the Web browser.(20) Web Printer Function SelectionThis parameter is to choose whether to use the printer as a web printer.When “PARAMETER SET” appears, press the [PAUSE] key untilthe following display appears.PARAMETER SETWEB PRINTER OFFUse the [FEED] or [RESTART] key to select a desired option.[RESTART][FEED]WEB PRINTER OFFWEB PRINTER ONUnavailableAvailableAfter selecting the Web printer function, press the [PAUSE] key.(21) Input Prime SelectionThis parameter is to choose whether to enable a reset operation whenINIT signal is ON.Normally, when the printer receives a reset request signal (nInit signal)from the host via Centronics interface, the printer will be reset and turn tothe idle state.When the INPUT PRIME parameter is set to OFF, the printer is reset butdoes not turn to idle.When this parameter is set to ON, the host sends an INIT signal and theprinter turns to idle each time the printer is turned on. If you would liketo avoid this processing, set this parameter to OFF.When “PARAMETER SET” appears, press the [PAUSE] key untilthe following display appears.PARAMETER SETINPUT PRIME ONUse the [FEED] or [RESTART] key to select a desired option.[RESTART][FEED]INPUT PRIME ONINPUT PRIME OFFAvailableUnavailableAfter selecting the Input Prime, press the [PAUSE] key.E2-26
2. PRINTER SETUP ENGLISH VERSION EO1-330582.9 Setting an Operating Environment2.9.1 Parameter Setting(Cont.)(22) Ribbon Near End SelectionThis parameter is to choose the remaining ribbon length where the ribbonnear end is detected.When “PARAMETER SET” appears, press the [PAUSE] key untilthe following display appears”.PARAMETER SETRBN NEAR END 70mUse the [FEED] or [RESTART] key to select a desired option.[RESTART][FEED]RBN NEAR END 70mNear end is detected when the remainingribbon is 70m long.RBN NEAR END 30mNear end is detected when the remainingribbon is 30m long.RBN NEAR END OFFRibbon end is not detected.After selecting the ribbon near end function, press the [PAUSE] key.(23) Expansion I/O Interface Type SelectionThis parameter is to choose a type of the Expansion I/O interfaceoperating mode.This parameter should be set depending on the expansion I/O controlspecification of the device to be connected via the expansion I/Ointerface. For details, refer to the External Equipment InterfaceSpecification.When “PARAMETER SET” appears, press the [PAUSE] key untilthe following display appears.PARAMETER SETEX.I/O TYPE1Use the [FEED] or [RESTART] key to select a desired option.[RESTART][FEED]EX.I/O TYPE1EX.I/O TYPE2TYPE1: Standard modeTYPE2: Inline modeAfter selecting an Expansion I/O Interface type, press the [PAUSE] key.E2-27
2. PRINTER SETUP ENGLISH VERSION EO1-330582.9 Setting an Operating Environment2.9.1 Parameter Setting(Cont.)(24) Centronics Interface SelectionThis parameter is to choose the type of the Centronics interface operatingmode.When “PARAMETER SET” appears, press the [PAUSE] key untilthe following display appears.PARAMETER SETCENTRO MODE SPPUse the [FEED] or [RESTART] key to select a desired option.[RESTART]CENTRO MODESPPSPP: Compatible mode[FEED]CENTRO MODEECPECP: ECP modeAfter selecting the Centronics interface operating mode, press the[PAUSE] key.NOTE:If the printer and the PC areconnected by USB, plug & play willbe automatically enabled, regardlessof the setting of this parameter.(25) Plug & Play SelectionThis parameter is to choose whether to enable a Plug & Play function.When “PARAMETER SET” appears, press the [PAUSE] key untilthe following display appears.PARAMETER SETPLUG & PLAY OFFUse the [FEED] or [RESTART] key to select a desired option.[RESTART][FEED]PLUG & PLAY OFFPLUG & PLAY ONUnavailableAvailableAfter selecting a Plug & Play, press the [PAUSE] key.E2-28
2. PRINTER SETUP ENGLISH VERSION EO1-330582.9 Setting an Operating Environment2.9.1 Parameter Setting(Cont.)(26) Label End/Ribbon End SelectionThis parameter is to choose a printing process when a label end or ribbonend is detected.When “PARAMETER SET” appears, press the [PAUSE] key untilthe following display appears.PARAMETER SETLBL/RBN END TYP1Use the [FEED] or [RESTART] key to select a desired option.[RESTART][FEED]LBL/RBN END TYP1TYPE1: When a label/ribbon end isdetected in the middle of printing,printing is immediately paused.LBL/RBN END TYP2TYPE2: When a label/ribbon end is detectedin the middle of printing, the printer prints thehalf-finished label as far as possible, andstops when the next label is at the homeposition.After selecting a Label End/Ribbon End type, press the [PAUSE] key.(27) Pre-Strip SelectionThis parameter is to choose whether to activate the Pre-strip function.When this parameter is set to ON (Available), the top edge of a label isseparated (pre-stripped) from the backing paper before the label is printed.This function is intended to make the strip issue easier in case the labelsare hard to strip due to the label intensity, adhesive power, or the printingspeed.When “PARAMETER SET” appears, press the [PAUSE] key untilthe following display appears.PARAMETER SETPRE PEEL OFF OFFNOTE:When the print speed is set to10”/sec., the pre-strip function willbe activated regardless of thisparameter setting.Use the [FEED] or [RESTART] key to select a desired option.[RESTART] PRE PEEL OFF OFF Unavailable[FEED]PRE PEEL OFF ON AvailableAfter selecting the Pre-strip function, press the [PAUSE] key.E2-29
2. PRINTER SETUP ENGLISH VERSION EO1-330582.9 Setting an Operating Environment2.9.1 Parameter Setting(Cont.)(28) Reverse Feed Speed SelectionThis parameter is to choose a reverse feed speed.In the strip issue, the back feed speed of 3”/sec. may cause a shortage offeed amount due to a lack of torque, slippery media surface, etc. In suchcase, reduce the back feed speed to 2”/sec. to secure the feed amount.When “PARAMETER SET” appears, press the [PAUSE] key untilthe following display appears.PARAMETER SETBACK SPEED STDUse the [FEED] or [RESTART] key to select a desired option.[RESTART][FEED]BACK SPEED STDBACK SPEED LOWSTD: 3 inch/secondLOW: 2 inch/secondAfter selecting the Back Feed Speed, press the [PAUSE] key.(29) Maxi Code Specification SelectionThis parameter is to choose a Maxi code specification.When “PARAMETER SET” appears, press the [PAUSE] key untilthe following display appears.PARAMETER SETMAXI CODE TYPE1Use the [FEED] or [RESTART] key to select a desired option.[RESTART][FEED]MAXI CODE TYPE1TYPE1: Compatible specificationwith the B-X seriesMAXI CODE TYPE2TYPE2: Specification for specifichome delivery companyAfter selecting a Maxi code specification, press the [PAUSE] key.E2-30
2. PRINTER SETUP ENGLISH VERSION EO1-330582.9 Setting an Operating Environment2.9.1 Parameter Setting(Cont.)NOTE:When the installed print head type ischanged, this parameter should bealso changed accordingly. Failure todo this may affect the print quality orprint head life.(30) Print Head Type SelectionThis parameter is to choose the print head type that is actually installed.When “PARAMETER SET” appears, press the [PAUSE] key untilthe following display appears.PARAMETER SETTHERMAL HEAD V2Use the [FEED] or [RESTART] key to select a desired option.[RESTART]THERMAL HEADV1Current type(TPH128R4)[FEED]THERMAL HEADV2Enhanced type(TPH128R5)After selecting a print head type, press the [PAUSE] key.E2-31
2. PRINTER SETUP ENGLISH VERSION EO1-330582.9 Setting an Operating Environment2.9.2 Dump Mode Setting While “DUMP MODE” is displayed on the LCD Message Display,press the [PAUSE] key to enter the Dump Mode.In the Dump Mode, data in the receive buffer are printed. Data areexpressed in hexadecimal values. This operation allows the user to verifyprogramming commands or debug the program.When “DUMP MODE” appears, press the [PAUSE] key.DUMP MODEBUFFER RS-232CUse the [FEED] or [RESTART] key to choose a receive buffer to bedumped.BUFFER RS-232C[RESTART][FEED]BUFFER CENTRO.BUFFER NETWORKBUFFER BASIC 1BASIC Interpreter (Interface → Interpreter buffer)BUFFER BASIC 2BASIC Interpreter (Interpreter → Printer buffer)BUFFERUSBAfter selecting the receive buffer, press the [PAUSE] key.DUMP MODEPRINT ON DEMANDNOTES:1. When “ON DEMAND” isselected, it is required to choose aprinting method again and pressthe [PAUSE] key to print thesubsequent data until the all datahas been printed.2 If an error occurs duringdumping, the printer will displayan error message and stopprinting. The error can becleared by pressing the [PAUSE]key, and then the display willshow “DUMP MODE”again.After a recovery from the errorthe printer will not start printingautomatically.Use the [FEED] or [RESTART] key to select a printing method.[RESTART][FEED]After selecting a printing method, press the [PAUSE] key.DUMP MODENOW PRINTING...[PAUSE]DUMP MODEPRINT ON DEMANDPrints 166 lines of data (approx. 50cm), thenstops.* To print the subsequent data, choose a printingmethod again and press the [PAUSE] key.PRINT ALLPrints all data in the receive buffer, then stops.Turn off the power, and then on.ON LINEB-SX4TVx.xE2-32
2. PRINTER SETUP ENGLISH VERSION EO1-330582.9 Setting an Operating Environment2.9.2 Dump Mode Setting(Cont.)Print Conditions• Printing width: 3.9 inches (100 mm)• Sensor selection: None• Print speed: 4”/sec.• Printing mode: Depends on theselection in use.• 16 bytes/line• Data is printed in the order from thenew one to the old one.• Data specified by the receive bufferwrite pointer will be printed inboldface.The data in the receive buffer is printed as follows:00 00 00 00 00 00 00 00 00 00 00 00 00 00 00 0000 00 00 00 00 00 00 00 00 00 00 00 00 00 00 0000 00 00 00 00 00 00 00 00 00 00 00 00 00 00 007B 41 58 3B 2B 30 30 30 2C 2B 30 30 30 2C 2B 30 {AX;+000,+000,+030 7C 7D 7B 44 30 37 37 30 2C 31 31 30 30 2C 30 0|}{D0760,1100,037 34 30 7C 7D 7B 43 7C 7D 7B 4C 43 3B 30 30 33 740|}{C|}{LC;00330 2C 30 30 32 30 2C 30 30 33 30 2C 30 36 36 30 0,0020,0030,06602C 30 2C 32 7C 7D 7B 4C 43 3B 30 30 37 30 2C 30 ,0,2|}{LC;0070,030 32 30 2C 30 30 37 30 2C 30 36 36 30 2C 30 2C 020,0070,0660,0,39 7C 7D 7B 4C 43 3B 30 30 35 30 2C 30 30 32 30 9|}{LC;0050,0020:::44 45 46 47 48 49 4A 7C 7D 7B 50 43 31 30 3B 30 DEFGHIJ|}{PC10;033 35 30 2C 30 34 30 30 2C 31 2C 31 2C 4B 2C 30 350,0400,1,1,K,030 2C 42 3D 41 42 43 44 65 66 67 68 69 6A 6B 6C 0,B=ABCDefghijkl6D 6E 6F 70 7C 7D 7B 50 56 30 32 3B 30 33 33 30 mnop|}{PV02;03302C 30 36 36 30 2C 30 32 37 30 2C 30 32 35 30 2C ,0660,0270,0250,41 2C 30 30 2C 42 3D 42 7C 7D 7B 50 56 30 33 3B A,00,B=B|}{PV03;:::3B 30 39 30 30 2C 30 31 38 30 2C 54 2C 48 2C 30 ;0900,0180,T,H,035 2C 41 2C 30 3D 31 32 33 34 35 36 37 38 39 30 5,A,0=123456789041 42 43 44 45 7C 7D 00 00 00 00 00 00 00 00 00 ABCDE|}::Feed directionReceive Buffer SizeInterfaceRS-232CCentronicsNetwork InterfaceBASIC 1BASIC 2USBBuffer size1MB (65536 lines)1MB (65536 lines)1MB (65536 lines)8KB (512 lines)8KB (512 lines)1MB (65536 lines)Required Label LengthInterfaceMedia length*RS-232C 198.2mCentronics 198.2mNetwork Interface 198.2mBASIC 1BASIC 22m2mUSB 198.2m*: Media length required for printing all data in the receive buffer.E2-33
2. PRINTER SETUP ENGLISH VERSION EO1-330582.9 Setting an Operating Environment2.9.3 BASIC Expansion ModeNOTE:For the BASIC enable setting mode,refer to the B-SX4T/SX5T SeriesKey Operation Specification <strong>store</strong>din the CD-ROM.While “EXPAND MDOE” is displayed on the LCD Message Display,press the [PAUSE] key to enter the BASIC Expansion Mode.In the BASIC Expansion Mode, it is possible to execute the BASICexpansion mode program under the following conditions.• The BASIC expansion mode program has already been loaded.• The BASIC enable setting mode is selected.The basic expansion mode ends when the basic expansion program isexited.When “EXPAND MODE” appears, press the [PAUSE] key.EXPAND MODEWhen the [PAUSE] key is pressed, BASIC program is executed.E2-34
2. PRINTER SETUP ENGLISH VERSION EO1-330582.10 Installing the Printer Drivers2.10 Installing the Printer Drivers2.10.1 IntroductionThis manual describes how to install the <strong>TOSHIBA</strong> printer driver for the <strong>TOSHIBA</strong> bar code printer on yourWindows host computer; install and delete the printer driver, the procedure for adding the LAN port, cautionsand limitations.The examples provided here illustrate the procedure for installing the printer driver version V7.0 for the B-SA4Tseries.2.10.2 General Description(1) FeaturesOnce you install the <strong>TOSHIBA</strong> printer driver on your Windows host computer, you can use the <strong>TOSHIBA</strong>bar code printer, as well as the easy-to-use general printers.You can use this printer by connecting a parallel interface cable (printer cable), a USB cable, or a LAN cableto your host computer.(2) System RequirementsTo install the <strong>TOSHIBA</strong> printer driver on your host computer, the following system and environment arerequired:• Operating system: Windows 98, Windows Me, Windows 2000, Windows XP• Hardware: A DOS-/V (IBM PC/AT compatible) machine running an above operating system.• Interface: • Parallel interface conforming to the IEEE1284 standard• USB interface• LAN interfaceE2-35
2. PRINTER SETUP ENGLISH VERSION EO1-330582.10 Installing the Printer Drivers2.10.3 Installing the Printer DriverThe installation procedure differs depending on the interface connected to the printer and the operation systemyou are using. Please install the printer driver by performing the appropriate procedure.If the previous version of the printer driver has been installed on your host computer , be sure to uninstall itbefore you install this printer driver. (Refer to Section 2.10.4 Uninstalling the Printer Driver.)To print via your network, please install the printer driver by performing the installation procedure for theparallel interface, and also perform the following:1. In the procedure, select “LPT1” for the port.2. After installation of the printer driver is completed, add the LAN port by referring to Section 2.10.5Adding/Deleting a LAN Port, and specify the LAN port.(1) Parallel InterfaceTo use the parallel interface, the following settings are required, after installing the printer driver:For Windows 98/Me: Open the printer properties. Select the “Details” tab and click on the[Spool Settings…] button. The “Spool Settings” dialog box is displayed.Select “Disable bi-directional support for this printer”.For Windows 2000/XP:Open the printer properties and select the “Ports” tab. Mark off the “Enablebidirectional support” checkbox.NOTE:In case of the B-SX4T or B-SX5T series, make sure that the Centronics interface type is set to SPP(default).E2-36
2. PRINTER SETUP ENGLISH VERSION EO1-330582.10 Installing the Printer DriversWindows 98/Me(1) Select “Settings” – “Printers” from the “Start” menu to open the printer folder.(2) Double-click on the “Add Printer” icon. The Add Printer Wizard runs. Click on the [Next] button.(3) Select “Local printer”, then click on the [Next] button. The screen listing “Manufacturers andPrinters” is displayed.(4) Click on the [Have Disk…] button. The “Install From Disk” dialog box is displayed.Specify the “\driver” folder in the CD-ROM drive, then click on the [OK] button.NOTE:The latest printer driver is available from the web site, “the Barcode Master”.(http://www.toshibatec-ris.com/products/barcode/download/index.html)(5) Select the printer to be installed from “Printers” list, then click on the [Next] button.Driver name Model Driver name Model Driver name Model<strong>TEC</strong> B-372 B-372-QP <strong>TEC</strong> B-415 B-415-GH24-QM <strong>TEC</strong> B-419 B-419-GS10-QQB-415-GH25-QMB-419-GS12-QP<strong>TEC</strong> B-431<strong>TEC</strong> B-472<strong>TEC</strong> B-492<strong>TEC</strong> B-682<strong>TEC</strong> B-872<strong>TEC</strong> B-SA4T<strong>TEC</strong> B-SV4B-431-GS10-QPB-431-GS10-CNB-472-QQB-472-QQ-USB-472-GH12-QQB-472-QPB-492L-TH10-QQB-492R-TH10-QQB-492L-TH10-QPB-492R-TH10-QPB-682-TS10-QQB-682-TS10-QQ-USB-682-TS10-QPB-872-QQB-872-QQ-USB-872-QPB-SA4TM-TS12-QM-RB-SA4TP-TS12-QM-RB-SV4D-GS10-QMB-SV4D-GH10-QMB-SV4D-GS10-QM-RB-SV4D-GH10-QM-R<strong>TEC</strong> B-SX5 B-SX5T-TS12-QQB-SX5T-TS12-QQ-USB-SX5T-TS12-QPB-SX5T-TS22-QQB-SX5T-TS22-QQ-USB-SX5T-TS22-QPB-SX5T-TS22-QM-R<strong>TEC</strong> B-SX8T-R B-SX8T-TS12-QM-R<strong>TEC</strong> B-452<strong>TEC</strong> B-472-CN<strong>TEC</strong> B-572<strong>TEC</strong> B-852<strong>TEC</strong> B-882<strong>TEC</strong> B-SA4T-CN<strong>TEC</strong> B-SX4<strong>TEC</strong> B-SX5-CN<strong>TEC</strong> CB-416-T3B-452-TS10-QQB-452-TS10-QQ-USB-452-TS11-QQ-PACB-452-TS12-QPB-452-TS12-QP-PACB-452-TS12-CNB-472-GH12-CNB-472-GH14-CNB-572-QQB-572-QQ-USB-572-QPB-852-TS12-QQB-852-TS12-QQ-USB-852-TS12-QPB-882-TS10-QQB-882-TS10-QQ-USB-882-TS10-QPB-SA4TM-TS12-CNB-SA4TP-TS12-CNB-SX4T-GS10-QQB-SX4T-GS10-QQ-USB-SX4T-GS10-QPB-SX4T-GS20-QQB-SX4T-GS20-QQ-USB-SX4T-GS20-QPB-SX4T-GS20-QM-RB-SX5T-TS12-CNB-SX5T-TS22-CNCB-416-T3-QQCB-416-T3-QQ-USCB-416-T3-QP<strong>TEC</strong> B-452H<strong>TEC</strong> B-482<strong>TEC</strong> B-672<strong>TEC</strong> B-852-R<strong>TEC</strong> B-SA4GB-419-GS12-CNB-452-HS12-QQB-452-HS12-QQ-USB-452-HS12-QPB-452-HS12-CNB-482-TS10-QQB-482-TS10-QQ-USB-482-TS10-QPB-672-QQB-672-QQ-USB-672-QPB-852-TS22-QQ-RB-852-TS22-QP-RB-SA4TM-GS12-QM-RB-SA4TP-GS12-QM-R<strong>TEC</strong> B-SP2D B-SP2D-GH20-QMB-SP2D-GH30-QMB-SP2D-GH30-QMB-SP2D-GH20-QM-RB-SP2D-GH30-QM-RB-SP2D-GH30-QM-R<strong>TEC</strong> B-SX4-CN B-SX4T-GS10-CNB-SX4T-GS20-CN<strong>TEC</strong> B-SX6T-R B-SX6T-TS12-QM-R<strong>TEC</strong> CB-426-T3CB-426-T3-QQCB-426-T3-QQ-USCB-426-T3-QPE2-37
2. PRINTER SETUP ENGLISH VERSION EO1-330582.10 Installing the Printer Drivers(6) The screen to select the existing installed printer driver or use the new one, is displayed. Select“Replace existing driver”, then click on the [Next] button. If you install the printer driver for the firsttime, this screen is not displayed.(7) Select the port to be used for printing from the “Available ports” list, then click on the [Next] button.(8) Change the printer name if necessary, and select whether or not you use the printer as the defaultprinter (“Yes” or “No”). Click on the [Finish] button.(9) The printer driver is installed. When installation is completed, the new printer icon is added in the“Printers” folder.E2-38
2. PRINTER SETUP ENGLISH VERSION EO1-330582.10 Installing the Printer DriversWindows 2000/XP(1) Log on to your host computer as a member who has full control access privilege concerning theprinter settings.(2) Select “Settings” – “Printers” from the “Start” menu to open the printer folder.(3) Double-click on the “Add Printer” icon. The Add Printer Wizard runs. Click on the [Next] button.(4) Select “Local printer”. Mark off the “Automatically detect and install my Plug and Play printer”checkbox, then click on the [Next] button.(5) Select the port to be used for printing from the “Available ports” list, then click on the [Next] button.(6) On the screen listing “Manufacturers and Printers”, click on the [Have Disk…] button. The “InstallFrom Disk” dialog box is displayed.(7) Specify the “\driver” folder in the CD-ROM drive, then click on the [OK] button.NOTE:The latest printer driver is available from the web site, “the Barcode Master”.(http://www.toshibatec-ris.com/products/barcode/download/index.html)(8) Select the printer to be installed from “Printers” list, then click on the [Next] button.Driver name Model Driver name Model Driver name Model<strong>TEC</strong> B-372 B-372-QP <strong>TEC</strong> B-415 B-415-GH24-QM <strong>TEC</strong> B-419 B-419-GS10-QQB-415-GH25-QMB-419-GS12-QP<strong>TEC</strong> B-431<strong>TEC</strong> B-472<strong>TEC</strong> B-492<strong>TEC</strong> B-682<strong>TEC</strong> B-872<strong>TEC</strong> B-SA4T<strong>TEC</strong> B-SV4B-431-GS10-QPB-431-GS10-CNB-472-QQB-472-QQ-USB-472-GH12-QQB-472-QPB-492L-TH10-QQB-492R-TH10-QQB-492L-TH10-QPB-492R-TH10-QPB-682-TS10-QQB-682-TS10-QQ-USB-682-TS10-QPB-872-QQB-872-QQ-USB-872-QPB-SA4TM-TS12-QM-RB-SA4TP-TS12-QM-RB-SV4D-GS10-QMB-SV4D-GH10-QMB-SV4D-GS10-QM-RB-SV4D-GH10-QM-R<strong>TEC</strong> B-SX5 B-SX5T-TS12-QQB-SX5T-TS12-QQ-USB-SX5T-TS12-QPB-SX5T-TS22-QQB-SX5T-TS22-QQ-USB-SX5T-TS22-QPB-SX5T-TS22-QM-R<strong>TEC</strong> B-SX8T-R B-SX8T-TS12-QM-R<strong>TEC</strong> B-452<strong>TEC</strong> B-472-CN<strong>TEC</strong> B-572<strong>TEC</strong> B-852<strong>TEC</strong> B-882<strong>TEC</strong> B-SA4T-CN<strong>TEC</strong> B-SX4<strong>TEC</strong> B-SX5-CN<strong>TEC</strong> CB-416-T3B-452-TS10-QQB-452-TS10-QQ-USB-452-TS11-QQ-PACB-452-TS12-QPB-452-TS12-QP-PACB-452-TS12-CNB-472-GH12-CNB-472-GH14-CNB-572-QQB-572-QQ-USB-572-QPB-852-TS12-QQB-852-TS12-QQ-USB-852-TS12-QPB-882-TS10-QQB-882-TS10-QQ-USB-882-TS10-QPB-SA4TM-TS12-CNB-SA4TP-TS12-CNB-SX4T-GS10-QQB-SX4T-GS10-QQ-USB-SX4T-GS10-QPB-SX4T-GS20-QQB-SX4T-GS20-QQ-USB-SX4T-GS20-QPB-SX4T-GS20-QM-RB-SX5T-TS12-CNB-SX5T-TS22-CNCB-416-T3-QQCB-416-T3-QQ-USCB-416-T3-QP<strong>TEC</strong> B-452H<strong>TEC</strong> B-482<strong>TEC</strong> B-672<strong>TEC</strong> B-852-R<strong>TEC</strong> B-SA4GB-419-GS12-CNB-452-HS12-QQB-452-HS12-QQ-USB-452-HS12-QPB-452-HS12-CNB-482-TS10-QQB-482-TS10-QQ-USB-482-TS10-QPB-672-QQB-672-QQ-USB-672-QPB-852-TS22-QQ-RB-852-TS22-QP-RB-SA4TM-GS12-QM-RB-SA4TP-GS12-QM-R<strong>TEC</strong> B-SP2D B-SP2D-GH20-QMB-SP2D-GH30-QMB-SP2D-GH30-QMB-SP2D-GH20-QM-RB-SP2D-GH30-QM-RB-SP2D-GH30-QM-R<strong>TEC</strong> B-SX4-CN B-SX4T-GS10-CNB-SX4T-GS20-CN<strong>TEC</strong> B-SX6T-R B-SX6T-TS12-QM-R<strong>TEC</strong> CB-426-T3CB-426-T3-QQCB-426-T3-QQ-USCB-426-T3-QPE2-39
2. PRINTER SETUP ENGLISH VERSION EO1-330582.10 Installing the Printer Drivers(9) The “Use Existing Driver” screen is displayed. Select “Replace existing driver”, then click on the[Next] button. If you install the printer driver for the first time, this screen is not displayed.(10) Change the printer name if necessary, and select whether or not you use the printer as the defaultprinter (“Yes” or “No”). Click on the [Next] button.(11) Select whether or not the printer will be shared with other network users (“Shared” or “Not shared”).Click on the [Next] button.(12) Select whether or not the test page will be printed (“Yes” or “No”), then click on the [Finish] button.(13) If the “Digital Signature Not Found” screen is displayed, click on the [Yes] button.(14) When the “Completing the Add Printer Wizard” screen is displayed, click on the [Finish] button.(15) When installation is completed, the new printer icon is added in the “Printers” folder.E2-40
2. PRINTER SETUP ENGLISH VERSION EO1-330582.10 Installing the Printer Drivers(2) USB InterfaceInstallation starts by the operating system’s plug-and-play function.Windows 98/Me(1) Turn the printer ON, then connect it to your host computer with the USB cable.The “New Hardware Found” dialog box is displayed, and “USB Device” is detected.(2) After a while, the “Add New Hardware Wizard” dialog box is displayed.Select “Specify the location of the driver (Advanced)”, then click on the [Next] button.E2-41
2. PRINTER SETUP ENGLISH VERSION EO1-330582.10 Installing the Printer Drivers(3) Select “Search for the best driver for your device. (Recommended)”.Mark the “Specify a location” checkbox, then click on the [Browse] button.Specify “\driver” folder, then click on the [Next] button.(4) Check to see that the “USB Printing Support” driver is detected, then click on the [Next] button.E2-42
2. PRINTER SETUP ENGLISH VERSION EO1-330582.10 Installing the Printer Drivers(5) When the screen which indicates the USB Printing Support driver has been installed, isdisplayed, click on the [Finish] button.(6) After a while, “<strong>TEC</strong> B-SA4T” is detected as a new hardware.(7) The “Add New Hardware Wizard” dialog box is displayed.Select “Specify the location of the driver (Advanced)”, then click on the [Next] button.E2-43
2. PRINTER SETUP ENGLISH VERSION EO1-330582.10 Installing the Printer Drivers(8) Select “Search for the best driver for your device. (Recommended)”.Mark the “Specify a location” checkbox, then click on the [Browse] button.Specify “\driver” folder, then click on the [Next] button.(9) Check to see that the “<strong>TEC</strong> B-SA4T” driver is detected, then click on the [Next] button.E2-44
2. PRINTER SETUP ENGLISH VERSION EO1-330582.10 Installing the Printer Drivers(10) Change the printer name if necessary, and select whether or not you use the printer as the defaultprinter (“Yes” or “No”). Click on the [Finish] button.(11) When the screen, which indicates <strong>TEC</strong> B-SA4T has been installed, is displayed, click on the[Finish] button.(12) When installation is completed, the new printer icon is added in the “Printers” folder.E2-45
2. PRINTER SETUP ENGLISH VERSION EO1-330582.10 Installing the Printer DriversWindows 2000/XPNOTE:When plug-and-play printer installation in progress is stopped, be sure to delete the printer detected anddisplayed on the “Device Manager” tab of the “System Properties” dialog box.(1) Log on to your host computer as a member who has full control access privilege concerning theprinter settings.(2) Turn the printer ON, then connect it to your host computer with the USB cable.(3) “USB Device” is automatically detected, and “USB Printing Support” is automatically installed.(4) After a while, for Windows XP, “<strong>TEC</strong> B-SA4T” is detected as a new device.For Windows 2000, “Unknown” device is detected as a new device. In both cases, perform thefollowing steps, though dialog boxes for Windows XP are used.(5) The “Found New Hardware Wizard” dialog box is displayed.Select “No, not this time”, then click on the [Next] button.E2-46
2. PRINTER SETUP ENGLISH VERSION EO1-330582.10 Installing the Printer Drivers(6) Select “Install from a list or specific location (Advanced)”, then click on the [Next] button.(7) Select “Search for the best driver in these locations”.Mark the “Include this location in the search” checkbox, then click on the [Browse] button.Specify the “\driver” folder in the CD-ROM, then click on the [Next] button.E2-47
2. PRINTER SETUP ENGLISH VERSION EO1-330582.10 Installing the Printer Drivers(8) When the dialog box below is displayed, click on the [Continue Anyway] button.(9) When the “Completing the Found New Hardware Wizard” screen is displayed, click on the[Finish] button.(10) When installation is completed, the new printer icon is added in the “Printers” folder.E2-48
2. PRINTER SETUP ENGLISH VERSION EO1-330582.10 Installing the Printer Drivers2.10.4 Uninstalling the Printer DriverNOTE:Before uninstalling the printer driver, be sure to complete all of printing, the status monitor, and properties settings.Windows 98/ME(1) Select “Settings” – “Printers” from the “Start” menu to open the printer folder.(2) Right-click on the printer driver icon to be deleted, then select “Delete”. The confirmation message isdisplayed.(3) Click on the [Yes] button to delete.(4) After the printer driver icon is deleted, restart your host computer.Windows 2000/XP(1) Log on to your host computer as a member who has full control access privilege concerning theprinter settings.(2) Select “Settings” – “Printers” from the “Start” menu to open the printer folder.(3) Right-click on the printer driver icon to be deleted, then select “Delete”. The confirmation message isdisplayed.(4) Click on the [Yes] button to delete.(5) After the printer icon is deleted, select “Server Properties” from “File” menu of the “Printers” folder.(6) Select the printer driver to be deleted, then click on the [Remove] button. After the printer driver isdeleted, restart your host computer.E2-49
2. PRINTER SETUP ENGLISH VERSION EO1-330582.10 Installing the Printer Drivers2.10.5 Adding/Deleting a LAN PortTo use the LAN interface, first, you have to make the following settings in “ IP ADDRESS” in the systemmode of the printer. (Refer to <strong>TOSHIBA</strong> <strong>TEC</strong> support representative.)• Set the printer IP address (“PRINTER IP ADRES”), the gateway IP address (“GATEWAY IPADRES”), and subnet mask (“SUBNET MASK”).• Set the port number (“SOCKET PORT”).Among these settings, the printer IP address and the port number are also required for adding a LAN port.(1) Adding a LAN PortWindows 98/ME(1) Right-click on the printer icon. Select “Properties” to open the printer “Properties” dialog box.(2) Select the “Details” tab, and click on the [Add Port…] button. The “Add Port” dialog box isdisplayed.(3) Select “Other”.Select “Seagull Scientific TCP/IP Port” from the list, then click on the [OK] button.(4) On the “Add Seagull TCP/IP Port” dialog box, enter the name or IP address, the port number, and theport name. For the IP address and the port number, enter the same ones as you have set in “ IPADDRESS” in the system mode of the printer. After entering these, click on the [OK] button.(5) When addition of the port is completed, the port is added to the drop down list for “Print to thefollowing port”.E2-50
2. PRINTER SETUP ENGLISH VERSION EO1-330582.10 Installing the Printer DriversWindows 2000/XP(1) Right-click on the printer icon. Select “Properties” to open the printer “Properties” dialog box.(2) Select the “Ports” tab, and click on the [Add Port…] button. The “Printer Ports” dialog box isdisplayed.(3) Select “Seagull Scientific TCP/IP Port” from the “Available Printer Ports” list, then click on the [OK]button.(4) On the “Add Seagull TCP/IP Port” dialog box, enter the name or IP address, the port number, and theport name. For the IP address and the port number, enter the same ones as you have set in “ IPADDRESS” in the system mode of the printer. After entering these, click on the [OK] button.(5) When addition of the port is completed, the port is added to the “Print to the following port(s)” list.(2) Deleting a LAN PortNOTE:Before deleting a port, be sure to check if other printers also use it. If there are printers which use the port tobe deleted, change their port to another, before deleting the port.Windows 98/ME(1) Right-click on the printer icon. Select “Properties” to open the printer “Properties” dialog box.(2) Select the “Details” tab, and click on the [Delete Port…] button.(3) Select the port to be deleted, then click on the [OK] button.(4) When deletion of the port is completed, the port is also deleted from the “Print to the following port”list.Windows 2000/XP(1) Right-click on the printer icon. Select “Properties” to open the printer “Properties” dialog box.(2) On the “Ports” tab, select the port to be deleted, then click on the [Delete Port] button.(3) When deletion of the port is completed, the port is also deleted from the “Print to the followingport(s)” list.E2-51
2. PRINTER SETUP ENGLISH VERSION EO1-330582.10 Installing the Printer Drivers2.10.6 Cautions(1) Printer Driver Upgrades• To upgrade the printer driver to this version, uninstall the previous version of the printer driver, beforeinstalling this printer driver.• Be sure to restart your host computer, after you upgrade the printer driver.• When your operating system is Windows 98, or Windows Me, be sure to restart your host computer,after you uninstall the previous version of the printer driver. Or, the printer driver is not upgradedproperly.(2) Others• If your operating system is Windows 2000 or Windows XP, when plug-and-play printer installation inprogress is stopped, be sure to delete the printer detected and displayed on the “Device Manager” tab ofthe “System Properties” dialog box.• Before uninstalling the printer driver, be sure to complete all of printing, the status monitor, andproperties settings.• Before deleting a port, be sure to check if other printers also use it. If there are printers which use theport to be deleted, change their port to another, before deleting the port.E2-52
2. PRINTER SETUP ENGLISH VERSION EO1-330582.10 Installing the Printer Drivers2.10.7 Using the Printer DriverFor how to use the Printer Driver, please refer to the Help for Windows Printer Drivers screen.1) Open the Properties screen of the Printer Driver.2) Clicking on the About tab causes the following screen to appear.Click on the [Help] button.About tab[Help] button3) The Help for Windows Printer Drivers screen appears. This screen will provide how to use the printerdriver.E2-53
2. PRINTER SETUP ENGLISH VERSION EO1-330582.11 Print Test2.11 Print Test After your operating environment has been set, perform a print test.1. Perform a print test by using the Printer Driver or an Issue Command.The printer driver’s Properties screen allows you to set thecommunication conditions, media size, and other printing conditionsin accordance with your operating environment. For details, refer tothe Help for the Windows Printer Drivers screen.Example: Stock tab display of the Printer Driver’s Properties ScreenPrint MethodSensorLabel GapIssue ModeCutPrint SpeedFine AdjustmentPrint Method:Sensor:Issue Mode:Cut:Fine Adjustment:Direct thermal or thermal transfer is selectable.Media sensor type is selectable.Batch or strip is selectable.Whether to use the cutter or not is selectable.Adjustment values for the feed amount, cut/stripposition, etc. can be set.2. Confirm the print test result.• When a print start position, cut/strip position, or print tone needs tobe adjusted: ⇒ Section 2.12 Position and Print Tone FineAdjustment• When pre-printed media is used, and if a print start position is notproperly detected: ⇒ Section 2.13 Threshold SettingE2-54
2. PRINTER SETUP ENGLISH VERSION EO1-330582.11 Print Test2.11 Print Test (Cont.)When using a Strip Module or an optional Cutter ModuleIt is necessary to set the issue mode, cut/strip position, etc. for the PrinterDriver or TPCL (<strong>TEC</strong> Printer Command Language) in accordance withyour printing condition.For details of the TPCL, refer to the B-SX4T/SX5T Series ExternalEquipment Interface Specification <strong>store</strong>d in the CD-ROM.Regarding how to use the Printer Driver, refer to the Help for theWindows Printer Drivers screen.To gain maximum performance and life from the Cutter Module or StripModule, periodic cleaning is required.Before starting a cleaning, be sure to TURN OFF the printer to avoid riskof injury.For details of cleaning, refer to Section 4.1.3 Optional Cutter Module.E2-55
2. PRINTER SETUP ENGLISH VERSION EO1-330582.12 Position and Print Tone Fine Adjustment2.12 Position and PrintTone FineAdjustmentThis section describes how to fine adjust a print start position, cut/stripposition, reverse feed amount, print tone, and ribbon motor torque.When a fine adjustment is required, such as print start position, print tone,etc, follow the procedure below.1. Turn on the printer and confirm that “ONLINE” appears on the LCDMessage Display.2. Press the [PAUSE] key to pause the printer.3. Hold down the [RESTART] key for three seconds until “RESET”is displayed.4. Press the [FEED] or [RESTART] key until “ADJUST SET”appears on the LCD Message Display.5. When “ADJUST SET” appears, press the [PAUSE] key to enterthe Parameter Fine Adjustment Mode.ADJUST SET[PAUSE]ADJUST SETFEED ADJ.+10.0mm[PAUSE]ADJUST SETCUT ADJ. +10.0mm[PAUSE]ADJUST SETBACK ADJ. +5.0mm[PAUSE]ADJUST SETX ADJUST +50.0mm[PAUSE]ADJUST SETTONE ADJ. +3[PAUSE]ADJUST SETTONE ADJ. -2[PAUSE]ADJUST SETRBN ADJ -10[PAUSE]ADJUST SETRBN ADJ -5[PAUSE]ADJUST SETTHRESHOLD1.0V[PAUSE]The Parameter Fine Adjustment Mode contains the following sub menus.Each time the [PAUSE] key is pressed, the sub menus are displayedsequentially.(1) Feed Amount Fine Adjustment:Feed amount to the print start position is fine adjusted.(2) Cut/Strip Position Fine Adjustment:Cut position or strip position is fine adjusted.(3) Reverse Feed Amount Fine Adjustment:Reverse feed amount is fine adjusted.(4) X-coordinate Fine Adjustment:X-coordinate of a print position is fine adjusted.(5) Print Tone Fine Adjustment (Thermal transfer):Print tone is fine adjusted for thermal transfer mode.(6) Print Tone Fine Adjustment (Thermal direct):Print tone is fine adjusted for thermal direct mode.(7) Ribbon Motor Drive Voltage Fine Adjustment (Take-upmotor):Drive voltage of the ribbon take-up motor is fine adjusted.(8) Ribbon Motor Drive Voltage Fine Adjustment (Feed motor)Drive voltage of the ribbon feed motor is fine adjusted.(9) Threshold Fine Adjustment (Black mark sensor):Threshold for the black mark sensor is fine adjusted. See Section2.13.(10) Threshold Fine Adjustment (Feed gap sensor):Threshold for the feed gap sensor is fine adjusted. See Section2.13.NOTE:The printer driver’s properties screen also has Parameter Fine Adjustmentmenu.ADJUST SETTHRESHOLD1.4V[PAUSE]E2-56
2. PRINTER SETUP ENGLISH VERSION EO1-330582.12 Position and Print Tone Fine Adjustment2.12 Position and PrintTone FineAdjustment (Cont.)Print Start Position Fine AdjustmentADJUST SETFEED ADJ.+10.0mmNOTES:Choose a desired value by using the[RESTART] or [FEED] key.Pressing the [FEED] key one timecauses a –0.5mm change, up to–50.0 mm.Pressing the [RESTART] key onetime causes a +0.5mm change, upto +50.0 mm.[RESTART][FEED]FEED ADJ.+50.0mmFEED ADJ.+49.5mmFEED ADJ.+0.5mmFEED ADJ.+0.0mmFEED ADJ.-0.5mmFEED ADJ.-49.5mmFEED ADJ.-50.0mm• Example of Print Start Position Fine AdjustmentAfter selecting a fine adjustment value, press the [PAUSE] key.When setting +3.0 mmCompared with “+0.0mm” position, the print startposition is shifted forward.When setting +0.0 mmFeed Direction3mmOne labelPrint Start PositionWhen setting –3.0 mmCompared with “+0.0mm” position, the print startposition is shifted backward.Feed Direction3mmOne labelPrint Start PositionFeed DirectionOne labelPrint Start PositionE2-57
2. PRINTER SETUP ENGLISH VERSION EO1-330582.12 Position and Print Tone Fine Adjustment2.12 Position and PrintTone FineAdjustment (Cont.)Cut/Strip Position Fine AdjustmentADJUST SETCUT ADJ. +10.0mmNOTES:Choose a desired value by using the[RESTART] or [FEED] key.Pressing the [FEED] key one timecauses a –0.5mm change, up to–50.0 mm.Pressing the [RESTART] key onetime causes a +0.5mm change, upto +50.0 mm.[RESTART]CUT ADJ.+50.0mmCUT ADJ.+49.5mmCUT ADJ.+0.5mmCUT ADJ.+0.0mmCUT ADJ.-0.5mm[FEED]CUT ADJ.-49.5mmCUT ADJ.-50.0mmAfter selecting a fine adjustment value, press the [PAUSE] key.• Example of Cut Position Fine AdjustmentWhen setting +3.0 mmCompared with “+0.0mm” position, the cut positionis shifted forward.When setting +0.0 mmFeed Direction3mmCut PositionWhen setting –3.0 mmCompared with “+0.0mm” position, the cut positionis shifted backward.Feed DirectionFeed Direction3mmCut PositionCut PositionE2-58
2. PRINTER SETUP ENGLISH VERSION EO1-330582.12 Position and Print Tone Fine Adjustment• Example of Strip Position Fine AdjustmentWhen setting +3.0 mmCompared with “+0.0mm” position, the stop positionafter printing is shifted forward.Print HeadLabelWhen setting +0.0 mmStop position afterprinting3mmPlatenStrip PlateBacking PaperWhen setting –3.0 mmCompared with “+0.0mm” position, the stop positionafter printing is shifted backward.Stop position afterprinting3mmStop position afterprintingE2-59
2. PRINTER SETUP ENGLISH VERSION EO1-330582.12 Position and Print Tone Fine Adjustment2.12 Position and PrintTone FineAdjustment (Cont.)Reverse Feed Amount Fine AdjustmentADJUST SETBACK ADJ. +5.0mmNOTES:Choose a desired value by using the[RESTART] or [FEED] key.Pressing the [FEED] key one timecauses a –0.5mm change, up to–9.5 mm.Pressing the [RESTART] key onetime causes a +0.5mm change, upto +9.5 mm.[RESTART]BACK ADJ.+9.5mmBACK ADJ.+9.0 mmBACK ADJ.+0.5mmBACK ADJ.+0.0mmBACK ADJ.-0.5mm[FEED]BACK ADJ.-9.0mmBACK ADJ.-9.5mmAfter selecting a fine adjustment value, press the [PAUSE] key.• Example of Reverse Feed Amount Fine AdjustmentWhen setting +3.0 mmCompared with “+0.0mm” position, the print start positionafter a reverse feed is shifted forward.When setting +0.0 mmFeed Direction3mmPrint Start Position after areverse feedFeed DirectionWhen setting –3.0 mmCompared with “+0.0mm” position, the print start positionafter a reverse feed is shifted backward.Feed Direction3mmPrint Start Position after areverse feedPrint Start Position after areverse feedE2-60
2. PRINTER SETUP ENGLISH VERSION EO1-330582.12 Position and Print Tone Fine Adjustment2.12 Position and PrintTone FineAdjustment (Cont.)X Coordinate Fine AdjustmentADJUST SETX ADJUST +5.0mmNOTES:Choose a desired value by using the[RESTART] or [FEED] key.Pressing the [FEED] key one timecauses a –0.5mm change, up to–99.5 mm.Pressing the [RESTART] key onetime causes a +0.5mm change, upto +99.5 mm.[RESTART]X ADJUST +99.5mmX ADJUST +99.0mmX ADJUST +0.5mmX ADJUST +0.0mmX ADJUST -0.5mm[FEED]X ADJUST -99.0mmX ADJUST -99.5mmAfter selecting a fine adjustment value, press the [PAUSE] key.• Example of X Coordinate Fine AdjustmentFeed DirectionWhen setting –50.0 mmCompared with “+0.0mm” position, the print positionis shifted to the left.Top Down PrintingYXABCYWhen setting +0.0 mm50.0mmXBottom First PrintingABCWhen setting +50.0 mmCompared with “+0.0mm” position, the print positionis shifted to the right.50.0mmABCE2-61
2. PRINTER SETUP ENGLISH VERSION EO1-330582.12 Position and Print Tone Fine Adjustment2.12 Position and PrintTone FineAdjustment (Cont.)Print Tone Fine AdjustmentThermal Transfer PrintNOTES:Choose a desired value by using the[RESTART] or [FEED] key.Pressing the [FEED] key one timecauses a –1 tone change, up to–10 tones.Pressing the [RESTART] key onetime causes a +1 tone change, up to+10 tones.[RESTART][FEED]ADJUST SETTONE ADJ. +3TONE ADJ. +10TONE ADJ. +9TONE ADJ. +0TONE ADJ. -9DarkerStandardTONE ADJ. -10LighterAfter selecting a fine adjustment value or to skip this menu, press the[PAUSE] key.Thermal Direct PrintADJUST SETTONE ADJ. -2TONE ADJ. +10Darker[RESTART]TONE ADJ. +9TONE ADJ. +0Standard[FEED]TONE ADJ. -9TONE ADJ. -10LighterAfter selecting a fine adjustment value or to skip this menu, press the[PAUSE] key.E2-62
2. PRINTER SETUP ENGLISH VERSION EO1-330582.12 Position and Print Tone Fine Adjustment2.12 Position and PrintTone FineAdjustment (Cont.)Ribbon Motor Voltage Fine AdjustmentWhen the ribbon is slack or wrinkled and printing is affected, fine adjustthe ribbon motor torque by using the following procedure.Take-up Motor (RBN ADJ )NOTES:Choose a desired value by using the[RESTART] or [FEED] key.Pressing the [FEED] key one timecauses a –1 step change, up to–15 steps.Pressing the [RESTART] key onetime causes a +1 step change, up to+0 steps.[RESTART][FEED]ADJUST SETRBN ADJ -10RBN ADJ +0RBN ADJ -1RBN ADJ -2RBN ADJ -14RBN ADJ -15HighMotor TorqueLowAfter selecting a fine adjustment value or to skip this menu, press the[PAUSE] key.Feed Motor (RBN ADJ )NOTES:Choose a desired value by using the[RESTART] or [FEED] key.Pressing the [FEED] key one timecauses a –1 step change, up to–15 steps.Pressing the [RESTART] key onetime causes a +1 step change, up to+0 steps.[RESTART]ADJUST SETRBN ADJ -5RBN ADJ +0RBN ADJ -1RBN ADJ -2HighMotor Torque[FEED]RBN ADJ -14RBN ADJ -15LowAfter selecting a fine adjustment value or to skip this menu, press the[PAUSE] key.E2-63
2.PRINTER SETUPENGLISH VERSION EO1-330582.13 Threshold Setting2.13 Threshold SettingTo maintain a constant print position the printer uses the media sensor todetect a print start position according to the difference of voltage betweena print area and a gap or black mark. When the media is pre-printed, thedarker (or more dense) inks can interfere with this process causing paperjam errors.To get around this problem, first, try an automatic threshold setting.If the problem still occurs, then, the threshold voltage needs to bemanually set.Automatic threshold setting procedure1. Turn the power ON. The printer is in online mode.2. Load a pre-printed media roll.When using a label stock, move the Feed Gap Sensor so that it is inline with the centre of the label.When using a tag stock, move the Black Mark Sensor so that it is inline with the centre of a black mark.3. Press the [PAUSE] key.4. The printer enters the pause mode.5. Press and hold the [PAUSE] key in the pause state until the followingscreen appears.6. The sensor type is displayed.TRANSMISSIVEB-SX4T V1.0A7. Select the sensor to be adjusted by using the [FEED] key.REFLECTIVEB-SX4T V1.0ABlack mark sensor[FEED]TRANSMISSIVEB-SX4T V1.0AFeed gap sensorNOTES:1. Failure to feed more than 1.5labels may result in an incorrectthreshold setting.2. While the Top Cover is raised,the [PAUSE] key does not work3. A paper end error cannot bedetected during paper feed.8. Press and hold the [PAUSE] key until more than 1.5 labels (tags)have been issued.The media will continue to be fed until the [PAUSE] key is released.(An automatic threshold setting for the selected sensor is completedby this operation.)PAUSEB-SX4TV1.0A9. Press the [RESTART] key.ON LINEB-SX4TV1.0A10. The printer returns to online mode.Send an issue command from the host computer to the printer.E2-64
2.PRINTER SETUPENGLISH VERSION EO1-330582.13 Threshold Setting2.13 Threshold Setting(Cont.)<strong>Manual</strong> threshold setting procedureIf a paper jam error still occurs even after an automatic threshold settinghas been performed, manually set the threshold voltage.To make a threshold value manually set in this section effective, selectthe Transmissive Sensor (when using manual threshold value) orReflective Sensor (when using manual threshold value) within softwarecommands or the printer driver.1. While holding down the [FEED] and [PAUSE] keys, turn on theprinter.2. When “DIAG.” appears on the LCD Message Display, release the[FEED] and [PAUSE] keys.DIAG.Now, the printer is in the System Mode for system administrators.SENSOR ADJ.[PAUSE]SENSOR ADJ.[H]28°C [A]28°C[PAUSE]SENSOR ADJ.[REFLECT] 3.5V[FEED] or [RESTART]SENSOR ADJ.[REFLECT] 4.8V*[PAUSE]SENSOR ADJ.[TRANS.] 2.4V[FEED] or [RESTART]SENSOR ADJ.[TRANS.] 4.1V*[PAUSE]SENSOR ADJ.[PE]R0.1V T4.8V[FEED] or [RESTART]SENSOR ADJ.[PE]R0.1V T4.8V*[PAUSE]SENSOR ADJ.[RIBBON] 3.1V[FEED] or [RESTART]SENSOR ADJ.[RIBBON] 3.1V*[PAUSE]3. Press the [FEED] or [RESTART] key until “SENSOR ADJ.”appears on the LCD Message Display.SENSOR ADJ.4. Press the [PAUSE] key to enter the Sensor Adjustment Mode.SENSOR ADJ.[H]28°C [A]28°CThe Sensor Adjustment Mode contains sub menus for displaying thecurrent status of each sensor and for storing “media level” voltage and“no media level” voltage. Each time the [PAUSE] key is pressed, thesub menus are displayed sequentially.(1) Sensor Status Display:Temperatures being detected by the Print Head Thermistor andthe Ambient Thermistor are displayed.(2) Black Mark Sensor Status Display:Voltage being detected by the Black Mark Sensor is displayed.(3) Black Mark Sensor Adjustment:Using the media actually used, a “media level” voltage is <strong>store</strong>d.(4) Feed Gap Sensor Status Display:Voltage being detected by the Feed Gap Sensor is displayed.(5) Feed Gap Sensor Adjustment:Using the media actually used, a “media level” voltage is <strong>store</strong>d.(6) Black Mark Sensor/Feed Gap Sensor Status Display (Nomedia):“No media level” voltage detected by the Black MarkSensor/Feed Gap Sensor is displayed.(7) Black Mark Sensor/Feed Gap Sensor Adjustment (Nomedia):“No media level” voltage is <strong>store</strong>d.(8) Ribbon End Sensor Status Display:Voltage being detected by the Ribbon End Sensor is displayed.(9) Ribbon End Sensor Adjustment:Using the ribbon actually used, a “ribbon level” voltage is <strong>store</strong>d.E2-65
2.PRINTER SETUPENGLISH VERSION EO1-330582.13 Threshold Setting2.13 Threshold Setting(Cont.)Voltage at a black markMidpoint (Threshold voltage)Voltage at a print areaSENSOR ADJ.[REFLECT] 3.5VSENSOR ADJ.[REFLECT] 4.8V*SENSOR ADJ.[TRANS.] 2.4VVoltage at a label gapMidpoint (Threshold voltage)Voltage at a print areaSENSOR ADJ.[TRANS.] 2.4VSENSOR ADJ.[TRANS.] 2.4V*SENSOR ADJ.[PE]R0.1V T4.8V• When using the Black Mark Sensor(1) While “SENSOR ADJ.” is displayed, press the [PAUSE] keyuntil the message appears.The displayed value is a real-time voltage being detected by the BlackMark Sensor.SENSOR ADJ.[REFLECT] 3.5V(2) Measure a voltage at a blank part of media and a black mark,respectively. At this time, write down the midpoint between bothvoltages. (This value is used later for a threshold setting.)(Example)Print area = 4.8V, Black mark = 2.4V Midpoint = 3.6VNOTES:1. When measuring a voltage of a blank area, be careful not to align apre-print with the sensor by mistake.2. Confirm that there is at least 0.7V difference between the two values.If the difference in voltage is less than 0.7V, a print start positioncannot be detected. In that case, please consider changing the mediatype.3. Make sure that the Top Cover is closed when measuring the voltages.(3) Press and hold the [RESTART] or [FEED] key for about 3 secondsaligning a blank part of print area with the Black Mark Sensor.(4) When storing a “media level” voltage is completed, an asterisk “*”isdisplayed on the right side of a voltage. Press the [PAUSE] key.(5) A real-time voltage being detected by the Feed Gap Sensor isdisplayed.• When using the Feed Gap Sensor(1)Measure a voltage at a blank part of label and a label gap, respectively.At this time, write down the midpoint of both voltages. (This value isused later for a threshold setting.)(Example)Print area = 2.4V, Gap = 4.0V Midpoint = 3.2VNOTES:1. When measuring a voltage at a blank area, be careful not to align apre-print with the sensor by mistake.2. Confirm that there is at least 0.7V difference between the two values.If the difference in voltage is less than 0.7V, a print start positioncannot be detected. In that case, please consider changing the mediatype.3. Make sure that the Top Cover is closed when measuring the voltages.(2) Press and hold the [RESTART] or [FEED] key for about 3 secondsaligning a blank part of print area with the Feed Gap Sensor.(3) When storing a “media level” voltage is completed, an asterisk “*”isdisplayed on the right side of a voltage. Press the [PAUSE] key.(4) The display changes as shown on the left.E2-66
2.PRINTER SETUPENGLISH VERSION EO1-330582.13 Threshold Setting2.13 Threshold Setting(Cont.)• Storing a “No Media Level” VoltageThe following is how to set a “No media level” voltage that is used todetect a paper end.If a “NO PAPER” is displayed even if the media has not run out yet, thisvoltage needs to be set again.(1) Remove any media from the Black Mark Sensor/Feed Gap Sensor.(2) A real-time voltages being detected by the Black Mark Sensor andFeed Gap Sensor are displayed.SENSOR ADJ.[PE]R0.1V T4.8VBlack Mark Sensor(3) Press and hold the [RESTART] or [FEED] key for about 3 seconds.SENSOR ADJ.[PE]R0.1VT4.8V*(4) When storing a “no media level” voltage is completed, an asterisk“*”is displayed on the right side of a voltage. Press the [PAUSE] key.(5) The message returns to “SENSOR ADJ.”.SENSOR ADJ.Feed Gap Sensor• <strong>Manual</strong> Threshold SettingThen, set the calculated threshold voltage in the Parameter FineAdjustment mode.(1) While “SENSOR ADJ.” is displayed, press the [FEED] or[RESTART] key until “ADJUST SET” is displayed.ADJUST SET(2)Press the [PAUSE] key to enter the Parameter Fine Adjustment Mode. ADJUST SETFEED ADJ.+10.0mmE2-67
2.PRINTER SETUPENGLISH VERSION EO1-330582.13 Threshold Setting2.13 Threshold Setting(Cont.)(3) Press the [PAUSE] key until the target sensor type is displayed.ADJUST SETTHRESHOLD1.0VBlack Mark Sensor[PAUSE] ADJUST SETTHRESHOLD1.4VFeed Gap Sensor(4) Set a threshold voltage (calculated in Sensor Adjustment Menu) byusing the [FEED] or [RESTART] key, as shown below.Threshold voltage = Midpoint between voltage at a print area andvoltage at a gap/black markBlack Mark SensorFeed Gap SensorTHRESHOLD4.0VTHRESHOLD3.9VTHRESHOLD3.8V[RESTART]THRESHOLD4.0VTHRESHOLD3.9VTHRESHOLD3.8VNOTE:Pressing the [FEED] key one timecauses a –0.1V change, up to 0.0V.Pressing the [RESTART] key onetime causes a +0.1V change, up to+4.0V.THRESHOLD0.1V [FEED] THRESHOLD0.1VTHRESHOLD0.0VTHRESHOLD0.0V(5) After choosing a threshold voltage, press the [PAUSE] key.(6) To check for a proper operation, issue the pre-printed media in online.If an error still occurs even after a manual threshold setting, changethe threshold voltage a little, and retry.E2-68
3. ON LINE MODE ENGLISH VERSION EO1-330583.1 Operation Panel3. ON LINE MODEThis chapter describes usage of the keys on the Operation Panel in OnLine mode.When the printer is in On Line mode and connected to a host computer,the normal operation of printing images on labels or tags can beaccomplished.3.1 Operation Panel• The figure below illustrates the operation panel and key functions.LCD Message DisplayON LINE LED (Green)POWER LED(Green)ERROR LED (Red)[FEED] key[RESTART] key[PAUSE] keyThe LCD Message Display shows messages in alphanumeric charactersand symbols to indicate the printer’s current status. Up to 32 characterscan be displayed on two lines.NOTE:Flashes only when the RibbonNear End Detection function isselected.There are three LED lights on the operation panel.LED Illuminates when… Flashes when…POWER The printer is turned on. -----ON LINE The printer is ready toprint.The printer iscommunicating withERRORAny error occurs withthe printer.your computer.The ribbon is nearlyover. (See NOTE.)NOTE:Use the [RESTART] key toresume printing after a pause, orafter clearing an error.There are three keys on the operation panel.PAUSE Used to stop printing temporarily.RESTART Used to restart printing.FEED Used to feed the media.E3- 1
3. ON LINE MODE ENGLISH VERSION EO1-330583.2 Operation3.2 OperationWhen the printer is turned on, the “ON LINE” message appears on theLCD Message Display. It is shown during standby or normal printing.1. The printer is turned on, standing by, or printing.ON LINEB-SX4TV1.0A2. If any error occurs during printing, an error message appears. Theprinter stops printing automatically. (The number on the right sideshows the remaining number of media to be printed.)NOTE:For the meaning of error messagesand actions to be taken, refer toSection 5 TROUBLESHOOTINGand APPENDIX 1.NO PAPER 125B-SX4T V1.0A3. To clear the error, press the [RESTART] key. The printer resumesprinting.ON LINEB-SX4T V1.0A4. If the [PAUSE] key is pressed during printing, the printer stopsprinting temporarily. (The number on the right side shows theremaining number of media to be printed.)PAUSE 52B-SX4T V1.0A5. When the [RESTART] key is pressed, the printer resumes printing.ON LINEB-SX4TV1.0A3.3 ResetA reset operation clears the print data sent from the computer to theprinter, and returns the printer to an idle condition.1. The printer is turned on, standing by, or printing.ON LINEB-SX4TV1.0A2. To stop printing, or clear the data sent from the computer, press the[PAUSE] key. The printer stops printing.PAUSE 52B-SX4T V1.0ANOTE:If the [RESTART] key is held forless than 3 seconds when theprinter is in an error or pausestate, the printer restarts printing.However, when a communicationerror or command error occurs,the printer returns to an idlecondition.3. Press and hold the [RESTART] key for 3 seconds or longer.RESET4. Press the [PAUSE] key. The data sent from the computer will becleared, and the printer returns to an idle condition.ON LINEB-SX4TV1.0AE3- 2
4. MAINTENANCE ENGLISH VERSION EO1-330584.1 Cleaning4. MAINTENANCEWARNING!1. Be sure to disconnect thepower cord beforeperforming maintenance.Failure to do this maycause an electric shock.2. To avoid injury, be carefulnot to pinch your fingerswhile opening or closingthe cover and print headblock.3. The print head becomeshot immediately afterprinting. Allow it to coolbefore performing anymaintenance.4. Do not pour water directlyonto the printer.This chapter describes how to perform routine maintenance.To ensure the continuous high quality operation of the printer, you shouldperform a regular maintenance routine. For high throughput it should bedone on a daily basis. For low throughput it should be done on a weeklybasis.4.1 CleaningTo maintain the printer performance and print quality, please clean theprinter regularly, or whenever the media or ribbon is replaced.4.1.1 Print Head/Platen/SensorsCAUTION!1. Do not use any volatilesolvent including thinnerand benzene, as this maycause discoloration to thecover, print failure, orbreakdown of the printer.2. Do not touch the PrintHead Element with barehands, as static maydamage the Print Head.1. Turn off the power and unplug the printer.2. Open the Top Cover.3. Turn the Head Lever to Free position, then release the Ribbon ShaftHolder Plate.4. Open the Print Head Block.5. Remove the ribbon and media.CAUTION!When cleaning the print head, be careful not to damage the print headwith a hard object like a watch or a ring.Care must be taken not to allowthe metal or glass part of a watchto touch the print head edge.Care must be taken not to allow ametal object like a ring to touchthe print head edge.Since the print head element can be easily damaged by shock, pleasetreat it carefully by not hitting a hard object against it.E4- 1
4. MAINTENANCE ENGLISH VERSION EO1-330584.1 Cleaning4.1.1 Print Head/Platen/Sensors (Cont.)6. Clean the Print Head Element with a Print Head Cleaner or a cottonswab or soft cloth slightly moistened with alcohol.NOTE:Please purchase the Print HeadCleaner (P/No. 24089500013)from your authorised <strong>TOSHIBA</strong><strong>TEC</strong> service representative.Print HeadPrint HeadElementPinch RollerPlatenFeed RollerBlack Mark Sensor/Feed Gap Sensor7. Wipe the Platen, Feed Roller, and Pinch Roller with a soft clothslightly moistened with alcohol. Remove dust or foreign substancesfrom the internal part of the printer.8. Wipe the Feed Gap Sensor and Black Mark Sensor with a dry softcloth.4.1.2 Covers and PanelsCAUTION!1. DO NOT POUR WATERdirectly onto the printer.2. DO NOT APPLY cleaneror detergent directly ontoany cover or panel.3. NEVER USE THINNEROR OTHER VOLATILESOLVENT on the plasticcovers.4. DO NOT clean the panel,covers, or the supplywindow with alcohol as itmay cause them todiscolour, loose theirshape or developstructural weakness.Wipe the covers and panels with a dry soft cloth or a cloth slightlymoistened with mild detergent solution.E4- 2
4. MAINTENANCE ENGLISH VERSION EO1-330584.1 Cleaning4.1.3 Optional Cutter Module The swing cutter and rotary cutter are available as an option. They areboth cleaned in the same way. When removing the Cutter Cover of theWARNING!rotary cutter unit, remove the screws from the bottom of the cover.1. Be sure to turn the poweroff before cleaning theCutter Module.2. As the cutter blade issharp, care should betaken not to injureyourself when cleaning.1. Loosen the two screws to remove the Cutter Cover.2. Remove the Plastic Head Screw to detach the Media Guide.3. Remove the jammed paper.4. Clean the Cutter with a soft cloth slightly moistened with alcohol.5. Reassemble the Cutter Module in the reverse order of removal.ScrewPlastic HeadScrewCutter CoverCutter UnitMedia GuideFixed CutterSwing CutterE4- 3
5. TROUBLESHOOTING ENGLISH VERSION EO1-330585.1 Error Messages5. TROUBLESHOOTINGThis chapter lists the error messages, possible problems, and their solutions.WARNING!If a problem cannot be solved by taking the actions described in this chapter, do not attempt to repair theprinter. Turn off and unplug the printer, then contact an authorised <strong>TOSHIBA</strong> <strong>TEC</strong> service representativefor assistance.5.1 Error MessagesNOTES:• If an error is not cleared by pressing the [RESTART] key, turn the printer off and then on.• After the printer is turned off, all print data in the printer is cleared.• “****” indicates the number of unprinted media. Up to 9999 (in pieces).Error Messages Problems/Causes SolutionsHEAD OPENThe Print Head Block is opened in Close the Print Head Block.Online mode.HEAD OPEN **** Feeding or printing has been attemptedwith the Print Head Block open.Close the Print Head Block. Then pressthe [RESTART] key.COMMS ERROR A communication error has occurred. Make sure the interface cable is correctlyconnected to the printer and the host, andthe host is turned on.PAPER JAM ****1. The media is jammed in the mediapath. The media is not fed smoothly.2. A wrong Media Sensor is selected forthe media being used.3. The Black Mark Sensor is notcorrectly aligned with the BlackMark on the media.4. Size of the loaded media is differentfrom the programmed size.5. The Feed Gap Sensor cannotdistinguish the print area from a labelgap.1. Remove the jammed media, and cleanthe Platen. Then reload the mediacorrectly. Finally press the[RESTART] key.⇒ Section 5.3.2. Turn the printer off and then on. Thenselect the Media Sensor for the mediabeing used. Finally resend the printjob.3. Adjust the sensor position. Then pressthe [RESTART] key.⇒ Section 2.4.4. Replace the loaded media with onethat matches the programmed sizethen press the [RESTART] key, orturn the printer off and then on, selecta programmed size that matches theloaded media. Finally resend the printjob.5. Refer to Section 2.13 to set thethreshold. If this does not solve theproblem, turn off the printer, and call a<strong>TOSHIBA</strong> <strong>TEC</strong> authorised servicerepresentative.E5- 1
5. TROUBLESHOOTING ENGLISH VERSION EO1-330585.1 Error Messages5.1 Error Messages (Cont.)Error Messages Problems/Cause SolutionsCUTTER ERROR ****(Only when the cuttermodule is installed onthe printer.)The media is jammed in the cutter.NO PAPER ****Remove the jammed media. Then pressthe [RESTART] key. If this does notsolve the problem, turn off the printer, andcall a <strong>TOSHIBA</strong> <strong>TEC</strong> authorised servicerepresentative.⇒ Section 4.1.3.1. The media has run out. 1. Load new media. Then press the[RESTART] key.⇒ Section 2.4.2. The media is not loaded properly. 2. Reload the media correctly. Thenpress the [RESTART] key.⇒ Section 2.4.3. The media is slack. 3. Take up any slack in the media.RIBBON ERROR **** The ribbon is not fed properly. Remove the ribbon, and check the statusof the ribbon. Replace the ribbon, ifnecessary. If the problem is not solved,turn off the printer, and call a <strong>TOSHIBA</strong><strong>TEC</strong> authorised service representative.NO RIBBON **** The ribbon has run out. Load a new ribbon. Then press the[RESTART] key.⇒ Section 2.5.REWIND FULL **** The Built-In Rewinder Unit is full. Remove the backing paper from the Built-In Rewinder Unit. Then press the[RESTART] key.EXCESS HEAD TEMP The Print Head has overheated. Turn off the printer, and allow it to cooldown (about 3 minutes). If this does notsolve the problem, call a <strong>TOSHIBA</strong> <strong>TEC</strong>authorised service representative.HEAD ERROR There is a problem with the Print Head. Replace the Print Head.POWER FAILURESYSTEM ERRORFLASH WRITE ERR.A momentary power failure hasoccurred.1. The printer is used in a locationwhere it is subject to noise. Or, thereare power cords of other electricalappliances near the printer orinterface cable.2. The Power Cord of the printer is notgrounded.3. The printer shares the same powersource with any other electricalappliances.4. An application software used onyour host computer has an error ormalfunction.An error has occurred in writing to theflash ROM.Check the power source which suppliespower to the printer. If the rating is notcorrect, or if the printer shares the samepower outlet with other electricalappliances that consume large amounts ofpower, change the outlet.1. Keep the printer and the interfacecables away from the source of noise2. Ground the Power Cord.3. Provide an exclusive power source forthe printer.4. Confirm the host computer operatesproperly.Turn the printer off, and then on again.E5- 2
5. TROUBLESHOOTING ENGLISH VERSION EO1-330585.2 Possible Problems5.1 Error Messages (Cont.)Error Messages Problems/Cause SolutionsFORMAT ERROR An error has occurred in formatting the Turn the printer off, and then on again.flash ROM.FLASH CARD FULL Saving failed because of an insufficient Turn the printer off, and then on again.capacity of the flash ROM.EEPROM ERROR Data cannot be read from/written to a Turn the printer off, and then on again.backup EEPROM properly.RFID WRITE ERROR The printer did not succeed in writing Press the [RESTART] key.data onto an RFID tag after havingretried for a specified times.RFID ERRORThe printer cannot communicate with Turn the printer off, and then on again.the RFID module.SYNTAX ERROR While the printer is in the Download Turn the printer off, and then on again.mode for upgrading the firmware, itreceives an improper command, forexample, a Issue Command.Other error messages A hardware or software problem mayhave occurred.Turn the printer off and then on. If thisdoes not solve the problem, turn off theprinter again, and call a <strong>TOSHIBA</strong> <strong>TEC</strong>authorised service representative.5.2 Possible ProblemsThis section describes problems that may occur when using the printer, and their causes and solutions.Possible Problems Causes SolutionsThe printer will not 1. The Power Cord is disconnected. 1. Plug in the Power Cord.turn on.2. The AC outlet is not functioningcorrectly.2. Test with a power cord from anotherelectric appliance.3. The fuse has blown, or the circuit 3. Check the fuse or breaker.breaker has tripped.The media is not fed. 1. The media is not loaded properly. 1. Load the media properly.⇒ Section 2.4.2. The printer is in an error condition. 2. Solve the error in the message display.(See Section 5.1 for more detail.)Pressing the [FEED]key in the initial stateresults in an error.Nothing is printed onthe media.A feed or an issue was attempted not onthe following default conditions.Sensor type: Feed gap sensorPrinting method: Thermal transferMedia pitch: 76.2 mmChange the print condition by using theprinter driver or a print command so thatit corresponds to your printing conditions.Then, clear the error state by pressing the[RESTART] key.1. The media is not loaded properly. 1. Load the media properly.⇒ Section 2.4.2. The ribbon is not loaded properly. 2. Load the ribbon properly.⇒ Section 2.5.3. The print head is not installedproperly.4. The ribbon and media are notmatched.3. Install the print head properly. Closethe Print Head Block.4. Select an appropriate ribbon for themedia type being used.E5- 3
5. TROUBLESHOOTING ENGLISH VERSION EO1-330585.2 Possible Problems5.2 Possible Problems (Cont.)Possible Problems Causes SolutionsThe printed image isblurred.1. The ribbon and media are notmatched.2. The Print Head is not clean.1. Select an appropriate ribbon for themedia type being used.2. Clean the print head using the PrintHead Cleaner or a cotton swab slightlymoistened with ethyl alcohol.The cutter does not 1. The Cutter Cover is not attached 1. Attach the Cutter Cover properly.cut.properly.2. The media is jammed in the Cutter. 2. Remove the jammed paper.⇒ Section 4.1.3.3. The cutter blade is dirty.Label stock is too thin or the glue is toosticky.3. Clean the cutter blade.⇒ Section 4.1.3.1. Refer to Section 7.1 Media andchange the label.The Strip Module doesnot remove labels fromthe backing paper.2. Set the Pre-strip function to ON.⇒Section 2.9.1.E5- 4
5. TROUBLESHOOTING ENGLISH VERSION EO1-330585.3 Removing Jammed Media5.3 Removing JammedMediaThis section describes in detail how to remove jammed media from theprinter.CAUTION!Do not use any tool that maydamage the Print Head.1. Turn off and unplug the printer.2. Open the Top Cover.3. Turn the Head Lever to Free position, then open the Ribbon ShaftHolder Plate.4. Open the Print Head Block.5. Remove the ribbon and media.Print Head BlockRibbon Shaft Holder PlateNOTE:If you get frequent jams in thecutter, contact a <strong>TOSHIBA</strong> <strong>TEC</strong>authorised servicerepresentative.6. Remove the jammed media from the printer. DO NOT USE any sharpimplements or tools as these could damage the printer.7. Clean the Print Head and Platen, then remove any further dust orforeign substances.8. Paper jams in the Cutter Unit can be caused by wear or residual gluefrom label stock on the cutter. Do not use non-specified media in thecutter.CAUTION!When removing the jammed media, be careful not to damage theprint head with a hard object like a watch or a ring.Care must be taken not to allowthe metal or glass part of a watchto touch the print head edge.Care must be taken not to allow ametal object like a ring to touchthe print head edge.Since the print head element can be easily damaged by shock, pleasetreat it carefully by not hitting a hard object against it.E5- 5
6. PRINTER SPECIFICATIONS ENGLISH VERSION EO1-330586. PRINTER SPECIFICATIONS6. PRINTER SPECIFICATIONSThis section describes the printer specifications.ModelItemB-SX4T-GS20-QM-RDimension (W × D × H) 291 mm × 460 mm × 308 mm (11.5” × 18.1” × 12.1”)WeightOperating temperature rangeRelative humidityPower supply39.7 lb (18 kg) (Media and ribbon are not included.)5°C to 40°C (40°F to 104°F)25% to 85% RH (no condensation)Universal switching power source AC100V to 240V, 50/60Hz±10%Input voltage AC100 – 240V, 50/60 Hz ±10%PowerconsumptionResolutionDuring a print jobDuring standby100V: 2.5 A, 130 W maximum 240V: 1.1 A, 138 W maximum100V: 0.18 A, 11 W maximum 240V: 0.17 A, 20 W maximum8 dots/mm (203 dpi)Printing methodPrinting speedAvailable media width (includingbacking paper)Effective print width (max.)Issue modeLCD Message displayThermal transfer or Thermal direct76.2 mm/sec. (3 inches/sec.)152.4 mm/sec (6 inches/sec.) For details, refer to Section 7.1.1.254.0 mm/sec (10 inches/sec.)30.0 mm to 112.0 mm (1.2 inches to 4.4 inches)104.0 mm (4.1 inches)BatchStrip (Strip mode is enabled only when the optional Strip Module isinstalled.)Cut (Cut mode is enabled only when the optional Cutter Module isinstalled.)16 characters × 2 linesE6- 1
6. PRINTER SPECIFICATIONS ENGLISH VERSION EO1-330586. PRINTER SPECIFICATIONSItemAvailable bar code typesModelAvailable two-dimensional codeB-SX4T-GS20-QM-RJAN8, JAN13, EAN8, EAN8+2 digits, EAN8+5 digits,EAN13, EAN13+2 digits, EAN13+5 digits, UPC-E, UPC-E+2 digits,UPC-E+5 digits, UPC-A, UPC-A+2 digits, UPC-A+5 digits, MSI, ITF,NW-7, CODE39, CODE93, CODE128, EAN128, Industrial 2 to 5,Customer Bar Code, POSTNET, KIX CODE, RM4SCC (ROYAL MAIL4STATE CUSTOMER CODE), RSS14Data Matrix, PDF417, QR code, Maxi Code, Micro PDF417, CP CodeAvailable fontTimes Roman (6 sizes), Helvetica (6 sizes), Presentation (1 size), LetterGothic (1 size), Prestige Elite (2 sizes), Courier (2 sizes), OCR (2 types),Gothic (1 size), Outline font (4 types), Price font (3 types)Rotations 0°, 90°, 180°, 270°Standard interfaceOptional interfaceSerial interface (RS-232C)Parallel interface (Centronics)PCMCIA interface (B-9700-PCM-QM-R)USB interface (B-9700-USB-QM-R)LAN interface (B-9700-LAN-QM-R)Expansion I/O interface (B-7704-IO-QM-R)Wireless LAN board (B-9700-WLAN-QM-R)NOTES:• Data Matrix TM is a trademark of International Data Matrix Inc., U.S.• PDF417 TM is a trademark of Symbol Technologies Inc., US.• QR Code is a trademark of DENSO CORPORATION.• Maxi Code is a trademark of United Parcel Service of America, Inc., U.S.E6- 2
7. SUPPLY SPECIFICATIONS ENGLISH VERSION EO1-330587.1 Media7. SUPPLY SPECIFICATIONS7.1 MediaPlease make sure that the media being used is approved by <strong>TOSHIBA</strong> <strong>TEC</strong>. The warranty does not apply when aproblem is caused by using media that is not approved by <strong>TOSHIBA</strong> <strong>TEC</strong>.For information regarding <strong>TOSHIBA</strong> <strong>TEC</strong> approved media, please contact a <strong>TOSHIBA</strong> <strong>TEC</strong> authorised servicerepresentative.7.1.1 Media TypeTwo types of media can be loaded for this thermal transfer and direct thermal printer: label or tag. The tablebelow shows size and shape of the media available for this printer.StoppositionCut positionLabelBlack Mark(on reverse side) Refer toNOTE 3 below. StoppositionCut positionTag paperBlack Mark(on reverse side)Feed DirectionItem Media pitchLabel dispensing modeBatch modeStrip modeRotary cutter (*2)Cut mode[Unit: mm]Swing cutterLabel 10.0 – 1500.0 25.4 – 1500.0 3”/sec., 6”/sec.: 38.0 - 1500.0 38.0 – 1500.0Tag 10.0 – 1500.0 ---- 3”/sec., 6”/sec.: 30.0 – 1500.0 25.4 – 1500.0 Label length 8.0 – 1498.0 23.4 – 1498.0 3”/sec., 6”/sec.: 32.0 – 1494.0 25.0 – 1494.0(*1) Width including backing paper (See NOTE 5.) 30.0 – 112.0 50.0 – 112.0 30.0 – 112.0 Label width (See NOTE 5.) 27.0 – 109.0 47.0 – 109.0 27.0 – 109.0 Gap length 2.0 – 20.0 6.0 – 20.0 Black mark length (Tag paper) 2.0 – 10.0 Effective print width 10.0 – 104.0 Effective print lengthLabel 6.0 – 1496.0 21.4 – 1496.0 3”/sec., 6”/sec.: 30.0 – 1492.0 23.0 – 1492.0Tag 8.0 – 1498.0 ---- 3”/sec., 6”/sec.: 28.0 – 1496.0 23.0 – 1496.0 Print speed up/slow down area 1.0ThicknessLabel 0.13 – 0.17Tag 0.15 – 0.29Maximum effective length for on the fly issue 1361.0Maximum outer roll diameterØ200Roll directionInsideInner core diameterØ76.2±0.3E7- 1
7. SUPPLY SPECIFICATIONS ENGLISH VERSION EO1-330587.1 MediaNOTES:1. To ensure print quality and print head life use only <strong>TOSHIBA</strong> <strong>TEC</strong> specified media.2. The media length specifications for use of the cutter are:*1: When issuing a label using the swing cutter, label length should be 35.0 mm – (Gap length/2).*2: The rotary cutter does not support the print speed of 10”/sec.When using the Rotary Cutter, be sure to install the Ribbon Saving Module (B-9904-R/R2 series). Failureto do this may cause a paper jam or ribbon error.3. When marking black marks on the label rolls, they should be marked at the gaps.4. “On the fly issue” means that the printer can feed and print without stopping between labels.5. There are restrictions in use of the media which is narrower than 50 mm. For details, refer to <strong>TOSHIBA</strong> <strong>TEC</strong>service representative.6. The ratio of a label length to a gap length must be a minimum of 3 to 1 (3:1).7. When using a label stock in cut mode, be sure to cut the gaps. Cutting labels will cause the glue to stick to thecutter, which may affect the cutter performance and shorten the cutter life.7.1.2 Detection Area of the Transmissive SensorThe Transmissive Sensor is movable from the centre to the left edge of media.The Transmissive Sensor detects a gap between labels, as illustrated below.Sensor positionMin. 2.0 mm(Min. 6.0 mm when usingthe cutter module.)Area to be detected.LabelGapLabelCentre of mediaPrint sideMin. 12 mmMedia feed directionSensor is movablewithin this range.Sensor positionMin. 2.0 mmCentre of mediaPrint sideSquare holes(Round holes are not acceptable.)Min. 12 mmMedia feed directionSensor is movablewithin this range.NOTE:Round holes are not acceptable.E7- 2
7. SUPPLY SPECIFICATIONS ENGLISH VERSION EO1-330587.1 Media7.1.3 Detection Area of the Reflective SensorThe Reflective Sensor is movable from the centre to the left edge of media.The reflection factor of the Black Mark must be 10% or lower with a waveform length of 950 nm.The Reflective Sensor should be aligned with the centre of the Black Mark.Sensor should be positioned atthe centre of the black mark.Centre of mediaMin. 2.0 mmMin. 12 mmDetecting the blackmarks on the back.Media feed directionSensor is movablewithin this range.7.1.4 Effective Print AreaThe figure below illustrates the relation between the head effective print width and media width.Out of print rangeOut of print range4 mm104 mm±0.2(Head Effective Print Range)112 mm (Max. media width)4 mmThe figure below shows the effective print area on the media.Area to be detected.Start line1.5 mm from theleft edge of media1mmGuaranteed print areaMedia height10 – 1500 mm1.5 mm from theright edge of media1mmMedia feed directionArea to be detected.Media width(backing paper width is not included.)NOTES:1. Be sure not to print on the 1.5-mm wide area from the media edges (shaded area in the above figure).Printing this area may cause ribbon wrinkles, resulting in a poor print quality of the guaranteed print area.2. The centre of media is positioned at the centre of the Print Head.3. Print quality in the 3-mm area from the print head stop position (including 1-mm non-printable area for printspeed slow down) is not guaranteed.E7- 3
7. SUPPLY SPECIFICATIONS ENGLISH VERSION EO1-330587.1 Media7.1.5 RFID TagsAvailable RFID tag types are different depending on the RFID modules, as follows:• B-9704-RFID-U1-US-R and B-9704-RFID-U1-EU-R• EPC Class 1• ISO18000-6B• B-9704-RFID-H1-QM-R• TAGSYS C210• TAGSYS C220• TAGSYS C240• I-Code• Tag-it• ISO15693Cautions for using RFID Tags(1) Lift-up of Print HeadAn RFID tag chip or the print head may be damaged when the print head passes over the chip.This can be prevented by using the ribbon saving module (standard feature for the B-SX5T and optional for theB-SX4T). The print head is lifted by the ribbon saving module when it passes over the chip to prevent it fromtouching the chip.The print head is lifted by approximately 1 mm from the platen.(2) Storage of RFID SuppliesDo not <strong>store</strong> RFID tags close to printers, or their communication performance may not be as specified when theyare used.(3) Roll-type RFID SuppliesWhen RFID supplies are to be rolled, roll hardness must be concerned.Although it depends on the type of glue, tag, and backing paper, RFID-tag embedded labels tend to stay rolled.Especially, when they are wound outside, a paper jam error may occur. Unless otherwise specified, it isrecommended that the RFID-tag embedded labels be wound inside.(4) SensorWhen the transmissive sensor or reflective sensor is enabled, transmissivity or reflectivity of a label or tag mayvary at an RFID-tag embedded area depending on the pattern of an antenna or other factors. In such cases, amanual threshold setting is required. For details, refer to Section 2.13 Threshold Setting.(5) CutterWhen an RFID label or tag is used in cut issue mode, care must be taken not to cut an antenna of the RFID tag oran IC chip in order not to damage the cutter.(6) Static ElectricityWhen printing is performed in a place where humidity is low or under some specific conditions, writing data onan RFID tag may fail due to static electricity generated by a label or a ribbon.E7- 4
7. SUPPLY SPECIFICATIONS ENGLISH VERSION EO1-330587.1 Media(7) Printing on Bump (Chip/Antenna) AreaEmbedding an RFID tag in labels creates bumps on the label surface, causing incomplete printing.Uneven printing or incomplete printing can occur easily, especially within 5 mm back and forth, and right andleft sides of the RFID-tag embedded area, as shown in the figure below.NOTE: The degree of poor printing quality differs depending on height of a chip/antenna used.5 mmMedia feeddirectionRFID-tagEmbeddedareaPoor printing may occur inthis area due to a bump.5 mmPoor printing may occur inthis area due to a bump.(8) Ambient TemperatureAs low temperature deteriorates wireless performance, writing data on an RFID tag may fail under suchconditions.(9) Head-up Reverse FeedWhen an RFID label is used, a reverse feed may be required before an issue depending on the location of anRFID tag in the label.A printer without the ribbon saving module may not be able to perform a reverse feed properly because the printhead may be caught by an edge of the label. For this reason, the ribbon saving module must be installed in theprinter when media, which requires a reverse feed before an issue, is used.(10) Strip IssueStripping performance in strip issue mode depends on the type of glue, tag, and backing paper. For some RFIDsupplies used, a strip issue may not be performed properly.(11) Caution for Minimum Label Pitch LengthWhen media, of which label pitch length is short, is used, data may be written on an RFID tag next to the targetRFID tag.As the location, where data is to be written, differs among RFID tag types, a check must be performed to makesure that the data is written on the target RFID tags. The B-SX RFID Analyze Tool can be used for this purpose.For details, please contact the nearest <strong>TOSHIBA</strong> <strong>TEC</strong> support representative.(12) Defective RFID SupplyRFID supplies may include defective RFID tags at the time of shipment from the maker. The defect rate differsdepending on tag types, method of converting to supplies, etc.The RFID supply manufacturer should provide a way to identify defective tags by printing a mark on them or anyother methods.Or, defective tags should be rejected in the production process.The end users must be notified on how to identify a defective tag from a good one.E7- 5
7. SUPPLY SPECIFICATIONS ENGLISH VERSION EO1-330587.2 Ribbon7.2 RibbonPlease make sure that the ribbon being used is approved by <strong>TOSHIBA</strong> <strong>TEC</strong>. The warranty does not apply to anyproblem caused by using non-approved ribbons.For information regarding <strong>TOSHIBA</strong> <strong>TEC</strong> approved ribbon, please contact a <strong>TOSHIBA</strong> <strong>TEC</strong> servicerepresentative.TypeWidthLengthOutside DiameterSpool type41 – 112 mmRecommended width is 41, 50, 68, 84, and 112 mm.600 mφ90 mm (max.)The table below shows the correlation between ribbon width and media width (backing paper is not included.)Ribbon width Media width Ribbon width Media width41 mm 30 – 36 mm 84 mm 63 – 79 mm50 mm 36 – 45 mm 112 mm 71 – 112 mm68 mm 45 – 63 mmNOTES:1. To ensure print quality and print head life use only <strong>TOSHIBA</strong> <strong>TEC</strong> specified ribbons.2. To avoid ribbon wrinkles use a ribbon that is wider than the media by 5 mm or more. However, too muchdifference in width between the two may cause wrinkles.3. When using a 112 mm wide media, be sure to use a 108 mm wide ribbon. Use of other ribbons may causeribbon wrinkles.7.3 Recommended Media and Ribbon TypesMedia typeVellum paper and labelsCoated paperPlastic filmsDescriptionGeneral use for low cost applications.Matt coated paperGeneral use including applications that require small letters and/or symbols.Glossy coated paperUsed where a high-grade finish is requiredSynthetic film (Polypropylene, etc.)This water-proof and solvent-resistant material has high physical strengthand low-temperature resistance, but poor heat resistance (dependant uponmaterial). This material can be used for labels stuck to recyclablecontainers, so it can be recycled in the same process.PET filmThis water-proof and solvent-resistant material has high physical strength,and low-temperature resistance as well as heat resistance. This material isused for many applications, especially where high durability is required.Mode/serial plate labels, caution labels, etc.PolyimideThis material gives the best performance on heat resistance (greater thanPET film). It is often used for PCB labels as it can withstand passagethrough a solder bath.E7- 6
7. SUPPLY SPECIFICATIONS ENGLISH VERSION EO1-330587.4 Care/Handling of Media and Ribbon7.3 Recommended Media and Ribbon Types (Cont.)Ribbon typeVellum wax ribbonStandard wax ribbonSmear-less ribbon (Wax resin ribbon)Scratch and solvent resistance ribbonDescriptionThis ribbon is mainly used for vellum paper and labels. It has a veryhigh ink density to cope with uneven printing surfaceGood match for coated paper (Matt coat and glossy coat).Good match for coated paper. The printed image will resist water andlight rubbing.Very good match for plastic films (synthetic paper, PET, polyimide,etc.)Scratch and solvent resistanceHeat resistance with PET and polyimide.Combination of Media and RibbonMedia typeRibbon typeVellum paper and label Coated paper Plastic filmsVellum wax ribbon◦Standard wax ribbon◦Smear-less ribbon (waxresinribbon)◦Scratch/solventresistance ribbon◦◦: Good match7.4 Care/Handling of Media and RibbonCAUTION!Be sure to carefully review and understand the Supply <strong>Manual</strong>. Use only media and ribbons that meetspecified requirements. Use of non-specified media and ribbons may shorten the head life and resultin problems with bar code readability or print quality. All media and ribbons should be handled withcare to avoid any damage to the media, ribbons or printer. Read the guidelines in this sectioncarefully.• Do not <strong>store</strong> the media or ribbon for longer than the manufacturer’s recommended shelf life.• Store media rolls on the flat end. Do not <strong>store</strong> them on the curved sides as this might flatten that sidecausing erratic media advance and poor print quality.• Store the media in plastic bags and always reseal after opening. Unprotected media can get dirty and theextra abrasion from the dust and dirt particles will shorten the print head life.• Store the media and ribbon in a cool, dry place. Avoid areas where they would be exposed to direct sunlight,high temperature, high humidity, dust or gas.• The thermal paper used for direct thermal printing must not have specifications which exceed Na + 800 ppm,K + 250 ppm and Cl - 500 ppm.• Some ink used on pre-printed media may contain ingredients which shorten the print head’s product life. Donot use labels pre-printed with ink which contain hard substances such as carbonic calcium (CaCO 3 ) andkaolin (Al 2 O 3 , 2SiO 2 , 2H 2 O).For further information, please contact your local distributor or your media and ribbon manufacturers.E7- 7
APPENDIX 1 MESSAGES AND LEDSENGLISH VERSION EO1-33058APPENDIX 1 MESSAGES AND LEDSAPPENDIX 1 MESSAGES AND LEDSAppendix 1 describes the LCD messages displayed on the operation panel.Symbols in the message1: : The LED is illuminated. : The LED is flashing. •: The LED is unlit.2: ****: the number of unprinted media. Up to 9999 (in pieces)3: %%%%%%%: ATA Card’s remaining memory 0 to 9999999 (in K bytes)4: ###: Flash memory card remaining memory for PC save area: 0 to 895 (in K bytes)5: &&&&: Remaining flash memory capacity for storing writable characters 0 to 3147 (in K bytes)No.LCD MessageLED IndicationPOWER ONLINE ERRORPrinter StatusRestoration byRESTART keyYes/NoAcceptance ofStatus RequestReset CommandYes/NoON LINE • In online mode ----- Yes1 In online mode (The printer in----- YesON LINE •communication)2 HEAD OPEN • •The print head block is opened in online ----- Yesmode.3 PAUSE **** • • The printer is paused. Yes YesA parity, overrun, or framing error has Yes Yes4 COMMS ERROR • occurred during communication throughthe RS-232C.5 PAPER JAM **** • The media is jammed during paper feed. Yes Yes6 CUTTER ERROR**** • A problem has occurred with the cutter Yes Yesmodule.7 NO PAPER **** • The media has run out, or the media is Yes Yesnot loaded properly.8 NO RIBBON **** • The ribbon has run out. Yes Yes9 HEAD OPEN **** • Feed or printing was attempted with the Yes Yesprint head block open.10 HEAD ERROR • There is a problem with the print head. Yes Yes11 EXCESS HEAD TEMP • The print head is overheated. No YesThe ribbon has been torn. A problem Yes Yes12 RIBBON ERROR**** • has occurred with the sensor thatdetermines the torque for the ribbonmotor.13 REWIND FULL **** • An overflow error has occurred in the Yes Yesrewinder unit.SAVING%%%%%%%In writable character or PC command ----- Yes14 orSAVING ###&&&& • save mode15 FLASH WRITE ERR. • 16 FORMAT ERROR • An error has occurred while writing toflash memory or ATA card.An erase error has occurred informatting the flash memory or ATAcard.17 FLASH CARD FULL • Data cannot be <strong>store</strong>d because the flash No Yesmemory or ATA card is full.Display of errorA command error has occurred in Yes Yes18 • message (See Notes.)analyzing the command.19 POWER FAILURE • A power failure has occurred. No No20 INTIALIZING… • • A flash memory card is being initialised. ----- -----21 EEPROM ERROR • Data cannot be read from/written to a ----- -----backup EEPROM properly.NoNoYesYesEA1- 1
APPENDIX 1 MESSAGES AND LEDSENGLISH VERSION EO1-33058APPENDIX 1 MESSAGES AND LEDSNo.LCD MessageLED IndicationPOWER ONLINE ERROR22 SYSTEM ERROR • 23100BASE LANINITIALIZING… • •24 RFID WRITE ERROR • 25 RFID ERROR • Printer StatusWhen the following abnormal operationsare performed, a system error occurs:(a) Command fetch from an odd address(b) Access to word data at an oddaddress(c) Access to long-word data at an oddaddress(d) Access to the area of 80000000H toFFFFFFFFH in the logic space inuser mode.(e) An undefined instruction in an areaother than a delay slot was decoded.(f) An undefined instruction in a delayslot was decoded.(g) An instruction to rewrite a delay slotwas decoded.100 Base LAN Board is beinginitialized.The printer did not succeed in writingdata onto an RFID tag after havingretried for a specified times.The printer cannot communicate withthe RFID module.Restoration byRESTART keyYes/NoNoAcceptance ofStatus RequestReset CommandYes/NoNo----- -----NOTE: When an error message listed above appears on the LCD message display, please refer to Section 5TROUBLESHOOTING for solution.YesYesYesYesEA1- 2
APPENDIX 1 MESSAGES AND LEDSENGLISH VERSION EO1-33058APPENDIX 1 MESSAGES AND LEDSNOTES:• If a command error is found in the command received, 16 bytes of the command error, starting from the commandcode, will be displayed. (However, [LF] and [NUL] will not be displayed.)Example 1[ESC] T20 G30 [LF] [NUL]Command errorThe following message appears.T20G30B-SX4TV1.0AExample 2[ESC] XR; 0200, 0300, 0450, 1200, 1, [LF] [NUL]Command errorThe following message appears.XR;0200,0300,045B-SX4T V1.0AExample 3[ESC] PC001; 0A00, 0300, 2, 2, A, 00, B [LF] [NUL]Command errorThe following message appears.PC001;0A00,0300,B-SX4T V1.0A• When the error command is shown, “? (3FH)” appears for codes other than codes 20H to 7FH and A0H to DFH.• For details, please refer to the B-SX4T/SX5T Series External Equipment Interface Specification <strong>store</strong>d in theCD-ROM.EA1- 3
APPENDIX 2 INTERFACEENGLISH VERSION EO1-33058APPENDIX 2 INTERFACEAPPENDIX 2 INTERFACENOTE:To prevent radiation and reception of electrical noise, the interface cables must meet the following requirements:• In case of a parallel interface cable or serial interface cable, fully shielded and fitted with metal or metallisedconnector housings.• Keep as short as possible.• Should not be bundled tightly with power cords.• Should not be tied to power line conduits.• A parallel interface cable to be used should conform to IEEE1284.• Parallel interface (Centronics) (Standard)Mode:Conforming to IEEE1284Compatible mode (SPP mode), Nibble mode, ECP modeData input method: 8 bit parallelControl signal:SPP Mode Nibble Mode ECP ModenStrobe HostClk HostClknAck PtrClk PeriphClkBusy PtrBusy PeriphAckPerror AckDataReq NAckReverseSelect Xflag XflagnAutoFd HostBusy HostAcknInit nInit nReverseRequestnFault nDataAvail nPeriphRequestnSelectIn IEEE1284Active IEEE1284ActiveData input code:Receive buffer:ASCII codeEuropean 8 bit codeGraphic 8 bit codeJIS8 codeShift JIS Kanji codeJIS Kanji code1M byteEA2- 1
APPENDIX 2 INTERFACEENGLISH VERSION EO1-33058APPENDIX 2 INTERFACEConnector:PINSignalNo. SPP Mode Nibble Mode ECP Mode1 nStrobe HostClk HostClk2 Data 1 Data 1 Data 13 Data 2 Data 2 Data 24 Data 3 Data 3 Data 35 Data 4 Data 4 Data 46 Data 5 Data 5 Data 57 Data 6 Data 6 Data 68 Data 7 Data 7 Data 79 Data 8 Data 8 Data 810 nAck PtrClk PeriphClk11 Busy PtrBusy PeriphAck12 PError AckDataReq nAckReverse13 Select Xflag XFlag14 nAutoFd HostBusy HstAck15 NC NC NC16 0V 0V 0V17 CHASSIS GND CHASSIS GND CHASSIS GND18 +5V (For detection) +5V (For detection) +5V (For detection)19 TWISTED PAIR GND(PIN1) TWISTED PAIR GND(PIN1) TWISTED PAIR GND(PIN1)20 TWISTED PAIR GND(PIN2) TWISTED PAIR GND(PIN2) TWISTED PAIR GND(PIN2)21 TWISTED PAIR GND(PIN3) TWISTED PAIR GND(PIN3) TWISTED PAIR GND(PIN3)22 TWISTED PAIR GND(PIN4) TWISTED PAIR GND(PIN4) TWISTED PAIR GND(PIN4)23 TWISTED PAIR GND(PIN5) TWISTED PAIR GND(PIN5) TWISTED PAIR GND(PIN5)24 TWISTED PAIR GND(PIN6) TWISTED PAIR GND(PIN6) TWISTED PAIR GND(PIN6)25 TWISTED PAIR GND(PIN7) TWISTED PAIR GND(PIN7) TWISTED PAIR GND(PIN7)26 TWISTED PAIR GND(PIN8) TWISTED PAIR GND(PIN8) TWISTED PAIR GND(PIN8)27 TWISTED PAIR GND(PIN9) TWISTED PAIR GND(PIN9) TWISTED PAIR GND(PIN9)28 TWISTED PAIR GND(PIN10) TWISTED PAIR GND(PIN10) TWISTED PAIR GND(PIN10)29 TWISTED PAIR GND(PIN11) TWISTED PAIR GND(PIN11) TWISTED PAIR GND(PIN11)30 TWISTED PAIR GND(PIN31) TWISTED PAIR GND(PIN31) TWISTED PAIR GND(PIN31)31 nInit nInit nReverseRequest32 nFault NDataAvail nPeriphRequest33 0V 0V 0V34 NC NC NC35 NC NC NC36 nSelectIn IEEE1284Active IEEE1284ActiveIEEE1284-B ConnectorEA2- 2
APPENDIX 2 INTERFACEENGLISH VERSION EO1-33058APPENDIX 2 INTERFACE• Serial interface (Standard)Type:RS-232CCommunication mode: Full duplexTransmission speed: 2400 bps, 4800 bps, 9600 bps, 19200 bps, 38400 bps, 115200 bpsSynchronization: Start-stop synchronizationStart bit:1 bitStop bit1 bit, 2 bitData length: 7 bit, 8 bitParity:None, EVEN, ODDError detection: Parity error, Framing errorProtocol:Unprocedure communicationData input code: ASCII code, European character 8 bit code, graphic 8 bit code, JIS8 code, Shift JISKanji code, JIS Kanji codeReceive buffer: 1M byteConnector:Pin No.Signal1 FG2 RD (Received Data)3 TD (Transmit Data)4 CTS (Clear to Send)5 RTS (Request to Send)6 DTR (Data Terminal Ready)7 SG (Signal Ground)20 DSR (Data Set Ready)• USB interface (Option: B-9700-USB-QM-R)Physical Layer: Conforming to V1.1 Full speedTransfer type: Control transfer, Bulk transferTransfer rate: Full speed (12M bps)Class:Printer classNumber of ports: 1Power source: Self powerConnector:Type BPin No. Signal1 VCC2 D-3 D+4 GND Series B PlugEA2- 3
APPENDIX 2 INTERFACEENGLISH VERSION EO1-33058APPENDIX 2 INTERFACE• LAN (Option: B-9700-LAN-QM-R)Physical Layer: IEEE802.3 10BASE-T/100BASE-TXNumber of ports: 1Connector: RJ-45LED status: Link LED, Activity LEDLED LED Status LAN statusLink ON 10Mbps link or 100Mbps link is detected.Link LED (Green)OFF No link is detected.* Communication cannot be made while theLink LED is off.Activity LED (Orange)Activity ON CommunicatingOFF IdleLAN cable: 10BASE-T: UTP category 3 or category 5100BASE-TX: UTP category 5Cable length: Segment length Max. 100 mNOTES:1. For IP address setting, refer to the B-SX4T/SX5T Series Key Operation Specification <strong>store</strong>d in the CD-ROM.2. When a generally-used twisted pair Ethernet (TPE) or UTP cable is used, a communication error mayoccur depending on your operating environment. In such case, you may be requested to use a shieldedtwisted pair cable.• Wireless LAN (Option: B-9700-WLAN-QM-R)Standard:Protocol:Security protocol:Antenna:Parameter setting:Default IP address: 192.168.10.21Default subnet mask: 255.255.255.0Conforming to IEEE802.11a, IEEE802.11b, and IEEE802.11gIP (RFC791), ICMP (RFC792), UDP (RFC768), TCP (RFC793,896), ARP(RFC826), HTTPD (RFC1866), TELNET, FTPD (RFC959), DHCP (RFC2131),SNMPWEP (64 bits/128 bits/152 bits) or AES, AES-OCB (128 bits)TKIP (only when using WPA, WPA-PSK)TWSL (unique encryption)Chip type, diversity antennavia HTTPNOTE:MAC address of the Wireless LAN module will be necessary when setting the MAC address filtering function of anaccess point. Please ask a service person of your nearest <strong>TOSHIBA</strong> <strong>TEC</strong> service representative.EA2- 4
APPENDIX 2 INTERFACEENGLISH VERSION EO1-33058APPENDIX 2 INTERFACE• Expansion I/O Interface (Option: B-7704-IO- QM-R)Input SignalIN0 to IN5Output Signal OUT0 to OUT6ConnectorFCN-781P024-G/P or equivalent(External Device Side)ConnectorFCN-685J0024 or equivalent(Printer Side)Pin Signal I/O Function Pin Signal I/O Function1 IN0 Input FEED 13 OUT6 Output2 IN1 Input PRINT 14 N.C. -----3 IN2 Input PAUSE 15 COM1 Common (Power)4 IN3 Input 16 N.C. -----5 IN4 Input 17 N.C. -----6 IN5 Input 18 N.C. -----7 OUT0 Output FEED 19 N.C. -----8 OUT1 Output PRINT 20 N.C. -----9 OUT2 Output PAUSE 21 COM2 Common (Ground)10 OUT3 Output ERROR 22 N.C. -----11 OUT4 Output 23 N.C. -----12 OUT5 Output POWER ON 24 N.C. -----N.C.: No ConnectionInput CircuitOutput CircuitOperating environment Temperature: 0 to 40 °CHumidity: 20 to 90% (No Condensation)EA2- 5
APPENDIX 2 INTERFACEENGLISH VERSION EO1-33058APPENDIX 2 INTERFACE• RFID (Option)• B-9704-RFID-U1-USModule:Frequency:Output:Available RFID tag:• B-9704-RFID-U1-EUModule:Frequency:Output:Available RFID tag:AWID MPR-1510A-RM902 MHz to 928 MHz (FH-SS (Frequency Hopping Spectrum Spread))500 mWEPC Class 0, 1, ISO018000-6BAWID MPR-1580A-RM869.5 MHz500 mWEPC Class 0, 1, ISO018000-6B• B-9704-RFID-H1-QMModule:Frequency:Output:Available RFID tag:TagSys MEDIOS002 (Not included in an optional kit.)13.56 MHz200 mWTagSys C210, C220, C240, I-Code, Tag-it, ISO15693PCMCIA Interface (Option: B-9700-PCM-QM-R)The PCMCIA Interface board allows use of the ATA card or flash memory card when connected to the CPU PCboard.• Conforming to PCMCIA V2.1/JEIDA V4.2• Number of slots: 1 Type II slot• Available cards: Refer to Section 2.8 Inserting the Optional PCMCIA CardsEA2- 6
APPENDIX 3 POWER CORDENGLISH VERSION EO1-33058APPENDIX 3 POWER CORDAPPENDIX 3 POWER CORDWhen purchasing the power cord:Since the power cord set is not enclosed in this unit, please purchase an approved one that meets the followingstandard from your authorized <strong>TOSHIBA</strong> <strong>TEC</strong> representative.(As of September 2004)CountryAgencyCertificationmarkCountryAgencyCertificationmarkCountryAgencyCertificationmarkAustralia SAA Germany VDE Sweden SEMKKOAustria OVE Ireland NSAI Switzerland SEVBelgium CEBEC Italy IMQ UK ASTACanada CSA Japan METI UK BSIDenmark DEMKO Netherlands KEMA U.S.A. ULFinland FEI Norway NEMKO Europe HARFrance UTE Spain AEEPower Cord Instruction1. For use with 100 – 125 Vac mains power supply, please select a power cord rated Min. 125V, 10A.2. For use with 200 – 240 Vac mains power supply, please select a power cord rated Min. 250V.3. Please select a power cord with the length of 4.5m or less.Country/Region North America Europe United Kingdom AustraliaPower CordRated (Min.)TypeConductor size(Min.)Plug Configuration(locally approvedtype)125V, 10ASVTNo. 3/18AWG250VH05VV-F3 x 0.75 mm 2 250VH05VV-F3 x 0.75 mm 2 250VAS3191 approved,Light or Ordinary Duty type3 x 0.75 mm 2Rated (Min.)125V, 10A 250V, 10A 250V, *1 250V, *1*1: At least, 125% of the rated current of the product.EA3- 1
APPENDIX 4 PRINT SAMPLESENGLISH VERSION EO1-33058APPENDIX 4 PRINT SAMPLESAPPENDIX 4 PRINT SAMPLES• FontEA4-1
APPENDIX 4 PRINT SAMPLESENGLISH VERSION EO1-33058APPENDIX 4 PRINT SAMPLESAPPENDIX 4 PRINT SAMPLES (Cont.)• Bar codesJAN8, EAN8MSIInterleaved 2 of 5CODE39 (Standard)NW7JAN13, EAN13UPC-EEAN13+2 digitsEAN13+5 digitsCODE128CODE39 (Full ASCII)CODE93UPC-E+2 digitsUPC-E+5 digitsEAN8+2 digitsEAN8+5 digitsUPC-AUPC-A+2 digitsEA4-2
APPENDIX 4 PRINT SAMPLESENGLISH VERSION EO1-33058APPENDIX 4 PRINT SAMPLESAPPENDIX 4 PRINT SAMPLES (Cont.)UPC-A+5 digitsUCC/EAN128Industrial 2 of 5POSTNETCustomer bar codeCustomer bar code of high priorityKIX CodeRM4SCCRSS-14RSS-14 StackedRSS-14 Stacked OmnidirectionalRSS LimitedRSS ExpandedData MatrixPDF417QR codeMicro PDF417MaxiCodeCP CodeEA4-3
APPENDIX 5 GLOSSARIESENGLISH VERSION EO1-33058APPENDIX 5 GLOSSARIESAPPENDIX 5 GLOSSARIESBar codeA code which represents alphanumeric charactersby using a series of black and white stripes indifferent widths. Bar codes are used in variousindustrial fields: Manufacturing, Hospitals,Libraries, Retail, Transportation, Warehousing, etc.Reading bar codes is a fast and accurate means ofcapturing data while keyboard entry tends to beslow and inaccurate.Batch modeIssue mode that continuously prints media until thespecified number of media has been printed.Black markA mark printed on the media so that the printer canmaintain a constant print position by detecting thismark.Black mark sensorA reflective sensor which detects the difference ofpotential between the black mark and print area tofind the print start position.Built-in rewinder modePrinter mode of operation where an optional stripmodule is installed to take up printed media ontothe build-in rewinder.Cut modePrinter mode of operation where an optional cuttermodule is installed to automatically cut media fromthe supply roll after they are printed. The printcommand can specify to cut every media or to cutafter a set number of media have been printed.Cutter moduleA device used to cut the media.DPIDot Per InchThe unit used to express print density.Expansion I/O interfaceAn optional interface circuit that may be installedinto printer to allow the printer to be connected toan external device such as a wrapping machine andto receive feed, print start, and pause signals fromthe external device and to send back print, pause,and error status signals to the external device.Feed gap sensorA transmissive sensor which detects the differenceof potential between the gap between labels andthe label to find the print position of the label.FontA complete set of alphanumeric characters in onestyle of type. E.g. Helvetica, Courier, TimesGapClearance between labelsIPSInch per secondThe unit used to express print speed.LabelA type of media with adhesive backing.LCDLiquid Crystal DisplayInstalled on the operation panel and displaysoperation modes, error message and so on.MediaMaterial on which data is printed by the printer.Label, tag paper, fanfold paper, perforated paper,etc.PCMCIA interfaceAn optional interface circuit that may be installedinto the printer to allow the use of the small creditcard sized PC cards such as flash memory cardsand LAN cards. PCMCIA is the acronym forPersonal Computer Memory Card InternationalAssociation.EA5- 1
APPENDIX 5 GLOSSARIESENGLISH VERSION EO1-33058APPENDIX 5 GLOSSARIESPre-printed mediaA type of media on which characters, logos, andother designs have been already printed.Print head elementThe thermal print head consists of a single line oftiny resistive elements and when current is allowedto flow through each element it heats up causing asmall dot to be burned onto thermal paper or asmall dot of ink to be transferred from a thermalribbon to ordinary paper.Print speedThe speed at which printing occurs. This speed isexpressed in units of ips (inches per second).Reflective sensorSee Black mark sensor.ResolutionThe degree of detail to which an image can beduplicated. The minimum unit of divided image iscalled a pixel. As the resolution becomes higher,the number of pixels increased, resulting in moredetailed imageRFID (Radio Frequency Identification)A method of automatically identifying people orobjects using radio waves. In case of the B-SXseries, the RFID module writes digital informationto an RFID tag mounted inside labels or tag paperwhile the printer is printing data on them. TheRFID tag is a microchip attached to an antenna.The microchip holds data and the antenna enablesthe tag to send and receive data.Thermal direct printingA printing method using no ribbon, but thermalmedia which reacts to heat. The thermal print headheats the thermal media directly, causing printimage to be printed on the media.Thermal print headA print head using thermal transfer or thermaldirect printing method.Thermal transfer printingA printing method that the thermal print head heatsan ink or resin coating on the ribbon against themedia, causing the ink/resin to transfer onto themedia.Threshold settingA sensor setting operation to have the printermaintain a constant print position of pre-printedmedia.Transmissive sensorSee Feed gap sensor.USB (Universal Serial Bus)An interface that is used to connect peripherals,such as a printer, keyboard, mouse. The USBallows disconnection of a USB device withoutturning off the power.RibbonAn inked film used to transfer an image onto themedia. In the thermal transfer printing, it is heatedby the thermal print head, causing an image to betransferred onto the mediaStrip modeA device used to remove labels from the backingpaper.SupplyMedia and ribbonTagA type of media with no adhesive. Usually tagsare made of cardboard or other durable material.EA5- 2
INDEXENGLISH VERSION EO1-33058INDEXINDEXAAuto ribbon saving 2-10BBacking paper 2-7, 7-1Bar code 6-2, A5-1Batch mode 2-7, 7-1, A5-1Black mark 2-6, 7-1, 7-3, A5-1Black mark length 7-1Black mark sensor 2-6, 2-66, 4-2, A5-1Built-in rewinder 2-8, A5-1CCentronics 1-3, 2-11, 2-25, 2-28, 6-2, A2-2Cut mode 2-8, 7-1, A5-1Cut/strip position fine adjustment 2-58Cutter module 1-1, 1-5, 2-8, 2-55, 4-3, A5-1EEffective Print length 7-1Effective print width 7-1ERROR LED 1-4, 3-1, A1-1Error message 5-1Expansion I/O interface 1-3, 2-11, 2-27, 6-2, A2-6,A5-1Expansion I/O interface board 1-1, 1-5FFan filter 1-2, 2-3Fanfold paper guide module 1-5Feed gap sensor 2-6, 2-66, 4-2, A5-1Flash memory card 1-5, 2-13GGap 2-6, 7-2, A5-1Gap length 7-1Guaranteed print area 7-3HHead lever 1-4, 2-4IInput voltage 6-1Interface 2-11, 6-2, A2-1Issue mode 2-7, 2-54, 6-1JJammed media 5-5LLabel 2-4, 7-1, 7-2, A5-1LAN interface 1-1, 1-5, 2-11, 6-2LCD language 2-19LCD message display 1-3, 1-4, 2-14, 3-1, 6-1MMedia 7-1, 7-7, A5-1Media pitch 7-1Media sensor 2-6OON LINE LED 1-4, 3-1, A1-1Operation Panel 1-3, 1-4, 3-1PParallel interface 1-3, 2-11, 6-2, A2-2PCMCIA card 1-5, 2-13PCMCIA interface 1-1, 1-5, 2-13, 6-2, A2-7Platen 1-4, 4-2Power consumption 6-1Power cord 2-3, A3-1POWER LED 1-4, 3-1, A1-1Power switch 1-3, 2-3, 2-12Pre-printed media 2-54, 2-64, 7-7, A5-2Print head 1-4, 2-4, 2-31, 4-2Print head block 1-4, 2-4, 2-9, 5-5Printing method 6-1Printing speed 1-1, 6-1, A5-2Print start position fine adjustment 2-58Print tone fine adjustment 2-62RReflective sensor 2-65, 7-3Resolution 6-1, A5-2RFID A2-7, A5-2RFID module 1-5Ribbon 2-9, 7-6, 7-7, A5-2Ribbon saving module 1-1, 1-5, 2-8, 2-21, 7-4Ribbon shaft 1-4, 2-9Ribbon stopper 1-4, 2-9Ribbon width 7-6RS-232C 1-3, 2-11, 2-17, 2-18, 6-2, A2-1
INDEXENGLISH VERSION EO1-33058INDEXSSerial interface 1-3, 2-11, 6-2, A2-4Strip mode 2-7, 7-1, A5-2Strip module 1-1, 1-5, 2-7, 2-8, 2-55TTag 2-4, 7-1, A5-2Thermal direct 2-62, 6-1, A5-2Thermal transfer 2-62, 6-1, A5-2Transmissive sensor 2-65, 7-2UUSB interface 1-3, 1-5, 2-11, 6-2, A2-3, A5-2WWeb printer 2-26Wireless LAN 1-1, 1-3, 1-5, 2-11, 6-2, A2-5
M EO1-33058