AutoHelm ST 2000 Plus - Comcast.net
AutoHelm ST 2000 Plus - Comcast.net
AutoHelm ST 2000 Plus - Comcast.net
- No tags were found...

You also want an ePaper? Increase the reach of your titles
YUMPU automatically turns print PDFs into web optimized ePapers that Google loves.
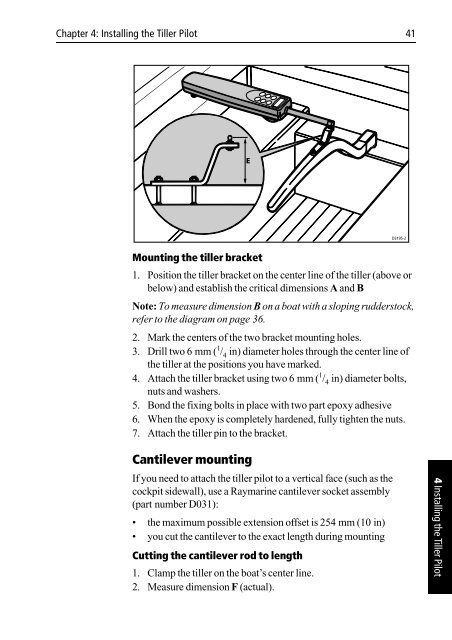
Chapter 4: Installing the Tiller Pilot 41ED3195-2Mounting the tiller bracket1. Position the tiller bracket on the center line of the tiller (above orbelow) and establish the critical dimensions A and BNote: To measure dimension B on a boat with a sloping rudderstock,refer to the diagram on page 36.2. Mark the centers of the two bracket mounting holes.3. Drill two 6 mm ( 1 / 4 in) diameter holes through the center line ofthe tiller at the positions you have marked.4. Attach the tiller bracket using two 6 mm ( 1 / 4 in) diameter bolts,nuts and washers.5. Bond the fixing bolts in place with two part epoxy adhesive6. When the epoxy is completely hardened, fully tighten the nuts.7. Attach the tiller pin to the bracket.Cantilever mountingIf you need to attach the tiller pilot to a vertical face (such as thecockpit sidewall), use a Raymarine cantilever socket assembly(part number D031):• the maximum possible extension offset is 254 mm (10 in)• you cut the cantilever to the exact length during mountingCutting the cantilever rod to length1. Clamp the tiller on the boat’s center line.2. Measure dimension F (actual).4 Installing the Tiller Pilot