Installing the BayStack 400-ST1 Cascade Module - CXtec
Installing the BayStack 400-ST1 Cascade Module - CXtec
Installing the BayStack 400-ST1 Cascade Module - CXtec

You also want an ePaper? Increase the reach of your titles
YUMPU automatically turns print PDFs into web optimized ePapers that Google loves.
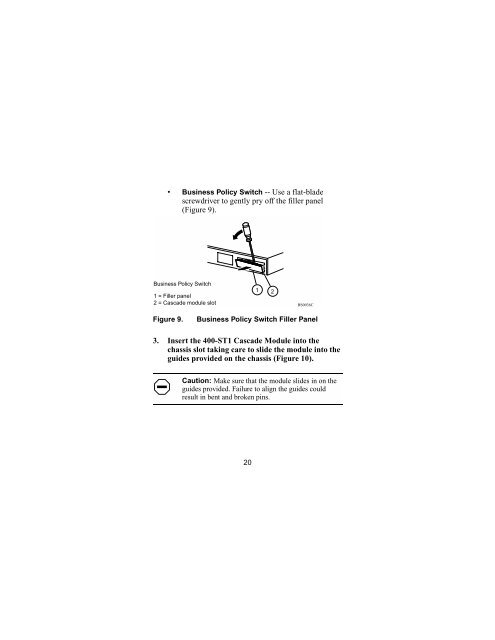
• Business Policy Switch -- Use a flat-bladescrewdriver to gently pry off <strong>the</strong> filler panel(Figure 9).Business Policy Switch1 = Filler panel2 = <strong>Cascade</strong> module slot1 2BS0036CFigure 9.Business Policy Switch Filler Panel3. Insert <strong>the</strong> <strong>400</strong>-<strong>ST1</strong> <strong>Cascade</strong> <strong>Module</strong> into <strong>the</strong>chassis slot taking care to slide <strong>the</strong> module into <strong>the</strong>guides provided on <strong>the</strong> chassis (Figure 10).Caution: Make sure that <strong>the</strong> module slides in on <strong>the</strong>guides provided. Failure to align <strong>the</strong> guides couldresult in bent and broken pins.20